How to Set up a Language Selector on the Login Page
Do you want to know how to enable a language selector on the WordPress login page? If yes, you’ll find your answer here.
When building a website for a global audience, it’s important to ensure that users can access content in their preferred language. One common way to accomplish this is by setting up a language selector on the login page.
In this article, we’ll walk you through the steps to enable the language selector on your WordPress login page.
Table of Contents
What is a WordPress Language Selector?
A WordPress language selector is a button on a site’s page that enables visitors to change the language of the page.
Users can choose their preferred language from a list provided by the website. This list is generated based on the language in which the website has content available.
When a user selects a specific language, the website displays content in that language. This includes posts, pages, menus, widgets, and other textual elements.
See the image below:
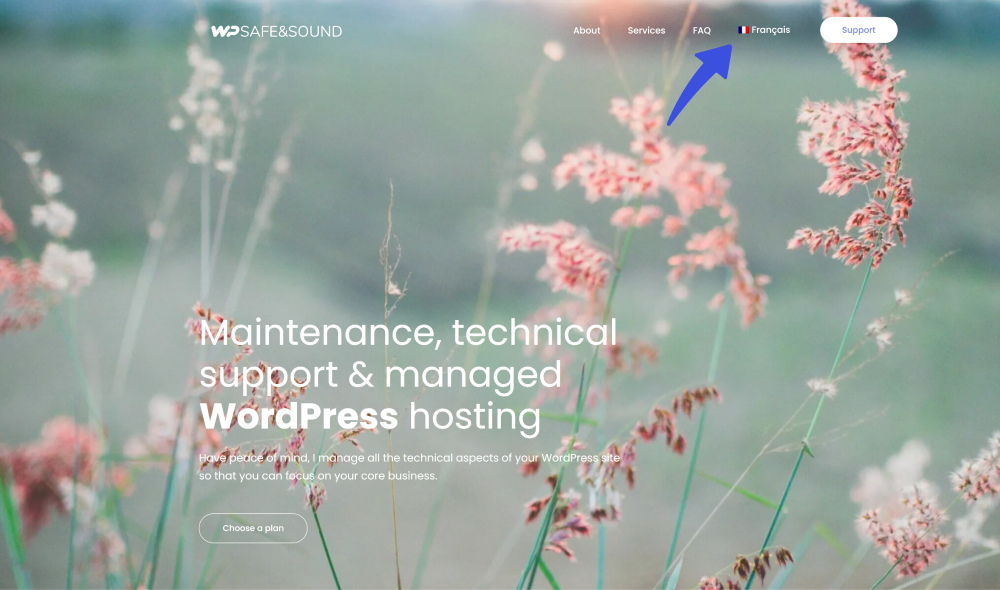
3 Examples of Language Selectors on WordPress Login Page
Let’s look into the mentioned language selector when implemented on the WordPress login page.
By implementing a language selector on the WordPress login page, website owners can cater to a diverse audience and improve visitor user experience. It helps users better understand what information is asked by the site owner to fill in the login or registration for:
Let’s have a look at some examples of language switchers:
Example # 1
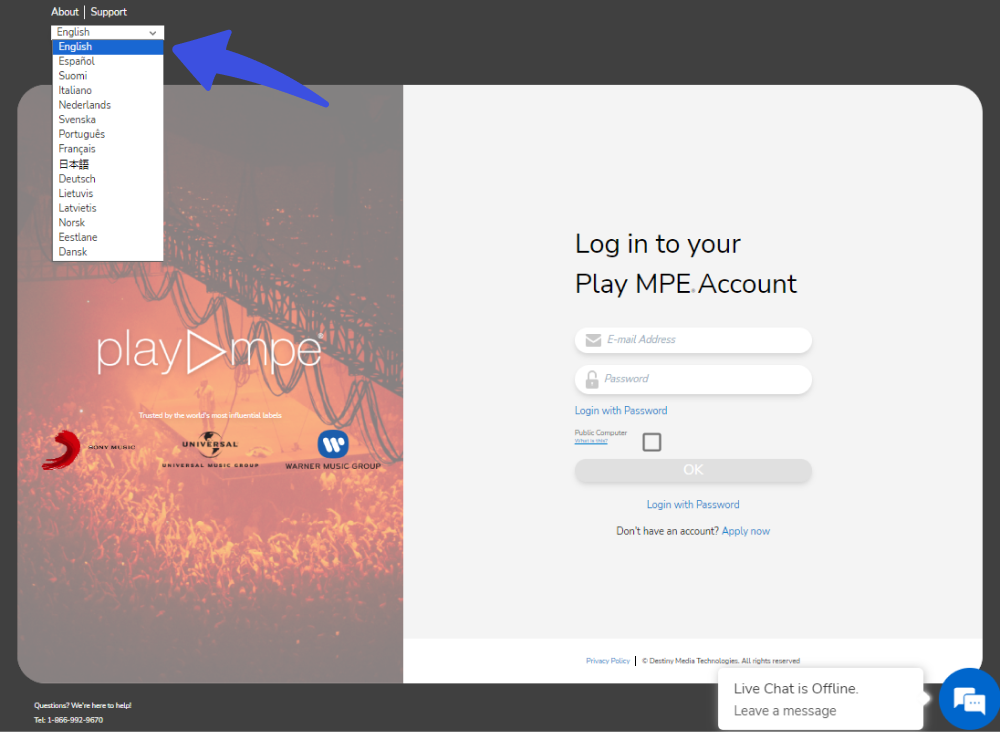
The Play MPE site used English as the default language for the login page. However, the users have the choice to select any other language from the drop-down menu given at the top of the login page.
They’ve displayed each language so that the native language visitors recognize their language at a glance.
Example # 2
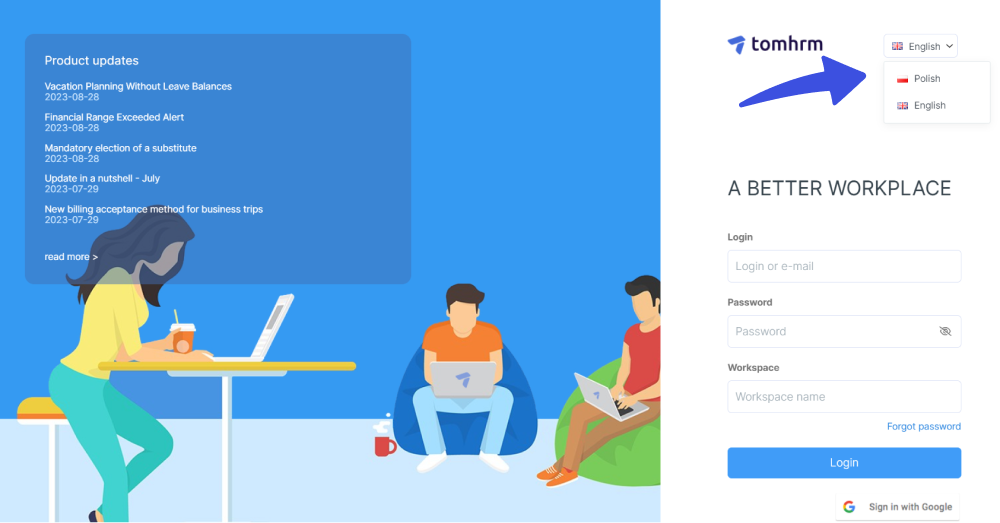
The Tomhrm site used 2 main languages, i.e., English and Polish, within their login form. Both languages are displayed along with the flags.
The language selection is displayed so the user can find them quickly.
Example # 3
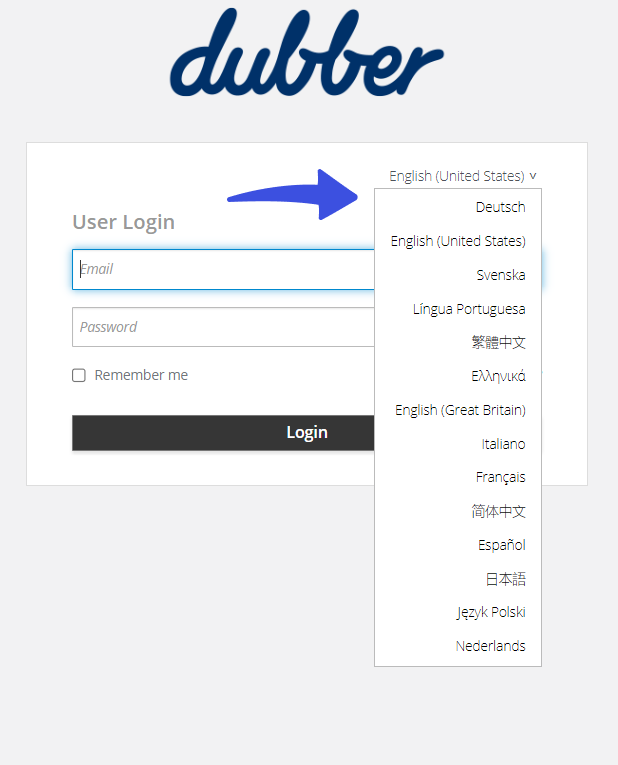
Dubber, the world’s communication service provider website, offers its login and registration form in 14 different languages through a simple language switcher button at the top-right corner of the login form.
The languages are displayed in the full name of the language to make them easily recognized by the respectful speakers, i.e., Deutsch, English (United States), English (Great Britain), and more.
The Benefits of Using a Language Selector on the Login Page
Implementing a language selector on your website’s login page can offer a range of benefits that can help improve user experience, expand your reach, and stay competitive in a global market.
Let’s look at the potential benefits of using a website language selector:
- Improved User Experience: By offering multiple language options, you can make your login page more accessible and user-friendly for a global audience.
- Increased Reach: With a language selector, you remove the language barrier. It can help to grow your business and increase revenue.
- Competitive Advantage: In today’s global market, offering multiple language options is increasingly important for staying competitive across multiple countries.
- Improved SEO: By offering multiple language options, you can increase the rate to appear in the search results for users searching in their preferred language.
Set up a Language Selector on the WordPress Login Page
By default, WordPress is set to English. It provides a convenient built-in language switcher, offering a selection of 65 languages and over 160 translations.
Remember that you can only change the language for your WordPress admin dashboard. Your site’s content will remain in the default language.
Additionally, there are two primary areas where these adjustments automatically apply, including:
- Login Form
- Register Form
Note: Remember, your site’s content must be written in the selected language. Also, changing your default language will cause you to lose all your previous translations.
Let’s dive into how you can set up a simple WordPress language switcher on the login page.
Step 1. Go to WordPress Settings Option
First off, log in to your WordPress site.
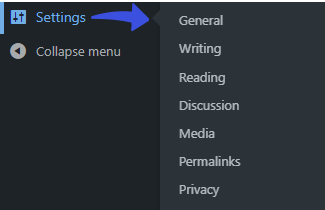
Go to the left sidebar of your WordPress admin dashboard > navigate to Settings > and click the General option.
Step 2: Select Language from the Site Language Drop-Down Menu
On the next screen, find the Site Language menu.
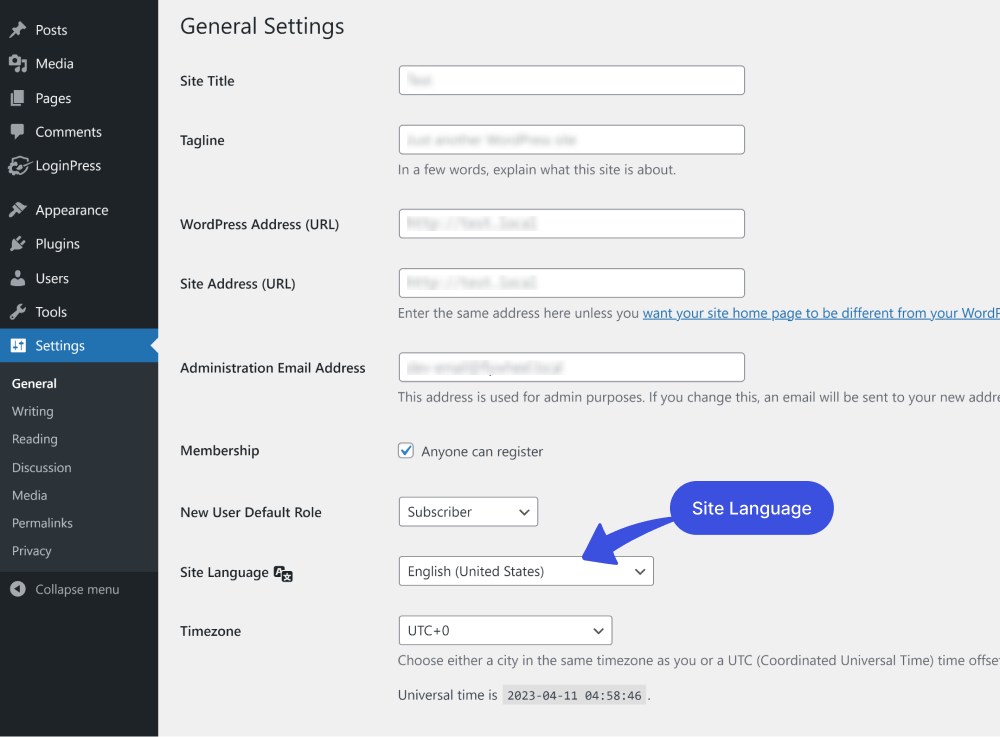
Next, you’ll need to open the drop-down menu and choose a language, i.e., Deutsch (Schweiz, DU).
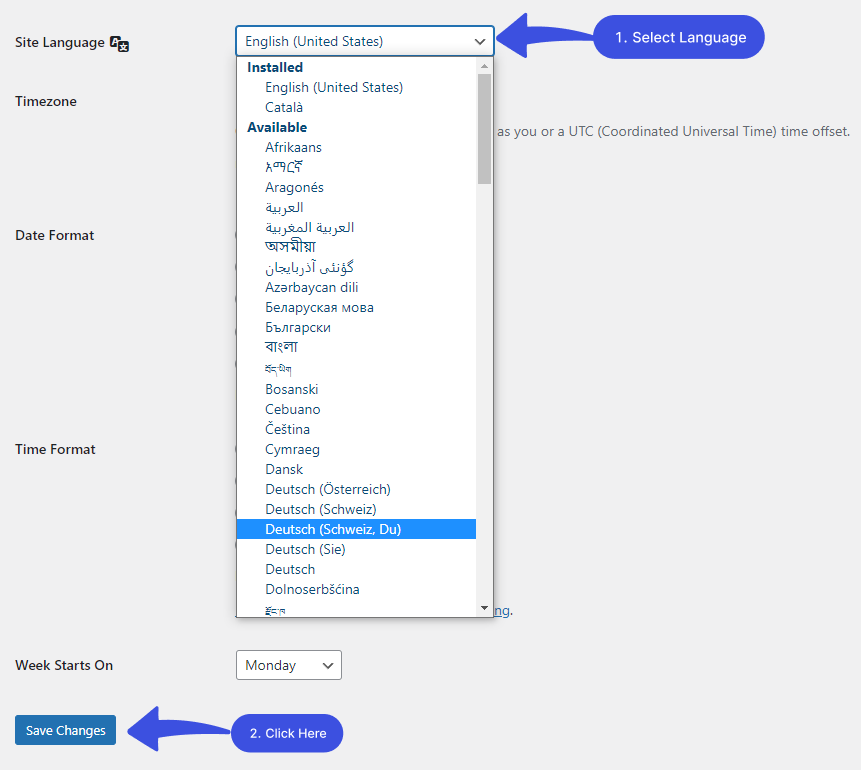
Note: The languages displayed in the Site Language dropdown are based on the currently installed languages of the WordPress installation.
When done, click the Save Changes button.
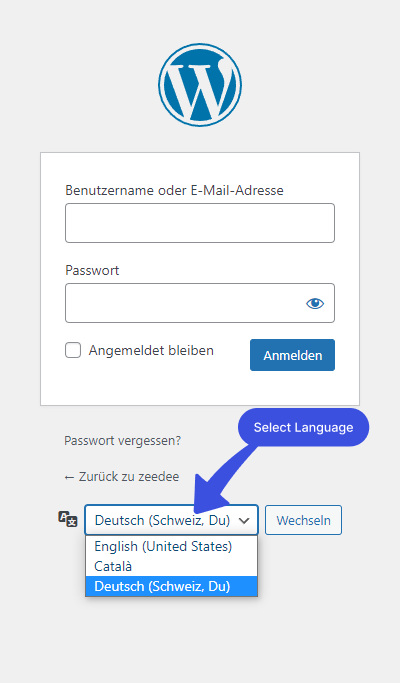
The selected language has appeared on the login page. Now, whenever a user accesses the login page, he can choose between this language from the drop-down list.
How to Disable Language Selector
Note: Disabling the language selector may not be the best option for all websites. If you have a global audience and want to make your website accessible to users in multiple languages, including a language selector is generally recommended.
However, if you still want, you can easily disable the language switcher on your WordPress site.
- Method 1. Disable the WordPress Login Language Switcher on the WordPress Login Page with Coding
- Method 2. Disable the Language Switcher on the WordPress Login Page with LoginPress
You can easily disable the language selector straight to the method you want.
Method 1. Disable the Language Switcher on the WordPress Login Page with Coding
Step 1. Go to Theme’s functions.php File
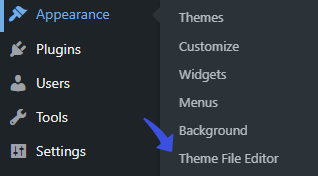
Go to the left sidebar of the admin dashboard. Navigate to Appearance and click the Theme File Editor option.
Step 2: Paste the Code
On the next screen, click the functions.php file. Now, scroll down at the end and paste the code.
Here is the code for you:
add_filter( 'login_display_language_dropdown', '__return_false' );
At the end, click the Update button.
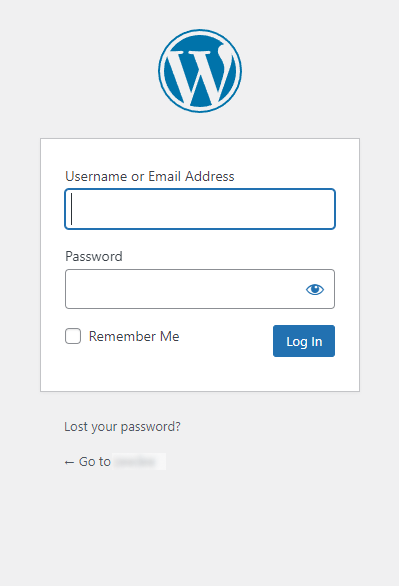
See, the language selector has been removed from the login page.
Method 2. Disable the Language Switcher on the WordPress Login Page with LoginPress
The better way to remove WordPress Login Switcher from the login page is LoginPress. It has adapted this functionality in version 1.5.11.
Note: We assume you’ve already enabled the default WordPress language switcher.
The first thing you need to do is install and activate the plugin on your WordPress site. For help, see our detailed guide on How to Install And Activate LoginPress (Free).
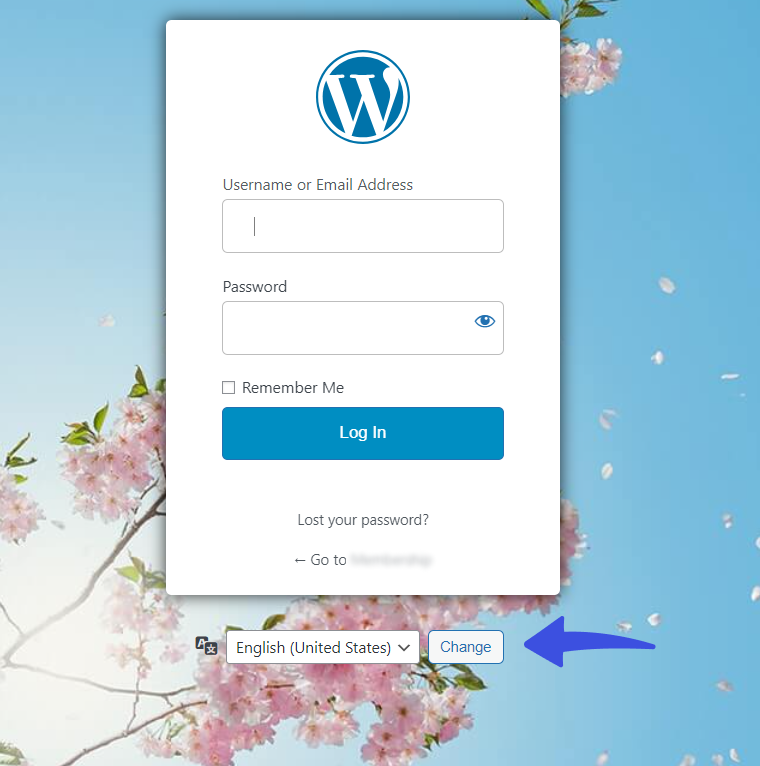
On activation, a dropdown language switcher appears on the login page like this.
Next, go to the left sidebar of the WordPress admin dashboard, navigate to LoginPress, and select the Settings option.
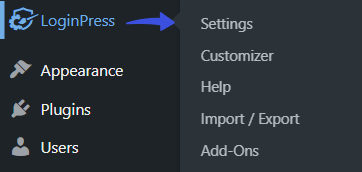
On the settings screen, you’ll find the Language Switcher option. Simply toggle on the button against it to remove the dropdown Language Switcher on the login page.
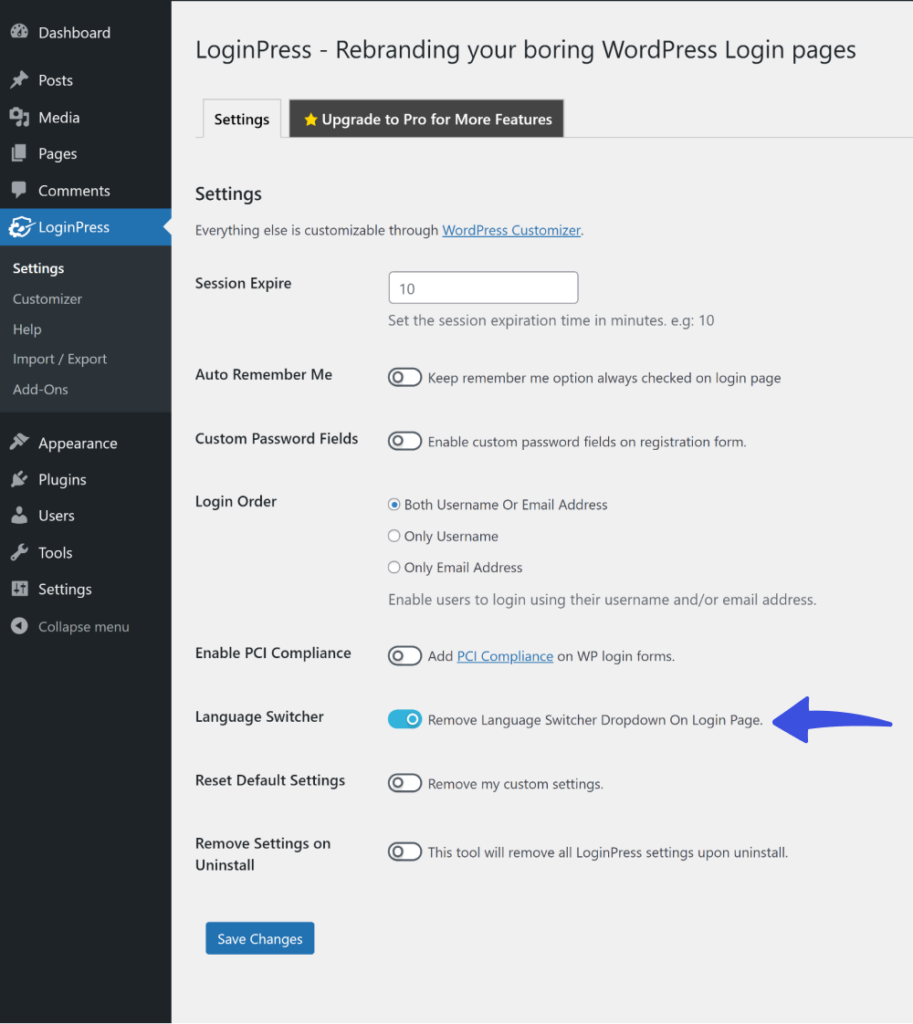
When done, click the Save Changes button.
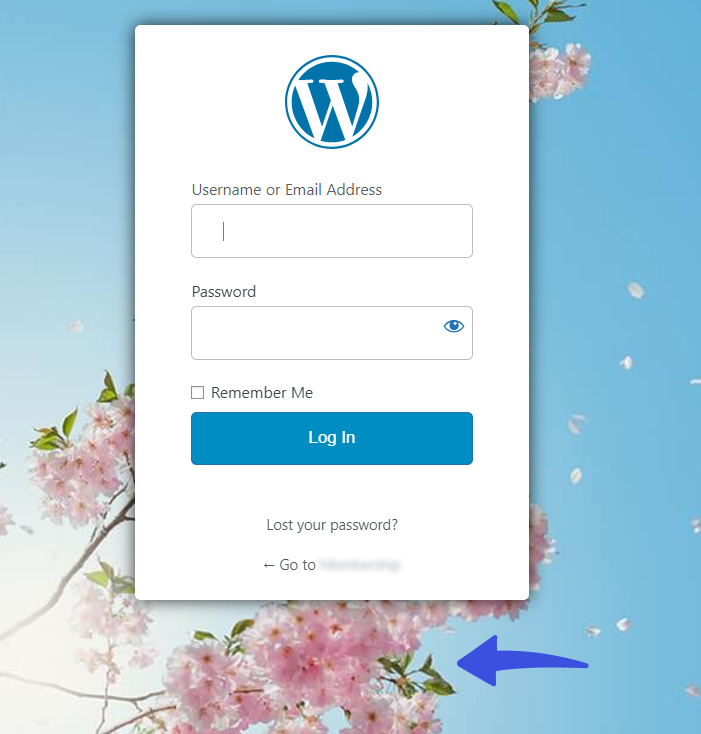
You’ll see the standard login screen without the language switcher option when you go to your login screen.
Best Practices for WordPress Language Switchers
Now you know how to enable/disable the default WordPress language swither on the login page. It’s time to learn some best practices for displaying a language switcher on the login page.
- Make Sure It’s Easy to Spot: Place the language switcher prominently, typically within the login form or header of the login page, so that it’s easily accessible.
- Ensure Consistency: Make language switcher consistent with your site’s branding.
- Use Language Names: Display language names in their native form or a universally recognized format, such as English, Español, or Français.
- Avoid Only Flags for Language Selection: Using clear and recognizable icons or flags with the language name is better. Using only flags can be misleading.
- Mobile Responsive: Ensure the language switcher is mobile-friendly and works well on all screen sizes, i.e., smartphones, desktops, and more.
Language Selector FAQs
Here are some frequently asked questions (FAQs), along with their answers on how to set up a language selector on the login page in WordPress:
What languages should I include in the dropdown language selector?
It’s better to enable those languages in the dropdown language selector that are best for your target audience. Suppose you are focusing on an audience from a specific region, i.e., France; use the languages most commonly spoken in this area.
Can a language selector be added to the login page without using a multilingual plugin?
You can use WordPress’s built-in language selector to translate the login page. However, you might need a plugin for customizing it’s appearance.
Conclusion
In conclusion, setting up a dropdown language selector on the login page can significantly enhance the user experience of your website.
This guide outlines the steps to enable/disable the language selector on the login form. It will help you effectively communicate with users worldwide, providing them with the best possible experience.
You may also want to check out our guides on:
Thank you for reading this article. Don’t forget to share this article with others who might find this helpful, too!
Try the WordPress language switcher now and increase your global reach!
That’s all for this guide!
Leave a comment below to tell us how much it helped you understand how to enable/disable the default language switcher on your WordPress login page.


