How to Create and Customize User Roles in WordPress (Step-by-Step Guide)
Do you want to create and customize user roles in WordPress? If yes, you’ve landed on the right article.
User roles are an essential feature in WordPress. They allow site administrators to manage what users can and cannot do.
In this guide, we’ll walk you through the steps to create, customize, and delete WordPress user roles (default and custom) so you can have complete control over user permissions.
WordPress User Roles (TOC):
What are WordPress User Roles?
WordPress user roles define what a person can and cannot do on your website.
Each role has a specific set of tasks it can perform. The admins have all the power and can set the right user access levels.
Here are the default WordPress user roles:
| WordPress User Role | Description |
|---|---|
| Administrator | Has complete control over a site, i.e., install/delete plugins and themes, add users, etc. |
| Editor | Can create, edit, and publish posts on their role and handle posts of other users side by side. |
| Author | Can create, edit, and publish their own posts only |
| Contributor | They can only create and edit posts but cannot publish |
| Subscriber | They can only manage their profiles and comment on your posts. |
Types of User Roles in WordPress
WordPress provides a set of default user roles, but you can also create custom roles for more specific needs.
Here’s a breakdown of both default and custom roles.

Get 60% OFF LoginPress! Use Code BFCM60
1. WordPress Default User Roles
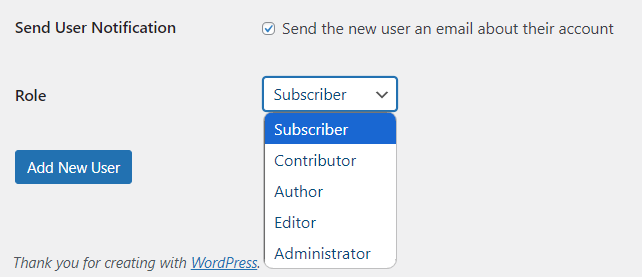
By default, WordPress offers five user roles that define the set of permissions of different types of users on a WordPress site, including:
- Administrator
- Editor
- Author
- Contributor
- Subscriber
These roles are flexible, and you can customize or create new ones.
Administrators have complete control over the site and can manage themes, plugins, users, and settings.
They can also write, edit, and delete all site content.

Editors can create, edit, publish, and delete posts on a WordPress site (including those by other users).
Other than this, they can manage categories and tags, moderate comments, and manage links.
This role is best for someone who oversees the content and manages other authors’ posts.

The author can create, edit, publish, and delete only their posts. They can upload media files without control over others’ content or site settings.
You can use this role across your site for regular contributors who need to manage their own content.

Contributors can write and edit their posts without publishing or uploading media files. An Editor or Administrator reviews their written content before it is published.
This role best suits the guest writers or new content creators.

Subscriber can only manage their profile, leave comments, and view private content (if allowed). They have no permission to create or edit posts.
You can add this type of role to your site if users need to log in to access certain content or leave comments.
These roles usually don’t contribute to the site’s content.
How to Add a User to Default Roles in WordPress (Manually)
The person who creates a WordPress site automatically becomes the site’s admin. They have the complete power to modify user roles for their sites.
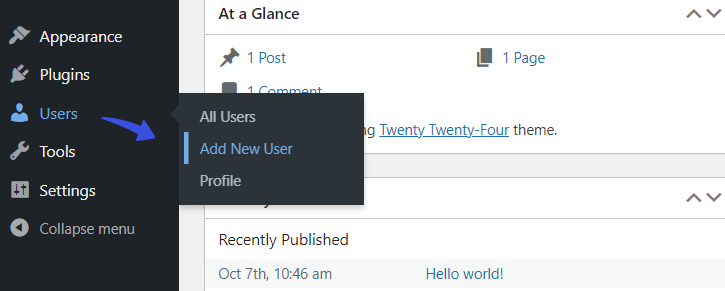
To assign or change user roles, they must go to the left sidebar of the WordPress admin dashboard, navigate to Users, and select the Add New User option.
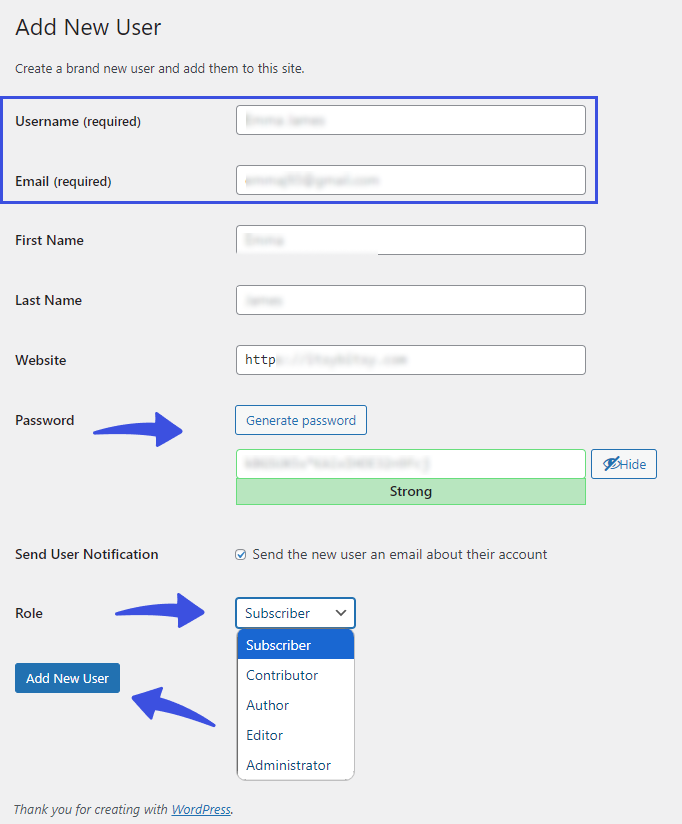
On the next screen, you’re required to add user information, such as:
- Username (required)
- Email ((required)
- First Name
- Last Name
- Website
- Password
- Role (select from dropdown menu)
When you’re done, click the Add New User button.
How to Edit the Default Role of Existing Users (Manually)
You can easily change the role of an existing WordPress user.
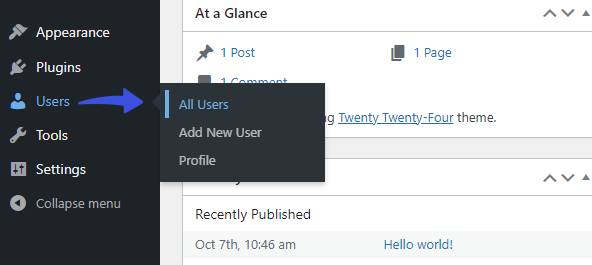
You can access the list of users by going to the left sidebar of the WordPress admin dashboard, navigating to Users, and selecting the All Users option.
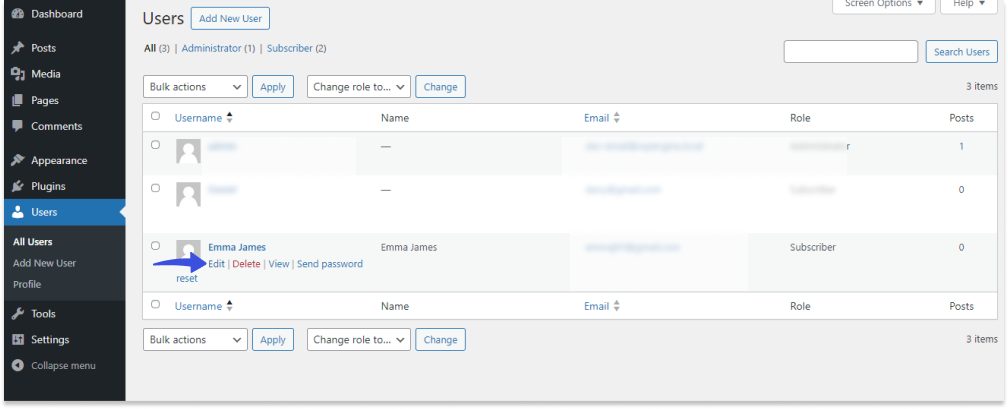
On the next screen, select the user and click the Edit button.
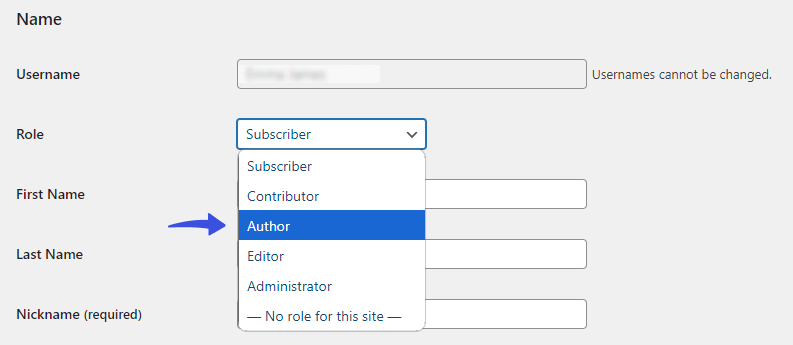
Now, scroll down to the Name section and select the new role for this user.
When you’re done, scroll down and click the Update User button.
How to Remove Default User Roles (Manually)
You can easily remove the default users manually. To do so, go to the left sidebar of the WordPress admin dashboard, navigate to Appearance, and click the Theme File Editor option.
On the next screen, you’re required to add the remove_role() function to remove the specific role, same as given below:
remove_role( 'subscriber' );

remove_role( 'editor' );

remove_role( 'contributor' );

remove_role( 'author' );
When done, click the Update Button.
2. WordPress Custom User Roles
Custom User Roles are when WordPress allows administrators to change the state of existing user roles (e.g., delete, edit, etc.), create new users, or delete roles to meet their site’s specific needs.
This way, admins can control users’ permissions (allowed on the site). Let’s explore all of this in the coming sections.
How to Create User Roles in WordPress
Method 1: How to Create a Custom User Role in WordPress with Plugin
You can easily create custom user roles in WordPress. All you need to do is to install and activate a plugin like the Members plugin.
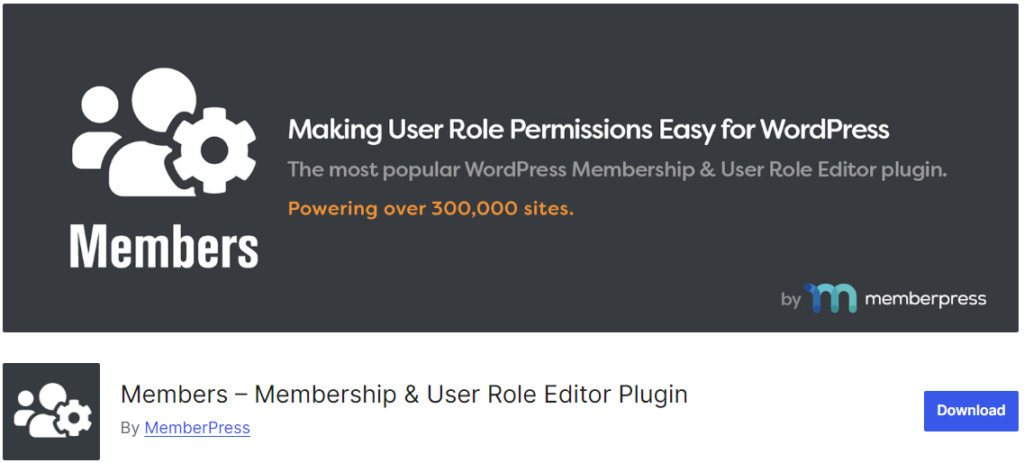
Simply install and activate the plugin on your site.
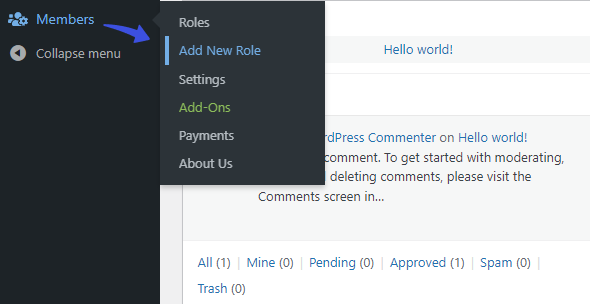
When done, go to the left sidebar of the WordPress admin dashboard, navigate to Members, and click the Add New Role option.
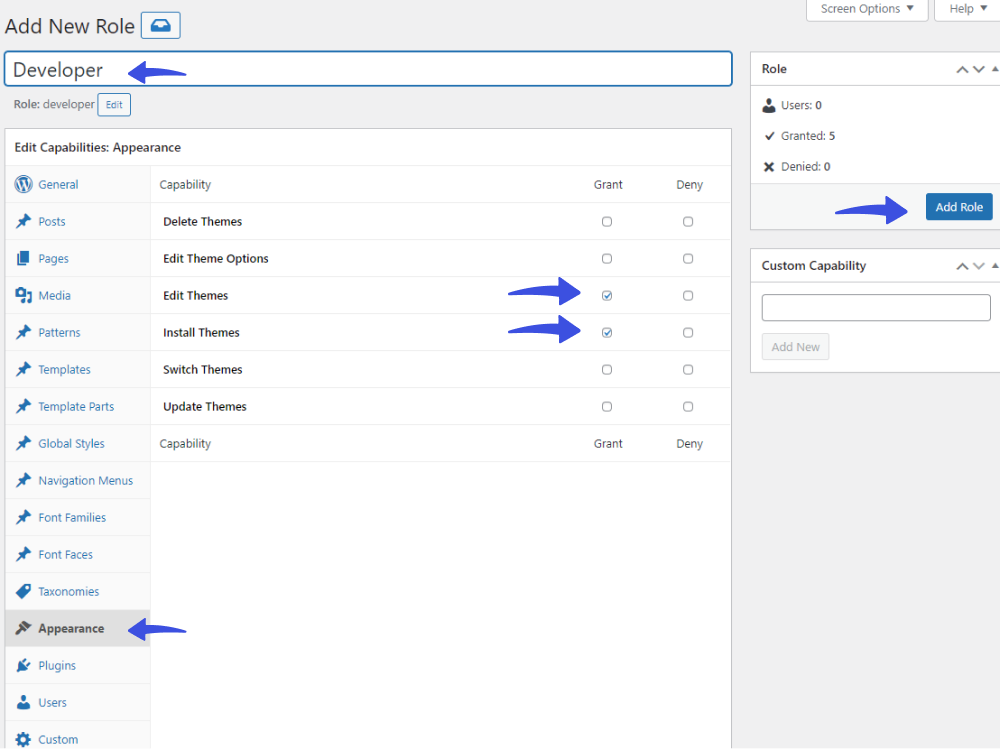
Add a new role name on the next screen, i.e., Developer.
Note: Here, we create a custom developer role with specific permissions, such as the
Next, select the Appearance option and choose the capabilities you want to add.
For example, we want to add editing and installing themes here for the developer role.
When done, click the Add Role button.
Now it’s time to create a new user and assign them the newly created user role, e.g., Developer.
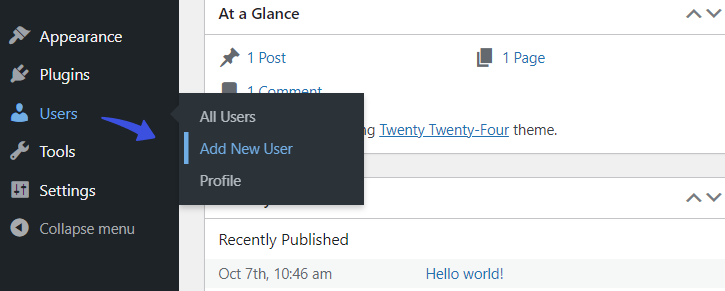
For this purpose, go to the left sidebar of the WordPress admin dashboard, navigate to Users, and click the Add New User option.
Next, add user information, such as username, Email, first and last name, Website, and Password.
After this, select the custom user role, i.e., Developer, and click the Add New User option.
See the image below:

All done, you’ve created a new custom user role for your site.
How to Delete Custom User Role
To delete the custom role, go to the left sidebar of the WordPress admin dashboard, navigate to Members, and click the Roles option.
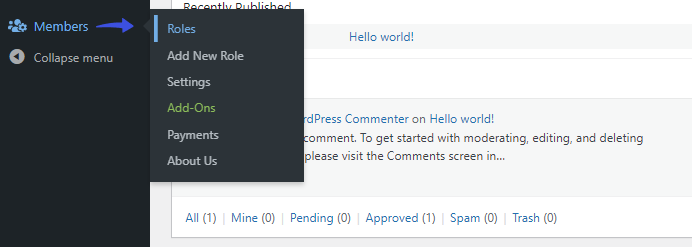
On the next screen, hover over the user role you want to delete and click the Delete button.
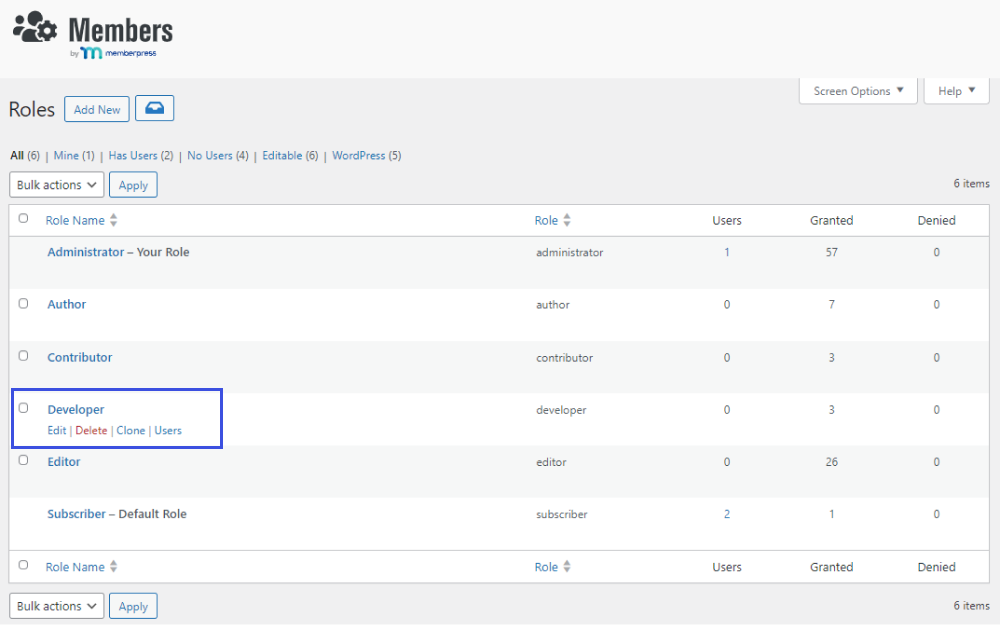
All done!
Method 2: How to Create a Custom User Role without a Plugin
You can also create a custom user role in WordPress without a plugin. For example, you can create:
- Administrator: Complete administrative access.
- Moderator: Can create, edit, and publish their and other WordPress users’ posts.
- Newbies: Can only edit their profile and create new posts.
- Or any other role you want for your site.
All you need to do is insert the add_role() function into the syntax.
Here is the syntax for you:
add_role( $role, $display_name, $capabilities );Here:
- $role is the unique name for the role.
- $display_name will be the name shown in the WordPress admin dashboard.
- $capabilities stand for the privileges of the role.
For example, to create a moderator role, go to the left sidebar of the WordPress admin dashboard > Appearance menu > Theme File Editor > themes’s functions.php file. Here, you must add some lines of code.
Here is the code for you:
add_role('moderator', 'Moderator', array(

'read' => true,

'create_posts' => true,

'edit_posts' => true,

'edit_others_posts' => true,

'publish_posts' => true,

'manage_categories' => true,

));
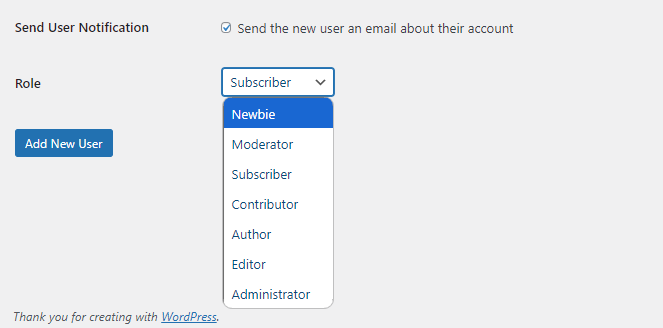
Now, you can find the Moderator option within WordPress default Roles.

You can also add the Newbie role. A person with this role can only edit their profile or create posts for your site.
To add this role to your site, add the following lines of code to the theme’s functions.php file:
add_role( 'newbie', __( 'Newbie' ), array(

'read' => true, // Allows a user to read

'create_posts' => true, // Allows user to create new posts

'edit_posts' => true, // Allows user to edit their own posts

) );
See the new user role has been added in the list:
How to Assign and Delete Custom User Roles without Plugin
Now, you can assign this newly created custom user role to anyone.
You can add new users by going to the left sidebar of the WordPress admin dashboard, navigating to Users, and selecting the Add New User option.

On the next screen, you’re required to add user information, such as:
- Username (required)
- Email ((required)
- First Name
- Last Name
- Website
- Password
- Role (select from dropdown menu)
To assign or change user roles, they must go to the left sidebar of the WordPress admin dashboard, navigate to Users, and select the Add New User option.

On the next screen, you’re required to add user information, such as:
- Username (required)
- Email ((required)
- First Name
- Last Name
- Website
- Password
- Role (select from the dropdown menu, i.e., Moderator)
This is how it will look like:
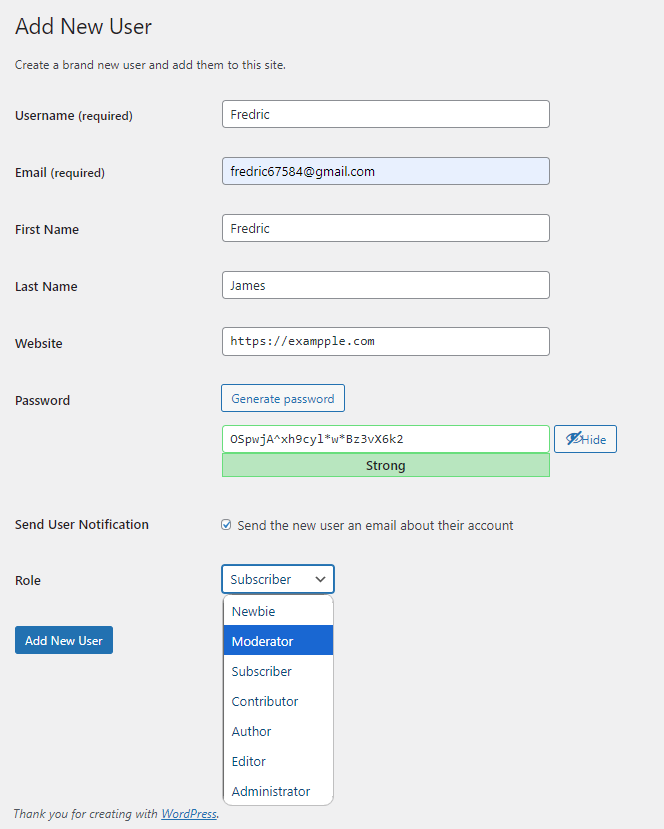
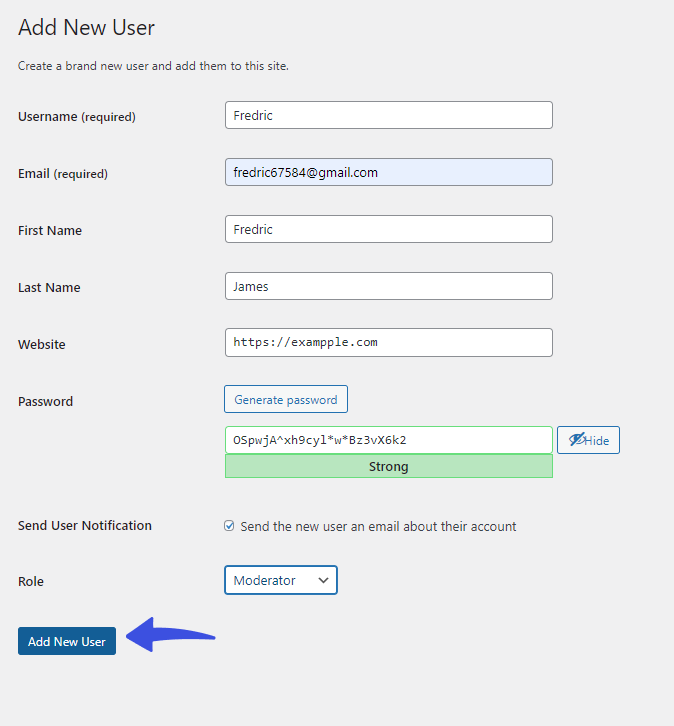
When you’re done, click the Add New User button.
How to Modify Custom User Roles in WordPress
1. Modify Custom User Role with LoginPress

Customize Your WordPress Login
Stand out from the competition with the best WordPress login plugin that lets you customize your login page – no coding required!
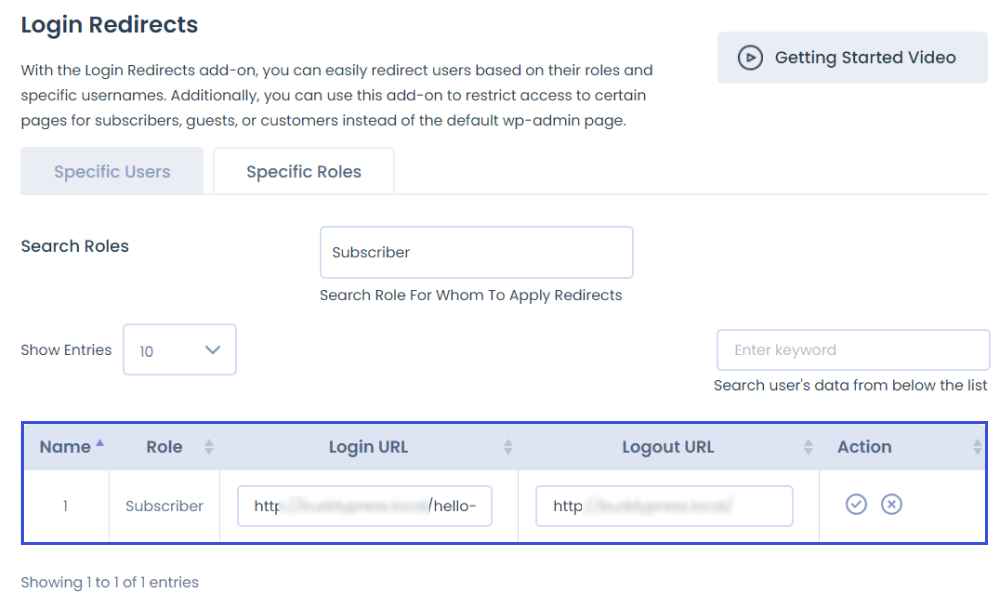
LoginPress is the best WordPress login plugin. It offers the Login Redirects Add-on to help you redirect specific users to specific areas of your site upon login or logout.
For example, you can set login and logout URLs for Subscribers.
You can also exclude specific user roles from the session expiration. This is best if your site has a custom user role that needs more time than the one defined in your login session expiration settings.
For example, if you want to exclude the Administrator and Contributor from the session expiration, add some code lines to your theme’s functions.php file and update it.
Here is the code for you:
function loginpress_exclude_role_session_callback() {

return array( 'administrator', 'contributor' );

}

add_filter( 'loginpress_exclude_role_session', 'loginpress_exclude_role_session_callback' );
Note: If you want to change other roles, see our detailed guide on How To Exclude Specific User Roles From The Session Expiration (Hook).
2. Modify Custom User Role with Members Plugin
You can easily customize use roles with the Members plugin, go to the left sidebar of the WordPress admin dashboard, navigate to Members, and click the Roles option.

On the next screen, you can manage your user roles.
For example, if you want to delete a role, hover over the user role you want to delete and click the Delete button.

If you want to change a user’s role, hover over the user role and click the Edit button.
On the next screen, add the desired capabilities against the role.
When done, click the Update button.
Beyond just assigning specific permissions to different users, you can also significantly enhance their experience by tailoring the very environment they work within.
Imagine providing a streamlined backend where clients or team members see only what’s relevant to their tasks.
If you’re looking to provide a more intuitive and professional experience, learning how to customize your WordPress dashboard can truly transform your site’s backend, making it easier for everyone to navigate and manage their responsibilities.
WordPress User Roles Plugins
1. Members

Members is a useful WordPress user role editor plugin that allows you to create custom user roles for your site quickly. Plus, you can assign multiple capabilities to the user role.
2. User Role Editor
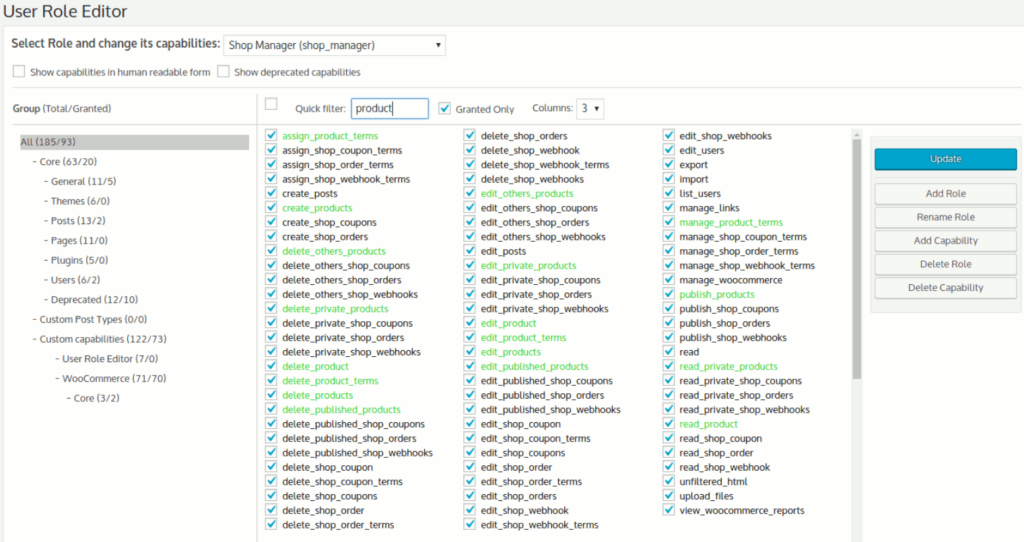
User Role Editor is one of the best WordPress plugins for modifying user roles on your site.
All you need to do is to select the desired role by enabling the checkboxes.
3. PublishPress Capabilities
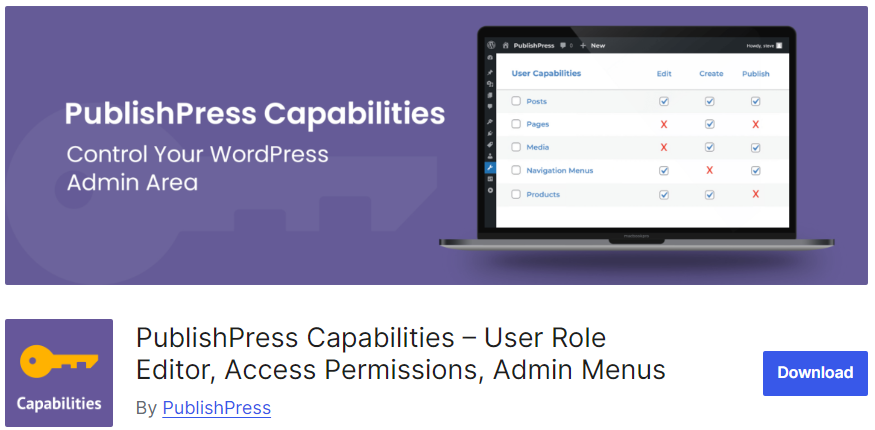
PublishPress Capabilities is a WordPress user role plugin that lets you control the user capabilities (e.g., all WordPress and plugin capabilities) permissions on a WordPress site, like:
- Create
- Edit User Role
- Duplicate User Role
With this plugin, you can easily remove items that do not match a specific user role from the WordPress admin, toolbar, widgets, etc.
Check this article for a complete list of the best user role plugins for WordPress.
User Roles in WordPress FAQs
How do I assign a user role to someone?
You can assign a user role to someone. Go to the left sidebar of the WordPress admin dashboard, navigate to Users, and click the Add New User option. Fill in the Username (required) and Email (required) on the next screen. Next, choose the appropriate role from the Role dropdown and click the Add New User button.
Can I redirect users to specific pages after login/logout?
With the LoginPress Login Redirects Addon, you can easily redirect users to specific pages after logging and logging out. This Add-on best helps you restrict users’ access to certain pages.
What’s the difference between Editor and Administrator?
An Editor can manage a WordPress site’s content, such as posts. However, they cannot change site settings or install plugins. On the other hand, an Administrator has full access to the site, such as installing and activating themes, plugins, user management, etc.
Can Subscribers leave comments?
Yes, Subscribers can leave comments on posts if commenting is enabled on your site. They can also manage their profiles without access to site settings or content creation.
WordPress User Roles: Final Thoughts
To summarize, customizing user roles in WordPress allows you to assign specific tasks and limit access for various users. Consequently, you get a more secure site.
Now that you know how to create and customize user roles, you can easily manage your WordPress site.
That’s all for this article!
Here are the key takeaways:
- What are WordPress User Roles?
- Types of User Roles in WordPress
- How to Create User Roles in WordPress
- How to Customize Custom User Role in WordPress
- WordPress User Roles Plugins
You may also like to read our other valuable how-to guides, including:
