How to Redirect Users After Successful Login in WordPress
Are you looking for a way to redirect users to specific website areas after they log into your website?
Typically, when a user logs into a WordPress website, they’re taken to the WordPress dashboard. However, based on their role, you might want to redirect the logged-in users to a different page.
In this article, we’ll show you how to redirect users after a successful login in WordPress using the LoginPress Login Redirects add-on.
Let’s get started!
Table of Contents
Why Do You Need To Redirect Users After Successful Login?
You might want users to visit the appropriate section of the website directly. In some scenarios, you might wish to show a specific page to some registered users (generally, product offers and specific landing pages).
Let’s explore some of the reasons you might want to set up redirection after user login.
1. Protect Your Admin Dashboard
By default, every user lands on the same page when they log in to the WordPress admin dashboard. However, you might not want every user to access the website dashboard for security reasons.
By redirecting the users to any desired website areas, you add a layer of security to your website. This way, only users with the appropriate role(s) can access the WordPress dashboard.
2. Properly Enforce User Roles
Each registered user on your WordPress website is assigned a role that determines their privileges and access to website content. To properly enforce these roles, you should redirect the users to appropriate website sections after they log into the website.
For instance, writers could be directed to post a draft page so that they could add new content. On the other hand, editors could be redirected to the main posts page where they could see the posts created by the writers.
3. Improved User Experience
Redirecting users improves the user experience on the WordPress dashboard.
For instance, if you sell products on your website, you can redirect new users to a page that presents specific new members’ discounts.
As you can imagine, redirecting users to website pages that offer special discounts and offers positively impacts the user experience.
4. Present user-role-specific Content
Whether you have a WooCommerce store or a WordPress-powered corporate website, you have content that targets specific user roles. For instance, you might want to redirect new employees to a policies page where they can read the company policies.
How to Redirect Users After Successful Login in WordPress (Step by Step)
By default, WordPress doesn’t offer the ability to control redirection after user login. However, the LoginPress Login Redirects add-on fills in the gap nicely. It is designed to restrict your users to certain pages. They can board to only those pages you wish to allow them. This amazing add-on has UX/UI that manages all login redirects you have created on your website.
Important Note: The following steps assume that you already have LoginPress installed and activated on your WordPress website. For more information, you can check our article on How To Install And Activate LoginPress (Premium).
Let’s see step by step how you can set up custom redirects using the LoginPress Login Redirects add-on.
Step 1: Download the Login Redirects Add-on
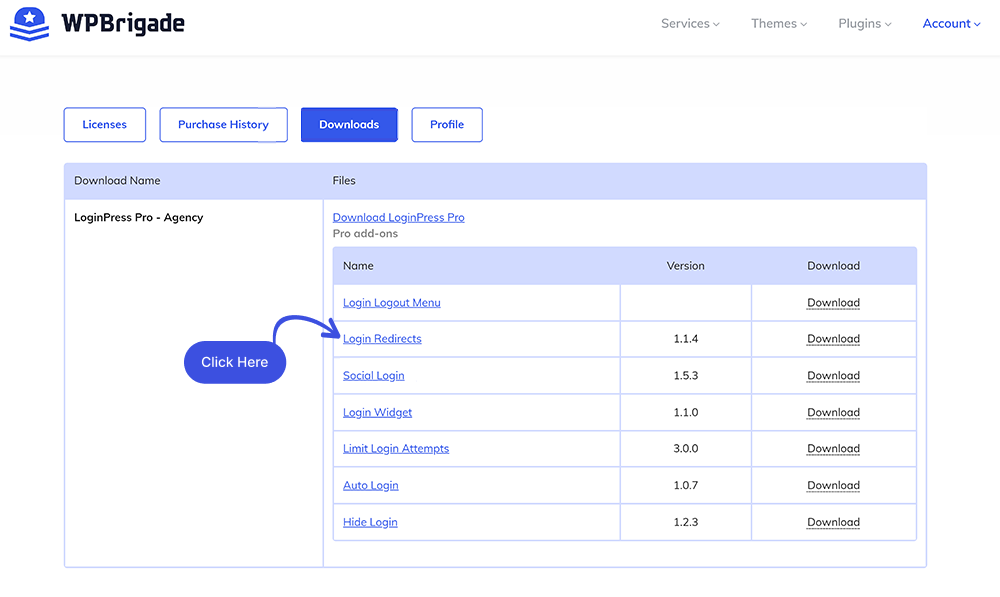
The first thing you need to do is download the Limit Login Attempts add-on. In order to do this, you need to Log in to your WPBrigade account and navigate to the Downloads page.
Once you’re on the downloads page, look for the Limit Login Attempts add-on and click on the Download button.
For further ado, see the screenshot below:
Step: 2 Install and Activate the Add-on
After you have downloaded the Login Redirects file, you need to enable it. To do this, go to the left sidebar of your WordPress admin dashboard, navigate to the Plugins, and click Add New option.

On the Add Plugins page, click the Upload Plugins button. Next, click the Choose File button. A popup will open up where you can select the downloaded file.
When done, click the Install Now button.

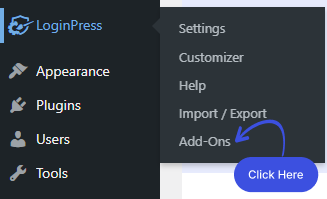
Next, go to the left sidebar of the WordPress admin dashboard, navigate to LoginPress, and click the Add-Ons option.
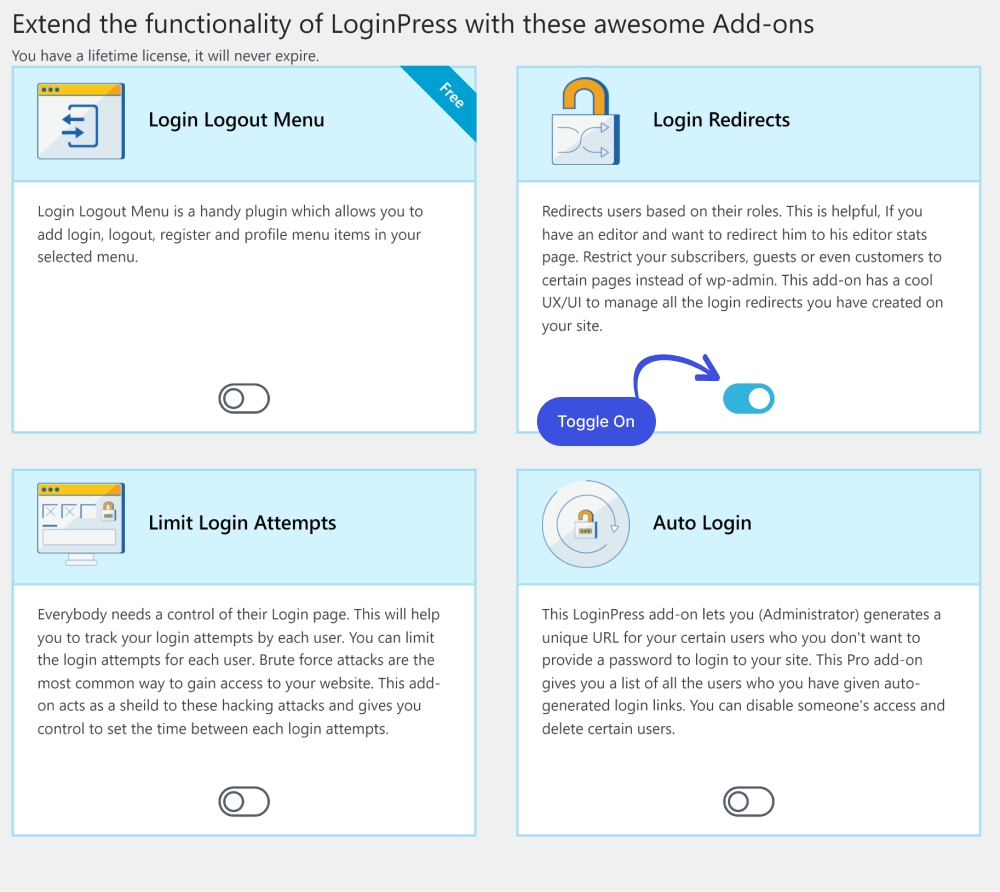
Next, hover over the Login Redirects toggle button and enable it.
Step 3: Set Up Login Redirection
To set up custom redirection after user login, go to the LoginPress settings. You’ll see the Login Redirect tab, where you can set the redirection options for the users.
Login Redirects Add-on that allows you to set redirection based on the user name or roles.

Login Redirects for Specific Users
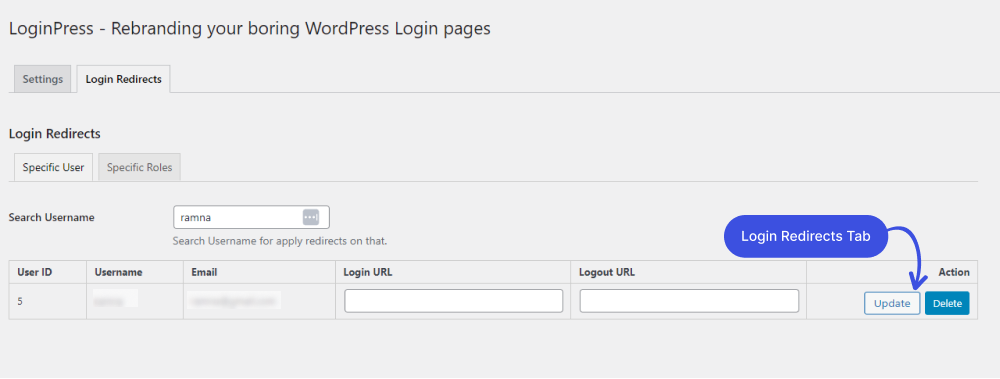
Redirecting specific users is very easy. Go to the Specific User tab and search the user’s name in the Search Username box.
If the user exists, you’ll see their details, including user ID, username, and registered email address. You get two fields labeled Login URL and Logout URL. This is where you can set the URLs you want to redirect that user to at the login and log out.
Once you have set the URLs, go to the next column and choose the appropriate action (Update or Delete).
Login Redirects According to User Roles
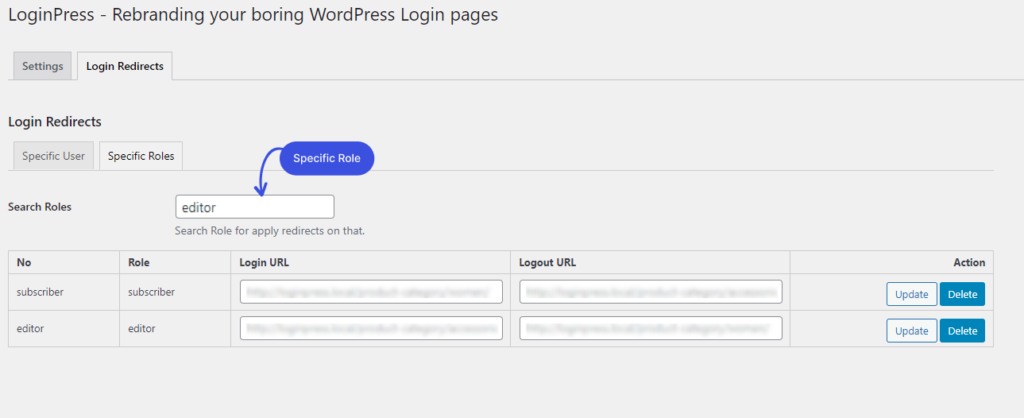
Redirecting users according to their assigned roles is very easy. Go to the Specific Roles tab and search for a role in the Search Roles box.
Once the role has been found, you can set the login and logout URLs for that role. Remember to update the settings to save the URL changes.
Final Thoughts
Adding login redirection to WordPress is a simple yet effective way of enforcing user roles, protecting the admin dashboard, and improving user experience.
In this article, we demonstrated how you could redirect users upon login. The LoginPress Login Redirects add-on simplifies the process and allows you to set up a login and log out redirection for specific users or entire user roles.
Now it’s your turn! Try out the LoginPress Login Redirects add-on, and let us know how much it helped you out!
That’s all! You can also check out our guide on 9 Best WordPress Login Plugins In 2022 (Expert Pick) and How To Limit Login Attempts in WordPress (Easy Guide).
Not using LoginPress yet? What are you waiting for?
Frequently Asked Questions
Does Google treat 301 and 302 Redirect the same way?
301 and 302 Redirects do not work the same way. A 301 Redirect indicates that the page has been permanently moved to a new location. In contrast, a 302 Redirect signifies that the move is temporary. It is important that you set up the appropriate redirect code to help out search engines and the users.
Are redirects bad for SEO?
Redirects hurt your SEO efforts only when they’re implemented incorrectly. If you pay attention to the type of redirect and how you implement them, redirects have little impact on your SEO efforts.


