How to Add Custom CSS to WordPress Login Screen

To add custom CSS to the WordPress login screen, open the LoginPress Custom CSS/JS section in the WordPress Customizer, paste your CSS and publish. Your styles load only on the login page, so you can change anything the regular LoginPress settings don’t cover without touching your theme files.
In this post, I will explain what custom CSS is and show the exact steps to add it.
Table of Contents
Table of Contents
What is Custom CSS?
CSS (Cascading Style Sheets) is the language that controls how a web page looks: colors, fonts, spacing, sizes and layout. HTML defines the content of the page, and CSS styles it.
Before diving deeper, you’ll need to understand what codes are.
A WordPress website code is a language that tells your web browser exactly how a website should look. HTML is the most common coding language. It helps you figure out what elements are present on a webpage.
Custom CSS has three main components; selectors, properties, and values. The selectors stand for the element you want to style, and properties and values add that desired styling to that element.
For example, if you want to customize the font of h1, it would be done this way:
H1{
   Font-family : Helvetica;
   }
Suppose you want to add a color and size of your choice:
H1{
   Font-size: 30 px;
   Color: green;
   Font-family : Helvetica;
      }
Now that you know what CSS is, let’s see how you can add it to the login screen of your WordPress login screen.
Add Custom CSS to WordPress Login Using LoginPress Custom CSS/JS
You can add custom CSS to the WordPress login screen from inside WordPress with LoginPress Custom CSS/JS. Follow these steps:
Step 1: Install and Activate LoginPress
The first thing you’ll need to do is install and activate the LoginPress plugin. For more details, see this step-by-step guide on how to install a plugin in WordPress.
Note: The Custom CSS/JS feature is available in both Free and Premium versions of LoginPress.
Step 2: Adding Custom CSS and JS
Once you’ve installed and activated LoginPress, you can add custom styling with CSS to your WordPress site.
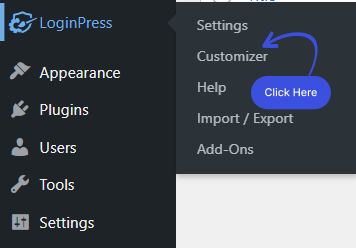
For this purpose, go to the left side of the WordPress admin dashboard of your website, navigate LoginPress, and click the Customizer option.
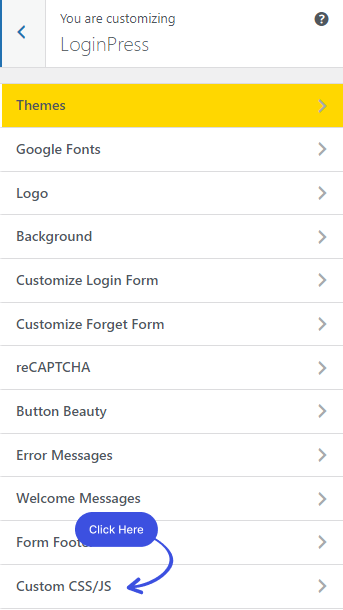
Once you click it, you’ll find yourself on a new screen with all the LoginPress customization Options. Select Custom CSS/JS option.
In CSS and JS editor, you will see 2 Textareas; one for the custom CSS and the second for the custom JS code.
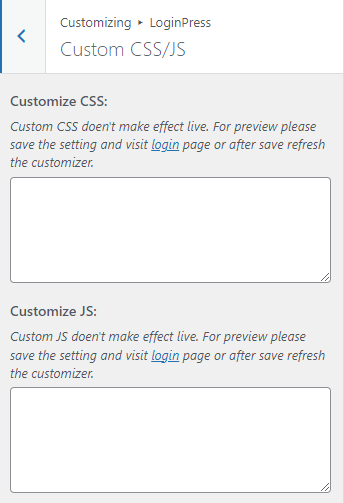
Simply paste your Custom CSS code into the Customize CSS Textarea.
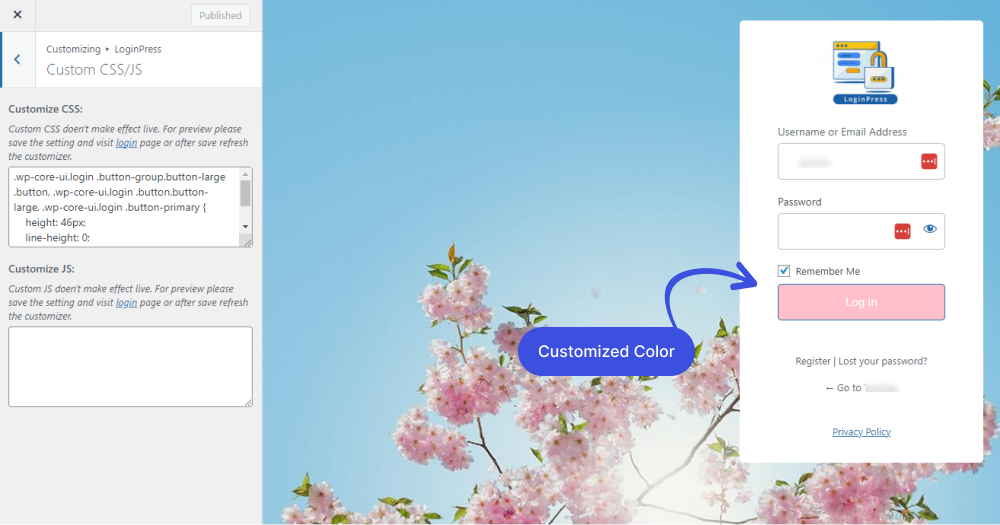
Note: Here, we’ve used custom CSS code for adding the pink color to the Log In button.
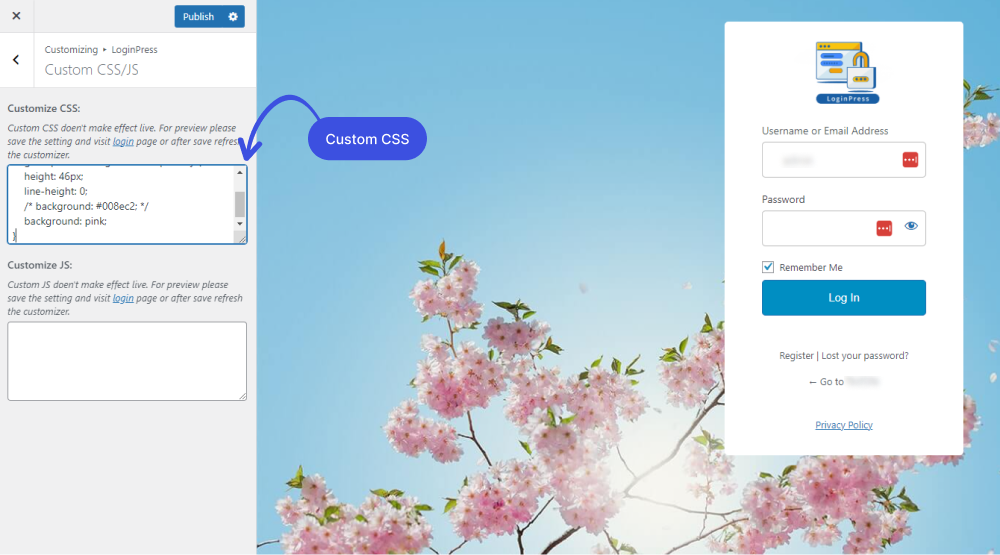
Once you are done, hit the Publish button at the top.
Step 3: Preview Your Custom Login Screen
LoginPress lets you preview your custom login changes before you save them, generally. If you are adding some custom code, hit the Publish button, then refresh the page to have a live preview at the right side of the login page.
Final Thoughts
LoginPress Custom CSS/JS feature is the quickest and easiest way to add your own custom CSS to the WordPress login screen.
Write custom CSS codes with Custom CSS/JS to make your login screen look exactly how you want it.
In case you find any confusion, feel free to contact our support team.
You can also check out How Social Login Improves CRO and How To Redirect Woocommerce Users after login.
Frequently Asked Questions
Is CSS coding?
CSS, Cascading Style Sheets, is the code that styles your web content. It’s a markup language used for describing the visual style and presentation of web pages, and while it involves writing code, it is not considered a programming language.
Can I use CSS without HTML?
No, you cannot use CSS without HTML. CSS is used to style and format HTML documents, and without an HTML document to apply styles to, there would be no way to see the effects of the CSS.