How to Display Custom WordPress Footer on Login Page
Do you want to display a custom WordPress footer on the login page of your website?
Every WordPress website has a footer area at the bottom of each page. Sometimes you prefer using this area for something more beneficial for your website visitors.
In this article, we’ll show you how you can display custom footer on the login page of your WordPress site.
So, without much ado, let’s get started!
Table of Contents
What is the Footer in WordPress?
You can see the footer at the bottom part of every WordPress website. It generally appears after the main content area. It is displayed on every page of your WordPress website.
Many beginners overlook this area, but you can make it more helpful for your visitors in several ways. You can use the footer area for uplifting your WordPress SEO.
Here’s an example of our footer on LoginPress that millions of visitors see every month.

We are still going! Every top-class WordPress theme has a footer widget area that is editable. You can make this area more useful by adding widgets, removing links, adding code, and more. You can go for creating custom footers for different pages.
1. Adding Widgets in Your Footer in WordPress
You’ll find widget areas in most WordPress themes.
You can utilize these widget areas for adding text, links to your privacy policy, and more.
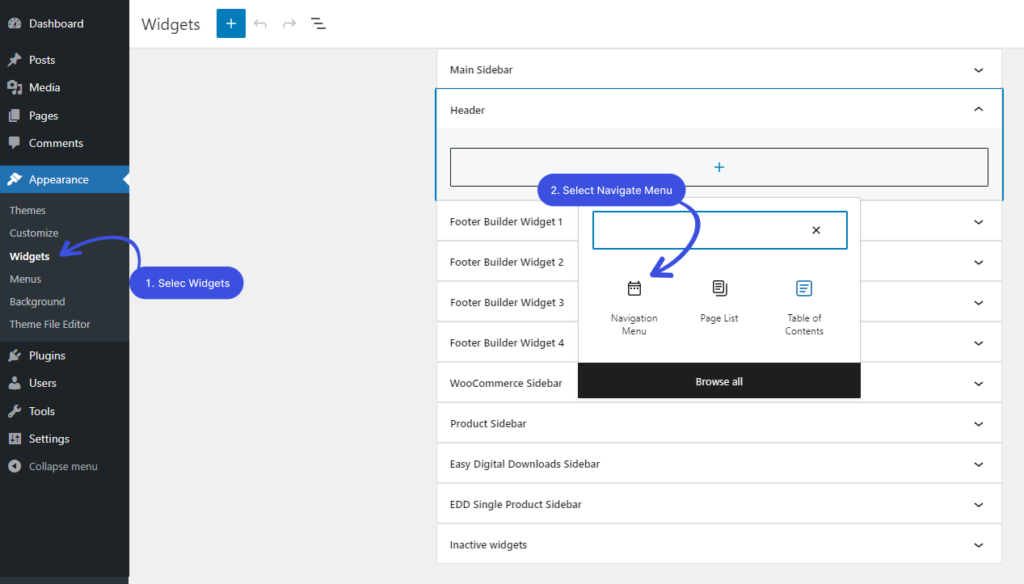
You can easily add text and images within a few clicks. All you need to do is to navigate Appearance > Widgets. Click the + sign to add a block in your Footer Sidebar section.
Note: Every theme uses the footer widget areas differently.
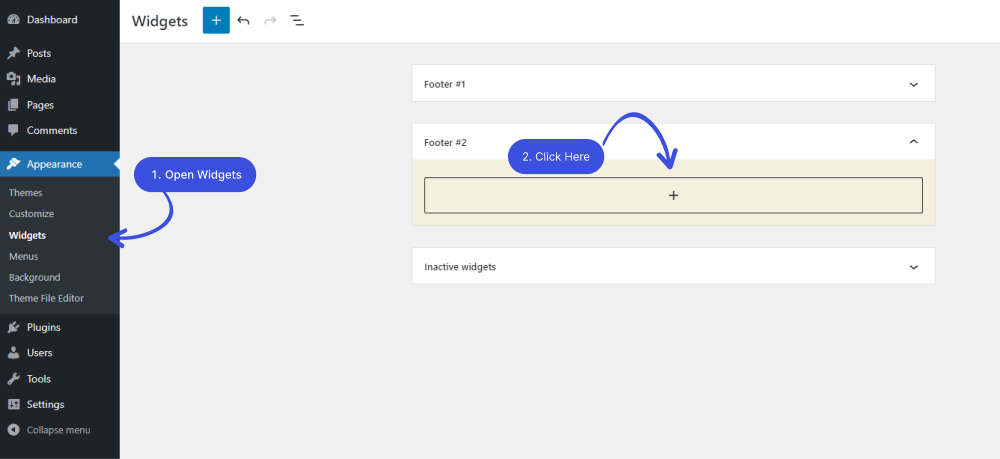
1.1 Adding Links in WordPress Footer Widget Area
Do you want to add links to different pages, posts, and categories in your WordPress website footer area?
WordPress has an easy way to manage these links using navigation menus. Go to Appearance > Menus. A new screen will open. From here, select the ‘Create new menu’ link.
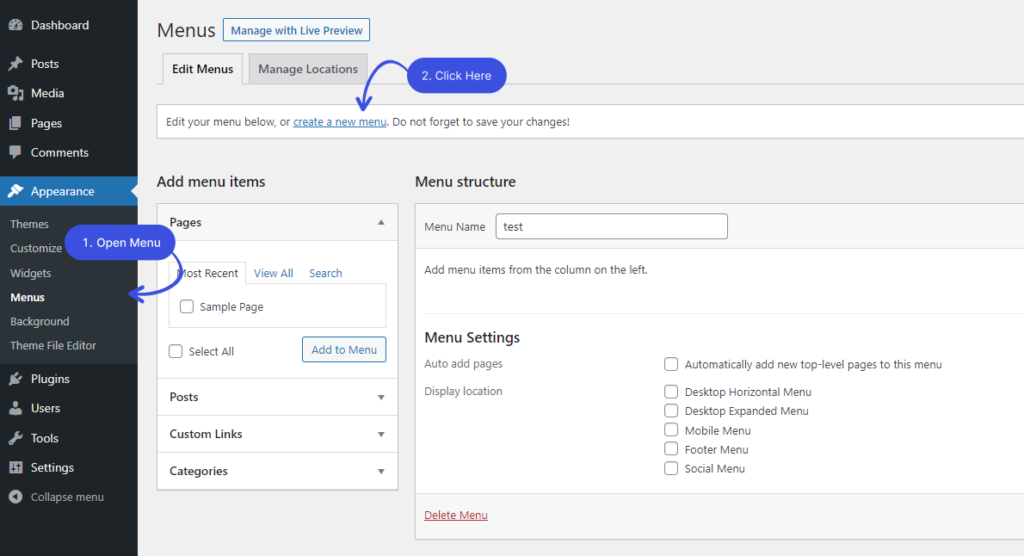
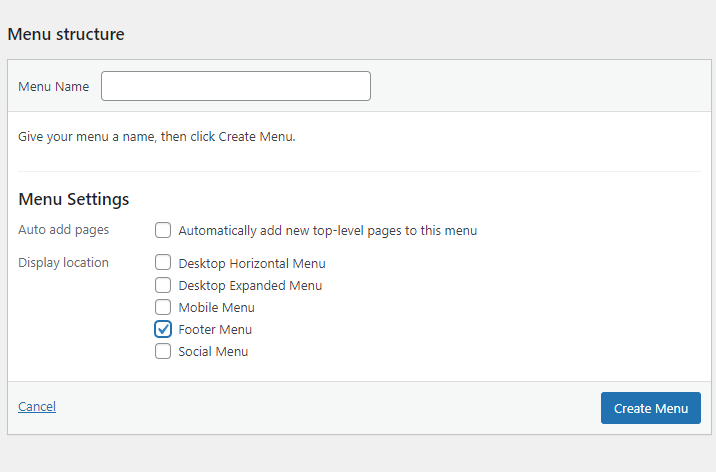
You’ll need to select a name for creating a new menu.
Type and enter the menu name, and select the relevant footer location. Once you’ve decided on the footer location, click the ‘Create Menu’ button.
The menu for your widget is ready, and now you can start adding links.
Select the posts, categories, or pages where you want to add them to your menu.
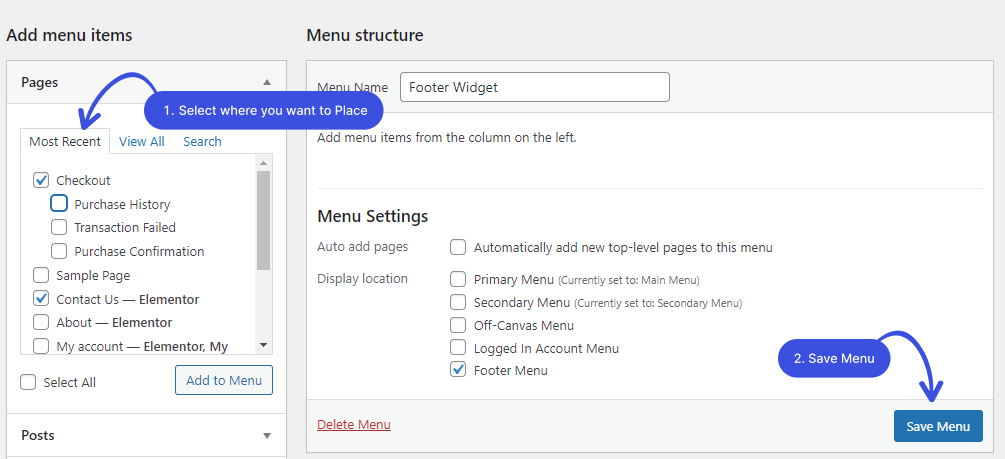
Click on the ‘Save Menu’ button when you are done to save the changes.
Your menu is ready to be added to the footer widget area of your WordPress site. Navigate to Appearance > Widgets page in your WordPress admin panel.
Next, click the + icon, search for Menu, then click the Navigation Menu block.
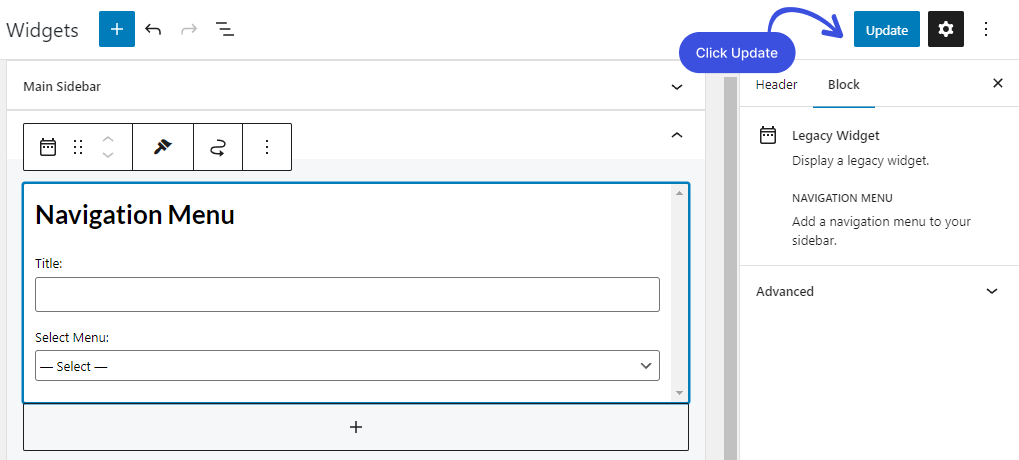
Afterward, select your footer navigation menu from the ‘Select Menu’ drop-down,
Note: You can add a title for your widget. It will appear as the title of your footer.
Then, click the ‘Update’ button to save your changes.
2. Custom WordPress Footer on Login Page using LoginPress
If you want to customize the footer on the login page of your WordPress site, the easiest and quickest way is to do it with the LoginPress WordPress plugin.
The first thing you need to do is activate and install the plugin. For more details, see our step-by-step guide on how to install a WordPress plugin.
The LoginPress is a feature-packed WordPress plugin. It lets you customize each element on the login page.
LoginPress offers a Footer Text feature that helps you customize your login form’s footer text. You can customize the footer text, display, decoration, hover color, and font size.
Note: You can see our detailed guide on Customize the Footer Text with LoginPress.
The Footer Text feature controls the footer section of the Login page, like copyrights, and changes the copyright text and background color.
All you need to do is to enable the “Enable Copyright Note” option.
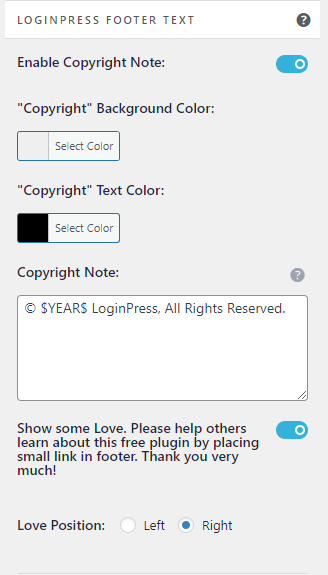
After enabling the Copyright Note option, a new window will open, where you can customize the login page footer text according to your requirements.
In the Login page footer “Copyright Note,” you can quickly auto-update the year instead of changing the year manually; you need to Use the $YEAR$ variable instead of writing the current year.
You will find the following features for customizing the login page footer in the Footer Text feature.
2.1. Creating a Custom Footer Text:
You can customize the copyright note via the LoginPress Form Footer feature without editing the footer.php file.
You can use HTML tags to beautify your text.
Note: The $YEAR$ automatically adds the year to the copyright note.
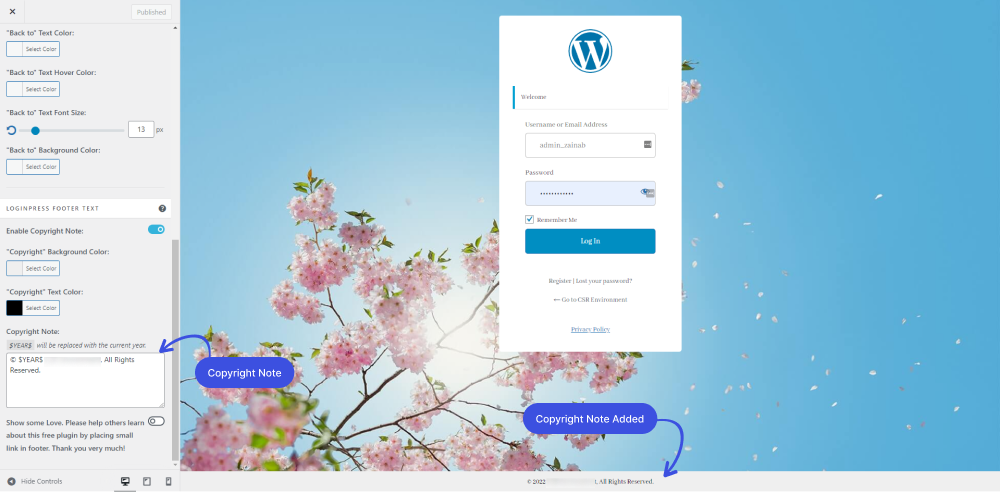
2.2. Removing ‘Powered by’ Text from Your Footer
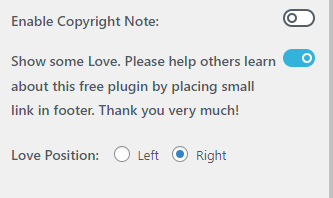
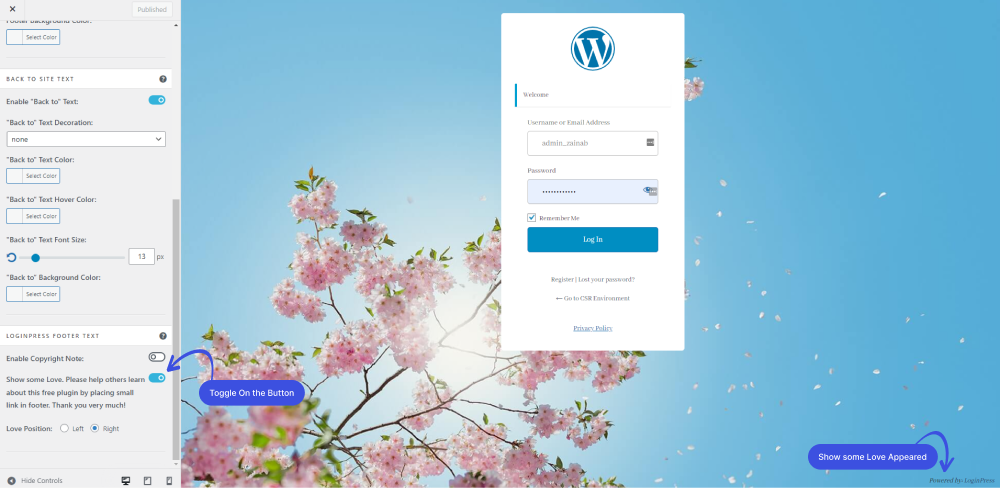
Enable or Disable the “Powered by LoginPress” text by toggling on the button right now to Show some love.
This will appear like this on the login page:
2.3. Changing the Position of the ‘Powered by’ Text in the Footer
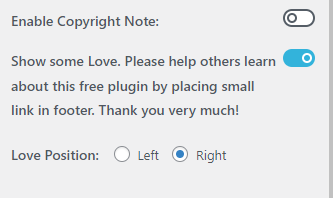
You can customize the Powered by branding position to the left or right.
3. Adding Code to Your WordPress Footer using Header and Footer Plugin
Sometimes, you may need to insert code snippets into your WordPress footer. You can do this simply by connecting your site with the help of plugins.
You can easily do this with the Header and Footer WordPress plugin if you want to insert an additional code to your WordPress footer.
WP Headers and Footers plugin helps you to add code to the headers and footers section of your WordPress website, like Google Analytics tracking code, Custom CSS code, and more. You don’t need to edit the theme files to insert the code.
First off, activate and install the plugin.
WP Headers and Footers plugin helps you to add code to the headers and footers section of your WordPress website, like Google Analytics tracking code, Custom CSS code, and more. You don’t need to edit the theme files to insert the code.
When activated, go to Code Snippets and click Header & Footer in your WordPress admin panel. Then, you can add your code to the ‘Footer’ box.
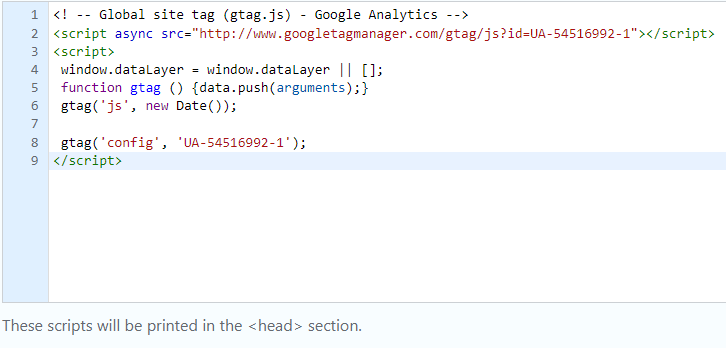
After that, click the Save Changes button at the end of the screen before moving on.

Simple, right?
Final Thoughts
We hope this article helped you understand how to edit the footer in WordPress.
That’s how you can easily customize the Login form and login page footer according to your requirements with the LoginPress plugin.
That’s all we helped you with How to Display Custom WordPress Footer on Login Page. You may also want to check out How to Redirect Users to the Referrer Page After Login and How To Redirect Woocommerce Users after login.
Frequently Asked Questions
What Would You Like To Add In The Footer Area of The Login Page?
You can add anything you prefer in the footer area of your WordPress site.
What does a footer do on your WordPress site?
The footer lets you add a copyright notice, link to a privacy policy, logo, contact information, social media, or email sign-up form to the bottom of your WordPress site.


