How to Change the Font Size in WordPress

To change the font size in WordPress, use heading blocks, set the size in the block editor, install a font resizer plugin, or add CSS to your theme for a site-wide change.
This guide shows you all four methods step by step.
Table of Contents
How to Change the Font Size in WordPress
Font size affects readability, tone and how visitors perceive your site. Typography is a key part of your site design.
Font size lets you tell your audience the overall tone of the content. For example, Comic Sans, a more casual font, delivers a lighter tone than that Times New Roman, which is often used for official documentation.
The font size matters for your text readability.
Method 1: Using Paragraph Headings
Use heading blocks to change text size quickly, because headings and subheadings are sized larger than body text.
In most WordPress themes, headings are in a larger font than regular body text. Headings help you break your content into sections.
Note: Do you know headings are a great source of help in helping you rank, as search engines give more weight to proper headings than normal paragraph text?
Let’s learn how to add a heading in the default WordPress block editor.
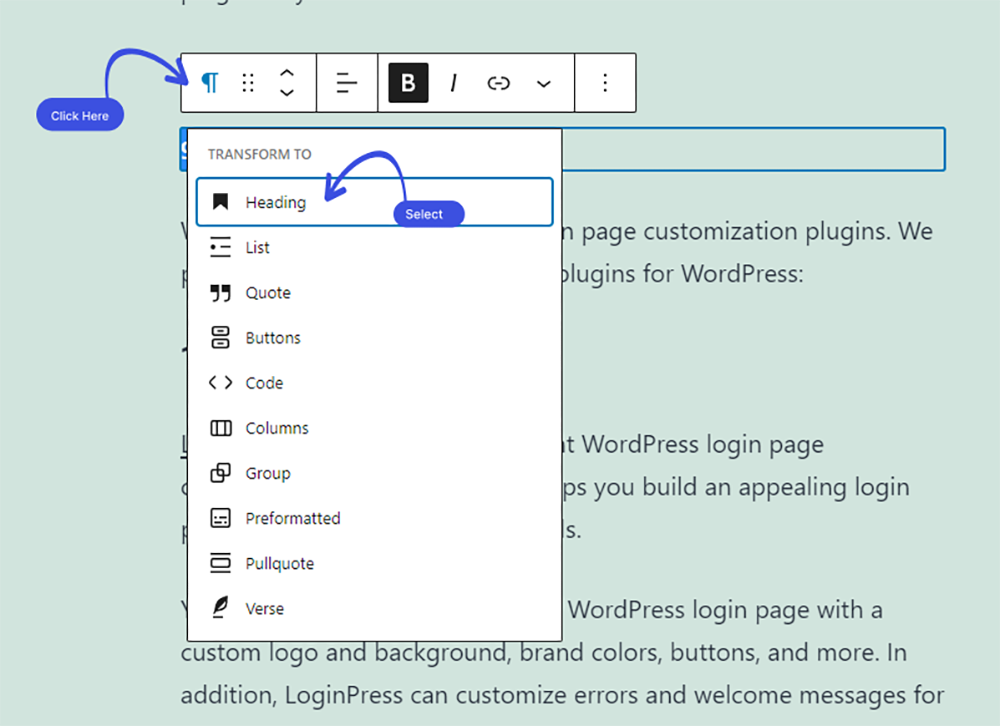
How to add a heading in the default WordPress block editor
You can add a heading to your posts or pages by simply adding the ‘Heading’ block. You can search for it or find it in the ‘Text’ section in the WordPress block editor.
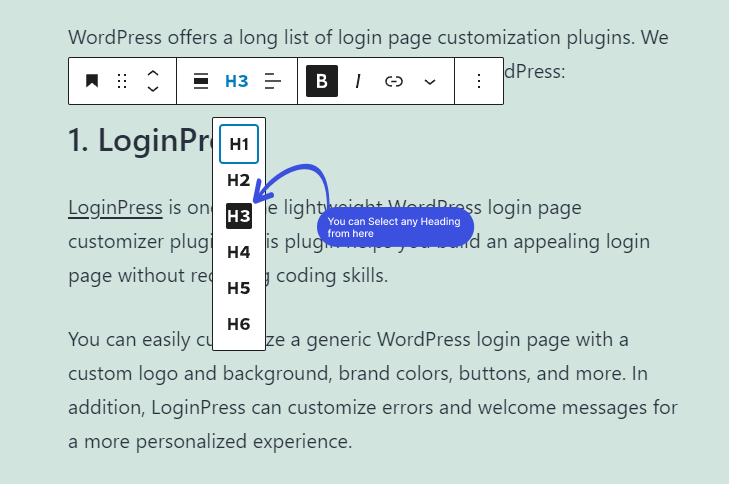
You can add further heading by selecting‘H2’ drop-down to select a different size for your headings.
Method 2: Changing the Size of the Text in the Block Editor
Use the block editor to set a larger font size for a paragraph or an entire post.
All you need to do is to click on the paragraph you want to change the funny paragraph block and navigate to font size under ‘Typography’ on the right-hand side of the screen.
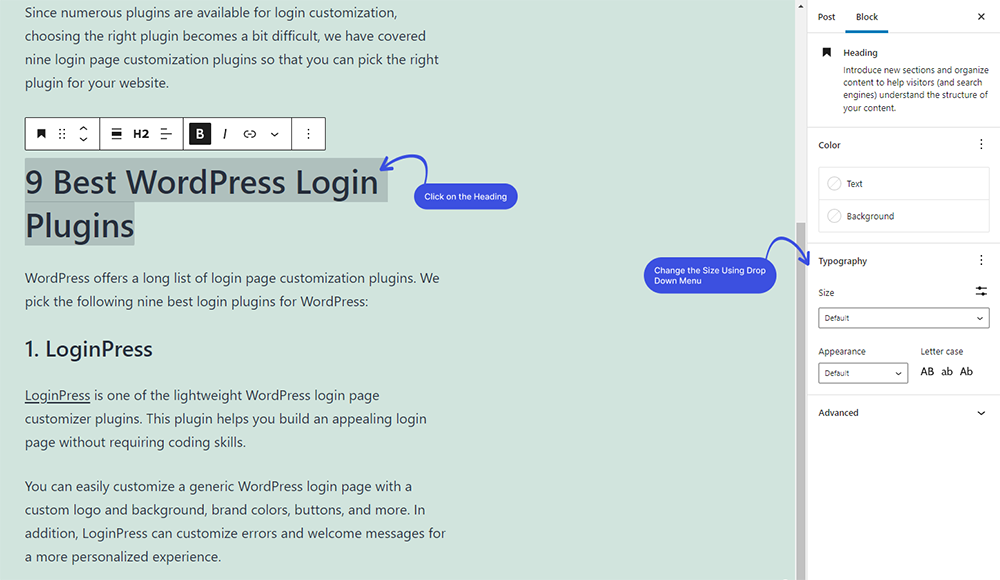
You can select from the drop-down, which covers Small, Normal, Medium, Large, and Huge. If you change your mind, then click the ‘Reset’ button to set your paragraph back to the default text.
There’s also a ‘Custom’ option where you can simply type in the pixel size that you’d like. If you want, you can also set a large Drop Cap to appear at the start of your paragraph.
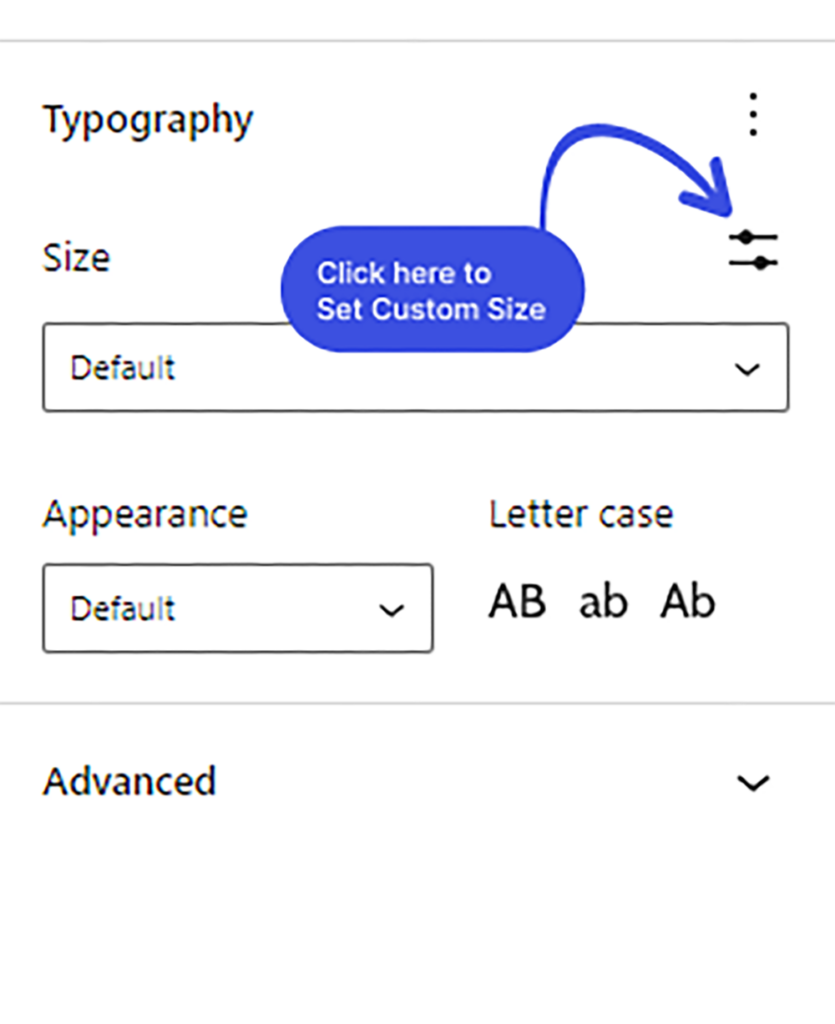
Note: This option isn’t available in older WordPress themes.
Method 3: Change Font Size Using Plugin (Zeno Font Resizer)
Use a plugin such as Zeno Font Resizer to change font size in a few clicks.
Here we’ve shown you how you can change font size using Zeno Font Resizer. As Zeno Font Resizer is one of the best WordPress font resize plugins with over 7,000 active installations and 4.5-star ratings.

The Zeno Font Resizer plugin is really convenient for resizing the font on the WordPress website. Those who visit your website using a sidebar widget can select a small or large font size.
Zeno Font Resizer allows visitors to your website to change the font size of your text.
Let’s walk through how you can change font size using the Zeno Font Resizer plugin.
Step 1: Install and Activate the Plugin
The first thing you need to do is install and activate the Zeno Font Resizer plugin. To do this, you need to go to the left side of the WordPress admin dashboard. Navigate to Plugins and click on Add New.
Next, you’ll need to search for the plugin in the search box. Now click on Instal Now and then click on the Activate button.
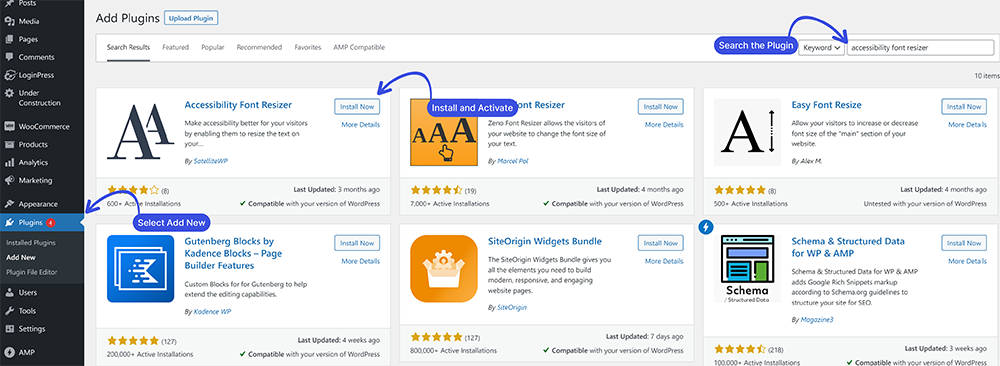
Step 2: Initial Plugin Configuration
On activation, you’ll need to navigate to Appearance and then click Widgets. A new screen will open up. Here you’ll find the Plus Sign (+) in the upper left corner.
Click the Plus Sign (+) next to Widgets in the upper left and search for the Zeno Font Resizer plugin.
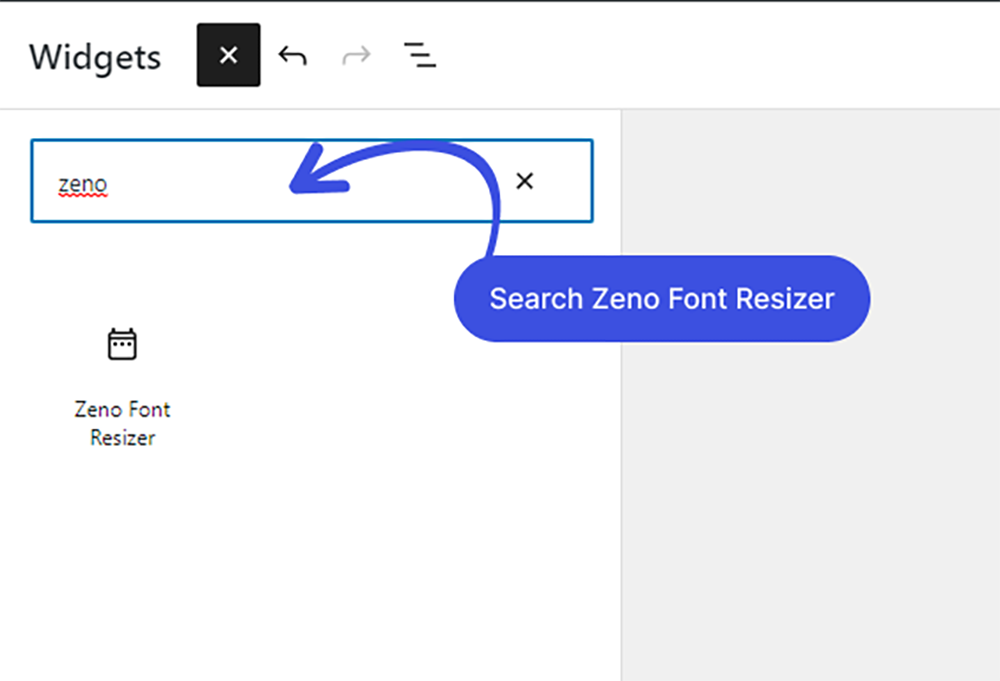
Note: You can also make use of template code if you are not interested in the use of the widget.
Click Update to finalize your changes. The widget will now be visible wherever you place it.
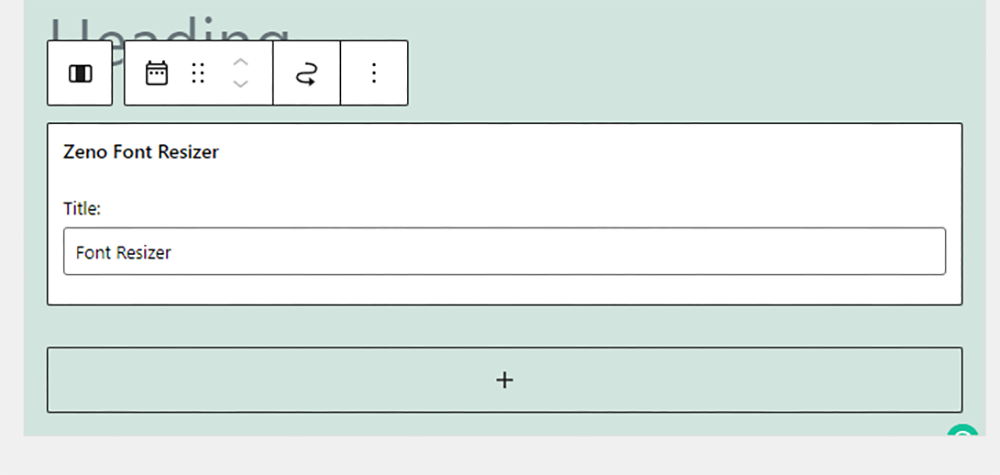
Now change your font size using Zeno Font Resizer.
Method 4: Change Site-Wide Font Size Using CSS
Add CSS to your theme to change the font size site-wide, so you do not resize text in every post.
Several WordPress themes come with an option for you to change the font size. If you find this option then you can do it without writing CSS code. But if not, then you’ll need to add custom CSS to add your own font size rules.
Note: Custom CSS isn’t available in older WordPress themes.
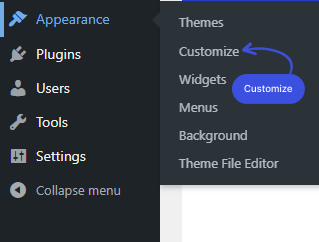
To add custom CSS, you’ll need to open up the theme customizer. Go to the left side of the admin dashboard and navigate to Appearance and click Customize option.
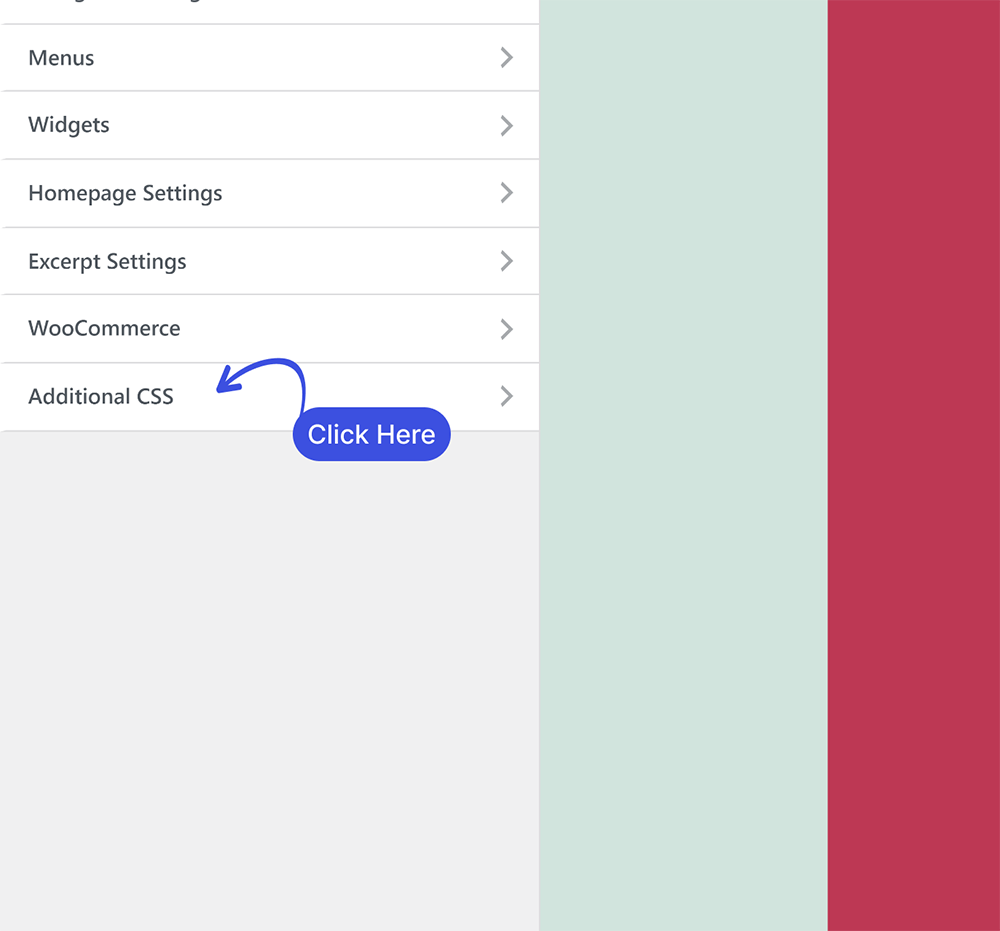
Next, navigate to the “Additional CSS” tab.
Now, you can add custom CSS to change the font size on the WordPress website.
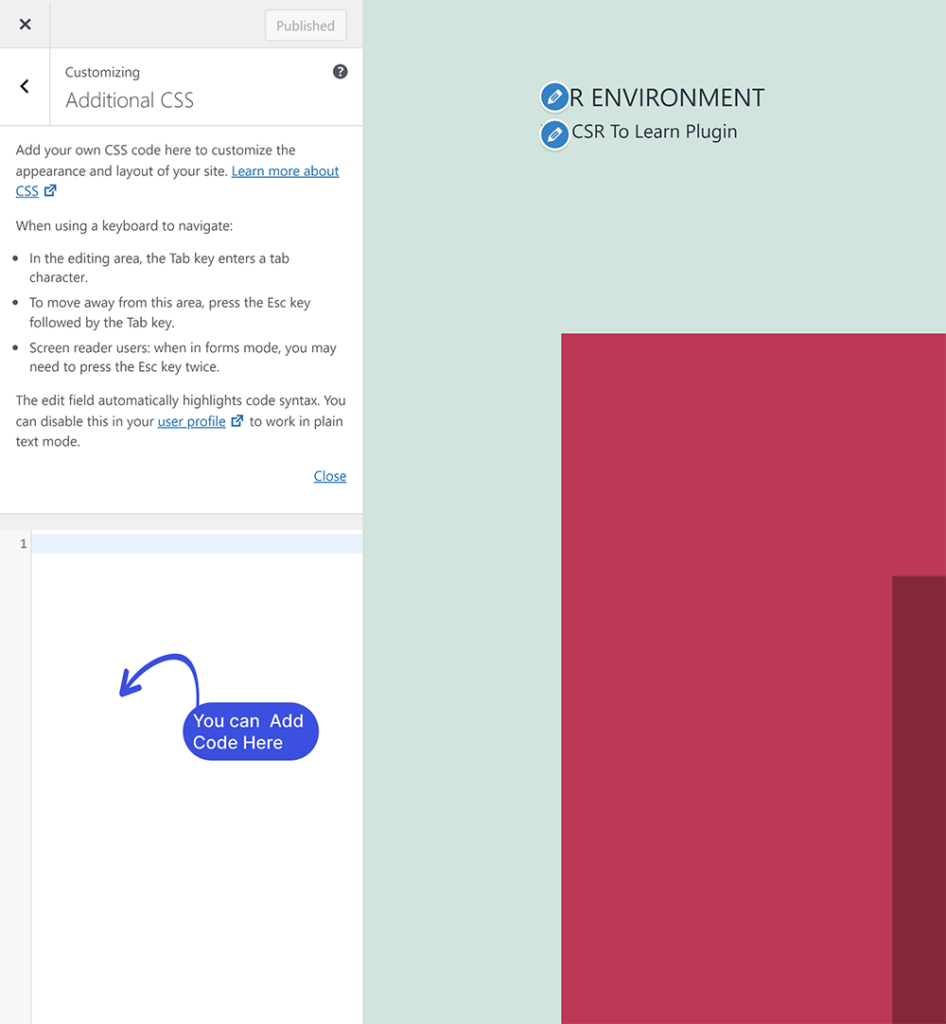
You can add something like the following:
p
{
font-size: 15px;
}
This CSS code will let you change the font size of everything on the website within a paragraph (“p”) to 15 pixels. You can simply change the 15 to any number you want for your website font. The same can be applied to headers and other elements used on your site.
Final Thoughts
You can change the font size in WordPress with heading blocks, the block editor, a plugin or site-wide CSS. Use CSS when you want one change to apply everywhere.
Take your website content to the next level by finding more ways to enhance the readability of your text.
Let us know if you’ll find any difficulties in changing the font size for your WordPress website.
Frequently Asked Questions
What is the rule for font size?
The rule for desktop font sizes is optimal font sizes.
What is the normal font size for a website?
The normal font size for any website is approximately 16 pixels.
That’s all! You can also check out How To Change The Theme for Your WordPress Website and How To Add Google Fonts With LoginPress.
Not using LoginPress yet? What are you waiting for?