How to Install WordPress on Localhost (Beginners Tutorial)
Are you looking for a way to install WordPress on localhost? If yes, you’ve landed on the right article!
Installing WordPress on a local host is a great way to build and test your site before making it live. This way, you have a controlled environment where you can experiment with themes, plugins, etc., without affecting your live WordPress site.
In this article, we’ve created an easy step-by-step guide to help you install WordPress on localhost.
Install WordPress on Localhost (TOC):
What is a Localhost?
A localhost refers to your computer serving as a local server for development and testing purposes.
Localhost allows you to run server software, i.e., Apache or Nginx. Plus, you can run database systems, such as MySQL or MariaDB. The best part is that everything is carried out straight from your Computer.
This setup copies the functionality of a live web server but operates entirely within your local machine, i.e., Computer.
When you access localhost, your computer acts as both the client and the server. It processes web pages and applications as if they were being served over the Internet.
Why Install WordPress on Localhost?
There are several advantages to installing WordPress on Localhost, including:
- No Internet Dependency: You can develop and test your site without an internet connection.
- Faster Development: Localhost provides faster load times and file access than remote servers. It speeds up the development process.
- Secure Testing: Localhost isn’t accessible online, so you can safely test code and new features without risking security breaches.
- Cost-Effective: Localhost is free. This is why it is best for testing purposes.
In summary, a local host is the best option for building and testing a site before moving to a live server.
How to Install WordPress on Localhost with XAMPP (6 Easy Steps)
If you want to create a local site, you must depend on a localhost webserver. There are multiple localhost solutions, including:
They help you set up your WordPress on Localhost.
Here, we’ll show you how to install WordPress on localhost using XAMPP.
Let’s get started!
Step 1. Download XAMPP
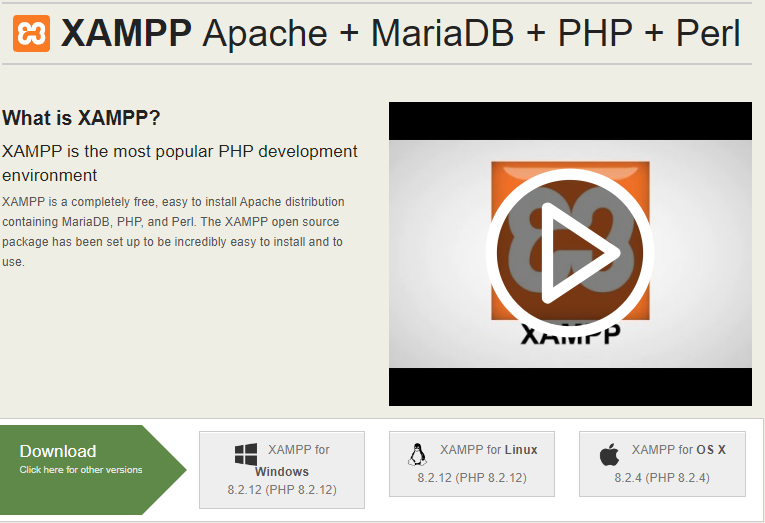
First, go to the Apache Friends website and download the XAMPP software for your operating system.
Note: Make sure to download the right XAMPP software that matches your operating system, i.e., Windows, Linux, or OS X.
Step 2. Install and Run XAMPP
Next, run the XAMPP installer and follow the installation instructions using the default settings.
Note: If a pop-up indicates that your antivirus software might affect the installation process, click Yes to continue.
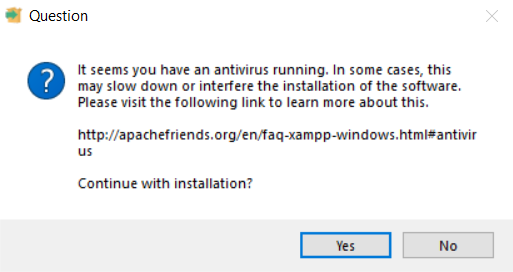
Complete the installation process.
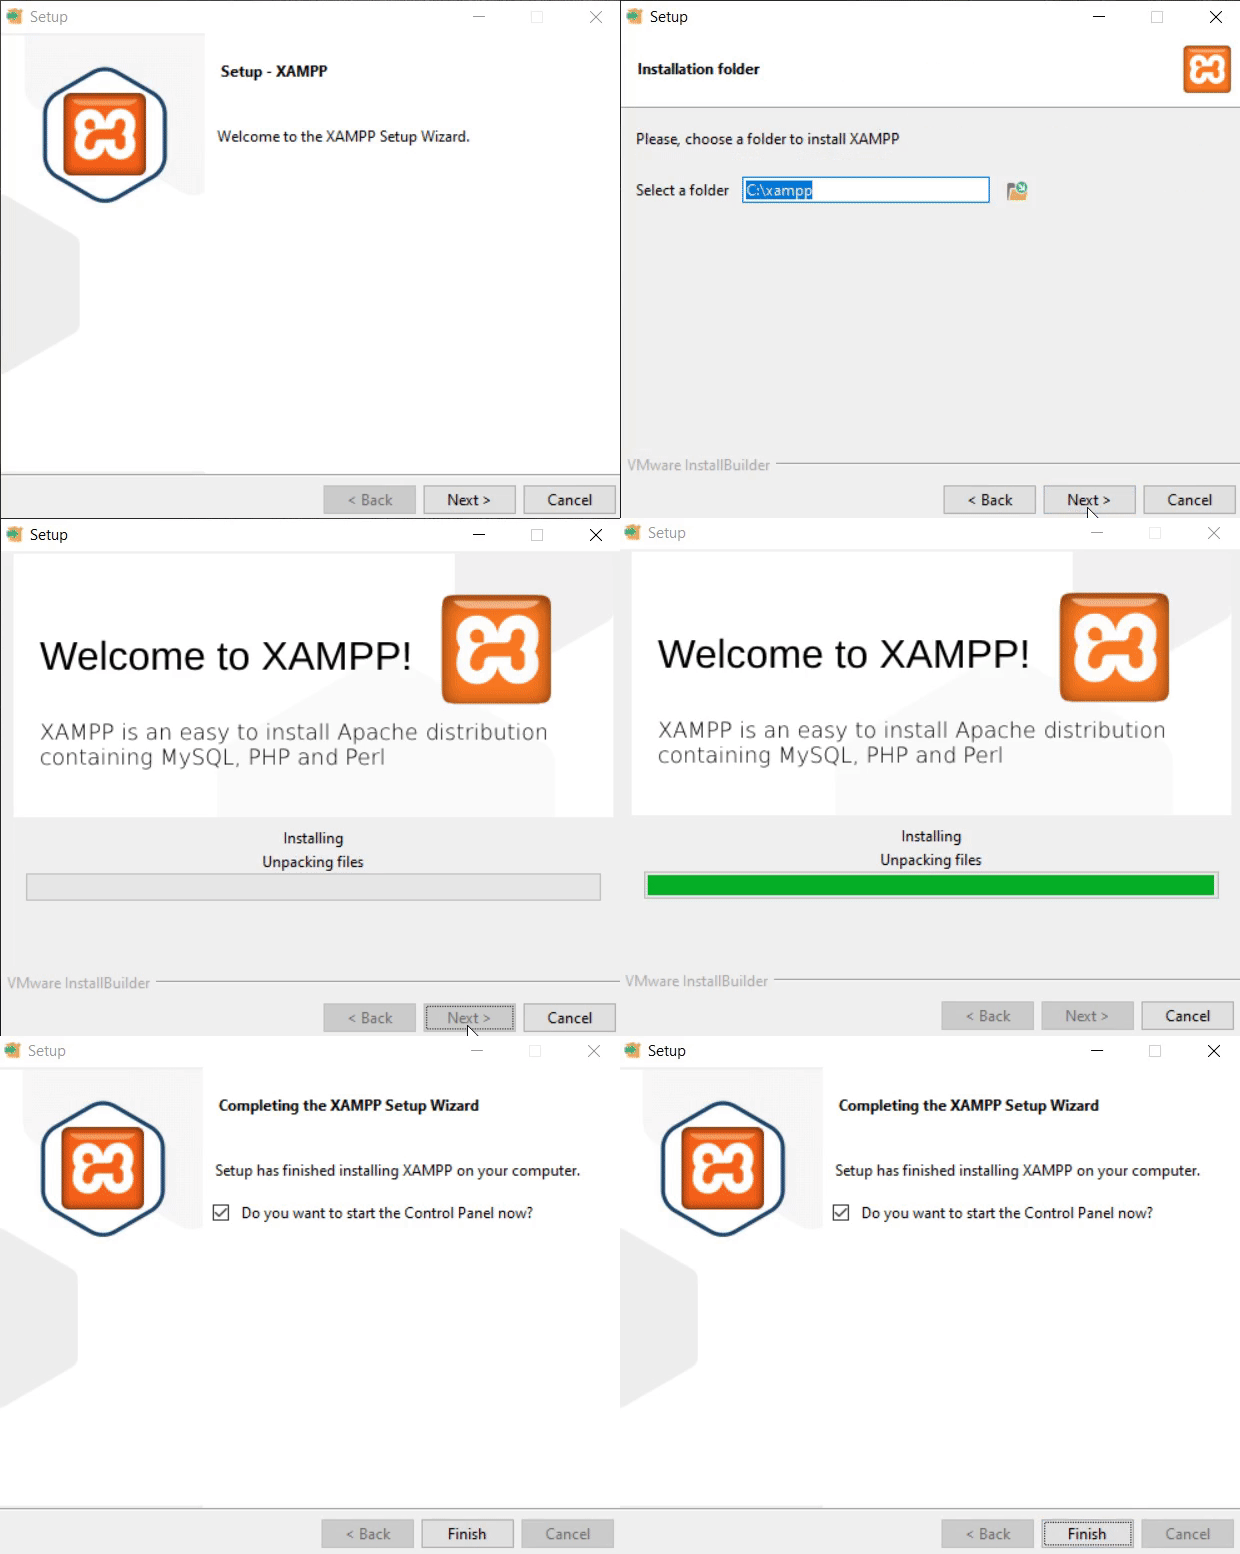
This will launch the XAMPP Control Panel app.
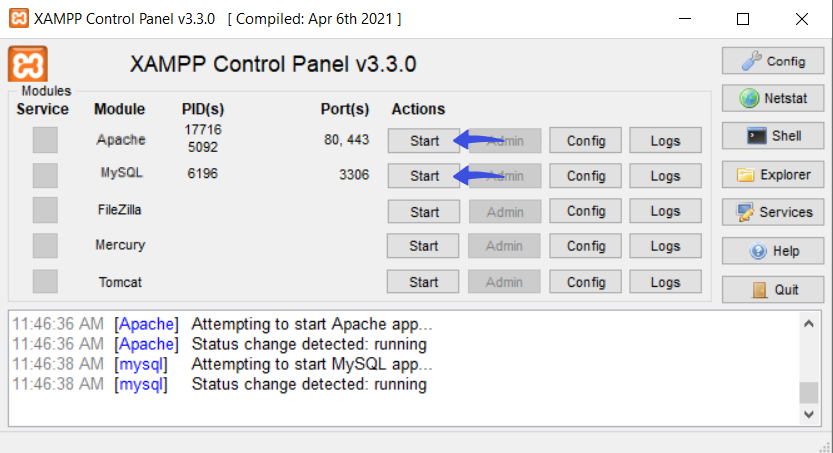
Here you can see XAMPP app modules, including:
- Apache: It is your local server.
- MySQL: It serves as your database server.
Go ahead and click the ‘Start’ button next to Apache and MySQL.
Step 3. Create a Local Database
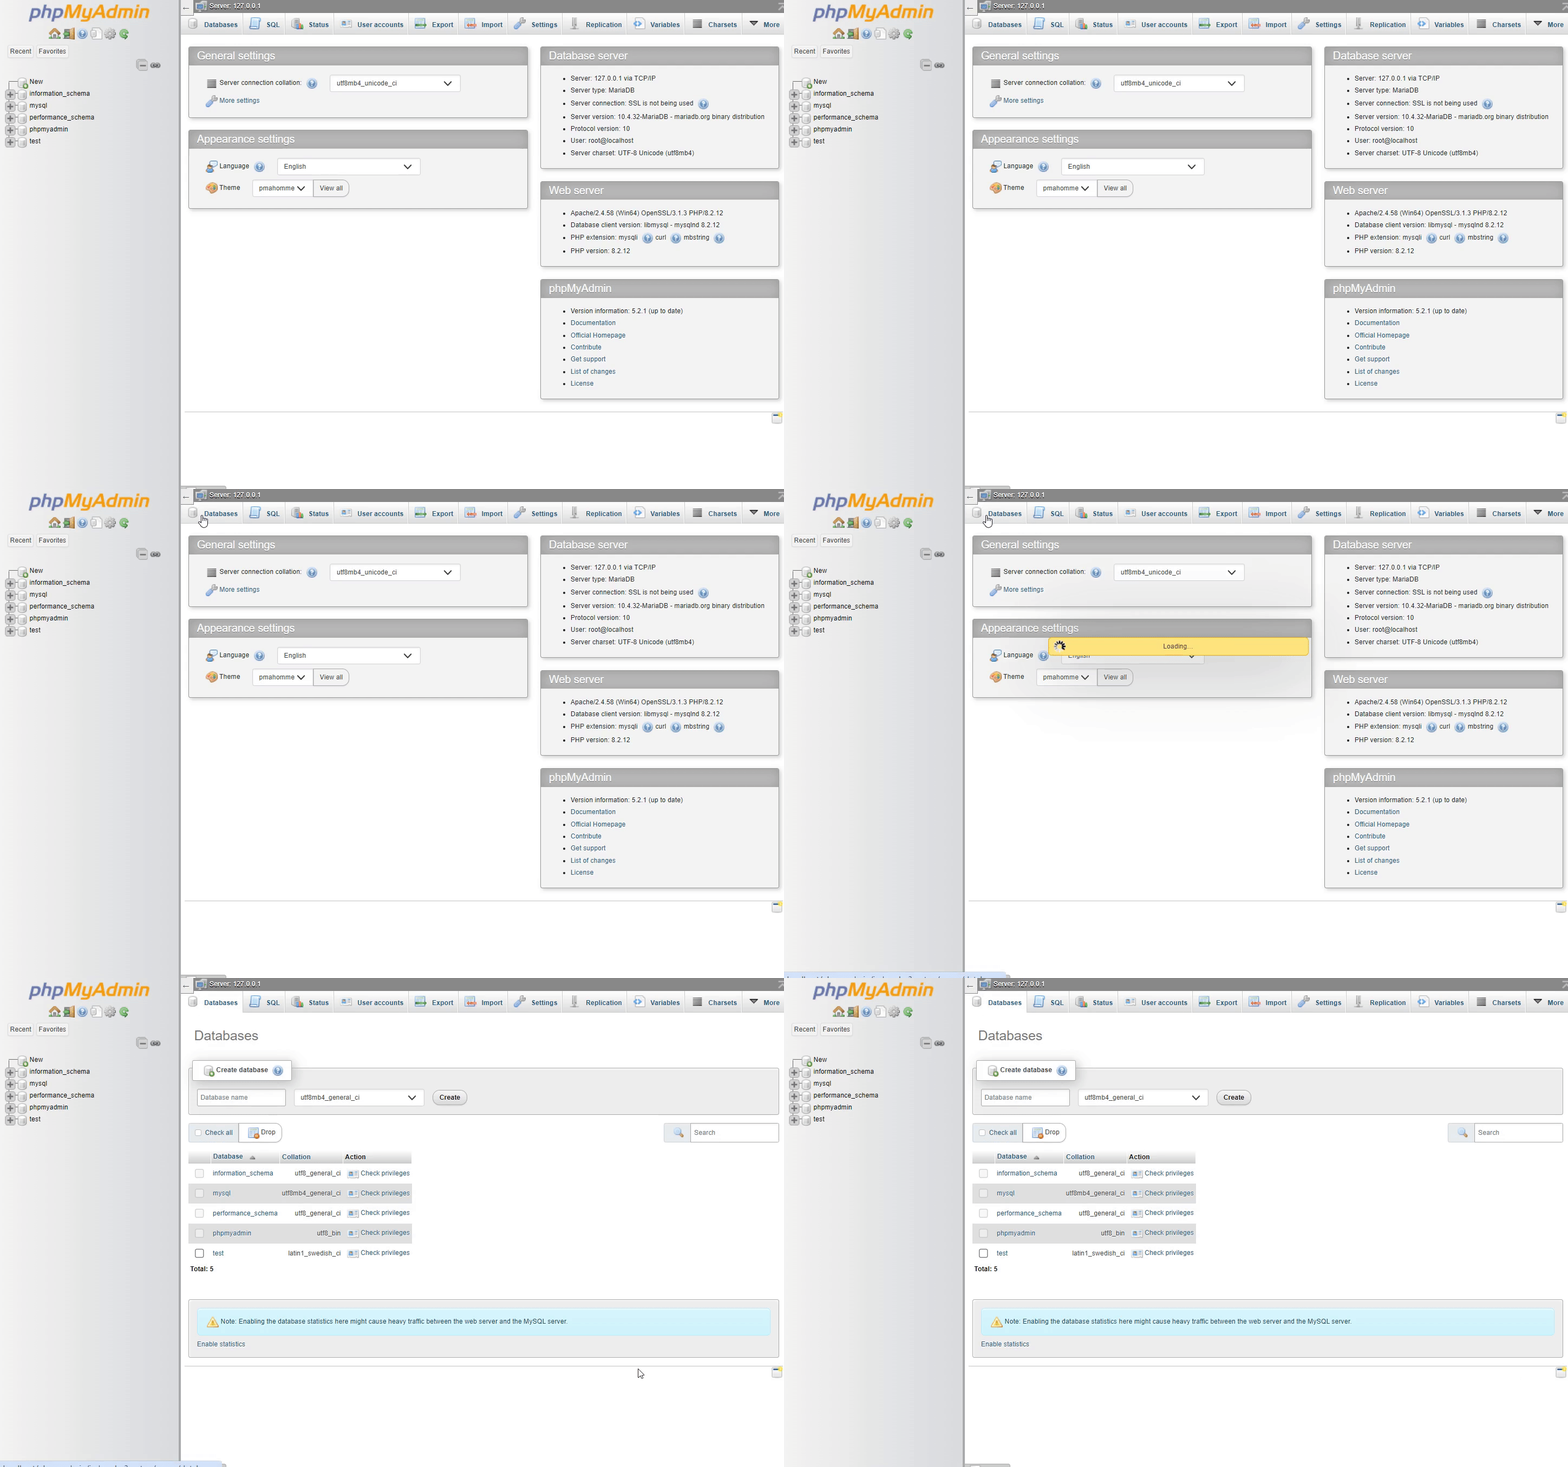
Next, you’ll need to click the Admin button of the MySQL module to launch phpMyAdmin. This area will be used to manage MySQL and MariaDB databases.
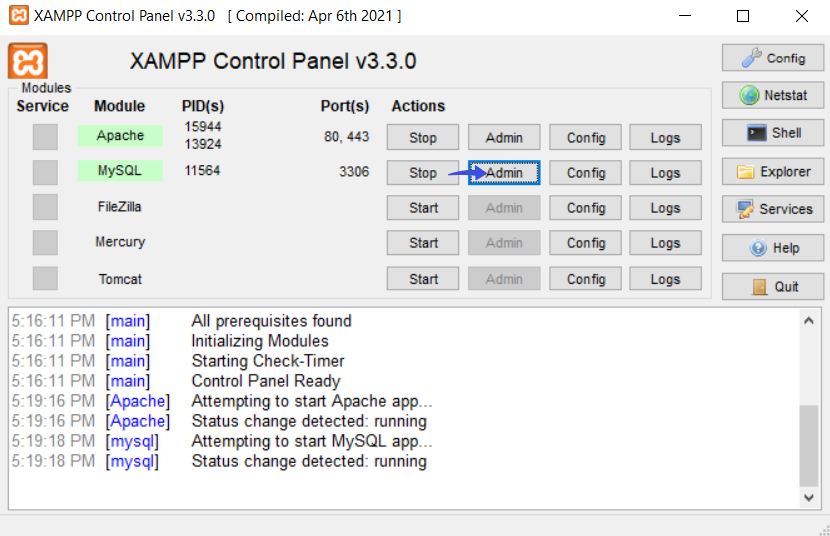
It will take you to the phpMyadmin screen. Simply click on the Database tab.
See the GIF below:
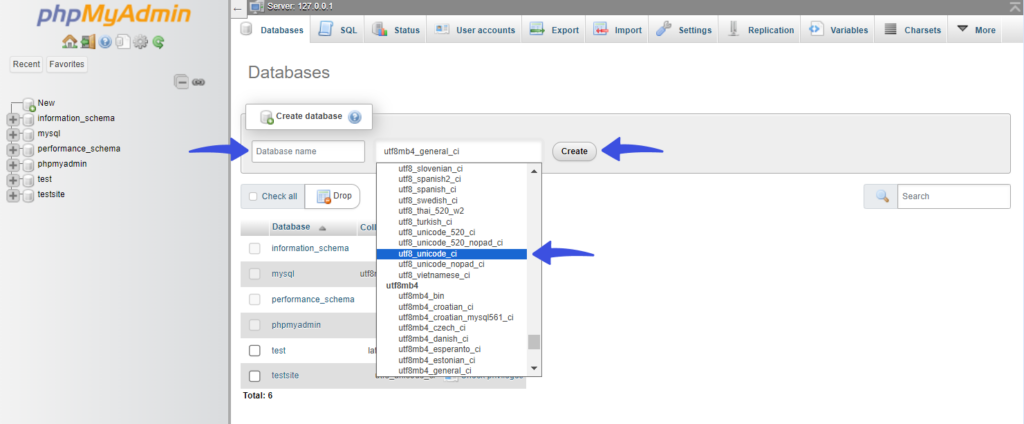
Add the Database username, select utf8_unicode_ci in the Collation drop menu, and click Create.
Note: Remember the Database name, which you’ll need later on.
See the image below:
Step 4. Download WordPress
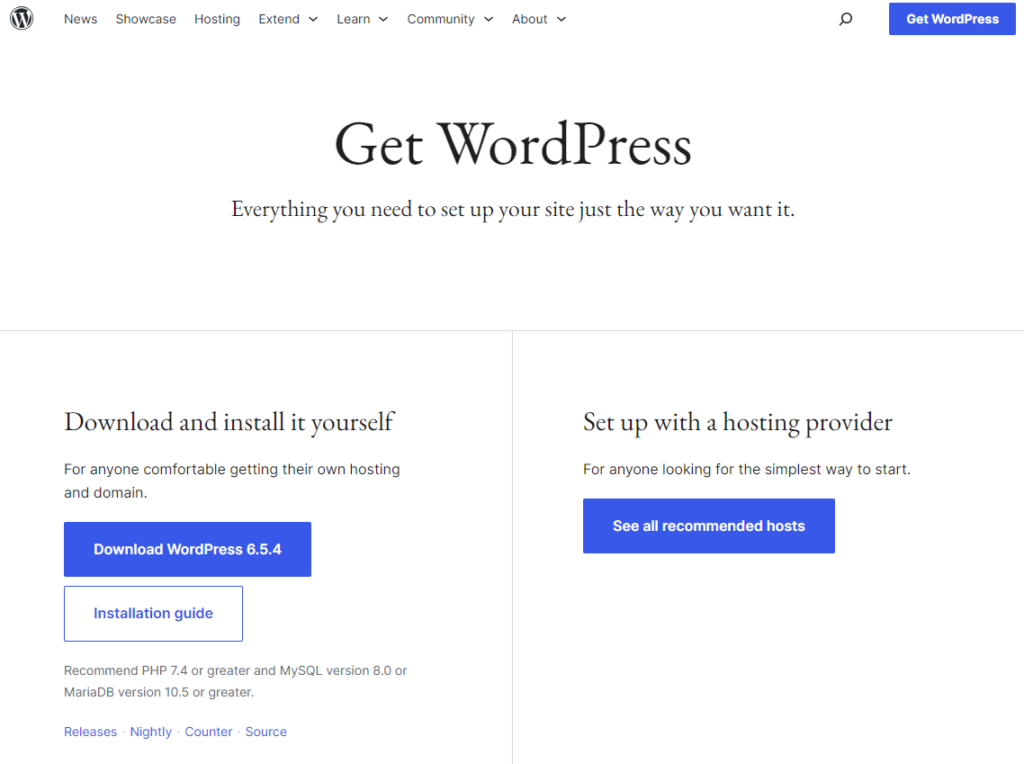
Once the server is up and running, the next step is installing WordPress. Download the latest WordPress version, then extract the ZIP file.
Upload the extracted WordPress files there. To make web development on the XAMPP server easier, we recommend renaming the new folder with your website’s name.
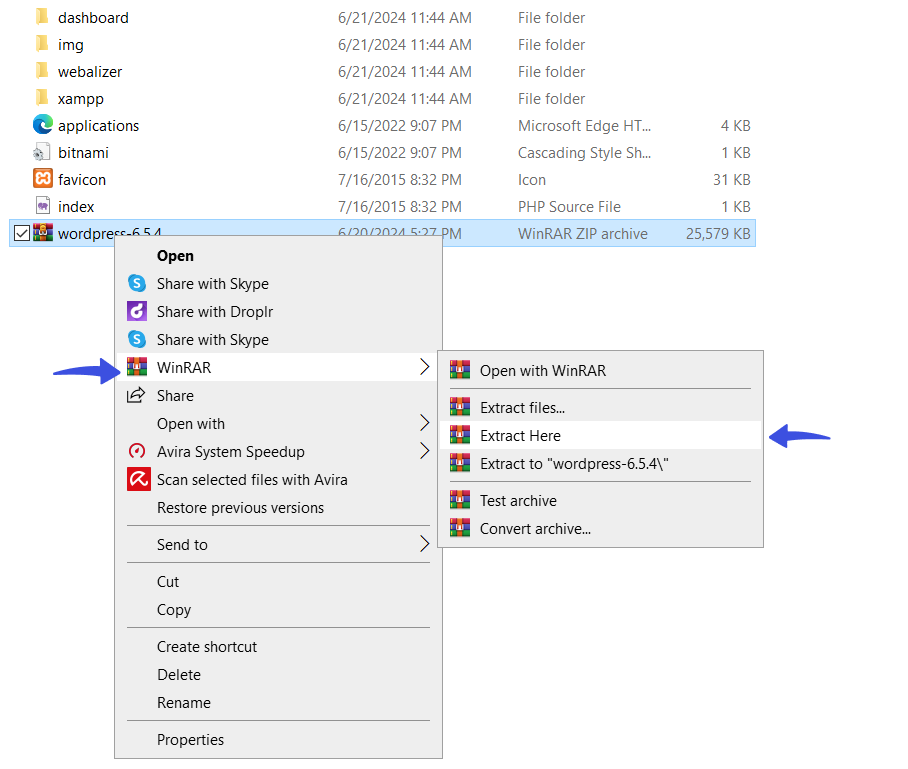
Open the directory where you have downloaded WordPress 6.5.4. Zip and copy the WordPress zip file and paste it into the xampp > htdocs folder.
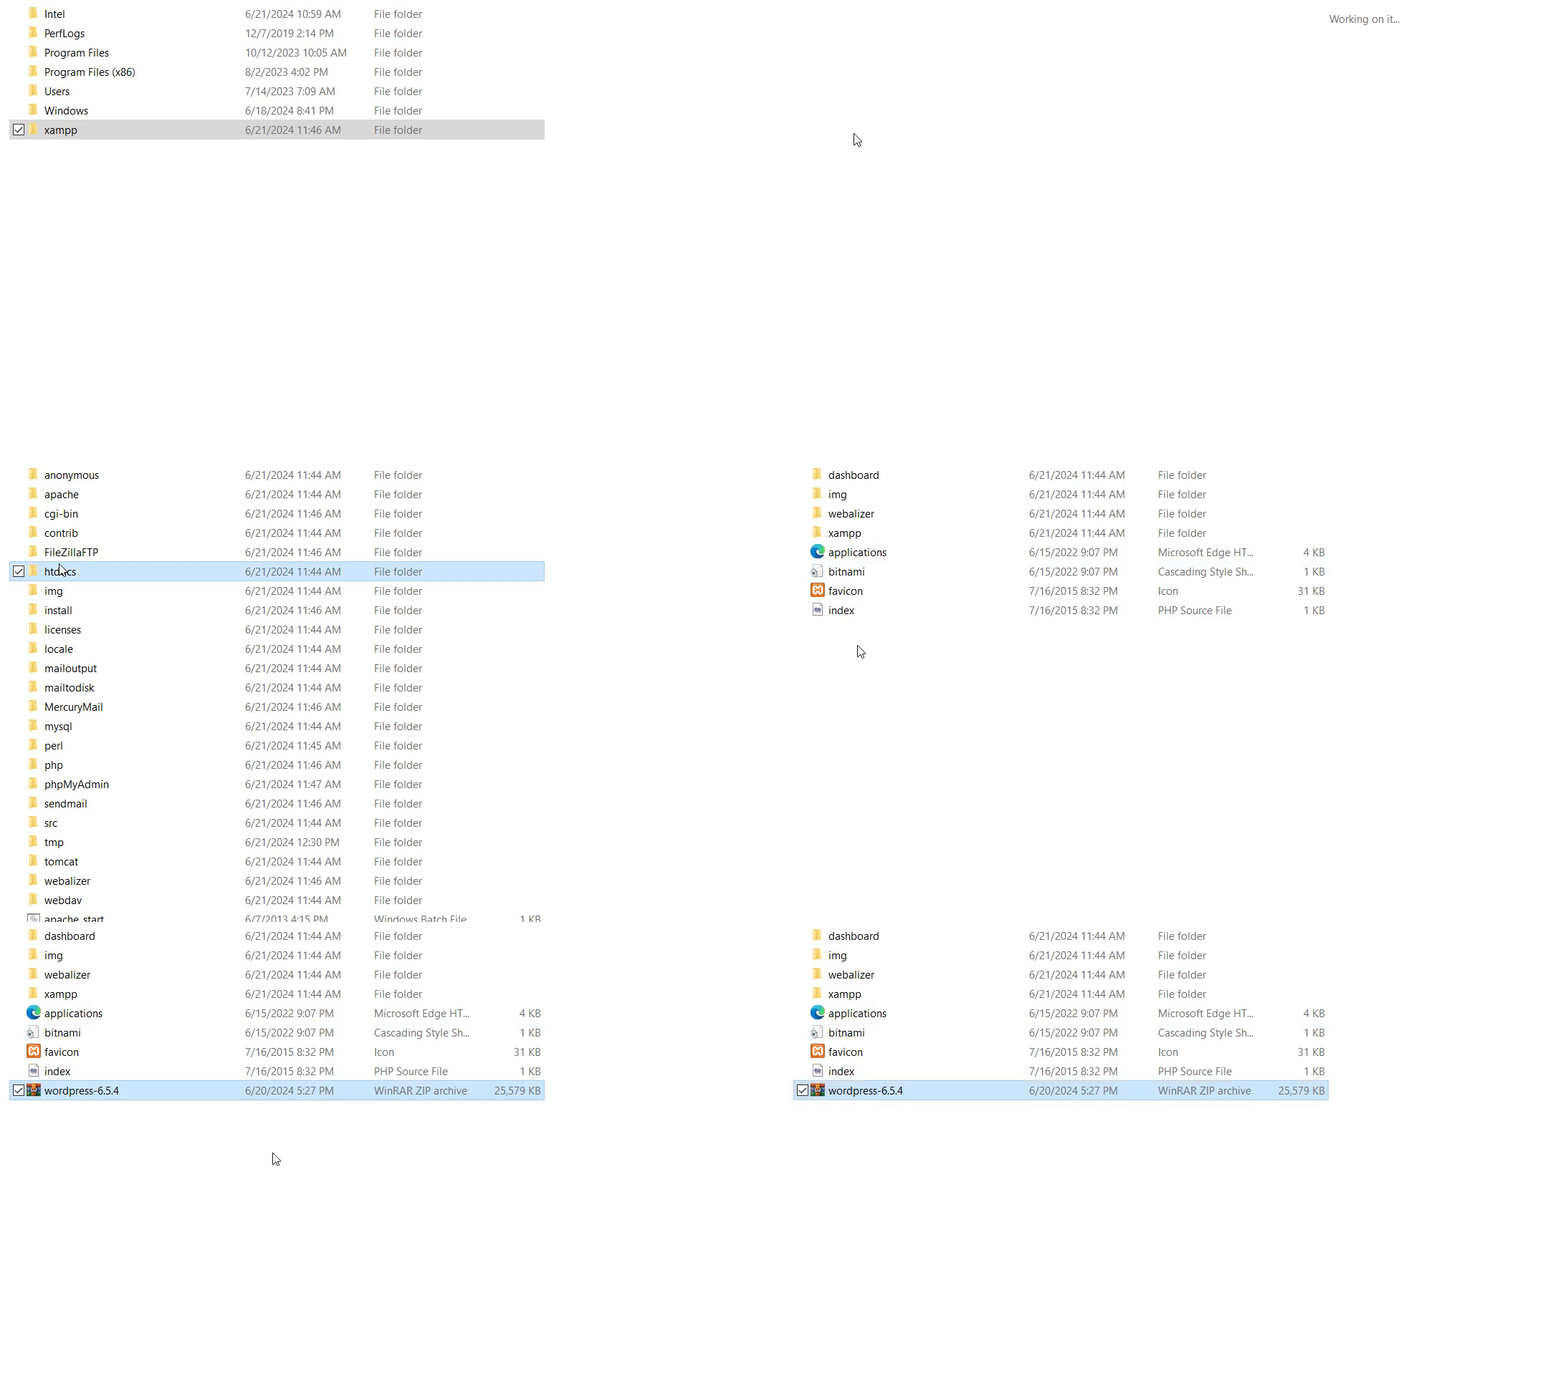
Extract the zip file to the htdocs folder in the local server environment’s directory.
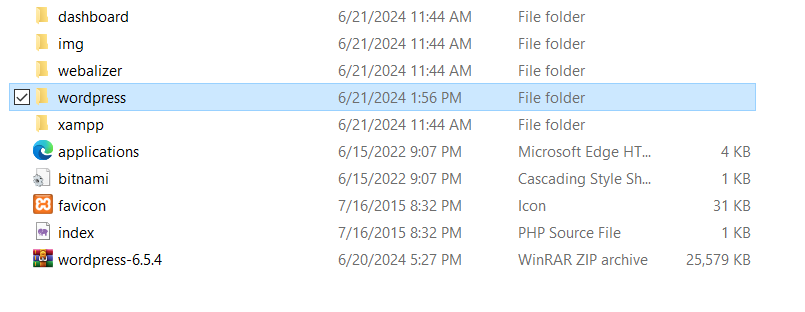
Now you can see a new folder wordpress here.
Step 5. Install WordPress on Localhost
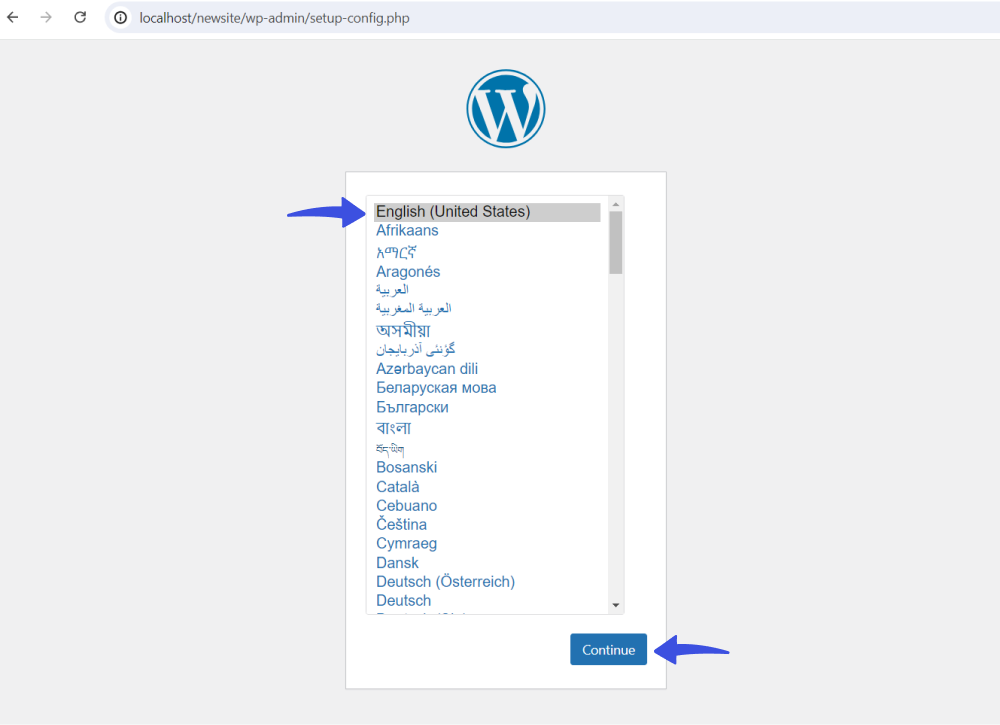
The first thing you need to do now is search localhost/wordpress in the address bar.
You’ll be directed to the WordPress installation page.
On this screen, choose your language and click the Continue button.
Next, you’ll find yourself on the welcome screen.
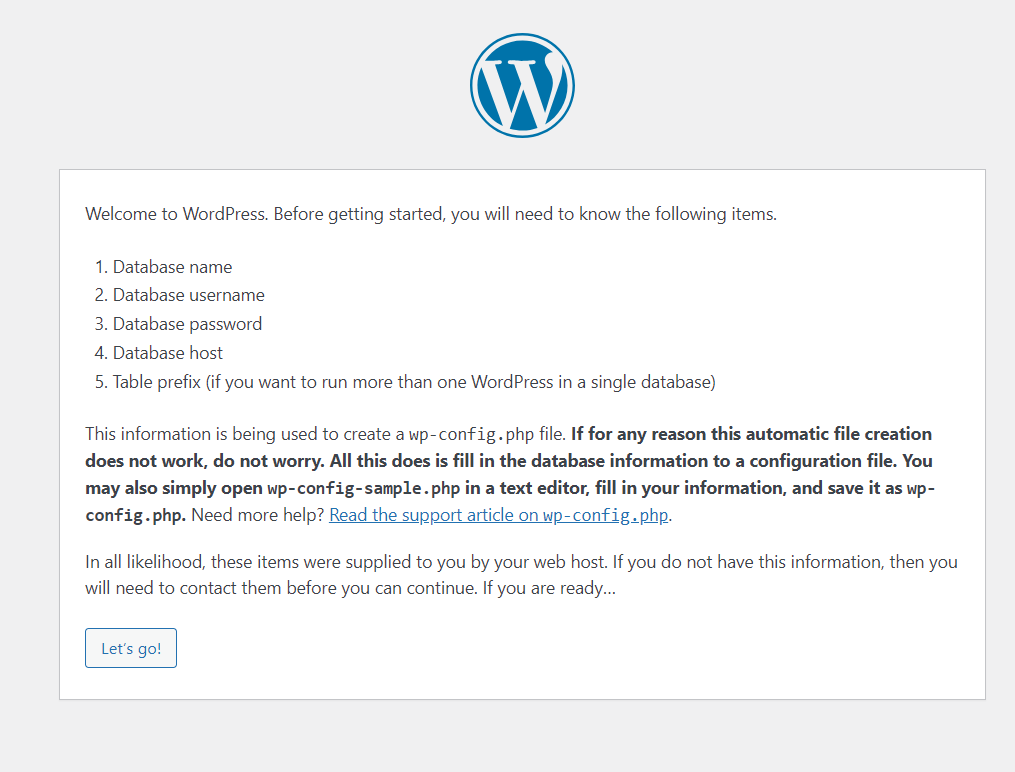
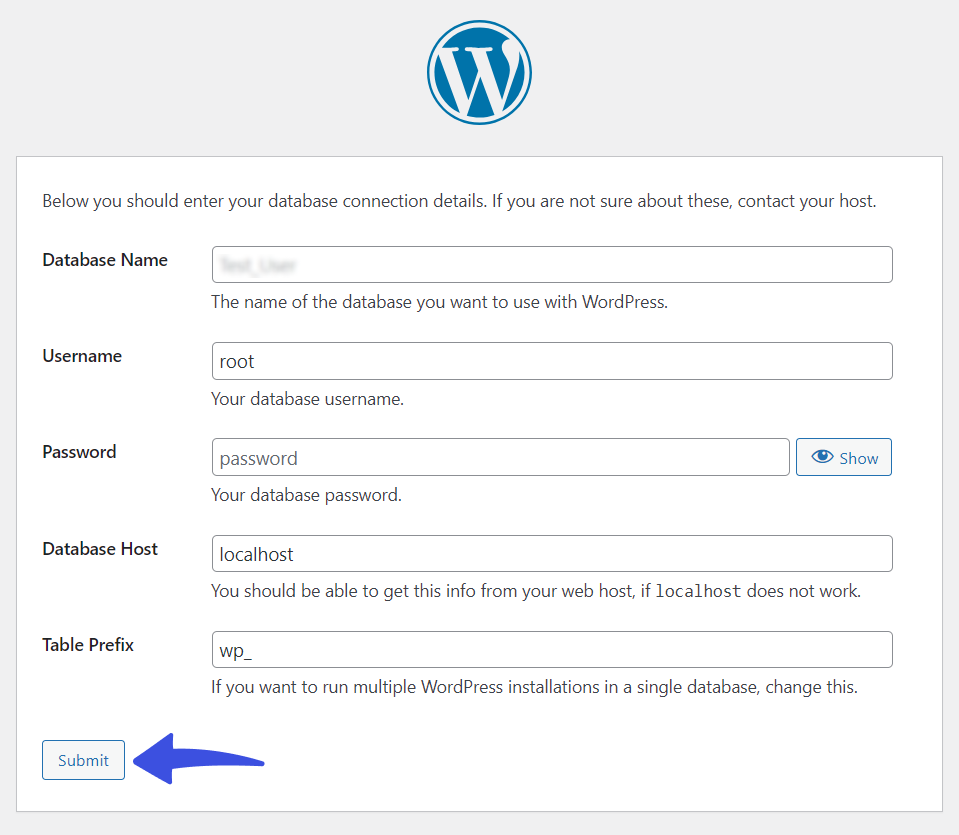
Now, you’re required to add the following things:
- Database name: Enter the name of the database you created in phpMyAdmin.
- Username: Type root as the default username in phpMyadmin.
- Password: Leave the password field blank (you’ll have to set the password later on).
- Database host: Keep the default localhost.
- Table prefix: Go for the default wp_.
When done, click the Submit button.
See the image below:
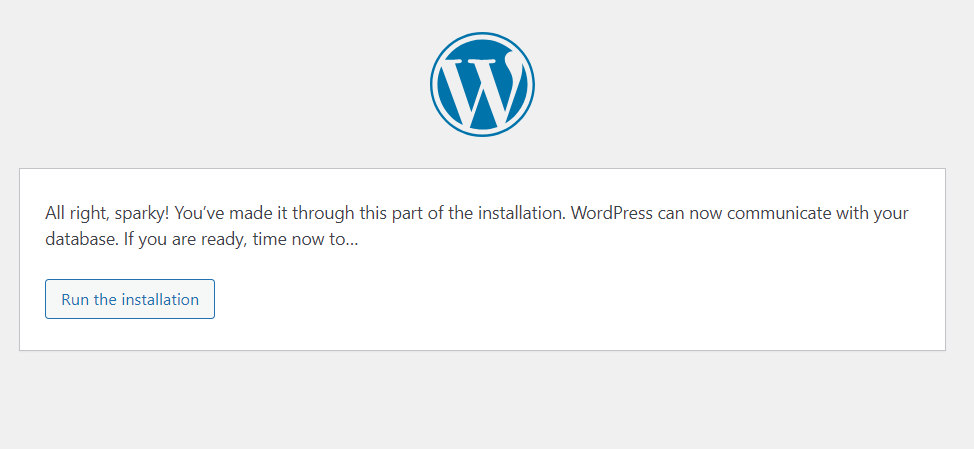
WordPress is ready to be installed! Click Run the installation button.
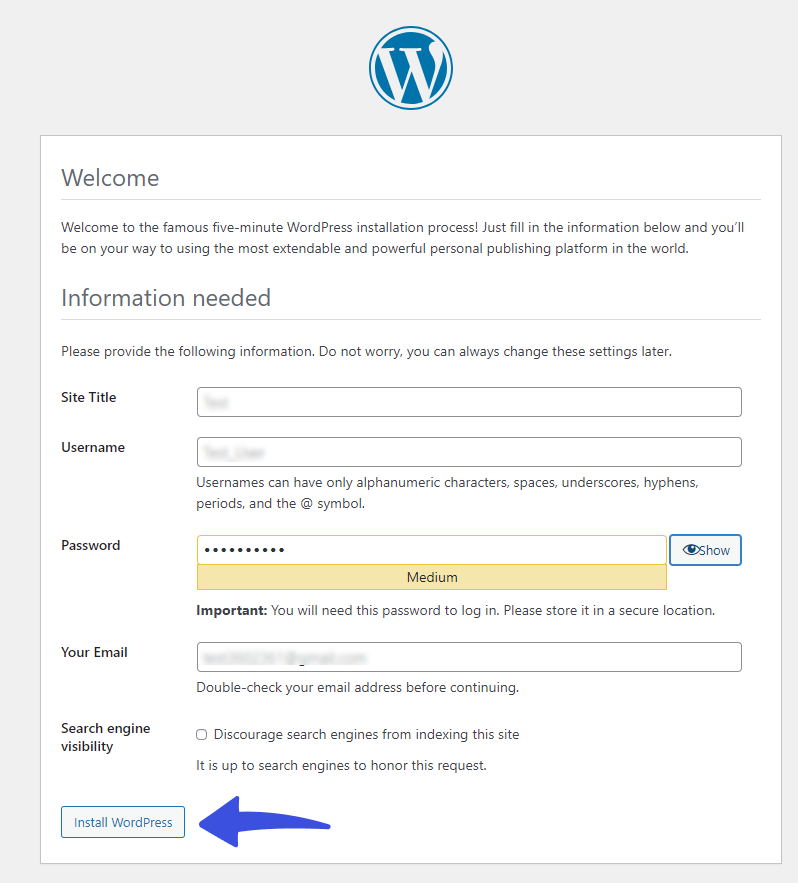
Now, you’re required to provide the following information:
- Site Title: Add a site title; this will appear as your site’s identity.
- Username: Create a username for WordPress.
- Password: Create a new password.
- Your Email: Provide your email address.
Note: Ignore Search engine visibility if you want to run WordPress locally.
When done, click the Install WordPress button.
Step 6. Check the Local Site You Built
Congratulations! You’ve created your WordPress site with Xampp.
Click the Log In link, provide the credentials, and start your WordPress journey.
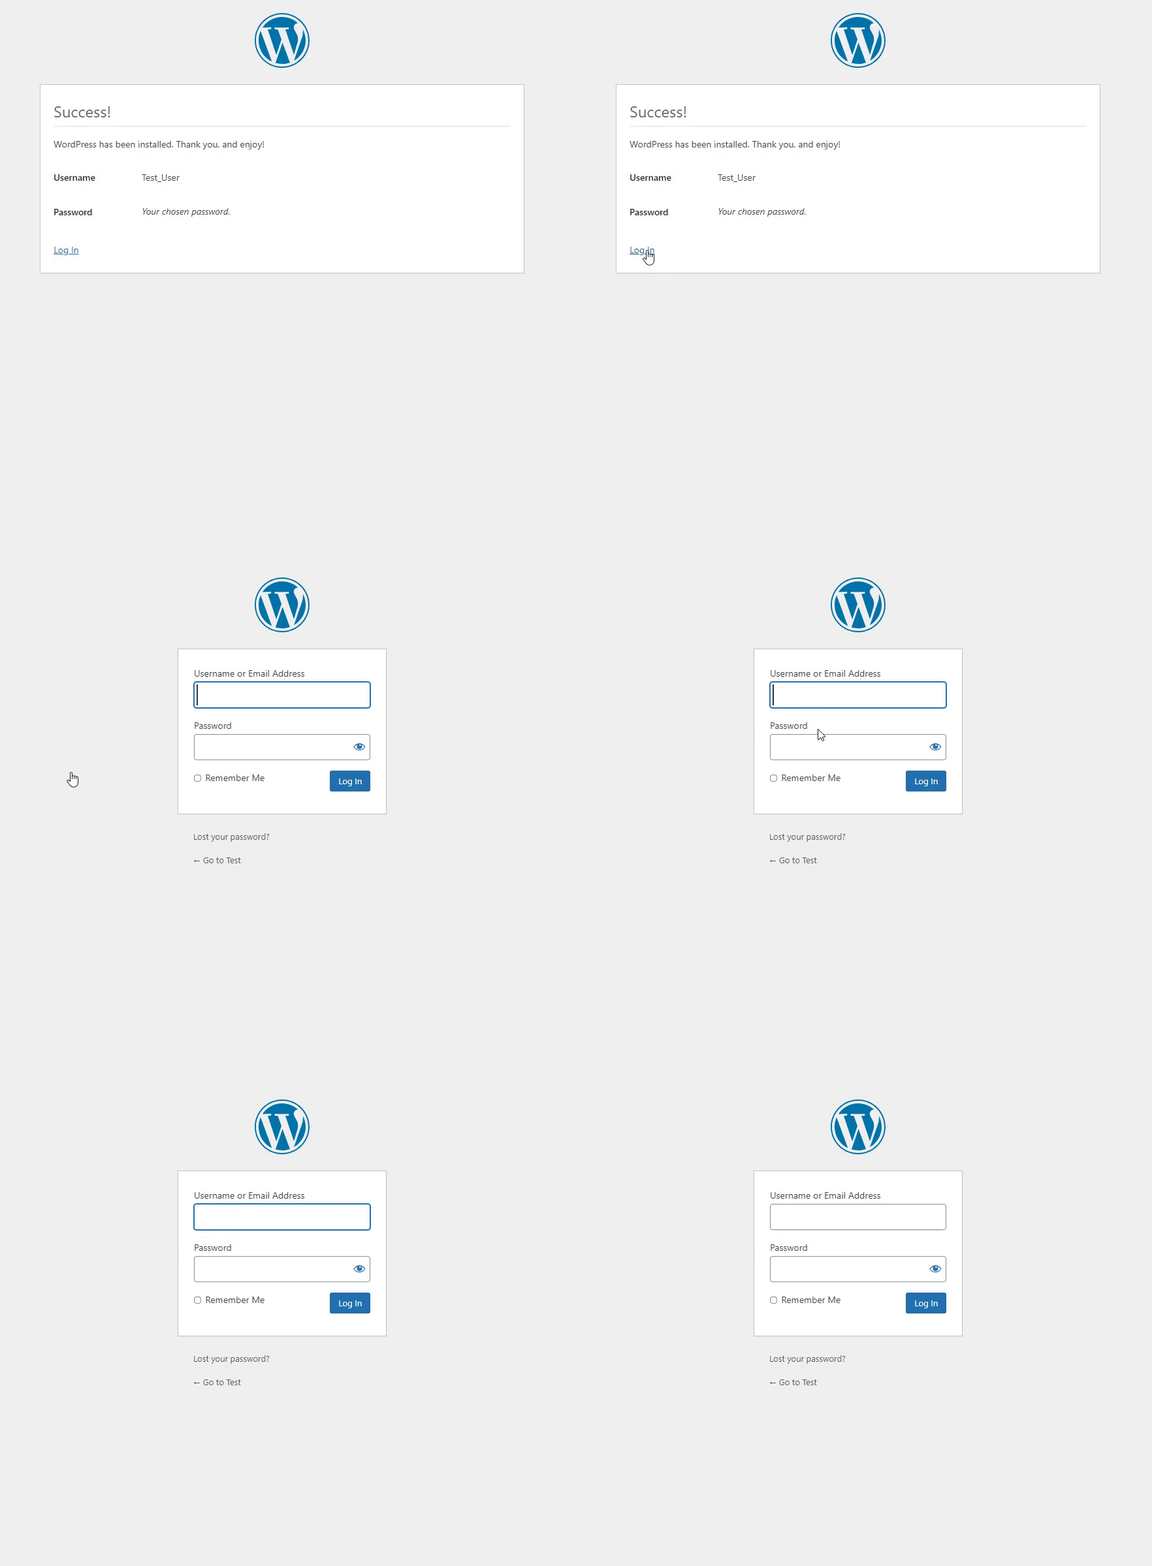
Whenever you want to access the WordPress dashboard, go to (http://localhost/wordpress/wp-login.php) and add the login credentials.
How to Uninstall WordPress on Localhost?
You can also easily uninstall WordPress on Localhost.
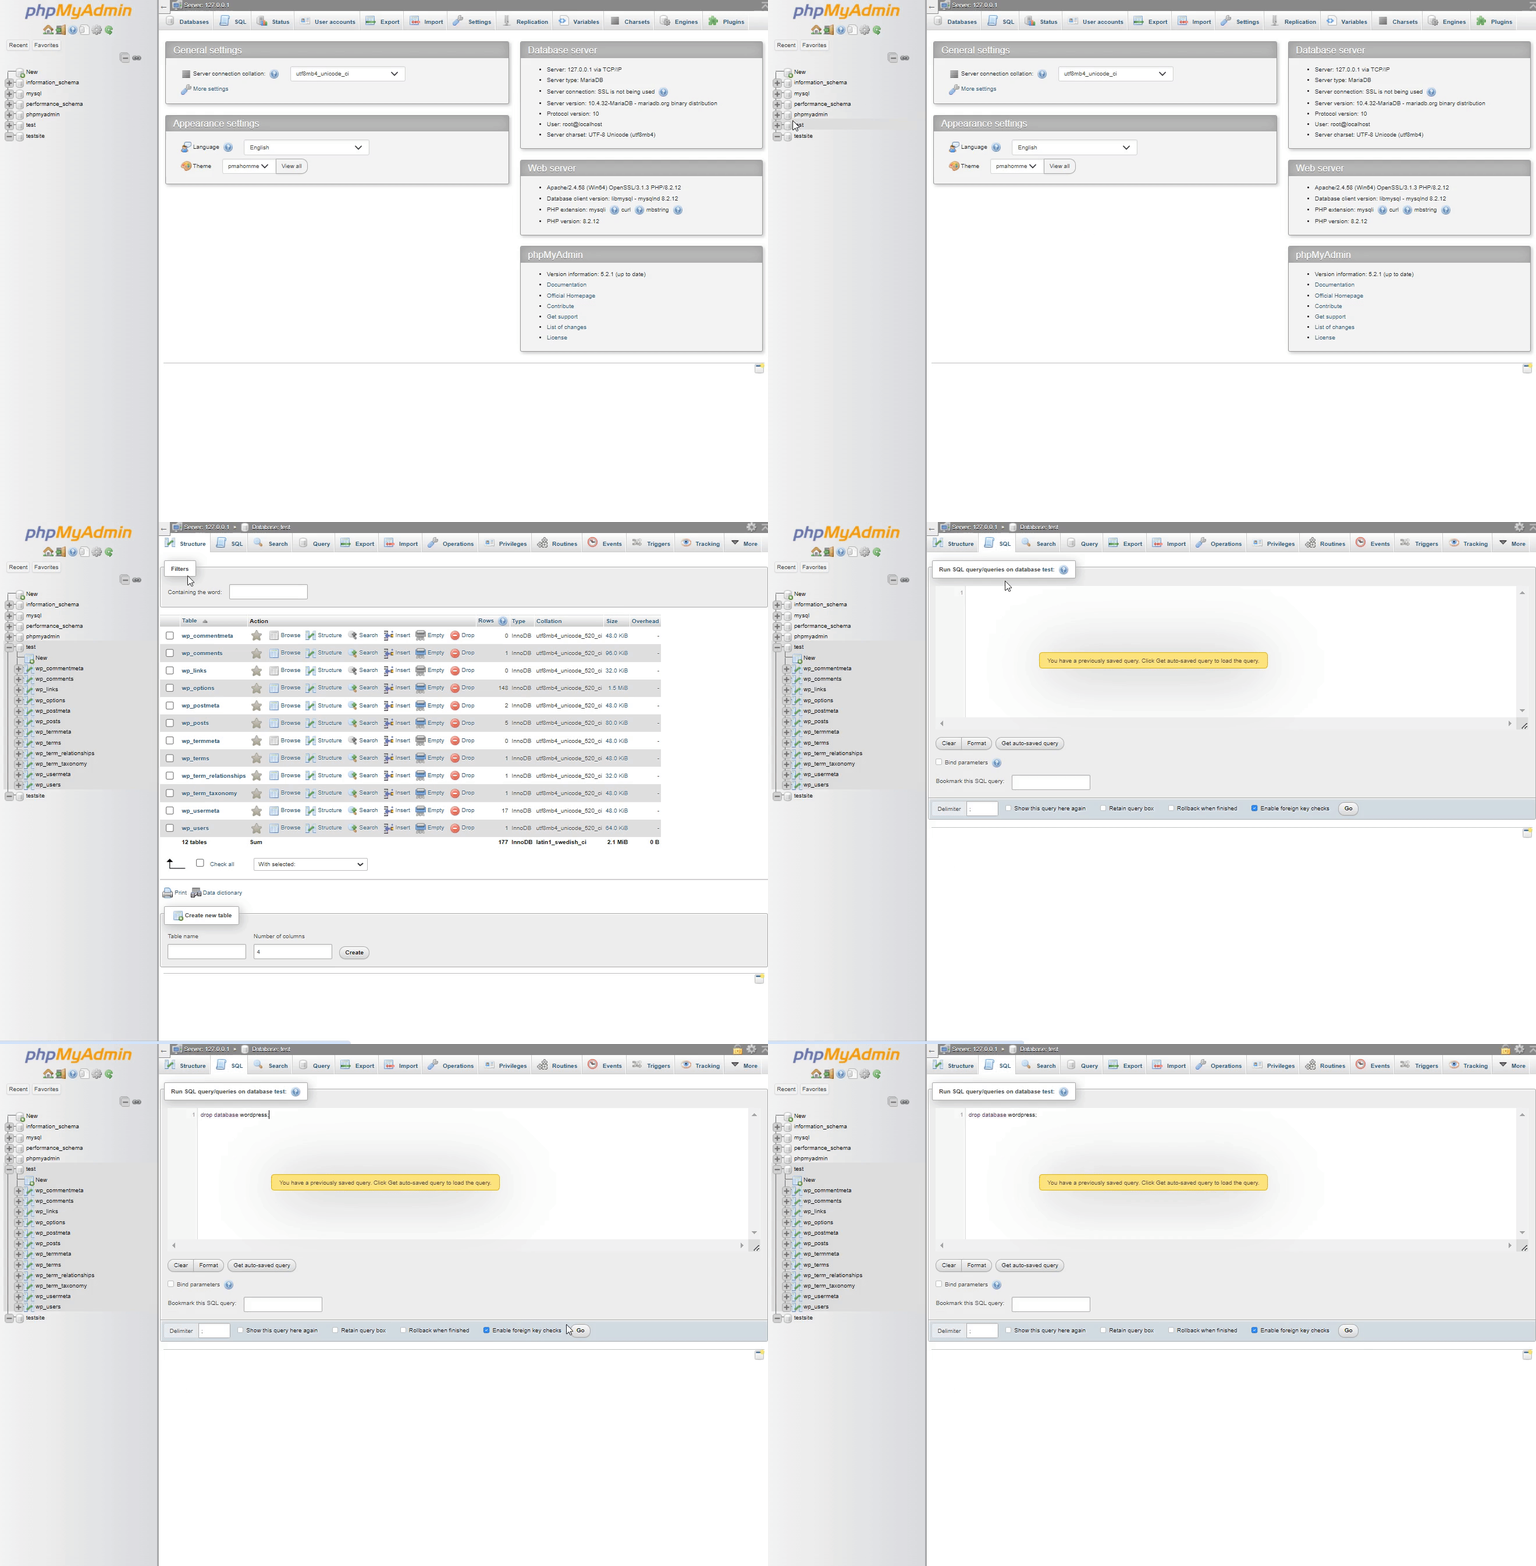
To do so, go to the phpMyAdmin page and select the desired database from the left sidebar menu.
Next, you’re required to open the SQL tab. Here, type “drop database wordpress, and click the Go button.
Note: Replace ‘wordpress’ with the name of your database in the command drop database wordpress;.
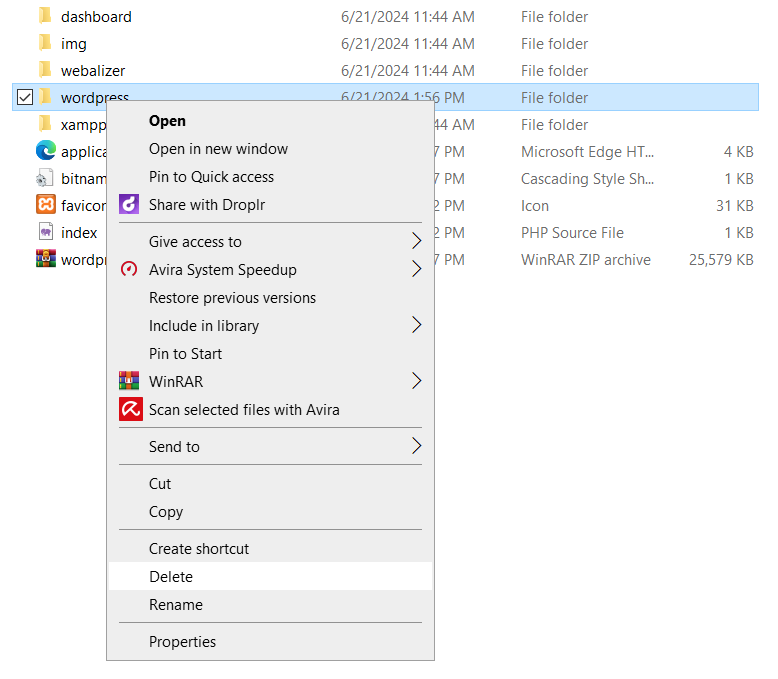
Now, go to the Xampp > htdocs folder on your local computer, right-click the wordpress folder, and click the Delete option.
You’ve successfully uninstalled WordPress on Localhost.
Bonus: Customize the Default WordPress Login Page
Now that you’ve installed WordPress on Localhost, why not customize the default WordPress login page?
Try LoginPress now! It is the best WordPress login page customizer plugin. Use it to customize each element on the default WordPress login page, where you don’t need to code.

Customize Your WordPress Login Page
Wait, there’s a lot more packed with LoginPress Pro, including:
Upgrade to LoginPress Pro and strengthen the default WordPress login security.
Local WordPress FAQs
What are the requirements for installing WordPress on localhost?
To install WordPress on localhost, you’ll need a local server environment, such as XAMPP, WAMP, MAMP, or LAMP. You also need WordPress installation files and a web browser to access the local server.
How can I access my local WordPress site after installation?
To access your local WordPress site, go to your web browser and navigate to http://localhost/wordpress.
How do I troubleshoot common issues with local WordPress installations?
You can quickly troubleshoot issues with local WordPress installation. All you need to do is ensure your server environment is running, check for typos in the database configuration, and verify that the required services (Apache, MySQL) are active. Lastly, look at error logs in your server environment for specific error messages.
Can I migrate my local WordPress site to a live server?
Yes, you can migrate your local WordPress site to a live server. Simply export your local WordPress database and upload WordPress files to the live server. Next, import the database to the live server and update the `wp-config.php` file with the live server’s database credentials. Last, change the site URL in the database (if necessary).
Final Thoughts
We hope you now understand how to install WordPress on localhost. Create a functional site on localhost and test codes, themes, plugins, etc., without any potential risk.
That’s all for this article!
Here is a quick recap:
- Download XAMPP
- Install and Run XAMPP
- Create a Local Database
- Download WordPress
- Install WordPress on Localhost
- Check the Local Site You Built
You may also like to read our other valuable how-to guides, including:
- How to Fix Custom Fields Not Showing in WordPress (2024)
- How to Find the WordPress Login URL (Easy Guide)
- How to Easily Change the Login Logo in WordPress
- How to Sell on WordPress Without WooCommerce
- How to Fix reCAPTCHA Not Working in WordPress
How far have we helped you install WordPress on localhost?
Let us know by leaving a comment below.

