To make the plugin extra easy and functional as per the requirements, here comes the detailed documentation regarding the plugin. All about educating the things related to the plugin.
How to Add reCAPTCHA On WordPress with LoginPress (Easy Guide)
Do you want to add Google reCAPTCHA to the WordPress login Page?
Google offers reCAPTCHA, a CAPTCHA-like system, to help you protect your website from spam or abuse. It is like a shield to your website that protects you against bots and other malicious software.
LoginPress's premium plans offer a feature to enable Google reCaptcha on the Login, Registration, and Forget form of your WordPress site.
In this knowledge-based article, we’ll show you how to easily add reCAPTCHA to the WordPress login page with LoginPress.
How to Add reCAPTCHA on WordPress Login Page with LoginPress
Step 1: Go to WordPress Admin Dashboard
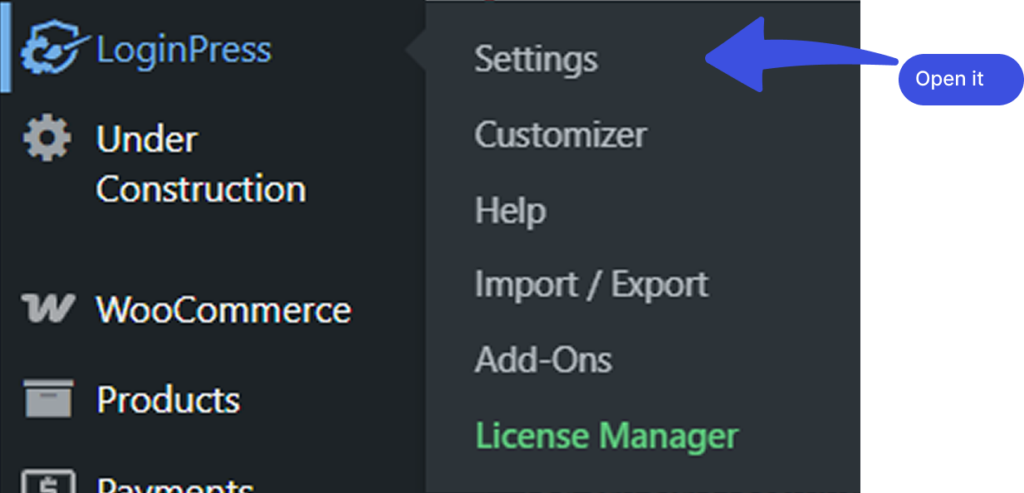
First, you’ll need to log in to your WordPress site. Go to the WordPress admin dashboard and navigate to LoginPress >> Settings.
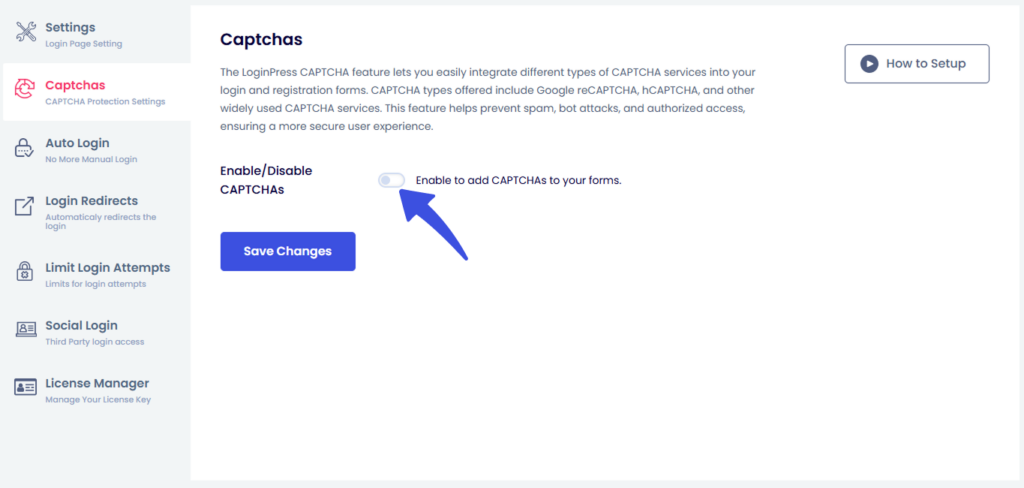
Next, a new screen with Settings will open. Under the Settings tab, you’ll find the Captchas tab. Toggling on Enable / Disable CAPTCHAs will enable CAPTCHAs.
Once CAPTCHAs is enabled, several additional fields will appear, including the Select Captcha option. From there, you can choose the Google reCAPTCHA option.
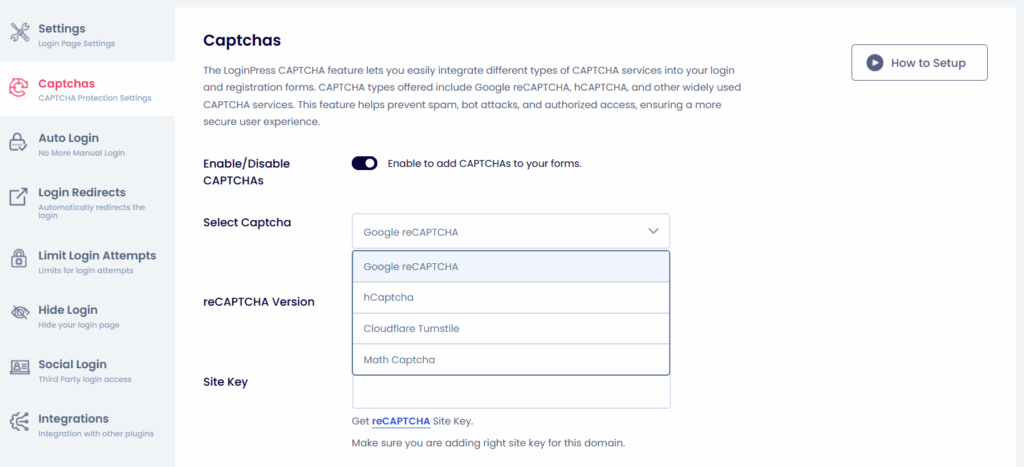
Once you select the Google reCAPTCHA option, you will see several other fields, which include:
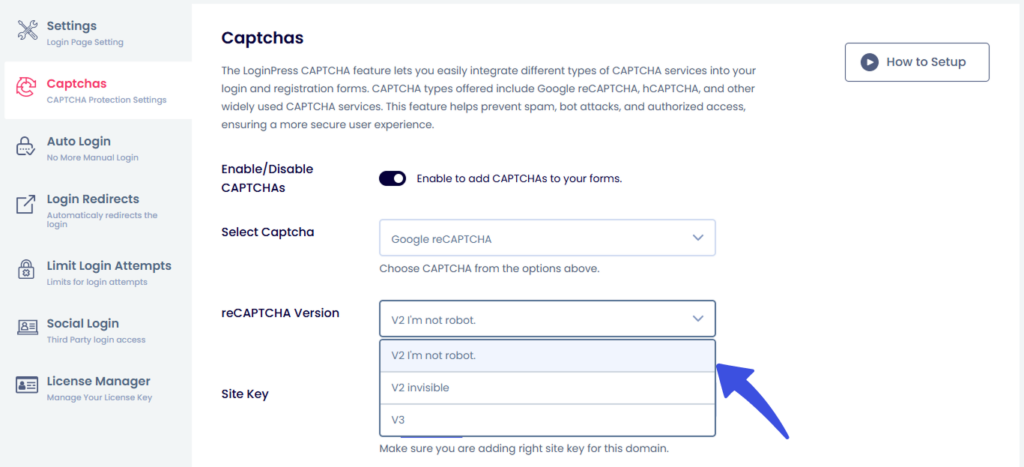
- reCAPTCHA Version
- Site Key
- Secret Key
- Theme Selection
- Language Selection
- Enable reCAPTCHA On (to choose where you want it active)
From here, you can select the desired Google reCAPTCHA version and configure the required settings using the Google-provided API keys.
Step 2: Register Your Site to Get reCAPTCHA API Keys
You need to go to the Google reCAPTCHA website to get these API keys.
You’ll need to enter your website name in the Label field and then select a reCAPTCHA type. In our case, we've chosen the reCAPTCHA v2 I’m not a robot checkbox.
Note: Make sure to choose the same type of reCAPTCHA as you selected in LoginPress Settings.
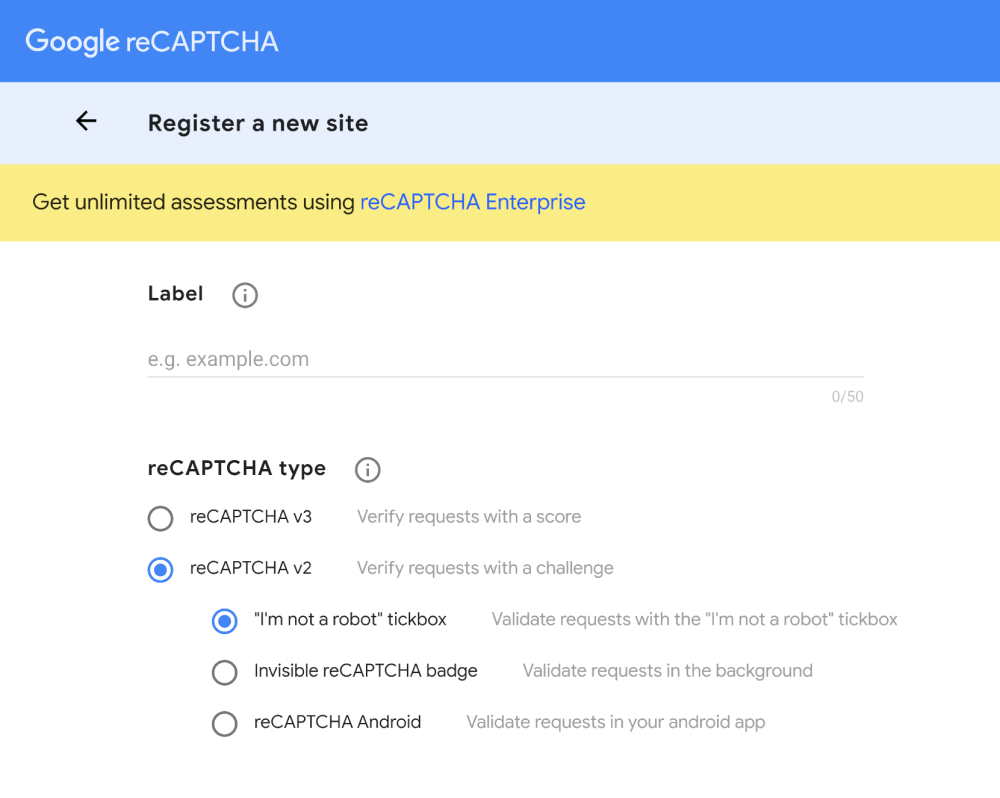
Next, you need to enter your domain name, e.g, yoursite.com

The Owners section shows your email address and lets you add a new owner.

After that, you need to check the box next to “Accept the reCAPTCHA Terms of Service” and the ‘Send alerts to owners’ box to get email alerts about suspicious traffic on your site.
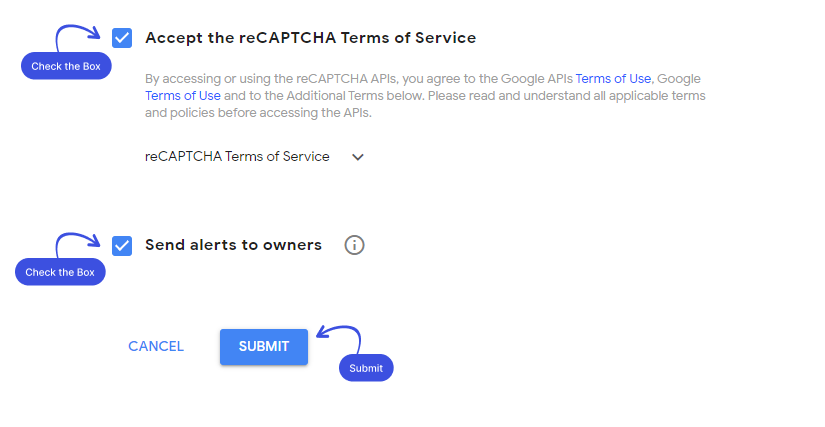
Once done, click on the Submit button.
Step 3: Adding reCAPTCHA to WordPress with LoginPress
Next, a new screen with the Site Key & Secret Key will open up.
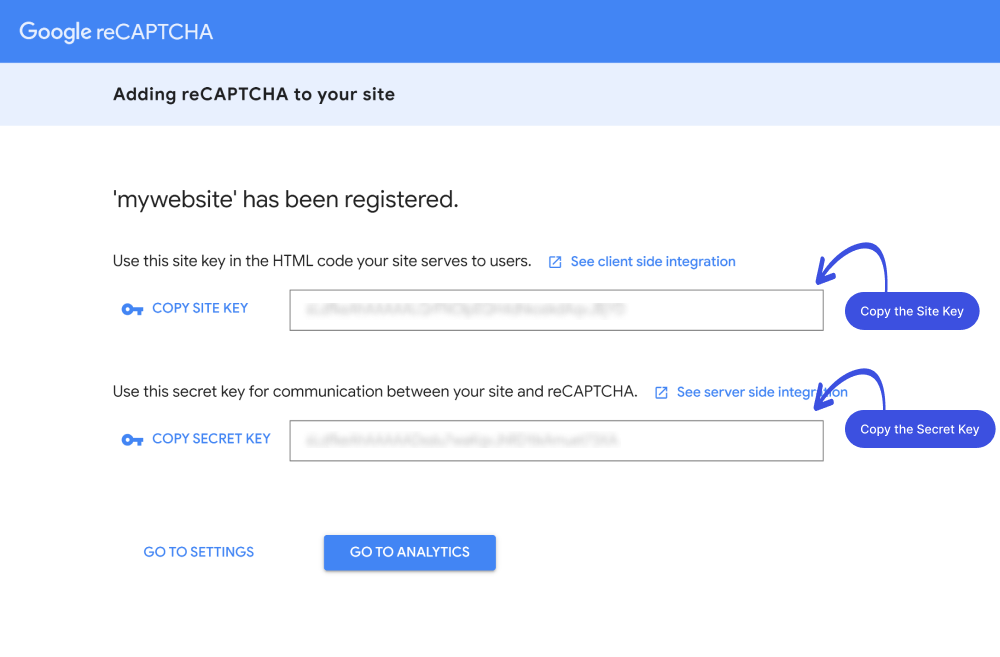
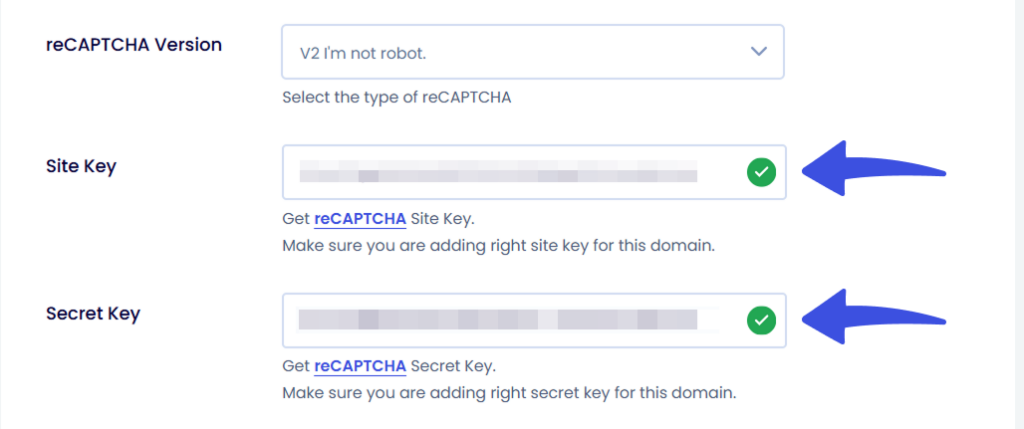
Once you've generated your Site Key and Secret Key from the Google reCAPTCHA website, copy both keys and paste them into the corresponding fields under the LoginPress >> Captchas Settings section.
After entering the keys, the Validation Section will automatically appear below the Site Key and Secret Key fields, allowing you to check and confirm the integration.
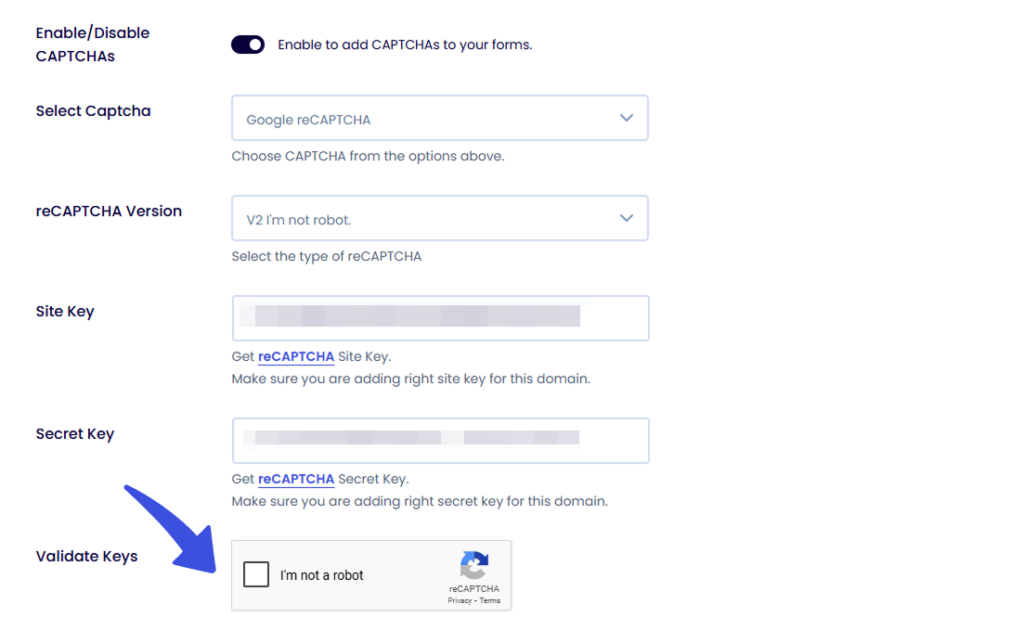
Now, check the Validation Section checkbox to verify the keys. Once validated successfully, click Save Settings. A green check mark will appear next to the keys, indicating the integration is now active.
- For reCAPTCHA v2 Checkbox, the Validation Section will appear after entering the keys — users should manually check this box to validate the keys.
- For reCAPTCHA v2 Invisible, the Validation Section will be auto-validated — no manual action is required.
- For reCAPTCHA v3, the Validation Section will not appear, as validation is handled in the background.
Note: You can choose between a Light or Dark theme if you select the reCAPTCHA V2 checkbox.
After selecting the reCAPTCHA v2 checkbox or v3, you can choose where to enable it on your site. LoginPress allows you to enable these reCAPTCHA on the following forms:
- Login Form
- Registration Form
- Lost Password Form
- WooCommerce Login
- WooCommerce Register
- Comment Section
You can enable reCAPTCHA on any or all of these forms based on your preference.
Note: If you select reCAPTCHA v2 Invisible, it can be enabled only on the Login, Registration, and Lost Password forms.
Click the Save button once the changes have been made.
Step 4: All Done
You’ve successfully added reCAPTCHA to your WordPress site. Now your site is protected against bots and automated scripts. It won’t let the user log in to your site unless they pass through a simple test that proves whether they are human or a bot.
Enjoy a well-maintained, secured, and protected WordPress site.
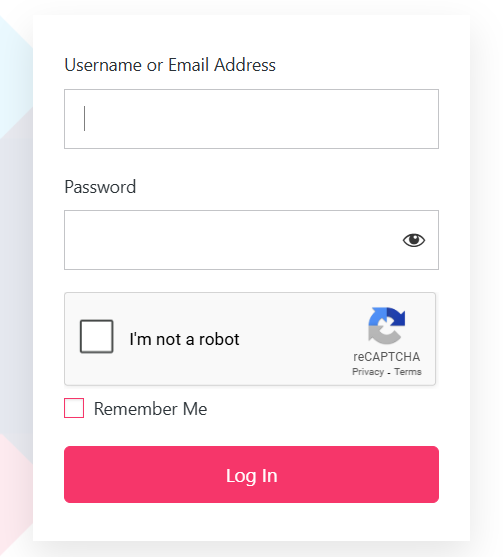
This is what your login page would look like with Google reCAPTCHA:
That’s it. We hope you understand how to add reCAPTCHA on WordPress using LoginPress.
If you have any questions regarding this article, feel free to contact our support team.
Frequently Asked Questions (FAQs)
These FAQs answer the most common questions about our WordPress custom login page plugin.
Where can I get support for LoginPress?
If you need help with LoginPress, you can contact us here. We’ll be happy to answer any questions about the plugin.
Do you have an affiliate program?
Yes, we have an affiliate program that you can sign up for here. As an affiliate, you’ll earn a commission on every sale you refer to us.
Do you offer refunds?
Yes, we offer a 14-day money-back guarantee on all of our plans. If you’re unsatisfied with LoginPress, simply contact us within 14 days of your purchase, and we’ll process a refund.
Can I upgrade my license after my initial purchase?
Yes, you can upgrade your LoginPress license at any time. Simply log into your account and go to the My Downloads page. From here, you can upgrade your license and download the latest version of the plugin.
Will LoginPress slow down my website?
No, LoginPress will not slow down your website. The plugin is lightweight and only loads the necessary files when someone tries to access your login page.

If you Still have Questions?
Get In Touch