To make the plugin extra easy and functional as per the requirements, here comes the detailed documentation regarding the plugin. All about educating the things related to the plugin.
How To Integrate Microsoft Social Login on WordPress Using LoginPress
With the Microsoft social login, users can register on your WordPress site using their Microsoft accounts. Exciting!! Isn't it?
This feature enhances user sign-ups by allowing them to quickly and easily authenticate using their existing accounts. This saves time and reduces the hassle of filling out traditional login or registration forms. Additionally, it helps cut down on spam and bot registrations.
This documentation provides step-by-step instructions on seamlessly integrating Microsoft login with LoginPress Social Login to your WordPress site.
Table of Contents
Integrate Microsoft App with Social Login Addon
Note: See our Complete guide on Social Login to learn how to activate the LoginPress Social Login Add-on.
First, you’ll need to enable Microsoft Login in the LoginPress Social Login’s Settings tab.
Once you’ve enabled it, you can see other fields, including:
- Client ID
- Client Secret
- Redirect URI
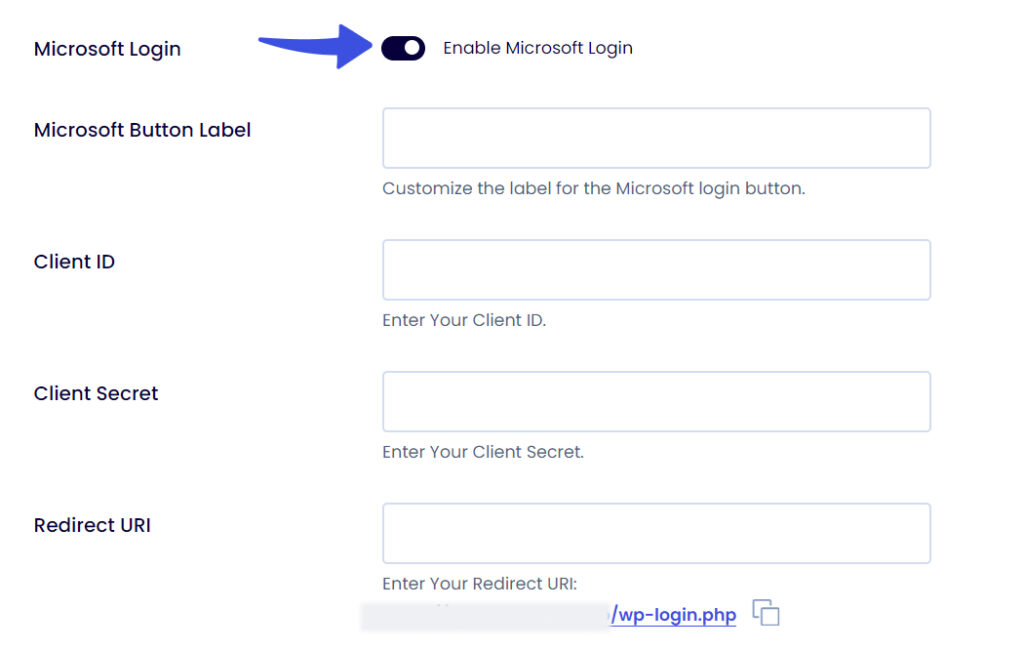
You’ll be required to fill in these fields to integrate the Microsoft Social Login on the WordPress login and/or Registration form with LoginPress.
Here, we’ve curated simple steps. Follow their instructions to create an app on Microsoft and configure the necessary settings to use Microsoft Login on your WordPress site.
Step 1: Microsoft App Registration
First of all, you’re required to create an app on Microsoft to use Microsoft Login in a web application.
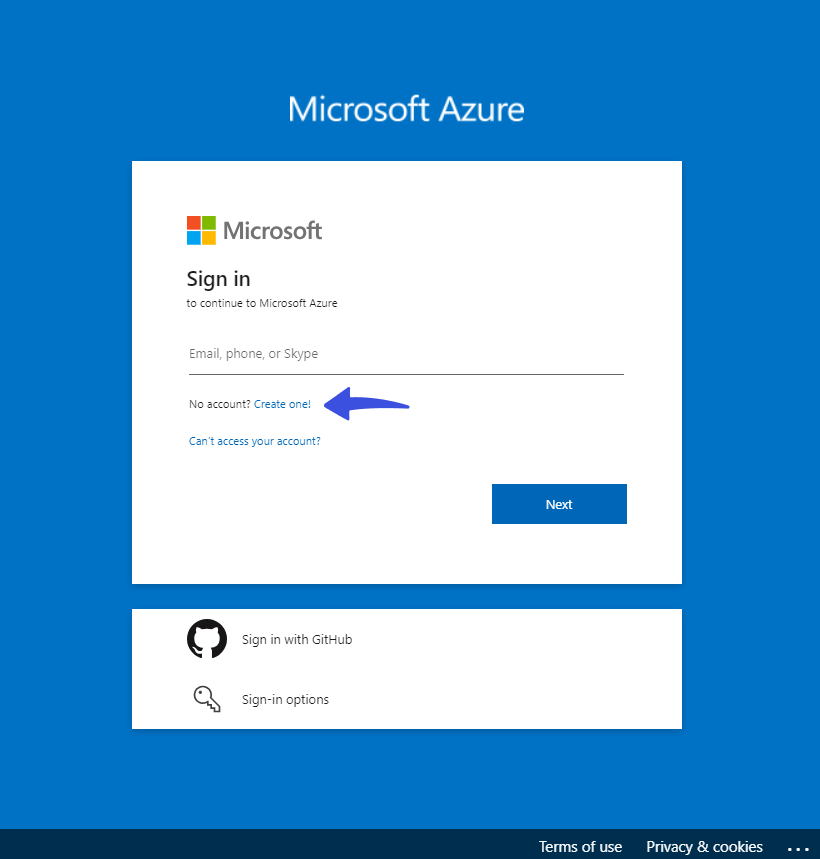
For this purpose, go to the Microsoft Azure Portal.
Now, click the Create one! link to create a new account.
Note: Ignore this step in case you have an existing Microsoft Azure account.
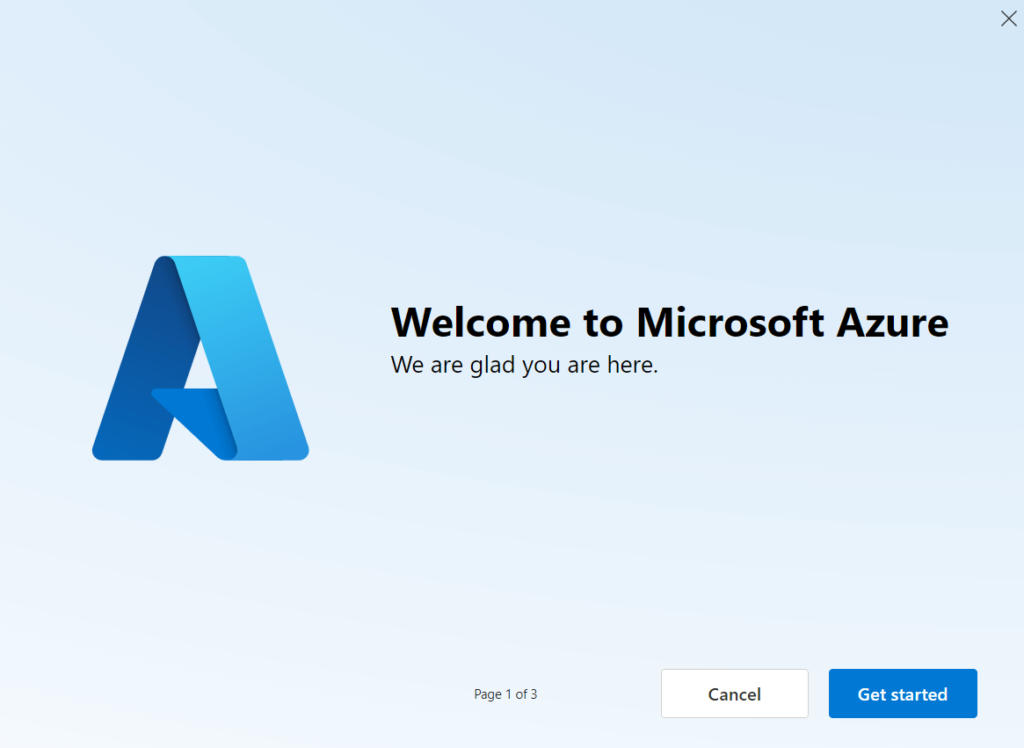
On the next screen, you’ll be asked to provide your email address and password, and then you'll be asked to verify.
When you verify your email account, you’ll be on the Welcome screen. To get started, click the Get started button.
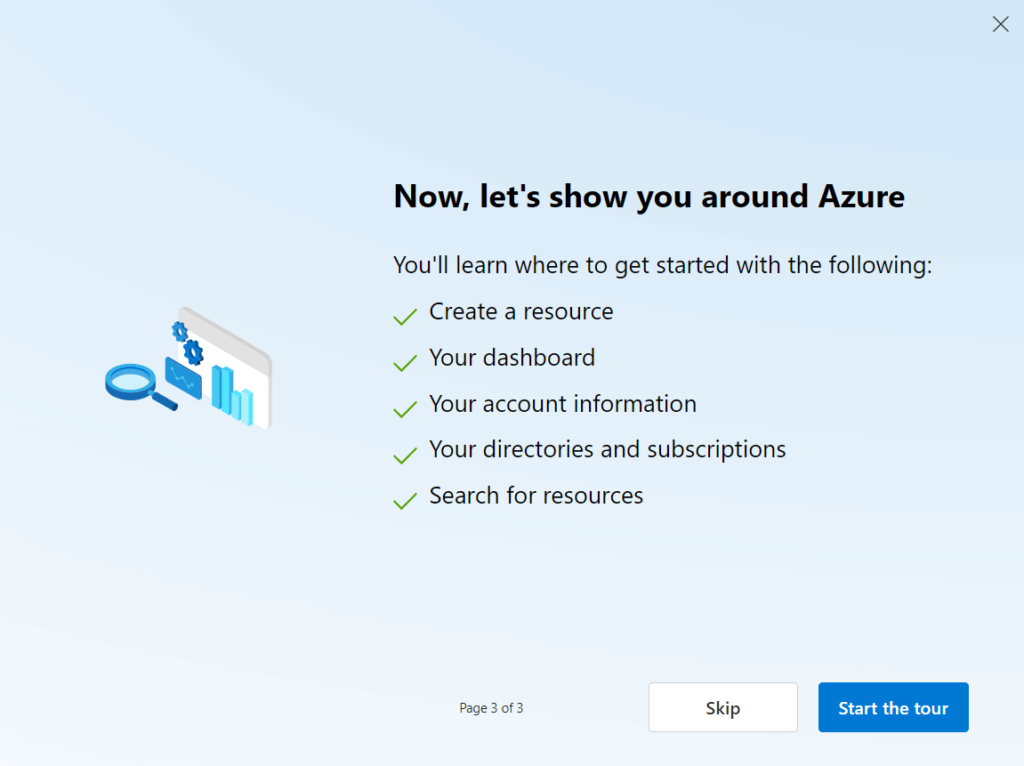
Now, you’re required to select the purpose behind creating the Microsoft Account.
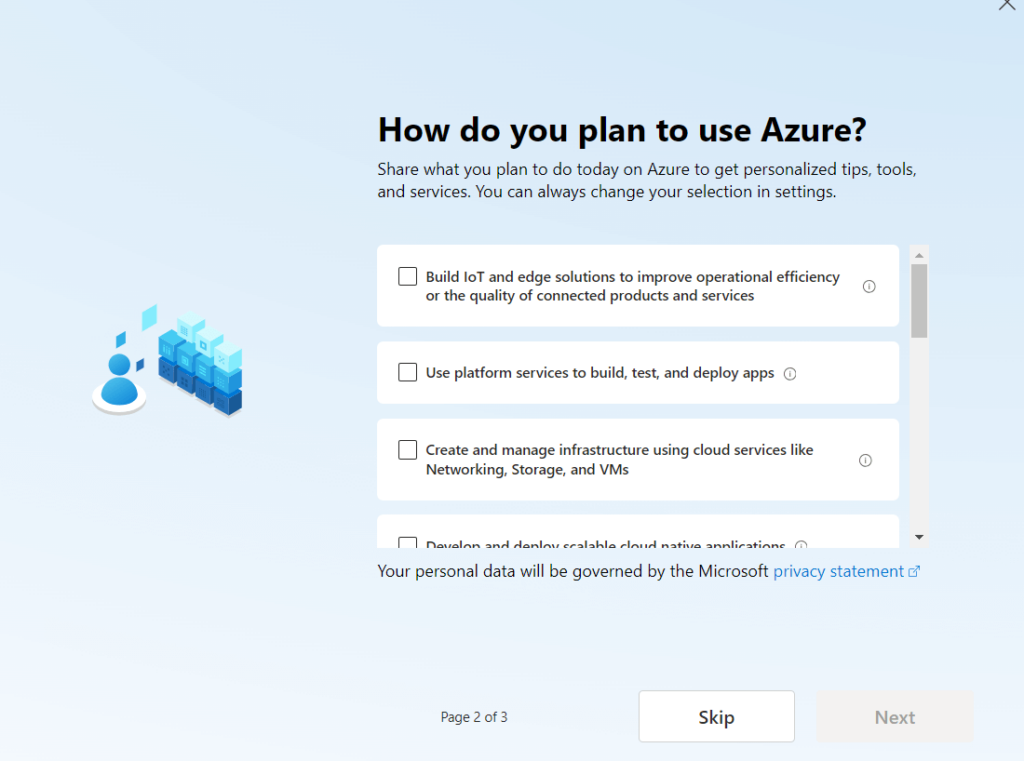
Next, click the Start the tour button.
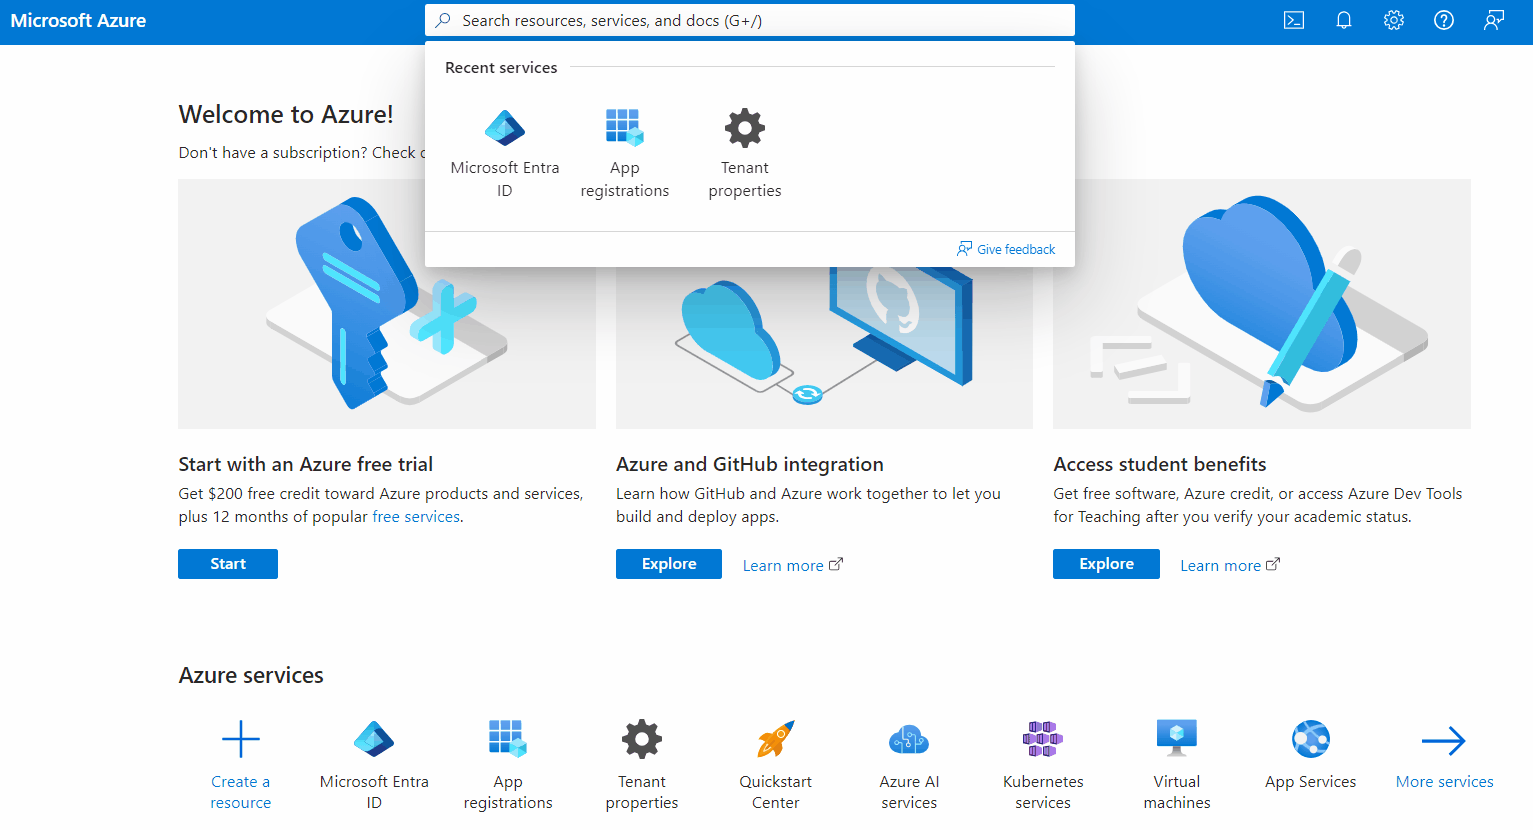
Now, you’ll find yourself on the Microsoft Azure screen.
Here, go to the Search bar at the top, type, and select Microsoft Entra ID.
See the GIF below:
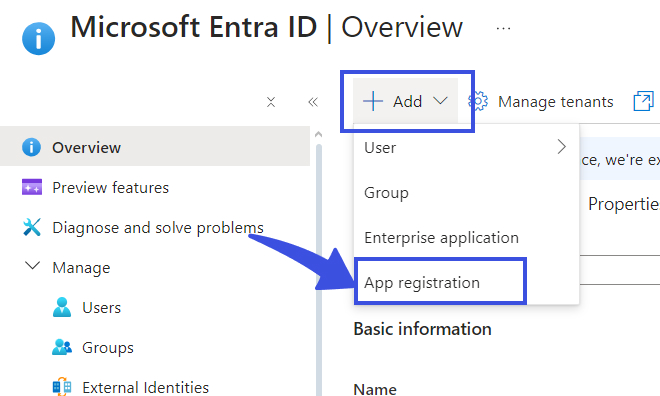
On the next screen, click the Add link and then choose App registration.
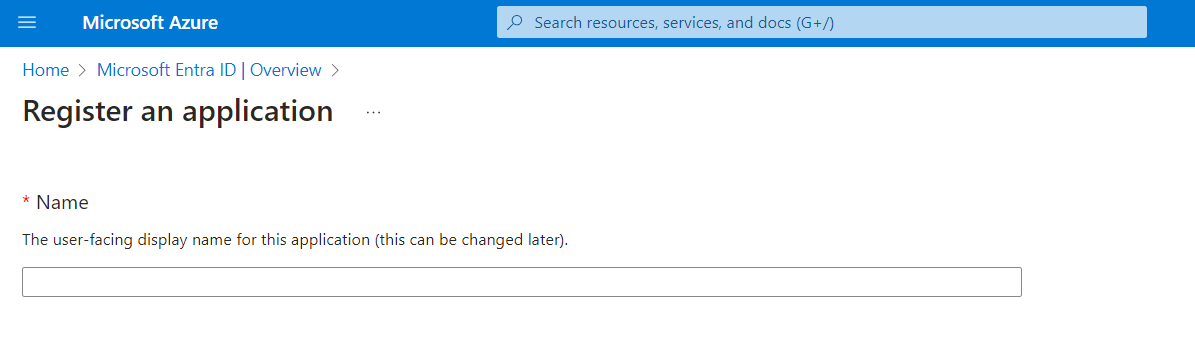
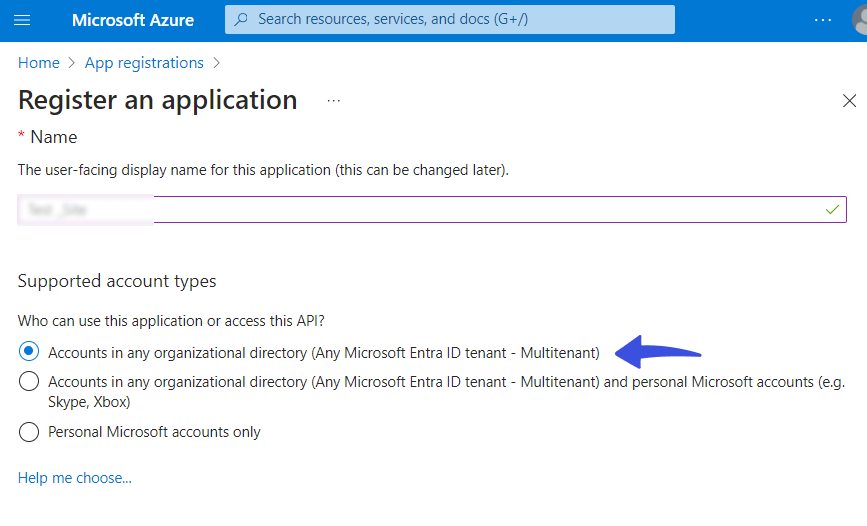
Now, type the desired app name in the Name field.
Choose an option for Supported account types. You will need to select the account type that fits your audience. Here’s a brief explanation of each account type if you are not sure what to choose:
- Accounts in any organizational directory (Any Azure AD directory – Multitenant): Only users with work/school accounts from Azure AD can sign into the application. Personal Microsoft accounts can not use the Microsoft button to log in when this option is selected.
- Accounts in any organizational directory (Any Azure AD directory—Multitenant) and personal Microsoft accounts (e.g. Skype, Xbox): This allows users with both personal Microsoft accounts and work/school accounts from Azure AD to sign into the application.
- Personal Microsoft accounts only: This option allows only users with personal Microsoft accounts (MSA) to sign into the application. Work and School Microsoft accounts can not use the Microsoft button to log in when this option is selected.
Note: Here we’ve selected the first option. You can select the one that fits your needs.
In the “Redirect URI (optional)” field, select the Web option as a platform and add the SITE_URL/wp-login.php.
Note: Don’t forget to add your site URL before wp-login.php slug.
See the image below:
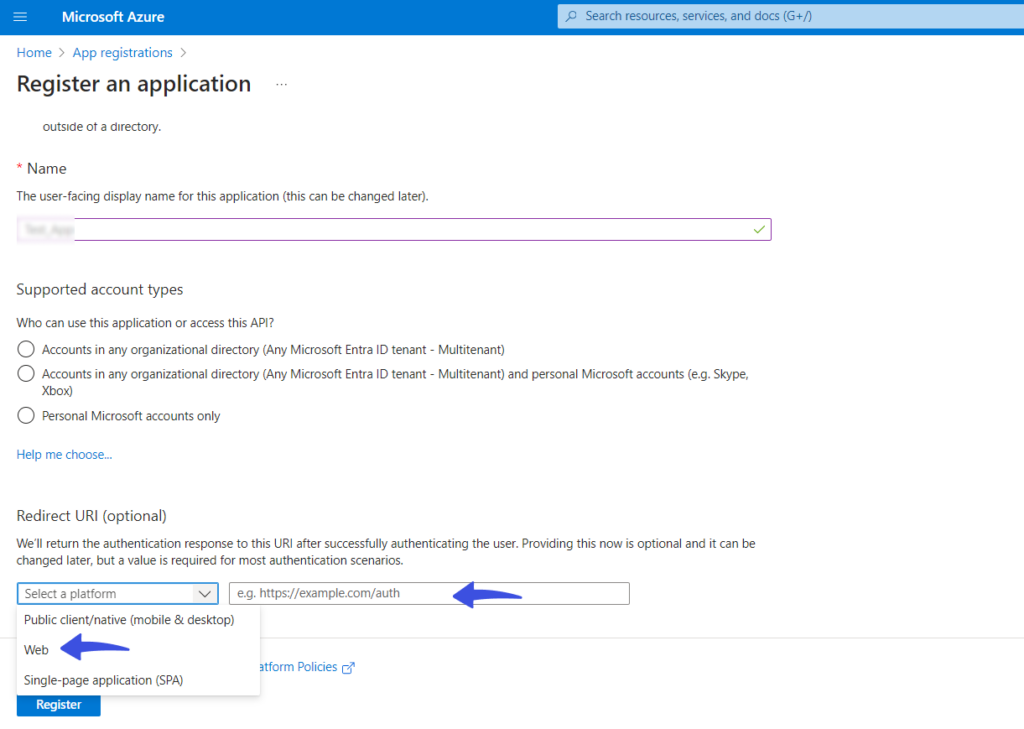
Now, click the Register button to create your App.
When you are done, you can proceed to the next step.
Step 2: App Configuration
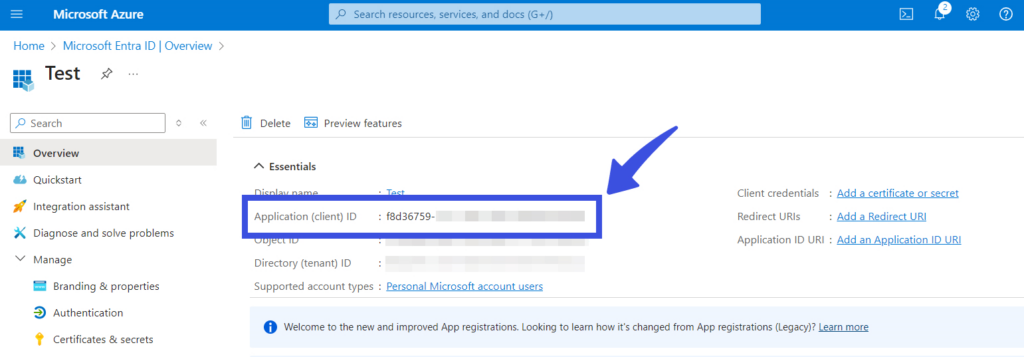
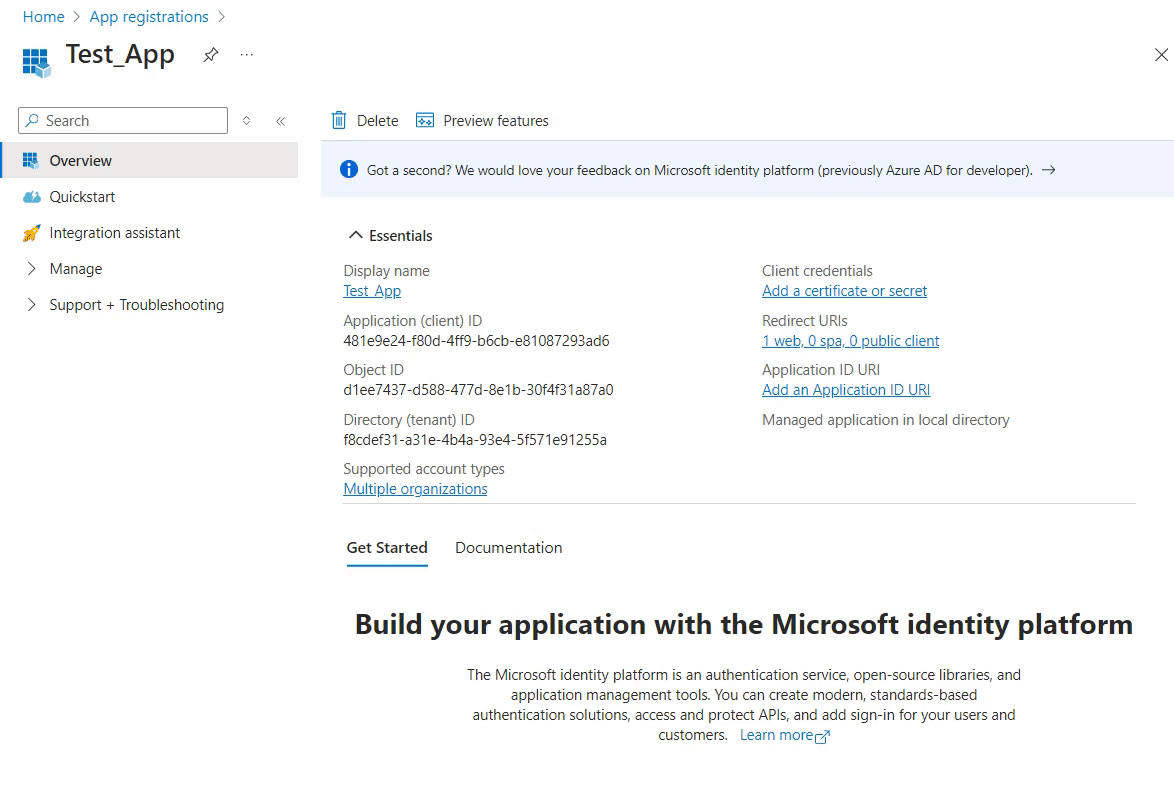
Next, you will be redirected to the newly created App Overview page.
Copy the Application (client) ID and paste it into the plugin settings inside the Client ID field.
Now go to the left sidebar menu on the Microsoft Azure screen, navigate to Manage, and click the Certificates & secrets option.
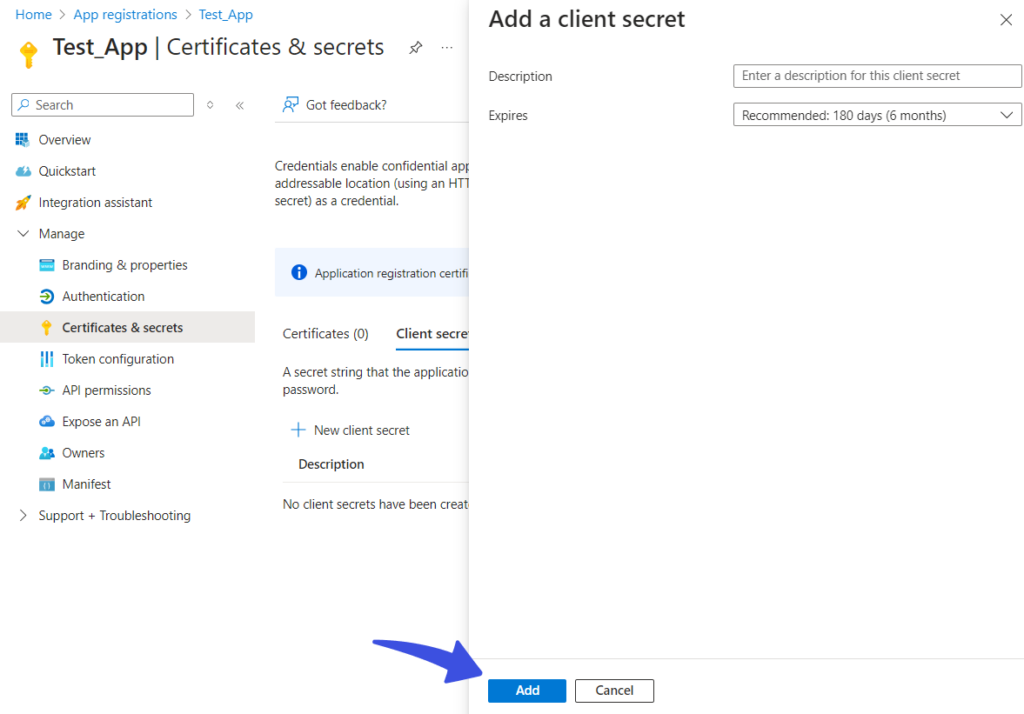
Next, you’re required to click on the + New client secret button.
A side pop-up will appear on the screen with 2 fields, including:
- Description: Add a description of the client's secret.
- Expires: Add the expiration date, i.e., 180 Days.
See the GIF below:
When done, click the Add button to generate your Client Secret key.
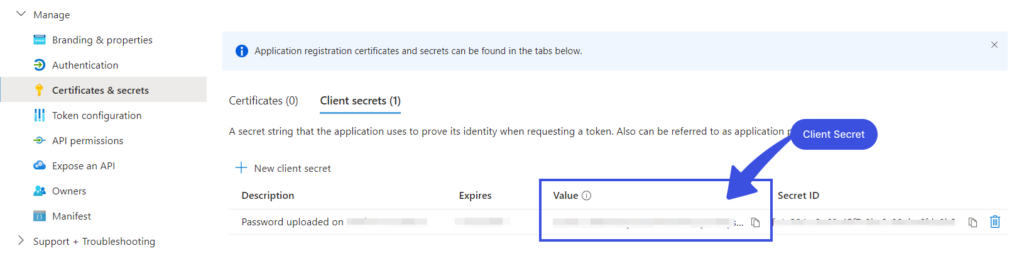
The Client Secret key will be named Value. All you need to do is to copy the Value and paste it into the plugin settings, inside the Client Secret field.
Step 3: Social Login Settings
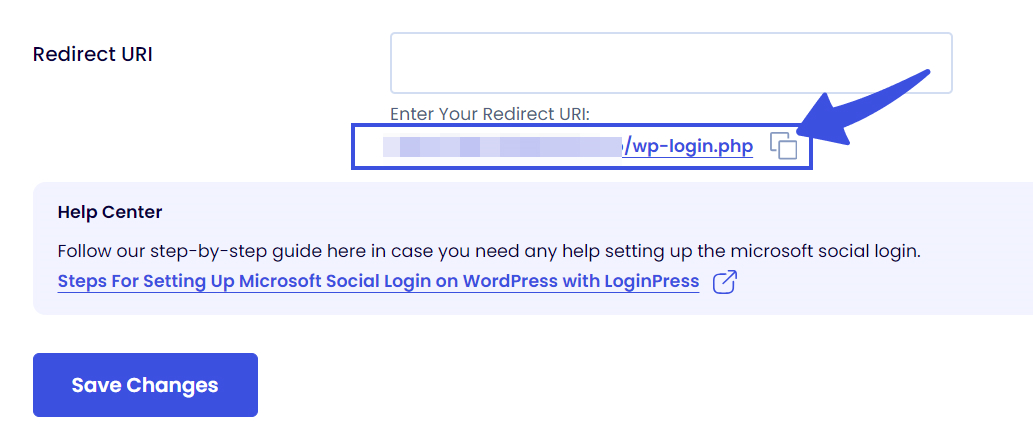
Now, go to the LoginPress Social Login screen and add Redirect URI.
Note: Redirect URI is given under the Redirect URI field.
See the image below:
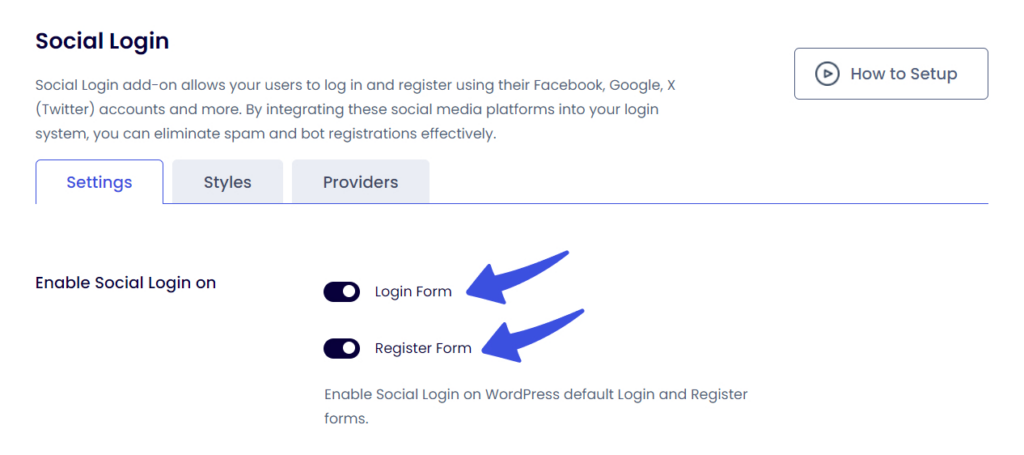
Now, if you want to again select where to add Microsoft Social Login, i.e., the Login Form, the Register Form, or both.
See the image below:
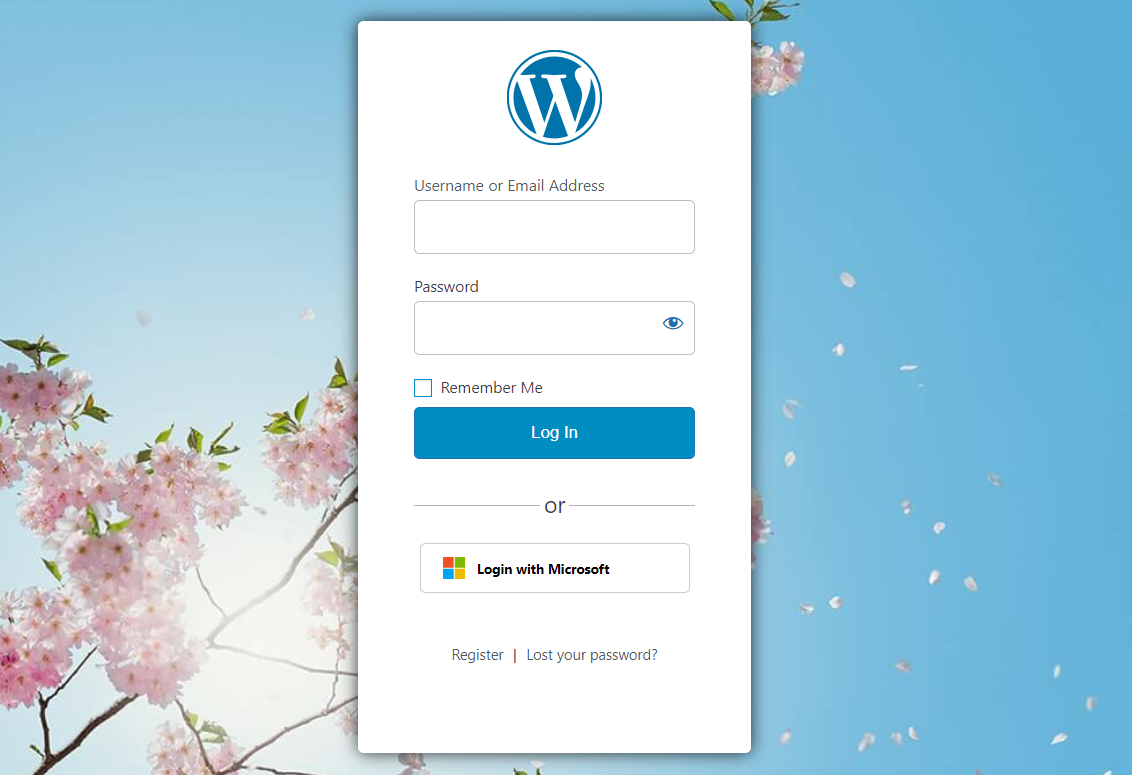
Log out from WordPress and revisit the login page to see the Microsoft Social Login in action.
Conclusion
We hope you now understand how to integrate Microsoft Social Login into your WordPress login and registration form. Users can enjoy a seamless login and registration process using their web application's Microsoft credentials.
That’s all!
Here is a quick recap:
Looking to add more social logins to your site with LoginPress? Here is how you can add Facebook, Twitter, Linked In, and Google to the WordPress login and registration form.
- How to Add Facebook Social Login on Your WordPress Site with LoginPress
- How to Add Twitter Social Login to Your WordPress Site with LoginPress.
- How to Integrate LinkedIn Social Login on WordPress
- How to Integrate Google Social Login on WordPress
You can contact our dedicated support team if you need any help.
Frequently Asked Questions (FAQs)
These FAQs answer the most common questions about our WordPress custom login page plugin.
Where can I get support for LoginPress?
If you need help with LoginPress, you can contact us here. We’ll be happy to answer any questions about the plugin.
Do you have an affiliate program?
Yes, we have an affiliate program that you can sign up for here. As an affiliate, you’ll earn a commission on every sale you refer to us.
Do you offer refunds?
Yes, we offer a 14-day money-back guarantee on all of our plans. If you’re unsatisfied with LoginPress, simply contact us within 14 days of your purchase, and we’ll process a refund.
Can I upgrade my license after my initial purchase?
Yes, you can upgrade your LoginPress license at any time. Simply log into your account and go to the My Downloads page. From here, you can upgrade your license and download the latest version of the plugin.
Will LoginPress slow down my website?
No, LoginPress will not slow down your website. The plugin is lightweight and only loads the necessary files when someone tries to access your login page.

If you Still have Questions?
Get In Touch