To make the plugin extra easy and functional as per the requirements, here comes the detailed documentation regarding the plugin. All about educating the things related to the plugin.
How to Install and Activate LoginPress Pro In WordPress?
We assume that you have already installed the LoginPress free version. It's time to upgrade to the LoginPress Pro version to have access to even more features and powerful add-ons.
Whether you're a beginner or an experienced WordPress user, this guide will provide all the information you need to get started with LoginPress Pro.
Let's get started!
Step 1: Purchase LoginPress Pro
The first thing you’ll need to do is to buy the LoginPress Pro.
For this purpose, visit the LoginPress official site and go to the Pricing Page.
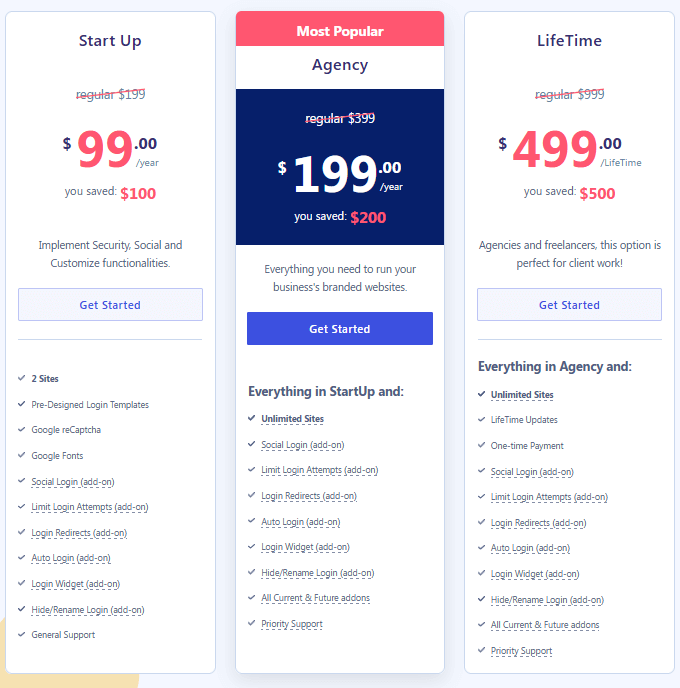
On the pricing page, you’ll find four different packages. See which one suits you the best.
On deciding the package, click the Get Started button.
This will take you to the checkout screen, where you’ll have to click the Complete Your Purchase button.
Note: We’ve selected the LoginPress Pro Agency package here.
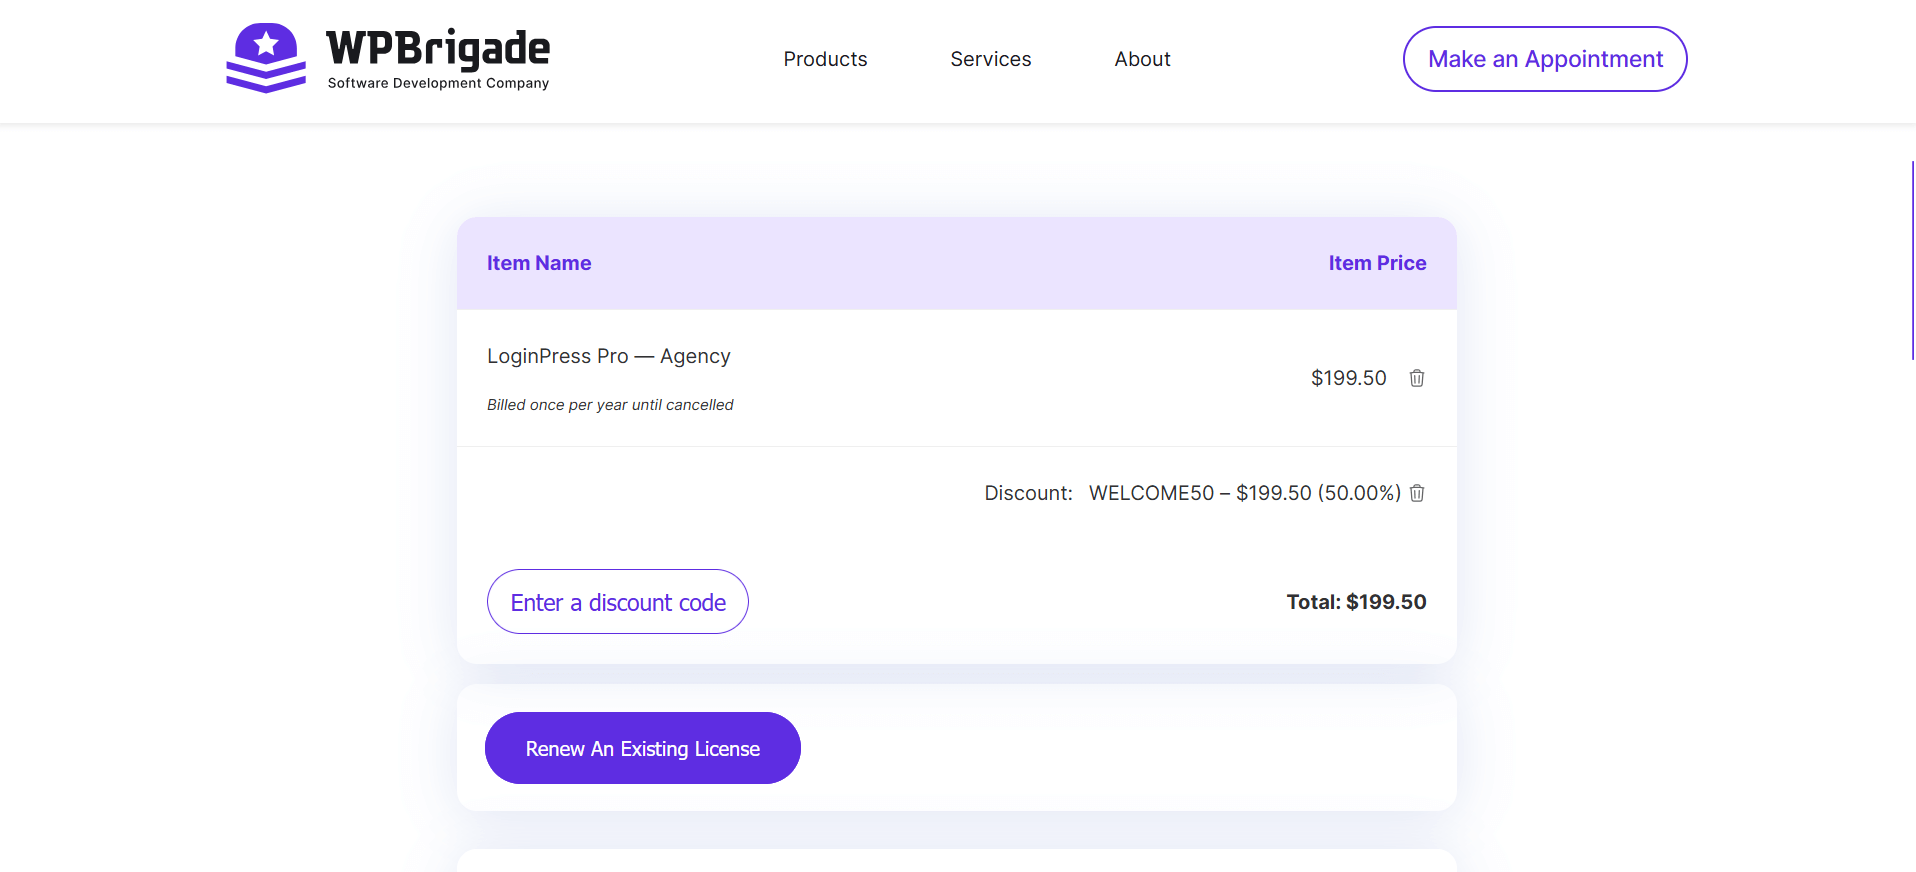
A pop-up will open up, where you’ll need to provide your details, including:
- Email Address
- Payment Method
- First Name and Last Name
- Card Number
- Zip Code
- Phone Number
When you fill in the details, proceed with the Pay $199.50 button.
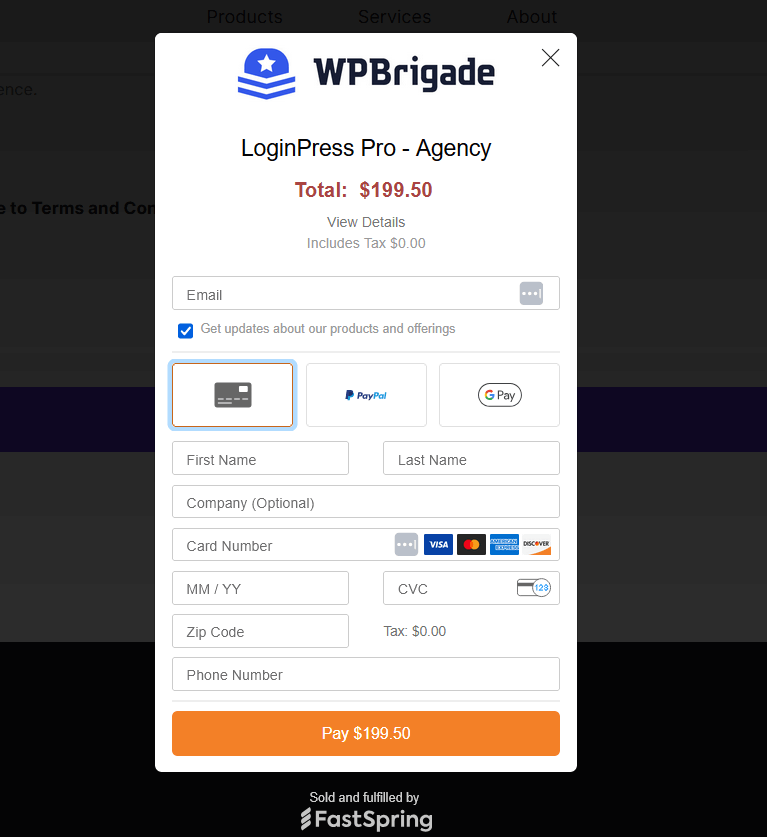
Once you place the order, you’ll receive two confirmation emails at the email address you used to purchase.
In the confirmation emails, you will receive your login information for your premium WPBrigade Account.
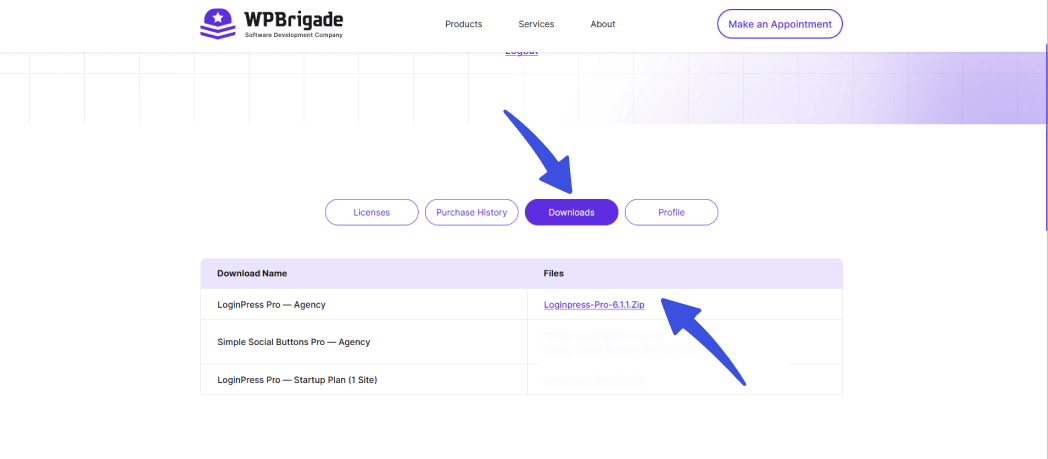
Step 2: Download the Zip File
Next, you’ll need to go to the WPBrigade Account and log in with the username and password you just received in the purchase email.
Once inside your WPBrigade Account, navigate to the Downloads tab and download the LoginPress Pro zip. File.
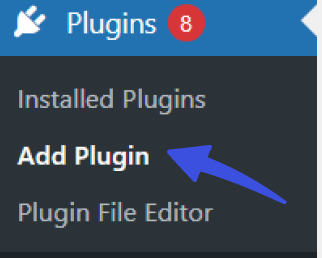
Step 3: Add Zip File to WordPress Plugins
When you’ve downloaded the LoginPress Pro zip file from the WPBrigade account, it’s time to add it to your WordPress.
To do this, go to the left sidebar of the WordPress admin dashboard, navigate to Plugins, and click the Add New option.
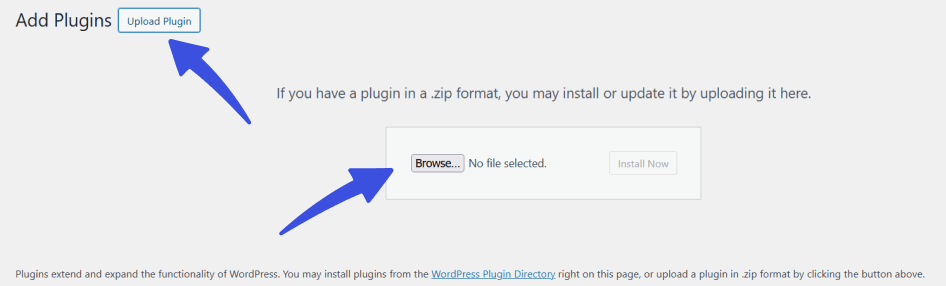
On the Add Plugins page, click Upload Plugin >> Choose File.
A pop-up screen will appear, where you’ll need to select the downloaded Loginpress-pro.zip file.
When done, click the Install Now button.
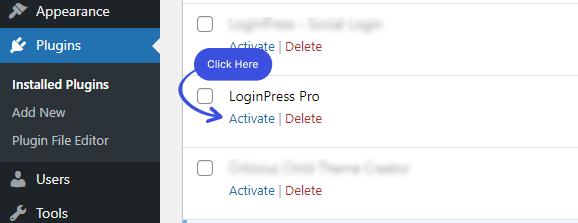
Step 4: Activate LoginPress (Pro)
Now that you’ve installed LoginPress, you need to activate it.
Simply go to the left sidebar of the WordPress admin dashboard and navigate to Plugins.
Select Installed Plugins, find out LoginPress Pro, and click Activate.
Step 5: License Key Activation
Once you’ve installed and activated LoginPress Pro, it’s time to activate the license key.
Note: In order to activate the license key, you can check out our guide on how to activate the LoginPress Pro license Key.
That’s it! You’ve now upgraded from LoginPress (Free) to LoginPress (Pro).
If you have any doubts or questions related to this matter, please don’t hesitate to reach out to our support team.
Already familiar with installing plugins? Explore our Getting Started with LoginPress guide for a broader overview of setup and basic customization options.
Frequently Asked Questions (FAQs)
These FAQs answer the most common questions about our WordPress custom login page plugin.
Where can I get support for LoginPress?
If you need help with LoginPress, you can contact us here. We’ll be happy to answer any questions about the plugin.
Do you have an affiliate program?
Yes, we have an affiliate program that you can sign up for here. As an affiliate, you’ll earn a commission on every sale you refer to us.
Do you offer refunds?
Yes, we offer a 14-day money-back guarantee on all of our plans. If you’re unsatisfied with LoginPress, simply contact us within 14 days of your purchase, and we’ll process a refund.
Can I upgrade my license after my initial purchase?
Yes, you can upgrade your LoginPress license at any time. Simply log into your account and go to the My Downloads page. From here, you can upgrade your license and download the latest version of the plugin.
Will LoginPress slow down my website?
No, LoginPress will not slow down your website. The plugin is lightweight and only loads the necessary files when someone tries to access your login page.

If you Still have Questions?
Get In Touch