To make the plugin extra easy and functional as per the requirements, here comes the detailed documentation regarding the plugin. All about educating the things related to the plugin.

Adding Login Logout Menu Filters to Your WordPress Website
LoginPress is a WordPress login page customizer plugin that enables you to customize the login page for your WordPress site according to your requirements. Did you know you can even add filters?
LoginPress has a cool Add-on called Login Logout Menu.
When you activate this Add-on, you can add the login and logout menu to any place on your WordPress site. The Login Logout Menu items will change when a user Logs in or out.
This knowledgebase article will explain how to use the Login Logout Menu Filter for redirect purposes to the following places.
Adding filters will be done with coding, so buckle up!
Let’s get started!
Login Logout Menu Filters:
Login Logout Menu General Filters
1. Filter To Redirect A User To A Specific Page After Logout
If you want to redirect a user after logging out to a specific page. You have to add the given line of code to your website theme's file "functions.php" and save the code.
Note: It’s recommended to use a child theme to edit the functions.php file instead of the parent theme. There are chances to lose the modified code when you update your theme. It might cause some adverse effects on your website.
/**
 * Filter to redirect a user to a specific page after logout.
 * @return [URL] logout URL with page slug on which it will be redirected after logout
 */
add_filter( 'login_logout_menu_logout', 'loginpress_login_menu_logout_redirect' );
function loginpress_login_menu_logout_redirect() {
 return wp_logout_url( '/hello-world' );
}
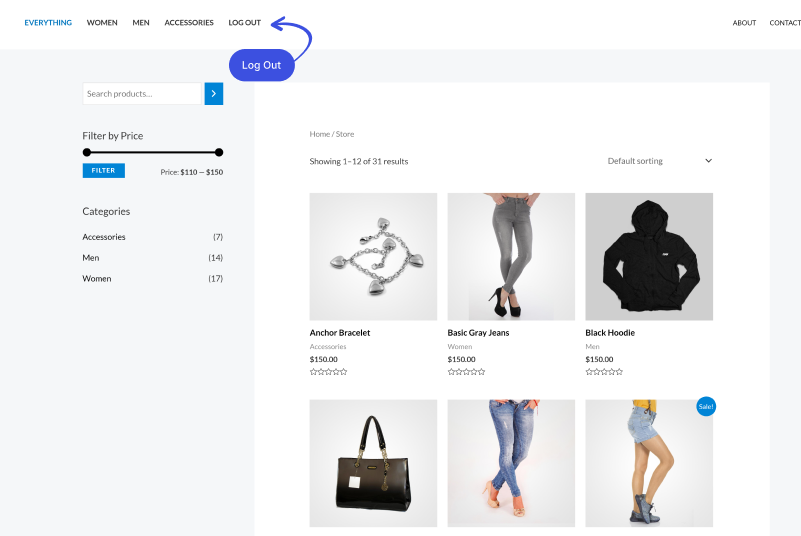
Let’s see what happens when you’ll log out now:

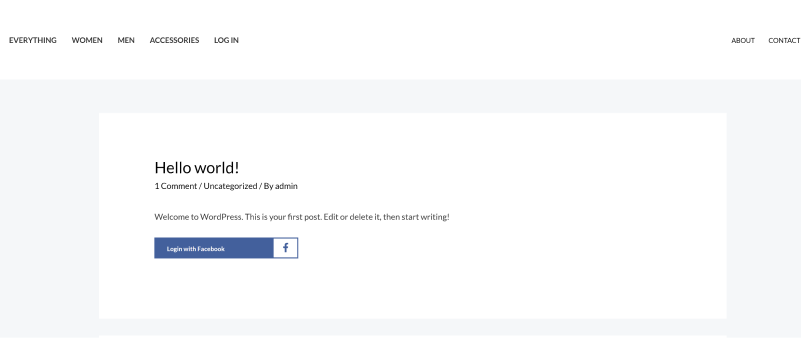
You’ll be redirected to the “hello-world” page as given in the filter:

2. Filter To Redirect After Successful Login
If you want to redirect users to another specific page after login instead of the site dashboard page, then you have o add the following piece of code in your website theme's "functions.php" and save the code.
Note: It’s recommended to use a child theme to edit the functions.php file instead of the parent theme. There are chances to lose the modified code when you update your theme. It might cause some adverse effects on your website.
/**
* Filter to redirect a user to a specific page after login.
*
* @return [URL] login URL with page slug on which it will be redirected after login
*/
add_filter( 'login_logout_menu_login', 'loginpress_login_menu_login_redirect' );
function loginpress_login_menu_login_redirect() {
  return wp_login_url( '/hello-world' );
}
Note: This filter works only when a user clicks on the login button or link from the Login Logout menu otherwise user will redirect to the default website page or dashboard.
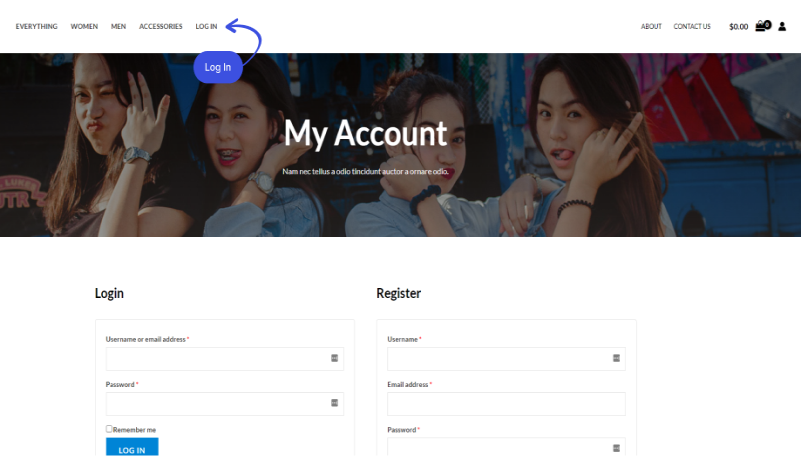
Let’s see what happens when you’ll log in from the Login Logout Menu now:

You’ll be redirected to the “hello-world” page as given in the filter:

3. Filter To Redirect the Users to a Custom Registration Page
If you want to redirect a new website visitor to a custom registration page that you have created on your website when a new user clicks on the registration button, then you have to use the given piece of filter code in your website theme's "functions.php" file and update the file.
Note: It’s recommended to use a child theme to edit the functions.php file instead of the parent theme. There are chances to lose the modified code when you update your theme. It might cause some adverse effects on your website.
/**
* Filter to redirect a user to a custom register page
*
* @return [URL] custom register page URL
*/
add_filter( 'login_logout_menu_register', 'loginpress_login_menu_register_redirect' );
function loginpress_login_menu_register_redirect() {
  return home_url( '/register' );
}
Let’s see what happens when you’ll click on the registration button now:
You’ll be redirected to a custom registration page as given in the filter:
4. Add/Modify Login Logout Menu Custom Username Text
If you want to add a custom Username text in Login Logout Menu, you must add the following code into your website theme's "functions.php" and update the file.
Note: It’s recommended to use a child theme to edit the functions.php file instead of the parent theme. There are chances to lose the modified code when you update your theme. It might cause some adverse effects on your website.
Note: Change the “Welcome” to your own text. This text will be appended before the username link.
/**
* Filter to Change the user profile link text
*
* @param [String] $user_name The name of the user who is logged in
*
* @return [string] Custom String and the username
*/
add_filter( 'login_logout_menu_username', 'custom_loginpress_login_logout_menu_username' );
function custom_loginpress_login_logout_menu_username( $user_name ) {
  return 'Welcome  ' . $user_name;
}
5. Filter To Redirect The User To Their Profile Page
If you are using any of these platforms in your WordPress website (Buddyboss, BuddyPress, and WooCommerce) and want to redirect the user to their profile page instead of the WordPress dashboard. You have to insert the given code below into your website theme's "functions.php" and update the file.
Note: It’s recommended to use a child theme to edit the functions.php file instead of the parent theme. There are chances to lose the modified code when you update your theme. It might cause some adverse effects on your website.
For BuddyPress
/**
* Filter to Change the user profile redirect URL
*
* @return [string] Custom link to user profile page
*
*/
add_filter( 'login_logout_menu_profile', 'loginpress_login_logout_menu_profile_link' );
function loginpress_login_logout_menu_profile_link( ) {
  //If BuddyPress is activated then go to its User profile page.
  if ( function_exists( 'bp_core_get_user_domain' ) ) {
     $url = bp_core_get_user_domain( get_current_user_id() );
  }
  return $url;
}
For BuddyBoss
/**
* Filter to Change the user profile redirect URL
*
* @return [string] Custom link to user profile page
*
*/
add_filter( 'login_logout_menu_profile', 'loginpress_login_logout_menu_profile_link' );
function loginpress_login_logout_menu_profile_link( ) {
  //If BuddyBoss is activated then go to its User profile page.
  if ( function_exists( 'bp_core_get_user_domain' ) ) {
     $url = bbp_get_user_profile_url( get_current_user_id() );
  }
  return $url;
}
For WooCommerce
/**
* Filter to Change the user profile redirect URL
*
* @return [string] Custom link to a user profile page
*
*/
add_filter( 'login_logout_menu_profile', 'loginpress_login_logout_menu_profile_link' );
function loginpress_login_logout_menu_profile_link( ) {
	$url= get_edit_user_link();
  	//If WooCommerce is activated then go to its User profile page.
	if ( class_exists( 'woocommerce' ) ) {
    	$url = get_permalink( get_option( 'woocommerce_myaccount_page_id' ) );
	}
	return $url;
}
6. Filter To Change The User Profile Redirect URL
If you are using any of these platforms in your WordPress website (Buddyboss, BuddyPress, and WooCommerce). If you want to change the user profile redirect URL [Custom URL], then you have to use the following code in your website theme's "functions.php" file and update your file.
Note: It’s recommended to use a child theme to edit the functions.php file instead of the parent theme. There are chances to lose the modified code when you update your theme. It might cause some adverse effects on your website.
For BuddyPress
/**
* Filter to Change the user redirect URL
*
* @return [string] Custom link to user profile page
*
*/
add_filter( 'login_logout_menu_username_url', 'loginpress_login_logout_menu_user_link' );
function loginpress_login_logout_menu_user_link( ) {
// If BuddyPress is activated then go to its User profile page.
  if ( function_exists( 'bp_core_get_user_domain' ) ) {
     $url = bp_core_get_user_domain( get_current_user_id() );
  }
 return $url;
}
For BuddyBoss
/**
* Filter to Change the user redirect URL
*
* @return [string] Custom link to user profile page
*
*/
add_filter( 'login_logout_menu_username_url', 'loginpress_login_logout_menu_user_link' );
function loginpress_login_logout_menu_user_link( ) {
// If BuddyBoss is activated then go to its User profile page.
  if ( function_exists( 'bp_core_get_user_domain' ) ) {
    $url = bbp_get_user_profile_url( get_current_user_id() );
}
return $url;
}
For WooCommerce
/**
* Filter to Change the user redirect URL
*
* @return [string] Custom link to user profile page
*
*/
add_filter( 'login_logout_menu_username_url', 'loginpress_login_logout_menu_user_link' );
function loginpress_login_logout_menu_user_link( ) {
	$url= get_edit_user_link();
	// If WooCommerce is activated then go to its User profile page.
	if ( class_exists( 'woocommerce' ) ) {
    	$url = get_permalink( get_option( 'woocommerce_myaccount_page_id' ) );
	}
	return $url;
}
Login Logout Menu Avatar Filters
These filters allow developers to modify the behavior and appearance of the avatar displayed in a login/logout menu when a user is logged in. The avatar is retrieved using the get_avatar_url() function and can be customized through two separate filters:
1. Filter: login_logout_menu_avatar_args
Description
This filter allows modification of the arguments passed to the get_avatar_url() function, controlling the size and other properties of the avatar image.
Parameters
- $args (array): An array of arguments for the get_avatar_url() function.
Usage
Developers can hook into this filter to modify the arguments of the avatar URL, such as changing the size, default image, or rating.
/**
 * Modify the arguments for the avatar size.
 *
 * @param array $args The avatar arguments.
 * @return array Modified avatar arguments.
 */
function custom_avatar_args( $args ) {
    // Modify the size of the avatar
    $args['size'] = 192;
    // Add more customizations here if needed
    return $args;
}
add_filter( 'login_logout_menu_avatar_args', 'custom_avatar_args' );
2. Filter: login_logout_menu_avatar_attrs
Description
This filter allows developers to modify the attributes used for rendering the HTML markup of the login/logout menu avatar. The login/logout menu avatar typically includes an image representing the user's profile picture or avatar, along with additional attributes such as title, class, and alt text.
Parameters
- $attrs (array): An associative array containing the attributes used for rendering the login/logout menu avatar HTML markup.
Usage
Developers can use this filter to customize the attributes of the login/logout menu avatar based on their specific requirements. The filter callback function receives the $attrs array as input and allows developers to modify or add additional attributes before they are rendered.
/**
 * Add or modify attributes for the login/logout menu avatar.
 *
 * @param array $attrs The avatar attributes.
 * @return array Modified avatar attributes.
 */
function custom_login_logout_avatar_attrs( $attrs ) {
    // Add or modify attributes as needed
    $attrs['class'] .= ' custom-class'; // Add a custom class
    $attrs['data-user-id'] = get_current_user_id(); // Add a data attribute with the current user's ID
    return $attrs;
}
add_filter( 'login_logout_menu_avatar_attrs', 'custom_login_logout_avatar_attrs' );
3. Filter: login_logout_menu_avatar_html
Description
This filter allows customization of the HTML markup for the avatar displayed in the login/logout menu. It combines the avatar image and the username into a single HTML string.
Parameters
- $avatar_html (string): The HTML markup for the avatar and username.
- $avatar (string): The HTML markup for the avatar image.
- $username (string): The username of the logged-in user.
Usage
Developers can hook into this filter to modify the HTML markup of the avatar and username, such as adding additional classes, wrapping elements, or including additional user information.
/**
 * Customize HTML for login/logout menu avatar.
 *
 * @param string $avatar_html The avatar HTML.
 * @param string $username    The username.
 * @param string $avatar  The avatar img.
 * @return string Modified avatar HTML.
 */
function custom_avatar_html( $avatar_html, $avatar, $username ) {
    // Wrap the avatar and username in a div with a custom class
    $avatar_html = '<div class="custom-avatar-wrapper">' . $avatar . $username . '</div>';

    // Add more customizations here if needed
    return $avatar_html;
}
add_filter( 'login_logout_menu_avatar_html', 'custom_avatar_html', 10, 3 );
/**
 * Customize HTML for login/logout menu avatar.
 *
 * @param string $avatar_html The avatar HTML.
 * @param string $username    The username.
 * @param string $avatar_url  The URL of the avatar image.
 * @return string Modified avatar HTML.
 */
function custom_login_logout_avatar_html( $complete_img, $avatar_html, $username, $avatar_url ) {
    // Create an <img> tag with the provided information
    $avatar_html = '<img src="' . esc_url( $avatar_url ) . '" alt="' . esc_attr( $username ) . '" class="login-logout-menu-nav-avatar custom-avatar" width="192" height="192" />'. esc_attr( $username );

    return $avatar_html;
}

add_filter( 'login_logout_menu_avatar_html', 'custom_login_logout_avatar_html', 10, 4 );
Notes:
- These filters provide flexibility for developers to customize the appearance and behavior of the login/logout menu avatar based on specific project requirements.
- Ensure that modifications made through these filters are compatible with the overall design and functionality of the login/logout menu and user management system.
- Proper sanitization and validation should be performed on any user input or output to maintain security standards.
That’s it. We hope you now understand how you can add the different Login Logout Menu Filters to your WordPress site.
If you have any doubts or questions related to this matter, please don’t hesitate to contact our support team.

Frequently Asked Questions (FAQs)
These FAQs answer the most common questions about our WordPress custom login page plugin.


Where can I get support for LoginPress?
If you need help with LoginPress, you can contact us here. We’ll be happy to answer any questions about the plugin.
Do you have an affiliate program?
Yes, we have an affiliate program that you can sign up for here. As an affiliate, you’ll earn a commission on every sale you refer to us.
Do you offer refunds?
Yes, we offer a 14-day money-back guarantee on all of our plans. If you’re unsatisfied with LoginPress, simply contact us within 14 days of your purchase, and we’ll process a refund.
Can I upgrade my license after my initial purchase?
Yes, you can upgrade your LoginPress license at any time. Simply log into your account and go to the My Downloads page. From here, you can upgrade your license and download the latest version of the plugin.
Will LoginPress slow down my website?
No, LoginPress will not slow down your website. The plugin is lightweight and only loads the necessary files when someone tries to access your login page.

If you Still have Questions?
Get In Touch