To make the plugin extra easy and functional as per the requirements, here comes the detailed documentation regarding the plugin. All about educating the things related to the plugin.
How to Integrate LinkedIn Social Login on WordPress
Among the various social login choices, LinkedIn is a powerful professional networking platform, often preferred by business-oriented users. It provides a seamless and efficient login process for your WordPress site.
Let's see how you can integrate LinkedIn Social Login on WordPress with LoginPress.
Add LinkedIn Social Login on WordPress with LoginPress
Note:See our Complete guide on Social Login to learn how to activate LoginPress Social Login Add-on.
Follow these steps to integrate Linkedin Login into your WordPress site.
Let’s get started!
Step 1: Enable LinkedIn Login
First, you’ll need to enable LinkedIn Login in the Social Login’s Settings tab.
Once you toggle on the Enable LinkedIn Login, other fields will open up. Including:
- Client ID
- Client Secret
- Redirect URI
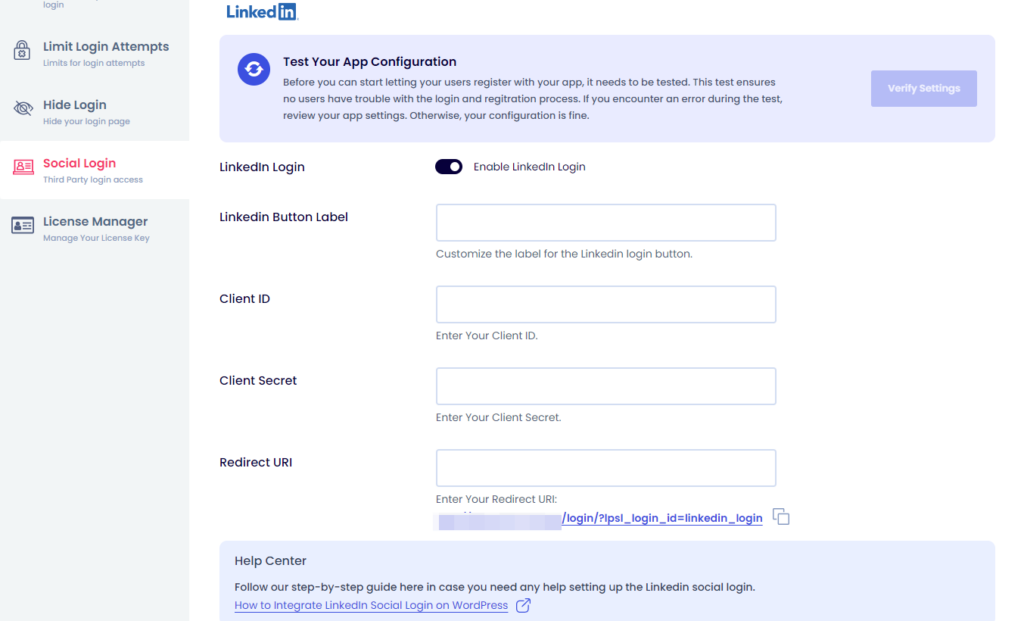
You must fill in these fields to integrate the LoginPress LinkedIn Login on the login or registration form.
Don’t worry! Simply follow the rest of the steps to get these keys. Buckle up!
Step 2: Register at LinkedIn Developer
Next, you’ll need to register your website with LinkedIn at the LinkedIn developer account.
When you are done, you can proceed.
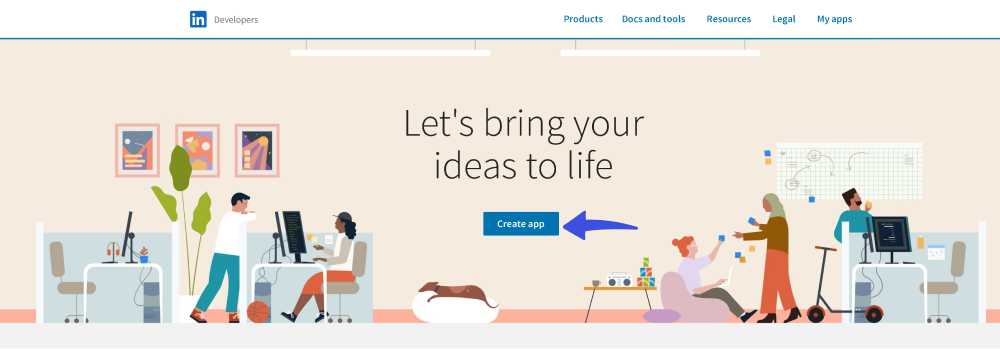
Step 3: Create LinkedIn App
Now, click on My Apps to create a LinkedIn Application.
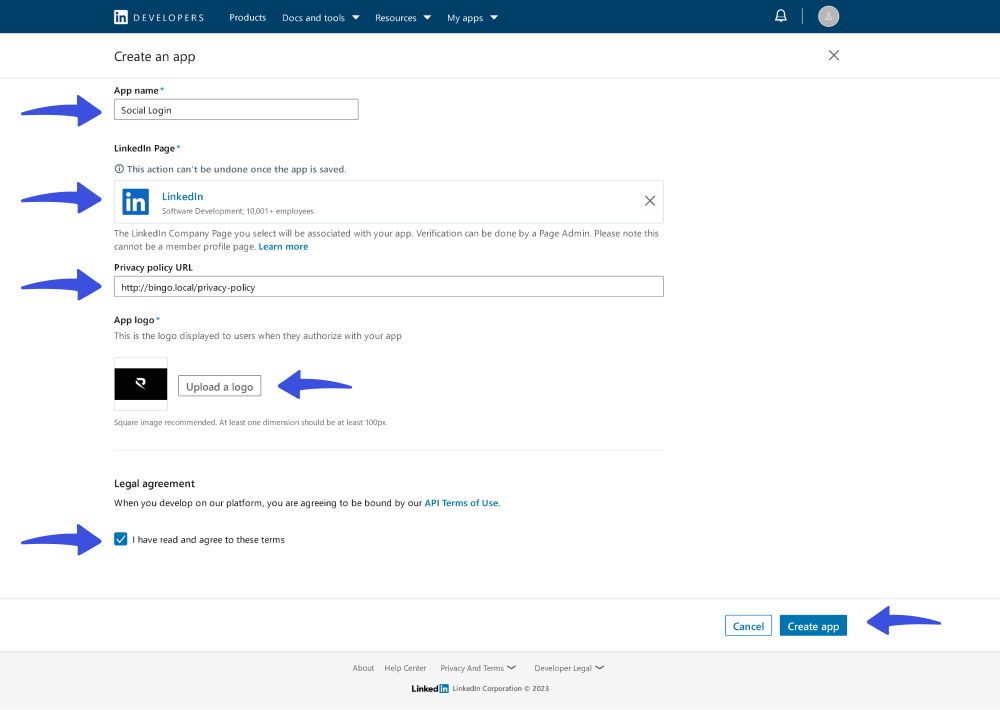
Here, you'll need to fill out the required information fields on the form, including:
- App Name: Fill in the desired App name.
- Privacy Policy URL: A privacy policy URL is a link to the webpage where the privacy policy of your WordPress site is posted. Simply Copy and paste your website’s privacy policy URL here.
- App Logo: Add the app logo (a square logo with a minimum of 100px*100px in size).
- Legal Agreement: Tick the Legal Agreement checkbox to continue creating the app.
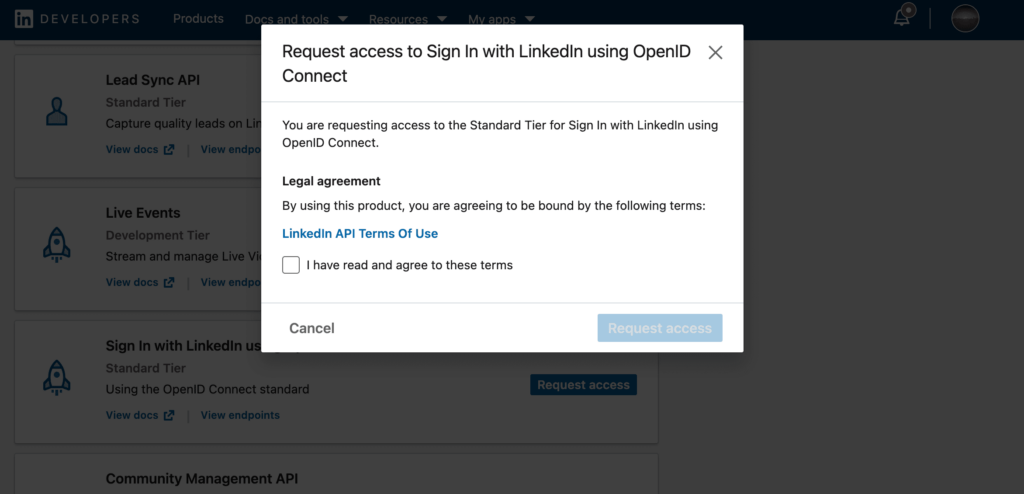
Step 4: Select Product "Sign In with LinkedIn using OpenID Connect"
You will be redirected to the “Products” tab. Find “Sign In with LinkedIn using OpenID Connect” and click “Request access”.
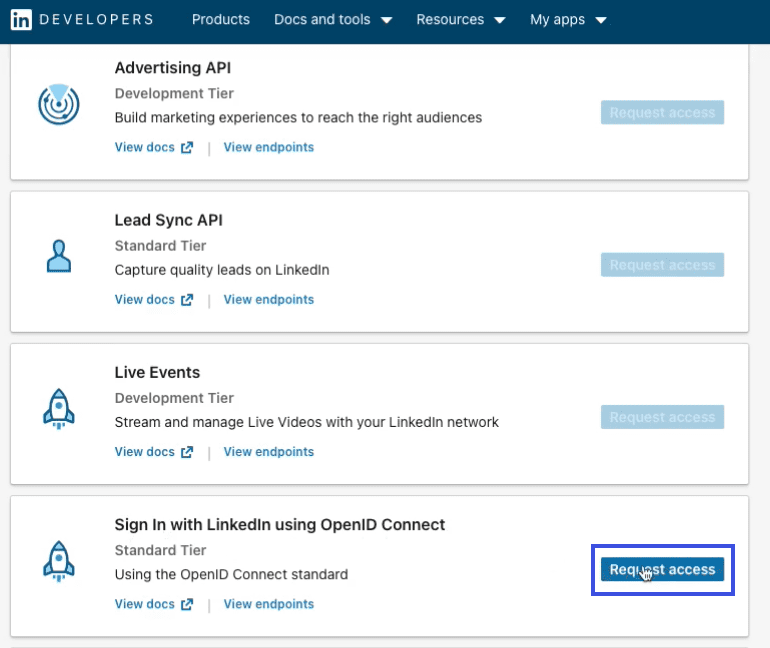
A modal will appear where you need to tick the “I have read and agree to these terms” checkbox and finally press the “Request access” button.
Step 5: Open the Auth Tab
After submitting the form, Check out the Auth tab in your newly created App. Auth tab will have Redirect URLs and Credentials (i.e., Client ID and Client Secret).
Here, you’ll require to click the edit icon for Authorized redirect URLs and click the + Add redirect URL.
Note: You can find the Authorized redirect URL under the Redirect URI field in LinkedIn Settings.
When done, click the Update button.
Step 6: Set up WordPress LinkedIn Social Login on LoginPress
You are almost done; this is the time to setup up a WordPress Linked Social login on LoginPress.
Copy the Client ID from the Auth tab on the LinkedIn Developer page and paste it to Client ID field.
Copy the Client Secret from the Auth tab on the LinkedIn Developer page and paste it into Client Secret field.
All done; you can now click the Save button and verify the app settings.
Note: You can choose between enabling LinkedIn on the Login or Register form.
Log out from WordPress and recheck the login page to see the LinkedIn Login button.
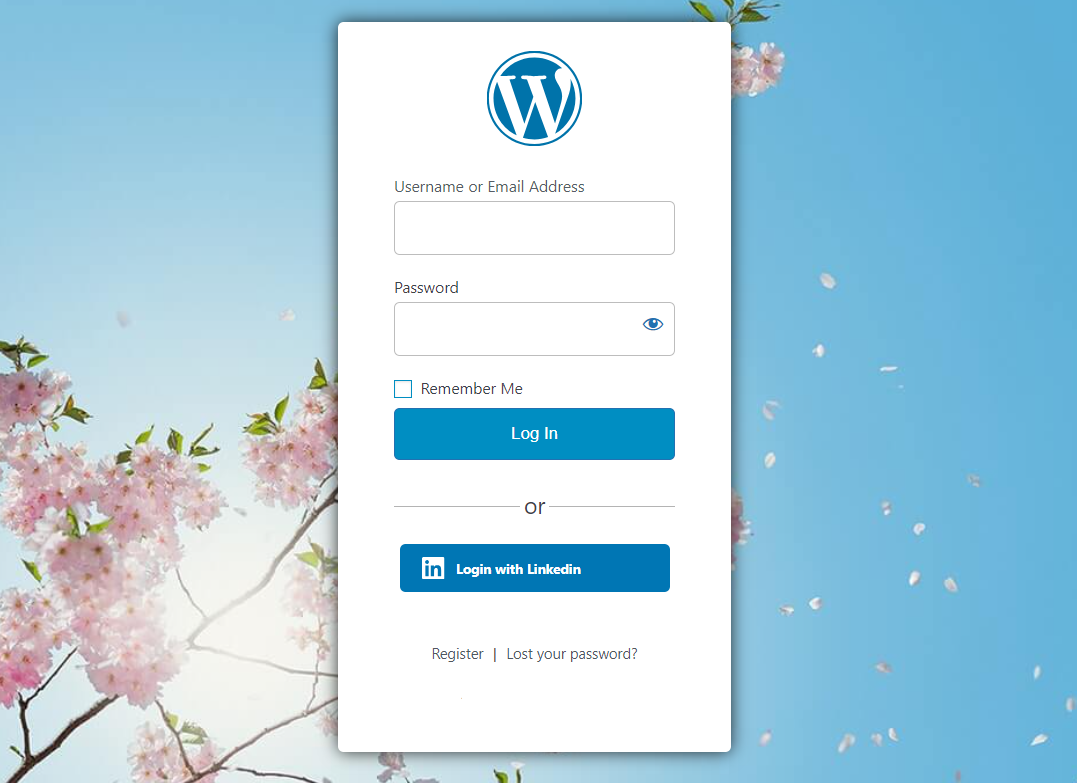
That’s it! You can easily add LinkedIn Social Login to your WordPress site.
In conclusion, LinkedIn Social Login makes it easy for users to connect with your WordPress.Try the LoginPress Social Login Add-on, and you'll witness increased registrations. What are you waiting for?
We have also covered separate documentation for integrating social logins on your WordPress site. See our detailed guides on How to Add Google Social Login to your WordPress Site with LoginPress and How to Add Twitter Social Login to Your WordPress Site with LoginPress.
Feel free to contact our support team anytime; we'll be delighted to provide you with the necessary help and guidance.
Frequently Asked Questions (FAQs)
These FAQs answer the most common questions about our WordPress custom login page plugin.
Where can I get support for LoginPress?
If you need help with LoginPress, you can contact us here. We’ll be happy to answer any questions about the plugin.
Do you have an affiliate program?
Yes, we have an affiliate program that you can sign up for here. As an affiliate, you’ll earn a commission on every sale you refer to us.
Do you offer refunds?
Yes, we offer a 14-day money-back guarantee on all of our plans. If you’re unsatisfied with LoginPress, simply contact us within 14 days of your purchase, and we’ll process a refund.
Can I upgrade my license after my initial purchase?
Yes, you can upgrade your LoginPress license at any time. Simply log into your account and go to the My Downloads page. From here, you can upgrade your license and download the latest version of the plugin.
Will LoginPress slow down my website?
No, LoginPress will not slow down your website. The plugin is lightweight and only loads the necessary files when someone tries to access your login page.

If you Still have Questions?
Get In Touch