7 Best Practices to Limit WordPress Failed Login Attempts
Are you looking for best practices to help you limit WordPress failed login attempts on your WordPress site?
You should pay attention to failed login attempts on your WordPress sites. Sometimes it gives rise to serial brutal site attacks. Consequently, so many WordPress sites have ended up shutting down. You should keep track of the failed login attempts on your WordPress site so that you may know immediately what is causing failed login attempts and devise solutions.
This article will show you the best practices to limit WordPress failed login attempts.
Let’s get started!
Table of Contents
What are WordPress Failed Login Attempts?
Being a WordPress user, you might have experienced failed login attempt message on the login form. It is usually displayed when a user tries to reach the WordPress admin area too many times but needs to enter the correct login or password details.
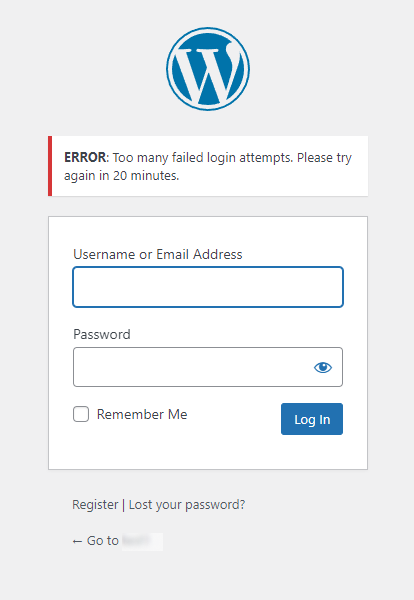
By default, WordPress doesn’t limit login attempts, which makes your site an easy target for hackers who usually go for brute-force attacks against your sites. If you see a failed login attempt message, the site owner has likely enabled the limit login attempts to the WordPress site using a Limit Login Attempts plugin.
WordPress registers the failed login attempt issue when ‘Too many failed login attempts, Please try again in 20 minutes’ error messages are displayed. No matter if you try to enter the correct login credentials, this time, WordPress will not let you reach the backend until the wait time expires.
A single failed login attempt never affects your site. However, an excessive amount of wrong credentials leads to Distributed Denial of Service (DDoS) and can bring your whole site down.
Being a WordPress site owner, take some time to understand the difference between accidentally failed logins and targeted attacks and try to take some security steps to overcome this.
What Causes WordPress Failed Login Attempts?
Now that you know, failed login attempts occur when someone tries to get into your site, providing the wrong credentials on the login form, i.e., Username or email address, or Password.
There are many reasons why a login attempt fails, such as password-protecting the WordPress site. It might require your visitors to log in and view your private content. So, any password typos can lead to failed login.
Other than this, a failed login attempt might be due to malicious attacks, i.e., when a hacker consistently uses brute force attack techniques to reach the backend of your WordPress site.
How to Handle WordPress Failed Login Attempts
1. Restrict Login Attempts
By default, WordPress doesn’t limit login attempts, which makes your site an easy target for hackers who usually go for brute-force attacks against your sites. The hackers use automated scripts and bots that try out hundreds of login credentials in a minute. Since there is no limit on the login attempt, these scripts may be proven correct.
The first thing you need to do is to limit the login attempts on your site. And LoginPress plugin’s Limit Login Attempts Add-on will help you with this.
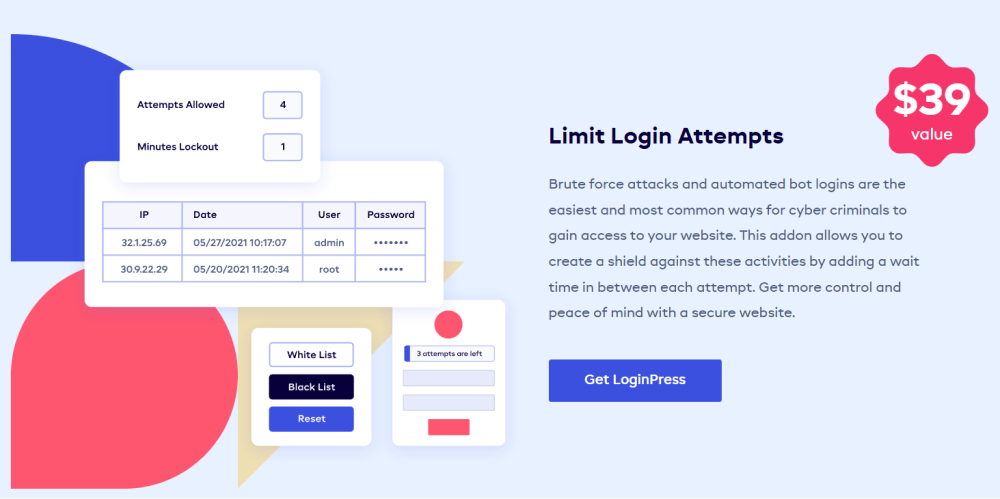
This Add-on helps limit the number of login attempts related to brute force attacks. The key features of LoginPress Limit Login Attempts Add-on include:
- Limit Login Attempts Add-on restricts the number of attempts when the user tries, again and again, to log in to your site per IP address.
- It provides adjustable Minutes Lockout.
- It has elastic Attempts Allowed.
- The Attempts Details tab gives you a deep insight into your WordPress site’s login attempts, including IP, Date & Time, Username, Password, and Gateway.
2. Enable the “Show Password” Button
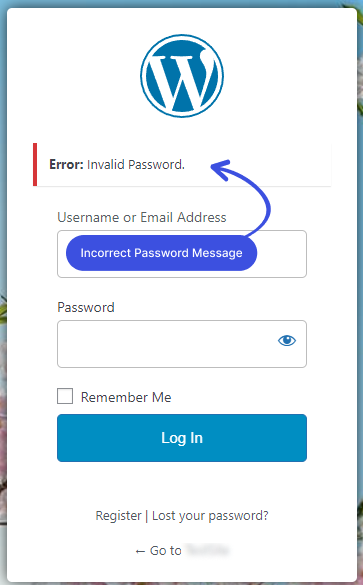
Password typos are among the main reasons for failed login attempts. LoginPress helps you with this by adding an eye button in the password field to reveal the password by default. This might help you track what password you’ve entered.
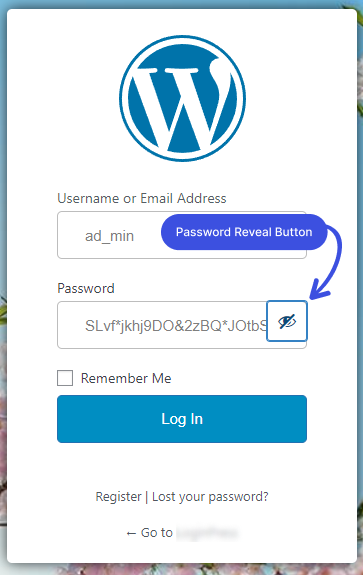
In addition, LoginPress offers a customized error message notifying your visitors about their wrong passwords.
3. Use Secured Login Credentials
A strong password protects the WordPress login page against brute force attacks. Follow these tips to compose a strong password:
- It should be composed of 10 to 15 alphabets (both cases), symbols, and numbers.
- Avoid dictionary words.
- Avoid using the same password everywhere.
- Avoid using common words.
- It’s recommended not to log in from a public computer.
Some examples of strong passwords:
- iM9wI8hL7bD5oA7c
- eK2@xA0~lB1<kI8>gW2<iU1^
- tO0_fJ0>nF3^gT4+kD0%kJ7:kE2$mC6>
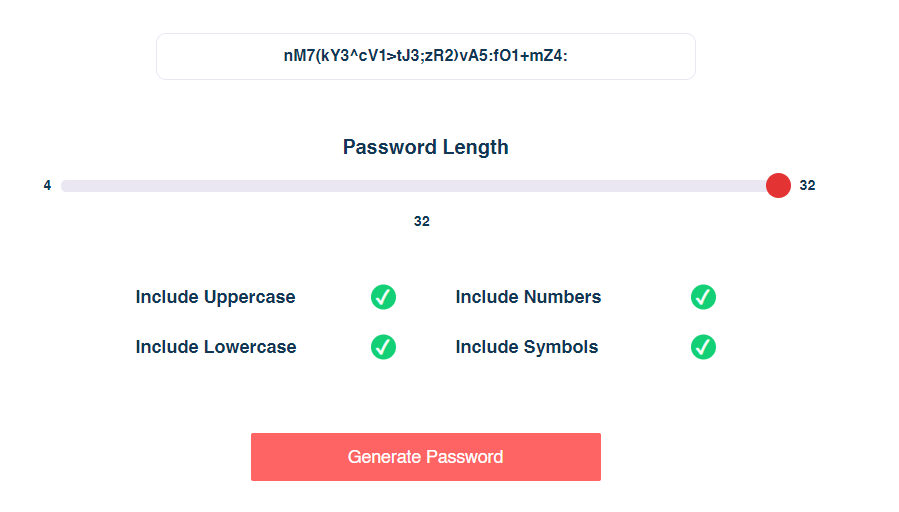
If you need help, we suggest the Strong Password Generator plugin to generate strong passwords with a click.
4. Make Use of 2FA and Security Plugins
Two-factor authentication (2FA) significantly hardens your WordPress website’s security. When 2FA is enabled, website log-in requires a code in addition to the credentials. Since an app generates this code on your phone (or another device), any hacker will have difficulty cracking two security layers.
The code required as the additional log-in credential is generated randomly and frequently changes to ensure maximum protection.
By default, 2FA is not added to WordPress. However, you can easily add it by installing Google Authenticator – Two-Factor Authentication (2FA) WordPress plugin.
5. Keep Your Site Updated
Every new WordPress version comes with a long list of fixes and upgrades to various platform components. You must upgrade your WordPress website to the latest stable version.
As a rule, you should enable auto-update for core WordPress files so that you won’t miss out on a critical update.
In case you’re using the older version of WordPress, it’s better to hide your WordPress version number from the public from a security point of view. Since hackers are always on their way to finding loopholes in your WordPress site. So that they might get a chance to gain access to the backend of your site.
6. Have a Reliable Web Host Security
Have you considered your web host’s safety when choosing one for your site? Remember, the web host is of much importance for your site. Make sure to get a reliable web host to tighten your server security. So being an owner of a WordPress site, take into account the significance of secure web hosting.
You must check web host security right away. If you feel that the host doesn’t guarantee your site’s proper security level, move to a safer one. Make sure to go for web hosting that provides 24/7 support.
7. Create Quick Access Links (QALs)
Last, but not least, you can use Quick Access Links (QALs) to help you prevent failed login attempts to your private content. QALs provides a quick link to the users to access your private site without requiring login credentials, i.e., passwords or passwords. This is a valuable technique that helps you maintain your site’s security.
Conclusion
Many reasons are causing failed login attempts in WordPress. Let it be password typos or password-protected, and more. At that point, using the practices mentioned above can quickly help you resolve the problem.
Since WordPress powers a good portion of the internet and is thus an easy target for cybercriminals, we strongly recommend you go for security measures for your WordPress site to help you make your site invulnerable to brute force attacks.
You may also want to check out our articles on How Social Login Improves CRO and How To Redirect Woocommerce Users after login.
Frequently Asked Questions
What is the account lockout duration?
Account lockout duration is the time interval during which your account remains locked. The website administrator sets this duration. You can retry logging into your account once the lockout period is over.
Why do I limit WordPress login attempts?
Hackers can make use of a brute force attack to try to guess your credentials, i.e., password. Since, by default, WordPress doesn’t put any limit to the login attempts. So the hackers might gain access to your site in no time. This is why it’s worth limiting the number of login attempts to help you secure your WordPress site.


