WordPress WooCommerce Tutorial (10 Step Easy Setup Guide)
Do you want to know how to set up a WordPress WooCommerce store? If yes, you’ve landed on the right WooCommerce tutorial.
We’ll cover everything from installing the WooCommerce plugin to configuring your store settings, adding products, and setting up payment and shipping options. By the end of this article, you’ll have all the information you need to launch your online store using WooCommerce.
In this WooCommerce tutorial, we’ll walk you through the entire process of setting up your own WooCommerce store from start to finish. So make sure to read this article till the end!
WordPress WooCommerce Tutorial (TOC):
What is WooCommerce?

WooCommerce is an open-source e-commerce plugin for WordPress that you can use to create a wide range of online stores, from small businesses to large enterprises. It is very flexible and easy to use. That’s why it is a popular choice for businesses of all sizes.
One of the critical benefits of WooCommerce is its integration with WordPress.
With WooCommerce, users can manage their inventory, process payments, handle shipping, and manage taxes. The platform also offers a range of extensions and plugins that can be used to add additional functionality to the store.
What can you sell with WordPress WooCommerce?
Now that you know, WordPress WooCommerce is a versatile e-commerce platform that is there to help you sell your products and services online.
Here’s a list of things you can sell using WooCommerce:
- Physical Products: You can use this platform to sell physical products, such as clothing, electronics, books, etc.
- Subscriptions: Offer subscription-based products like magazines, online streaming services, or subscription boxes.
- Bookings/Appointments: Allow customers to book appointments for salon visits, consultations, online classes, etc.
- Event Tickets: Sell tickets for events, concerts, workshops, or conferences.
- Donations: Collect donations for charitable causes or fundraising purposes.
- Affiliate Products: Integrate affiliate products from other websites and earn commissions for sales.
- Customizable Products: Offer personalized items where customers can customize colors, sizes, engravings, etc.
- Physical and Digital Bundles: Create bundled products containing physical and digital items.
WooCommerce, no doubt, offers many customization options and integrations. That’s what makes it a suitable choice for various online businesses. It is flexible enough to enable you to sell almost anything online.
How to Set up a WordPress WooCommerce Store?
Setting up your WordPress WooCommerce store is easier than ever with the WooCommerce WordPress plugin.
Here’s a simple step-by-step guide to set up WooCommerce store:
Step 1. Getting Started with WooCommerce for WordPress
To set up a WordPress WooCommerce store, you can start by creating:
- A domain name
- A web hosting account.
You need first to pay for the items mentioned above to build any type of website (not just WooCommerce). WooCommerce pricing depends on the services you choose for your site.
Many hosting providers offer one-click WordPress installations, simplifying the setup process, like:
- Bluehost
- GoDaddy
- Hostinger
- SiteGround
… and more.
Note: Want to learn more about hosting providers? See our detailed guide on 11 Best WordPress Hosting Providers 2023 [Tested+Compared].
WooCommerce and WordPress recommend Bluehost as a hosting provider. So here we’ll show you how to purchase a domain name and host with Bluehost.
Simply visit the Bluehost website. Next, you’ll see and click on the Get Started Now button.

On the next screen, Select a hosting plan for your website.
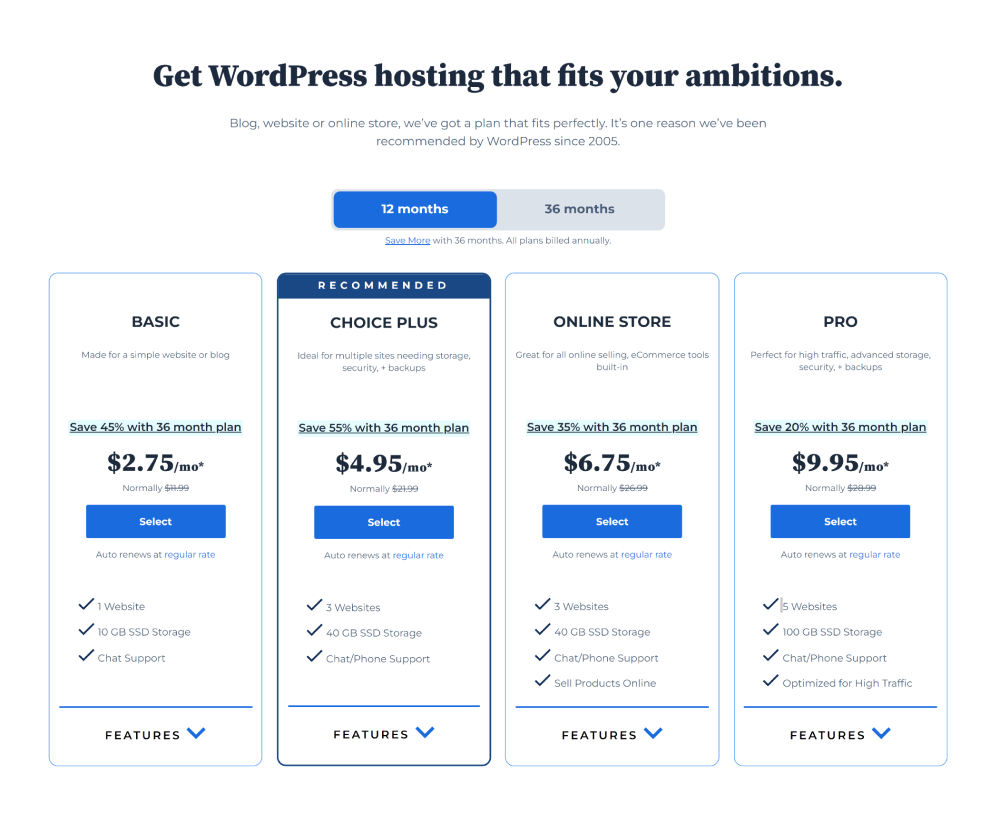
When done, click the Select button.
Now, you’re ready to Create a new domain.
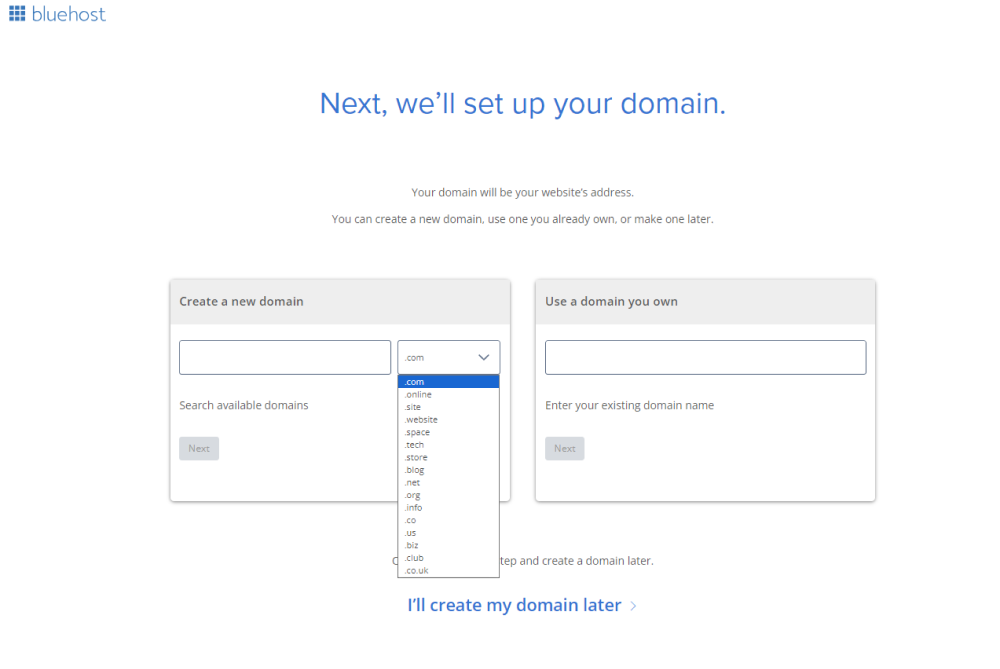
When done, click the Next button.
On the next screen, type in your account information and click the Submit button below., including Account, Package, and Payment Information.
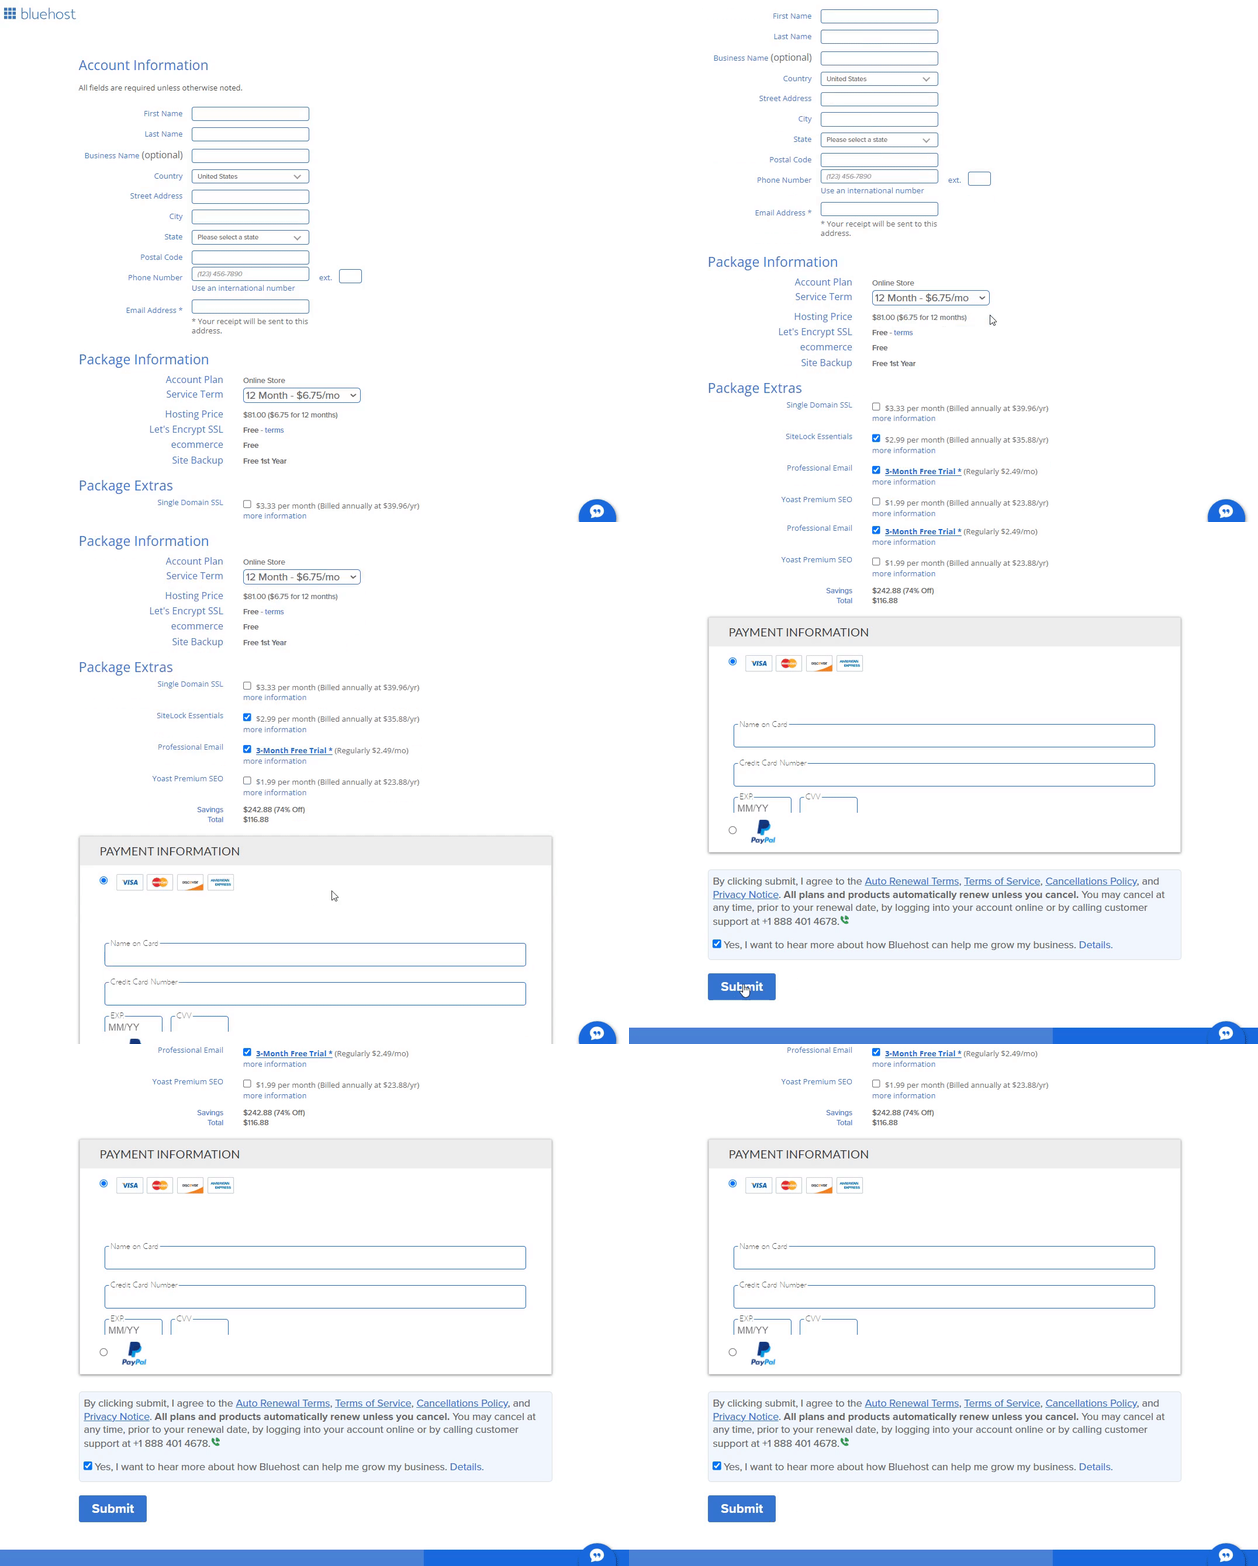
After submission, you’ll get an email (on your purchased email address). Here, you can see your login details for your web hosting control panel.
Step 2. Setting up WordPress WooCommerce
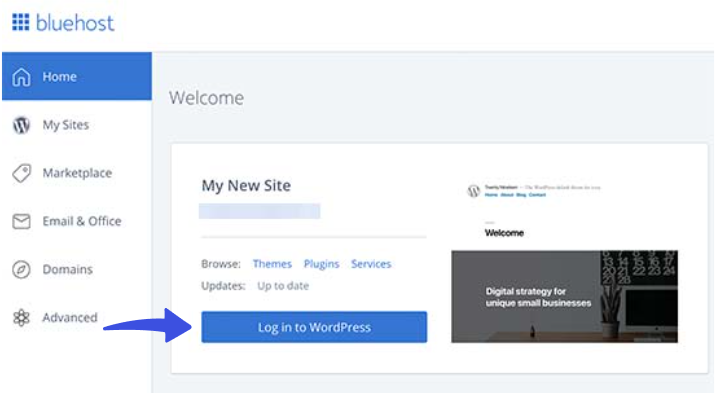
Next, you’re required to log in to your hosting account dashboard.
You’ll find WordPress installed automatically when signing up for your domain name via Bluehost. You only need to click the Log into WordPress button. It will take you directly to your WordPress admin dashboard.
Step 3. Install and activate the WooCommerce Plugin
Note: We assume you’ve already set up your whole site. For help, see our detailed guide on How To Build a WordPress Website.
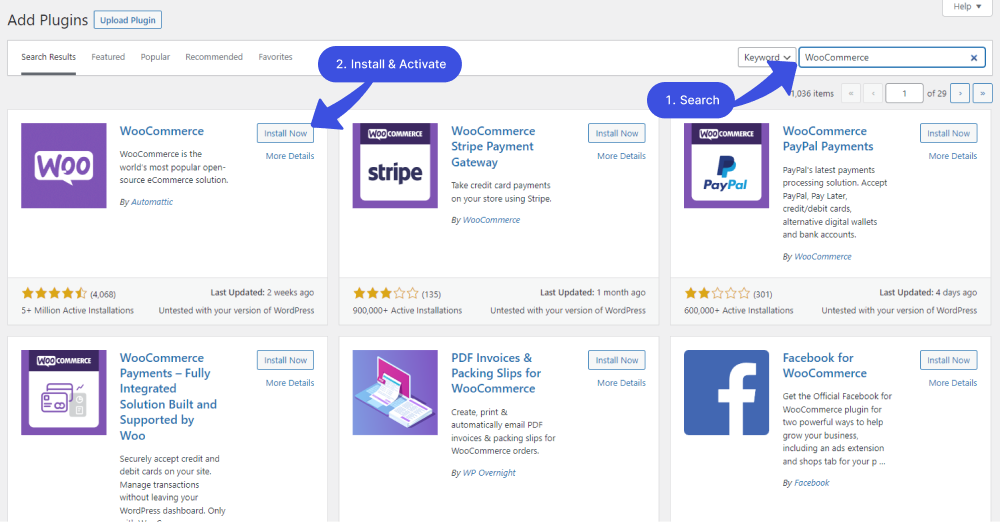
First off, go to the left sidebar of your WordPress admin dashboard. Navigate to Plugins and click the Add New option.

Next, you’ll be on the Add Plugins screen. Search WooCommerce in the search box.
Find the plugin from the list, click the Install Now, and then the Activate button in succession.
Step 4. Complete the Setup Wizard
Next, you’ll be prompted to walk through a setup wizard.
Note: This is optional, but it’s better to go through it to configure some key settings.
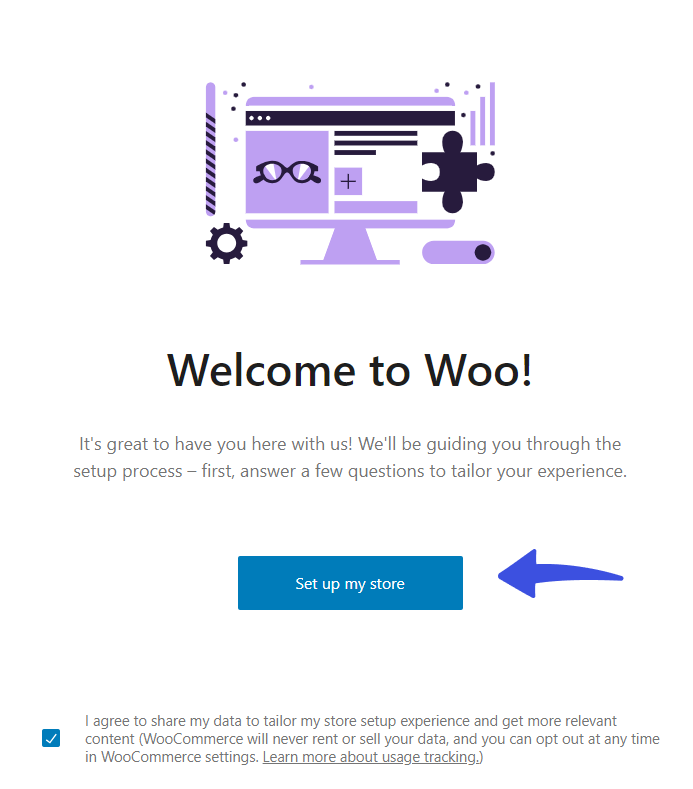
Next, you’re required to describe your business.
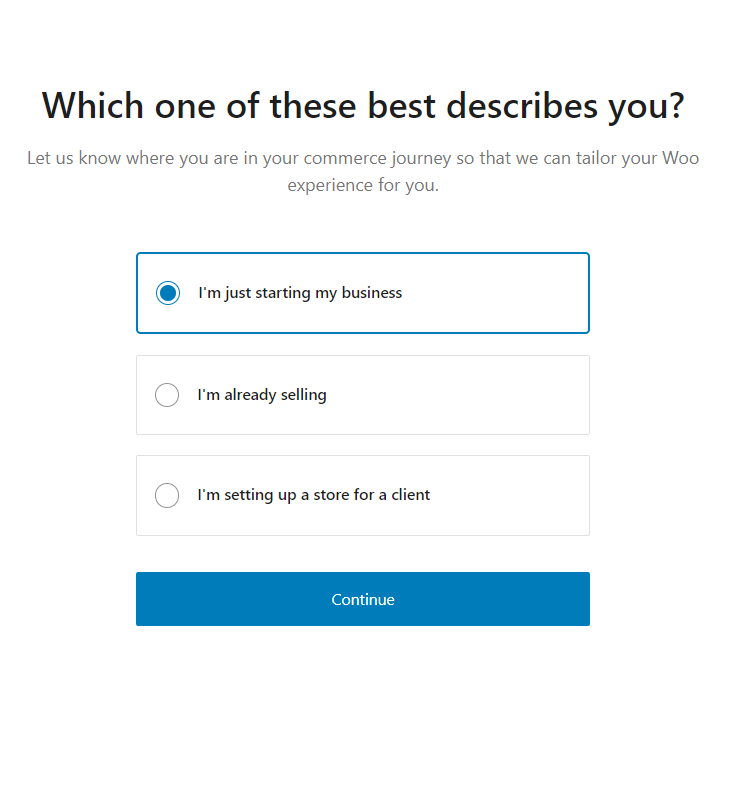
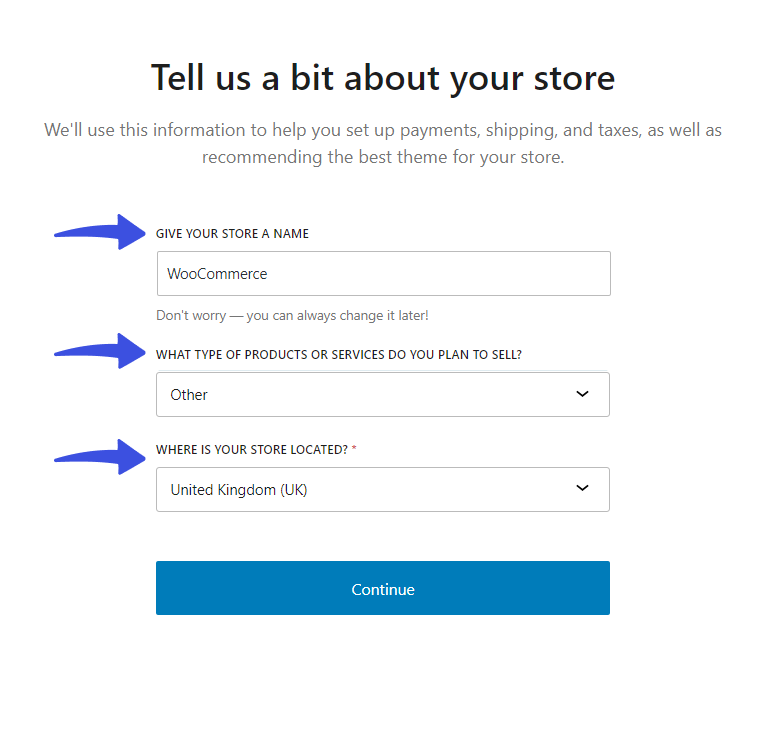
On the next screen, you’ll be asked to:
- Give your store a name.
- What type of services do you plan to sell?
- Where is your store located?
See the image below:
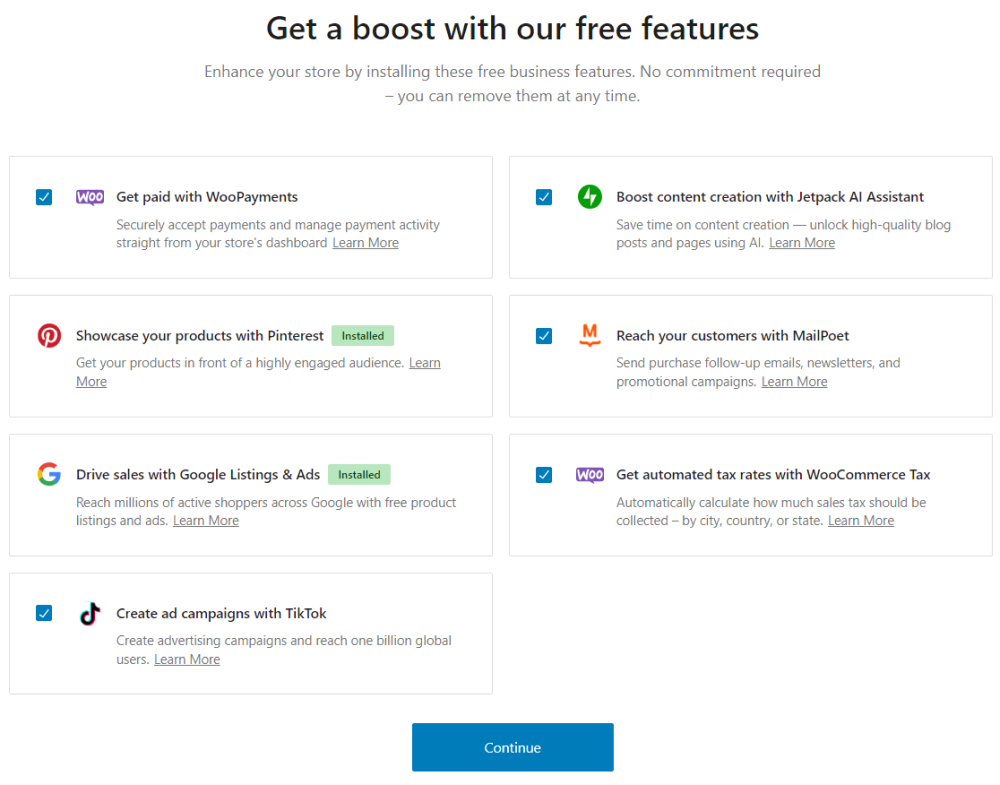
You are almost done! Simply select the payment method of your choice and click the Continue button.
Now, wait for the store to set up!
Step 5. Add Product
Now, you are ready to Add Product to your site.
All you need to do is go to the left sidebar of the WordPress admin dashboard, navigate to WooCommerce, and click the Home option.
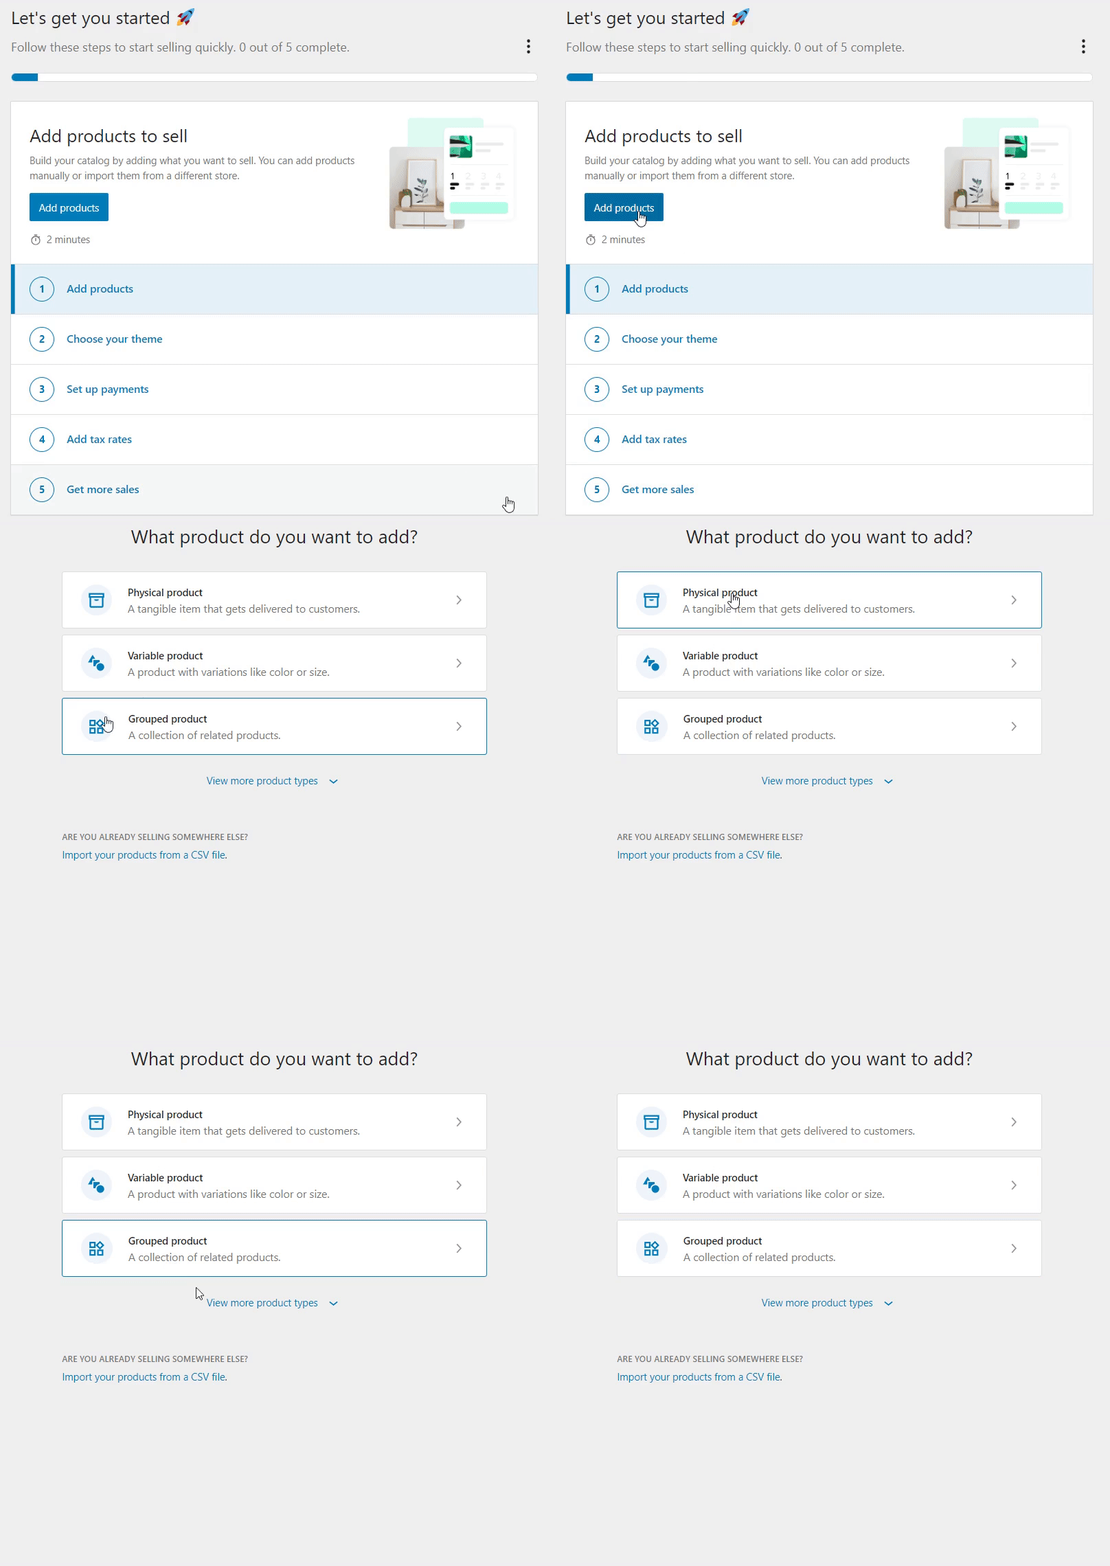
On the next screen, click the Add Products button and click on a Product type, i.e., Physical product, Variable product, and Grouped product.
Note: Here, we’ve selected the Physical products option.
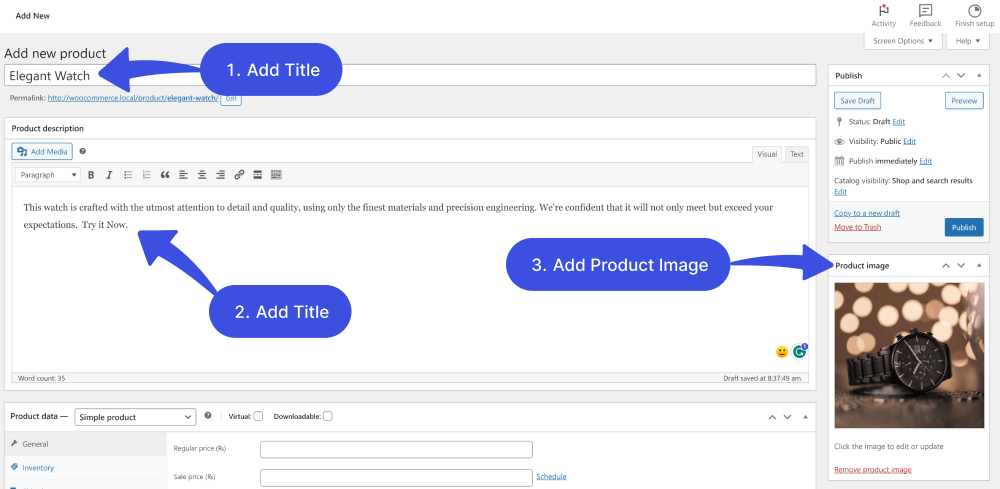
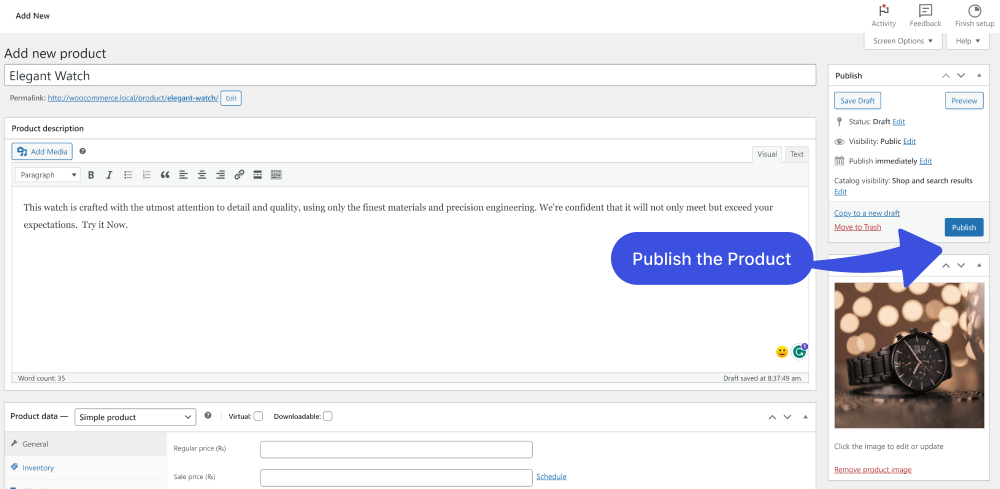
Now you’ll find yourself on the Add new screen. Here, you can find the options for your product’s title, description, and image.
Scroll down a bit and find the Product Data panel. It is where the most important data is added to your products.
You can select downloadable (digital) or virtual (service) here.
Note: Virtual products don’t require shipping. So, an order with virtual products won’t calculate shipping costs.

The Product Data panel lets you add much more information to your product. It has 7 sections, each for adding information to the product, including:
5.1. General Section

This section is used to add:
- Regular Price (of the product): It lets you add the standard price for the product.
- Sale Price (of the product): Here, you can add discounted prices that can be scheduled for a specific date.
5.2. Inventory Section
This section lets you manage stock for the product. You can manage stock level (quantity).
You can add your product as “In stock” or “Out of stock,” etc. Moreover, you can fully control purchases, i.e., limit purchases to 1 item per order.
5.3. Shipping Section

This section is used for adding weight, dimension, and shipping class to your product.
- Weight: Add the weight of your product.
- Dimensions: Here, you can add dimensions, including length, width, and height, for the product.
- Shipping Class: You can add shipping classes as well.
5.4. Linked Products Section

This section is used for upselling and cross-selling the products.
- Upsell: Here, you can add the products that you want users to upgrade based on the product they are currently viewing.
- Cross-sell: You can use this section to add products you want to display with the cart.
5.5. Attributes Section

This section is used to add descriptive pieces of information that customers can use to search for a product in your store, such as “Material” or “Brand”.
5.6. Advanced Section

The Advanced section is there to help you with advanced options for your product, including Purchase notes, Menu orders, and Enable reviews.
- Purchase note: From here, you can add a purchase note for the product.
- Menu order: The menu order option lets you add a custom ordering position for a product.
- Enable reviews: You can enable/disable reviews with the checkbox.
5.7. Get more options
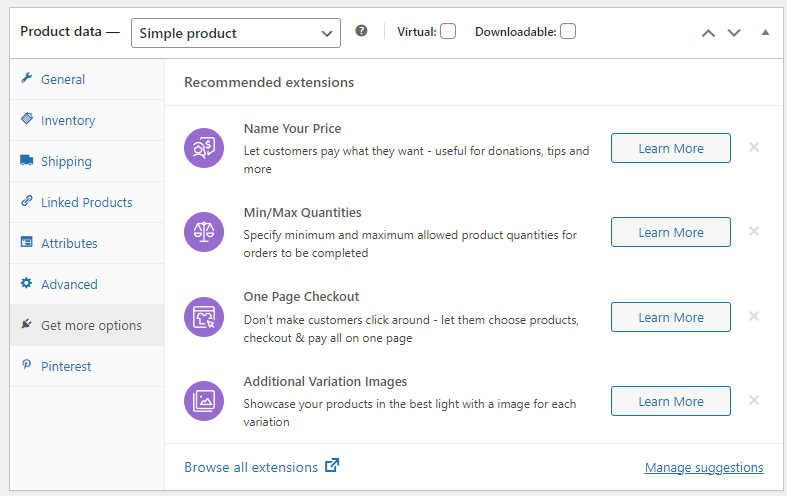
This section is here to help you get the recommended extensions.
When you’re done, Publish your product.
Step 6. Select Theme
Next, you’re required to set a Theme for your WooCommerce store.
For this purpose, go to the left sidebar of the WordPress admin dashboard > WooCommerce > Home.
Now, select the Choose your theme option.
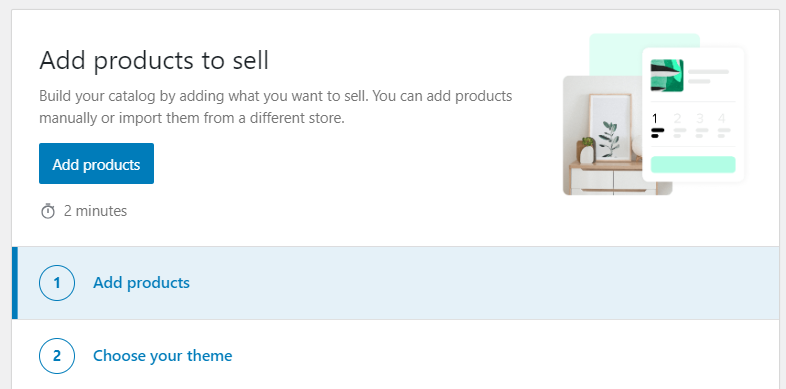
Add Themes screen will open up. From here, you can choose any theme of your choice.
Note: Here, we’ve selected the theme “Astra.”

Step 7. Set Up Payment
Now, it’s time to set up payment methods for your site.
For this purpose, go to the left sidebar of the WordPress admin dashboard > WooCommerce > Home.
Now, click on the Set up payments option.
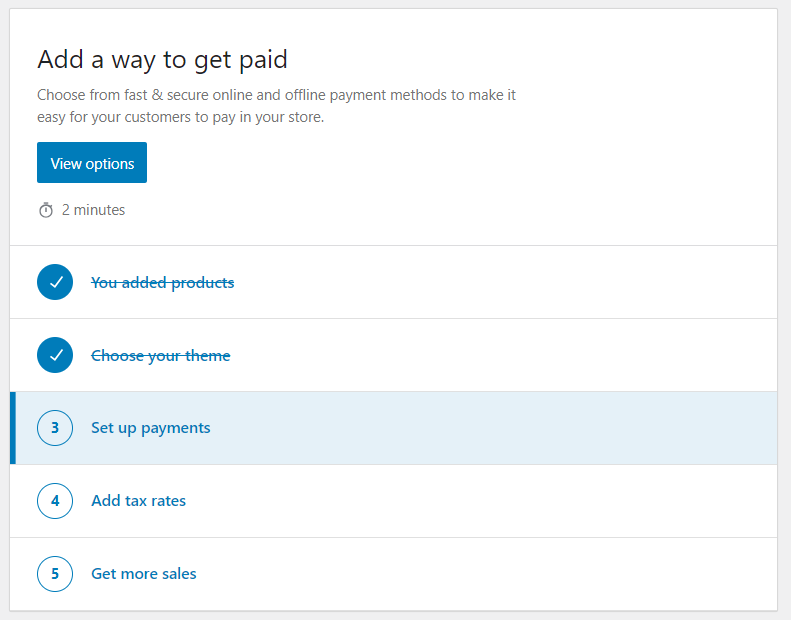
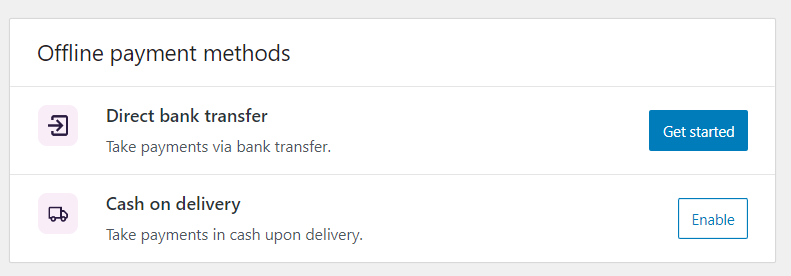
Now you can see 2 options:
- Direct bank transfer: It lets you receive payments via bank transfer.
- Cash on delivery: This option will let you take payments in cash upon delivery.
Step 8. Add Your Tax Rates
Now, it’s time to set up tax rates for your site.
For this purpose, go to the left sidebar of the WordPress admin dashboard > WooCommerce > Home.
Now, click on the Add tax rates option.
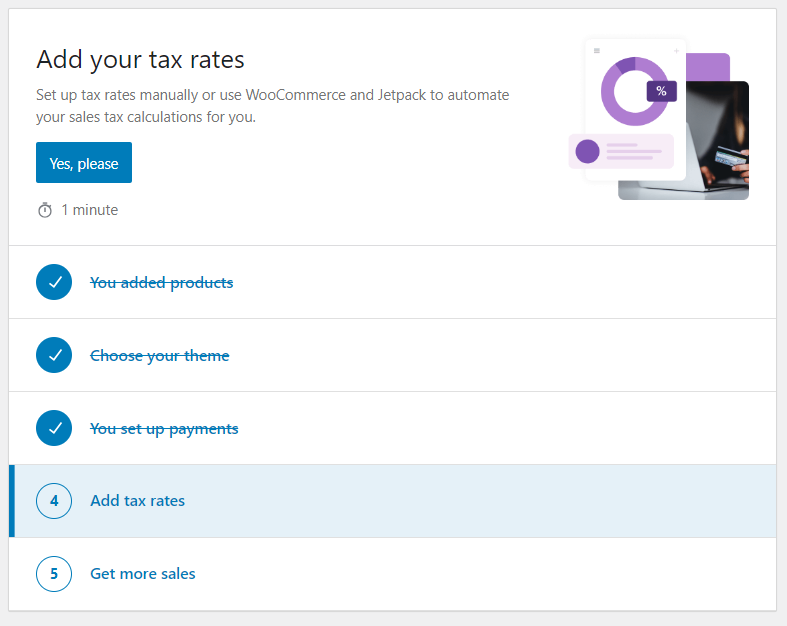
A new screen will open up where you’ve to Set the store location and Configure tax rates.
See the image below:
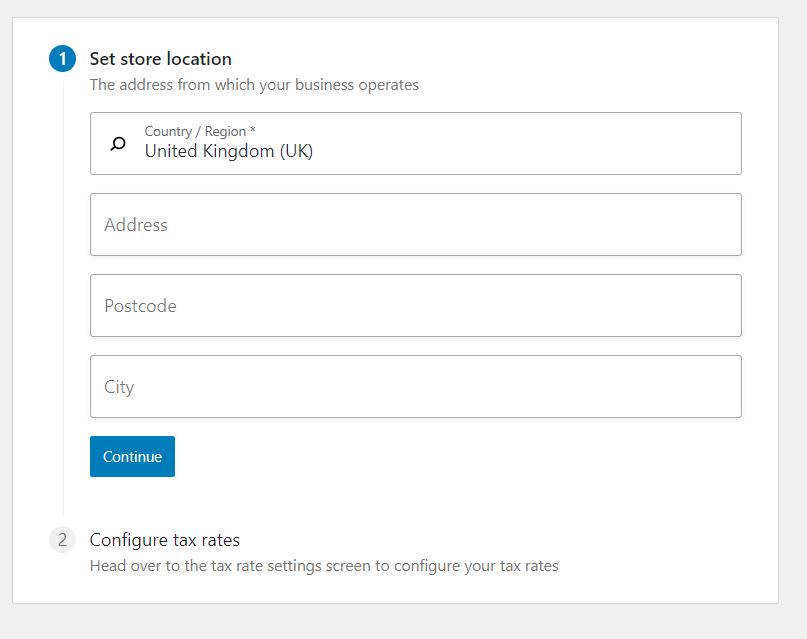
When you type in all the required information, click the Continue button. A new screen will open where you can configure the tax rates.
See the example below:

Step 9. Install Marketing Extensions
You are almost done!
Add marketing tools for your store. Go to the left sidebar of the WordPress admin dashboard > WooCommerce > Home for this.
Now, click on the Get more sales option.
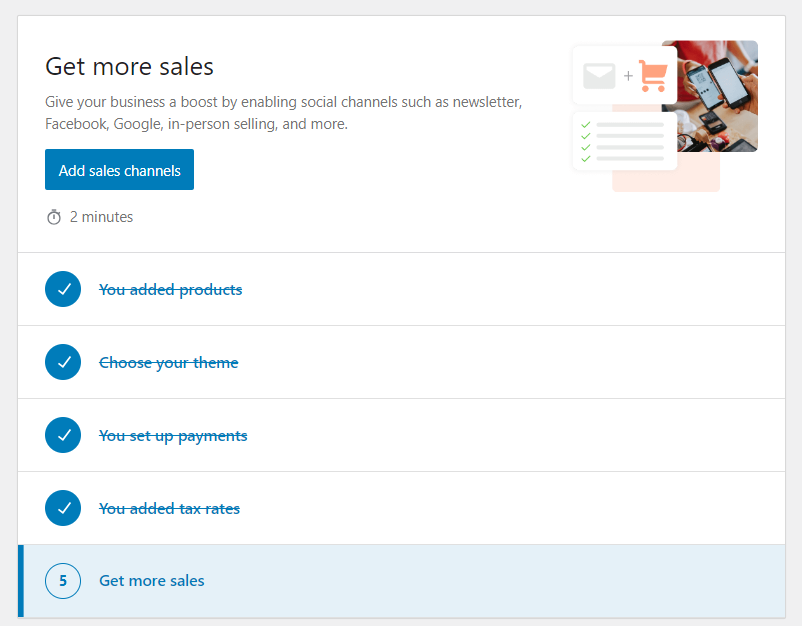
On the next screen, you’ll find all the extensions to help you grow your sales.
See the image below:
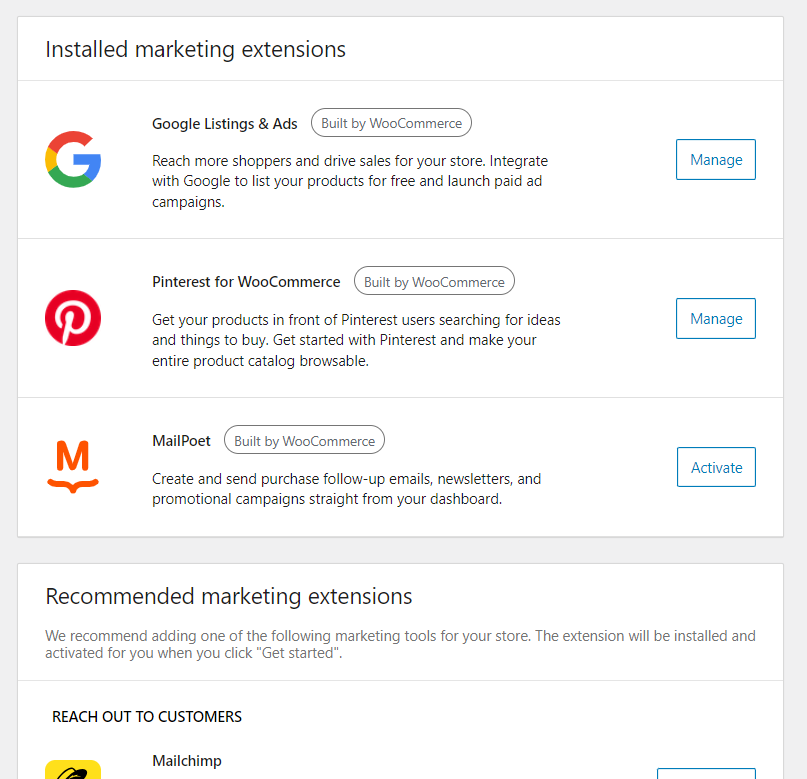
All set! You are ready to use your WordPress WooCommerce store!
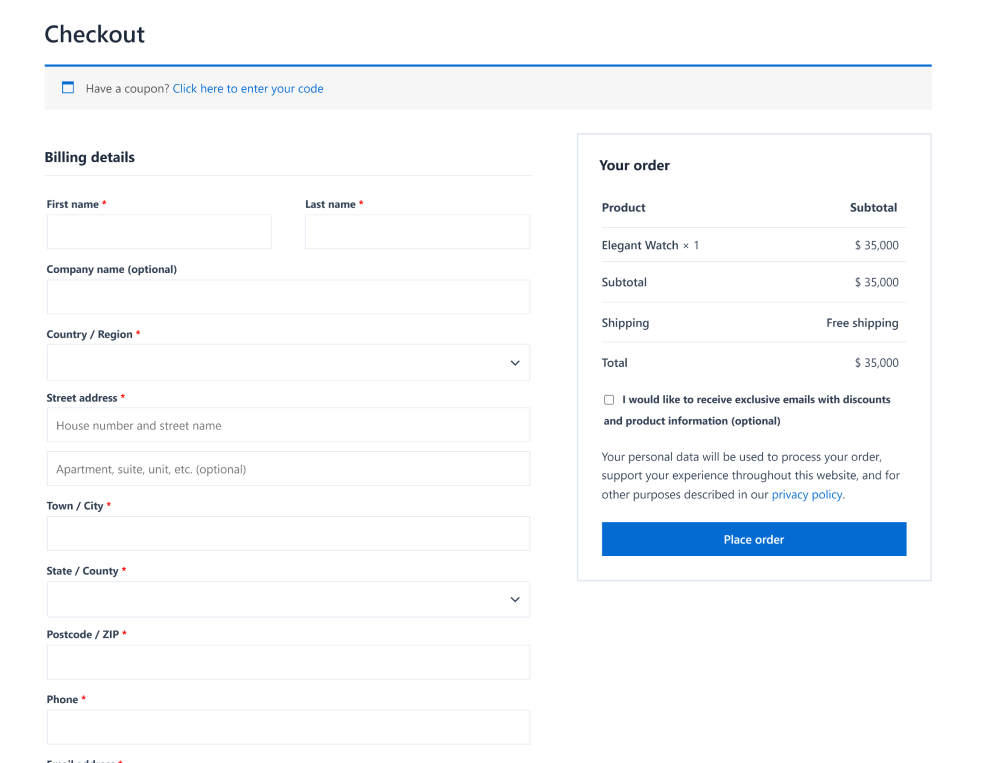
Step 10. Test WooCommerce Store Checkout
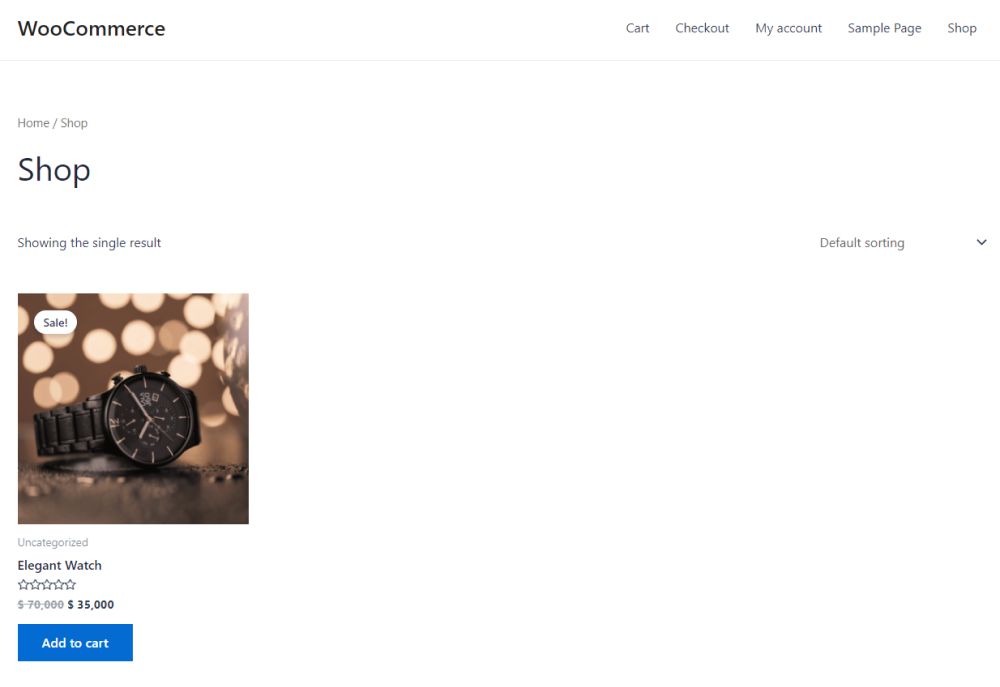
Your product is ready to be used.
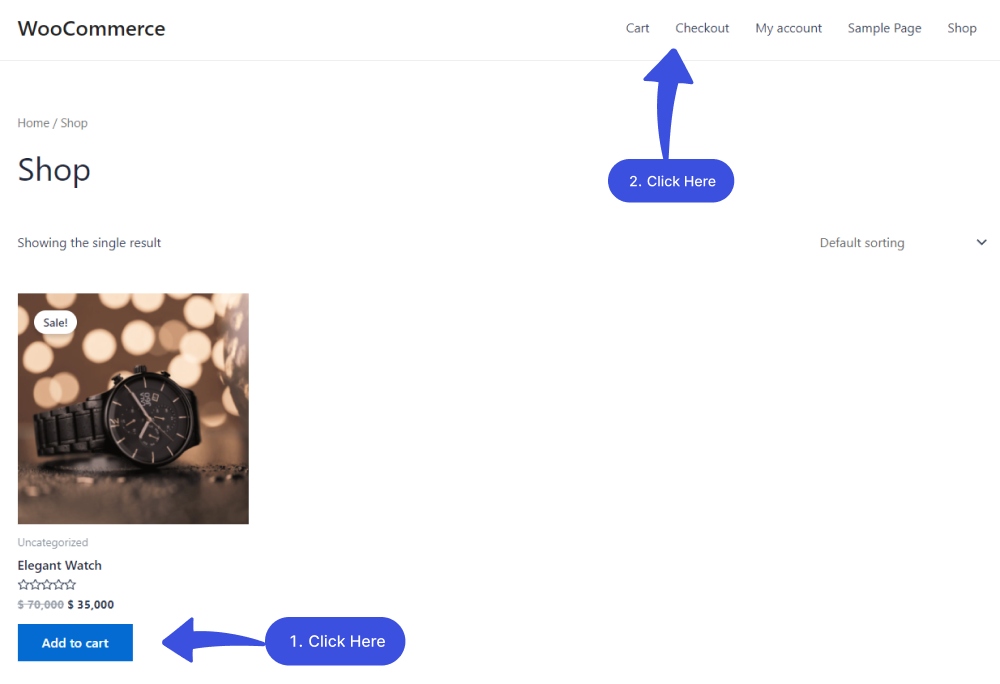
Suppose the user wants to buy your product; they must click the Add to Cart button first, then click the Checkout.
On the next screen, they can see the details of their purchase.
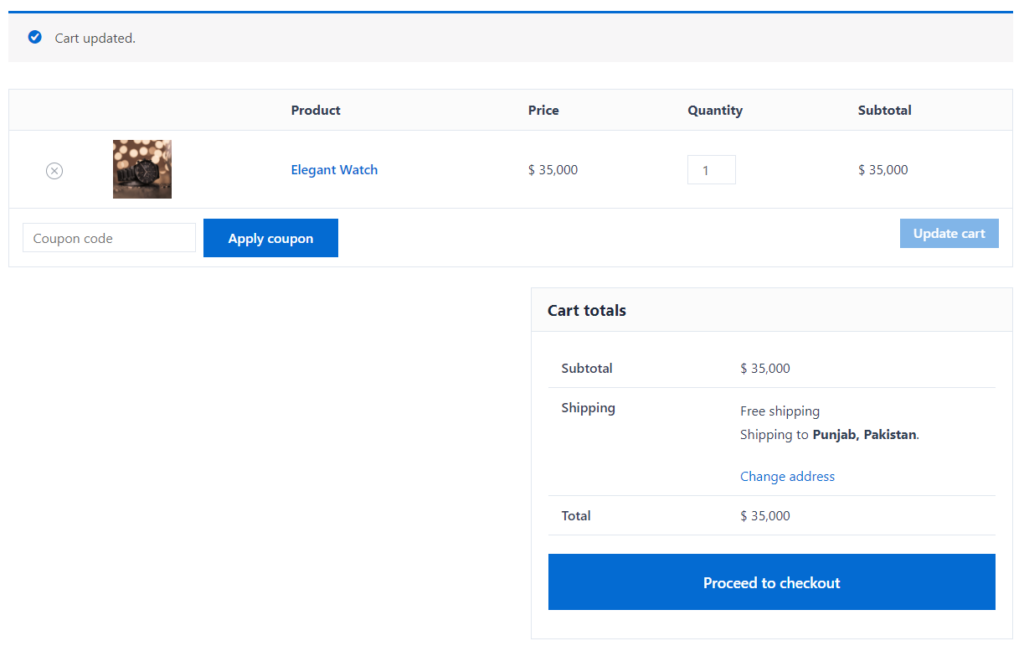
Now, go to the Checkout tab to test buying the product.
All done!
WordPress WooCommerce FAQs
Do I need to have experience with WordPress WooCommerce?
Having some essential experience with WordPress is helpful, but it’s not required. WooCommerce is designed to be user-friendly, so even beginners can easily set up their stores.
How much does it cost to set up a WordPress WooCommerce store?
The cost of setting up a WooCommerce store can vary depending on several factors, including the web hosting provider you choose, any premium WooCommerce extensions or themes you purchase, and the payment gateway fees you’ll incur. However, the good news is that WooCommerce is a free, open-source plugin that can be downloaded and installed on your WordPress website at no cost.
How do I add products to my WordPress WooCommerce store?
To set up payment options, log in to your account. Go to the left sidebar of the admin dashboard, navigate to Product, and click the Add New option. From here, you can add products to your WooCommerce site.
How do I manage taxes for my WordPress WooCommerce store?
You can easily manage taxes for your WooCommerce store. All you need to do is to go to the left sidebar of the WordPress admin dashboard > navigate to WooCommerce > Settings > General Tab > and select the Enable tax rates and calculations checkbox. Now, you can configure tax options based on your location and products.
How can I set up payment methods in WordPress WooCommerce?
To set up payment methods in WooCommerce, go to the left sidebar of the WordPress admin dashboard > WooCommerce Settings > Payments tab. Here, you can choose your preferred payment method on the payment screen, i.e., PayPal, Stripe, etc. When selected, configure the payment method by adding the required details.
How do I test my WordPress WooCommerce store before launching it?
To test your store, place a few test orders, check that payments are processing correctly, and ensure that your shipping options are working as expected.
Is WooCommerce SEO-friendly?
Yes, WooCommerce is SEO-friendly. You can optimize your store for search engines, i.e., Google, simply by using SEO plugins, writing compelling product descriptions, optimizing images, etc.
Conclusion
We hope you can set up a WordPress WooCommerce store on your site. It might seem daunting, but following the step-by-step instructions lets your store be up and running quickly.
With WooCommerce, you have a robust platform to help you grow your business and reach customers worldwide. So, get started today and enjoy the benefits of running your online store!
Thank you for reading this article. Don’t forget to share this article with others who might find this helpful, too.
You may also want to check out our other valuable How-to articles:
- How to White Label WordPress Login Page Using LoginPress
- How to Customize A WordPress Multilingual Login Page
- How to Use LoginPress with WordPress Multisite
- How to Set up Custom WordPress Login Credentials
- How to Fix reCAPTCHA Not Working in WordPress
Have we helped you successfully create a WordPress WooCommerce store? Are there any issues you’re still facing?
Let us know by leaving a comment below:
