How to Add CAPTCHA to WordPress Login and Registration Form
Do you want to add CAPTCHA to WordPress site’s registration and login forms?
WordPress user registration and login pages are frequently great targets for hackers, spammers, and brute force assaults. The best strategy to defend your website against bots and other malicious software is to use CAPTCHA.
This article will show you how to add CAPTCHA to your WordPress site’s login and registration form.
Table of Contents
What is Captcha?
A CAPTCHA is computer software that differentiates between human and automated users. It does that by imparting a check that would be pretty easy for a human person to pass, but more complicated and almost impossible for automatic scripts to get right.
Initially, CAPTCHA users were asked to enter the text they saw in the images. These images had random letters, words, or numbers with a distorted style.

So, developers tried something that would have convenient for the users. Finally, they introduced reCAPTCHA.
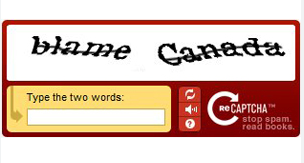
The Google reCAPTCHA was introduced in 2009 to replace CAPTCHA.
However, it needed to fix the problem as these were still annoying for the users and almost ruined the website’s user experience (UX).
As a solution, Google introduced No CAPTCHA reCAPTCHA. It used AI and user interactions to catch spambots.

reCAPTCHA has an easy checkbox for human users to click with I’m not a robot text on the login/registration form.
Sometimes, you might experience more complex objects to be identified for other suspicious traffic, i.e., bots, such as identifying Traffic Lights, Houses, Cats, and more.
Why Use reCAPTCHA for WordPress Login and Registration?
WordPress login/registration pages often fall victim to spammers, brute force attacks, and more.
The attacker’s main motive behind the attack is to get unauthorized access to your WordPress admin area. Sometimes, the attackers crash the entire network of websites. They do so just to get a ransom.
There are many ways to help you protect your website against this scenario, like using a WordPress firewall plugin, adding password protection, and more.
Google offers reCAPTCHA, a CAPTCHA-like system, to help you protect your website from spam or abuse. It is like a shield to your website that protects you against “bots” and other “malicious software.”
Default WordPress Login and Registration Forms
By default, WordPress Login Form has the standard WordPress features. (As shown in the image below)

The default WordPress registration form allows the users to create an account on your site.
Many website owners want to customize the default WordPress login/registration pages. They not only customize the default WordPress login/registration page with their logo, styles, etc. but want to do something for security. Mostly, they use different plugins to meet their need to swipe the default WordPress login/registration pages.
We’ll show you how to use reCAPTCHA on the custom WordPress login/registration page.
Add CAPTCHA to WordPress Login and Registration Forms with LoginPress (In 5 Steps)
Let’s take a look at 5 easy steps to quickly add CAPTCHA to WordPress site using one of the best WordPress plugins, LoginPress.
Step 1: Install and Activate LoginPress
The first thing you’ll need to do is install and activate the LoginPress plugin. For more details, see this step-by-step guide on how to install a plugin in WordPress.
LoginPress free is enough for most of you to swap the dull look and feel of the default login page. But if you want to work on the login form regarding security, you’ll need LoginPress Pro.
Note: LoginPress reCAPTCHA is a premium feature.
Step 2: Go to the WordPress Admin Dashboard
Note: Here, we’ve assumed that you have already upgraded to LoginPress Pro and have activated the License Key.
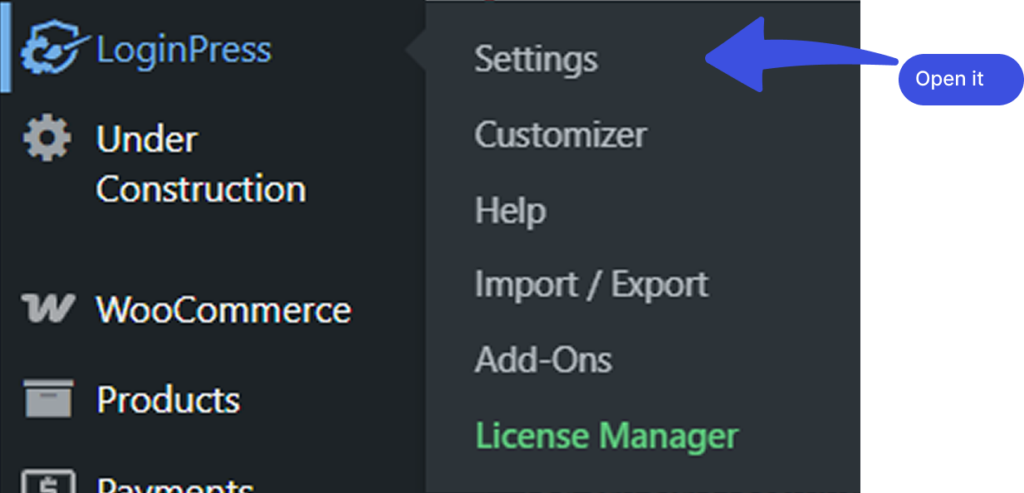
First, you’ll need to log in to your WordPress site. Go to the WordPress admin dashboard and navigate to LoginPress >> Settings.
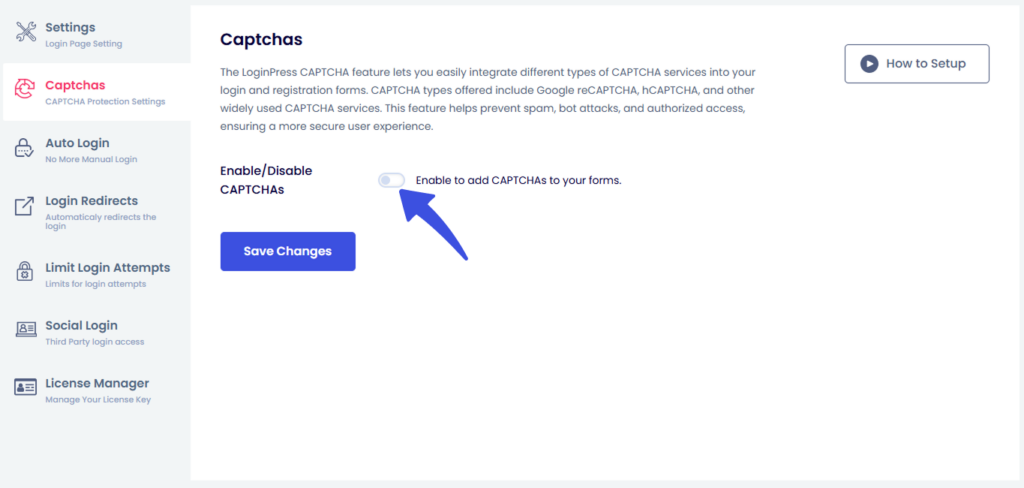
Next, a new screen with Settings will open. Under the Settings tab, you’ll find the Captchas tab. Toggling on Enable / Disable CAPTCHAs will enable CAPTCHAs.
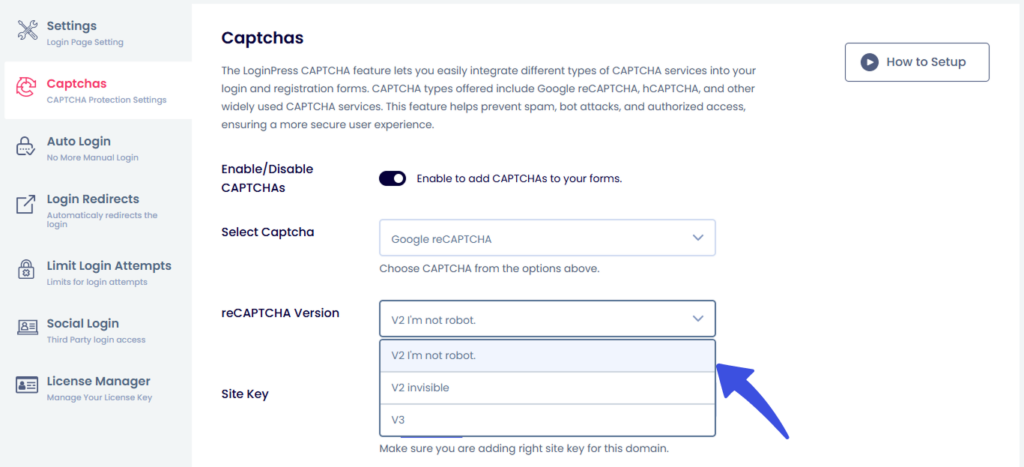
Once CAPTCHAs are enabled, several additional fields will appear, including the Select Captcha option. From there, you can choose the Google reCAPTCHA option.

Once you select the Google reCAPTCHA option, you will see several other fields, which include:
- reCAPTCHA Version
- Site Key
- Secret Key
- Theme Selection
- Language Selection
- Enable reCAPTCHA On (to choose where you want it active)
From here, you can choose the desired Google reCAPTCHA version and configure the required settings using the API keys provided by Google.
Step 3: Register Your Site to Get reCAPTCHA API Keys
You need to visit the Google reCAPTCHA website to obtain these API keys.
You’ll need to enter your website name in the Label field and then select a reCAPTCHA type. In our case, we’ve chosen the reCAPTCHA v2 I’m not a robot checkbox.
Note: Make sure to choose the same type of reCAPTCHA as you selected in LoginPress Settings.
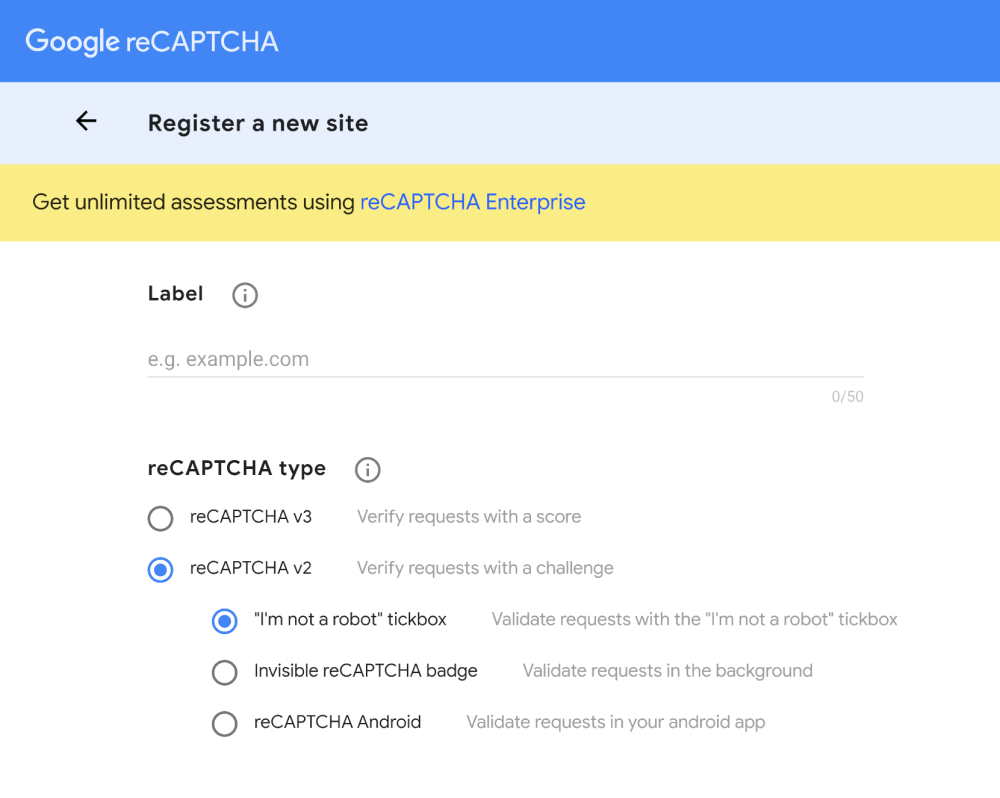
Next, you need to enter your domain name, e.g, yoursite.com

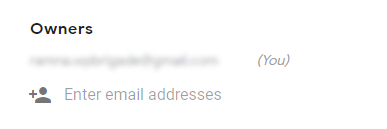
The Owners section displays your email address and allows you to add a new owner.
After that, you need to check the box next to “Accept the reCAPTCHA Terms of Service” and the ‘Send alerts to owners’ box to get email alerts about suspicious traffic on your site.
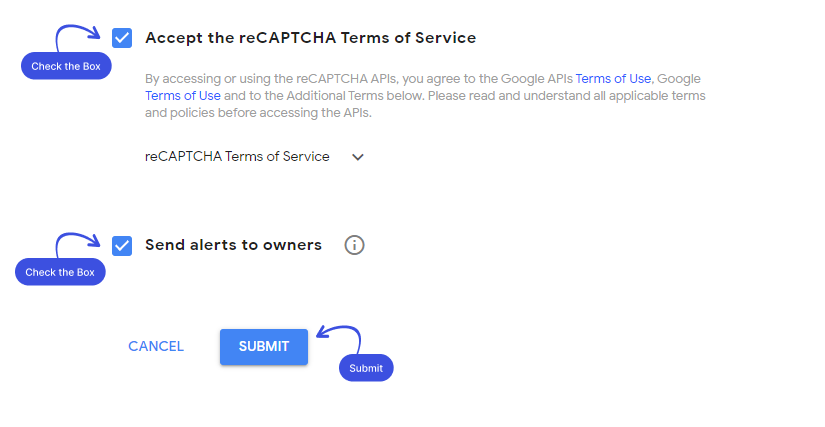
Once done, click on the Submit button.
Step 4: Adding reCAPTCHA to WordPress with LoginPress
Next, a new screen with the Site Key & Secret Key will open up.
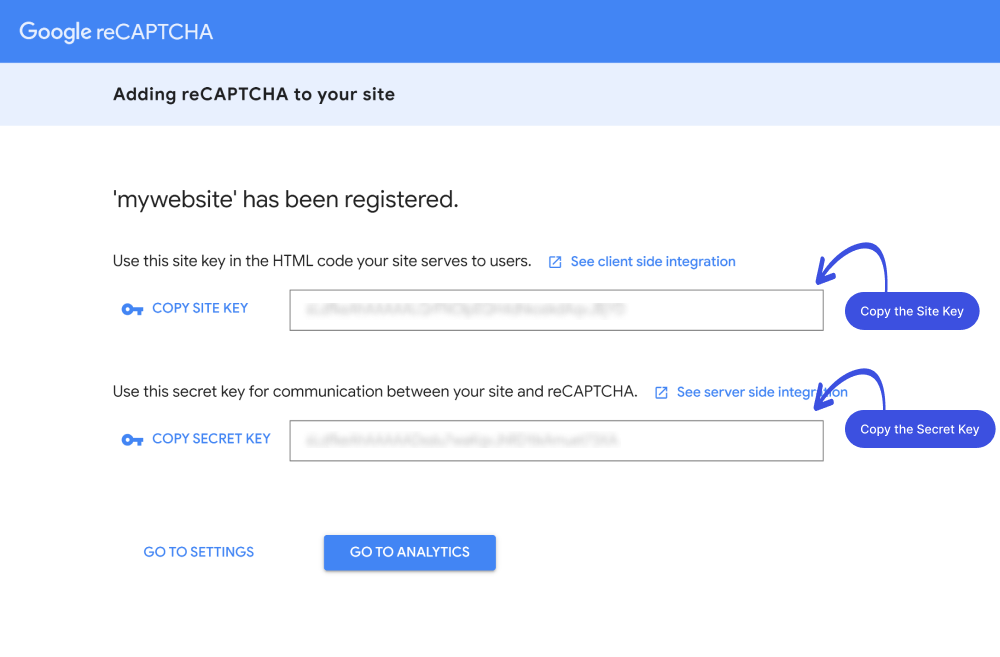
Once you’ve generated your Site Key and Secret Key from the Google reCAPTCHA website, copy both keys and paste them into the corresponding fields under the LoginPress > Captchas Settings section.
After entering the keys, the Validation Section will automatically appear below the Site Key and Secret Key fields, allowing you to check and confirm the integration.
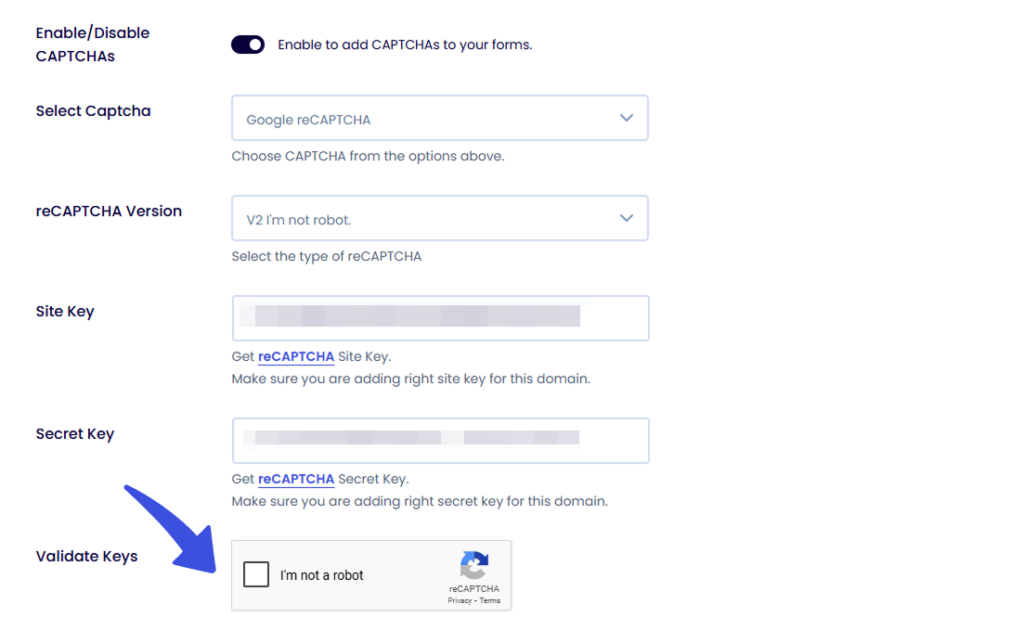
Now, check the Validation Section checkbox to verify the keys. Once validated successfully, click Save Settings. A green checkmark will appear next to the keys, indicating that the integration is now active.
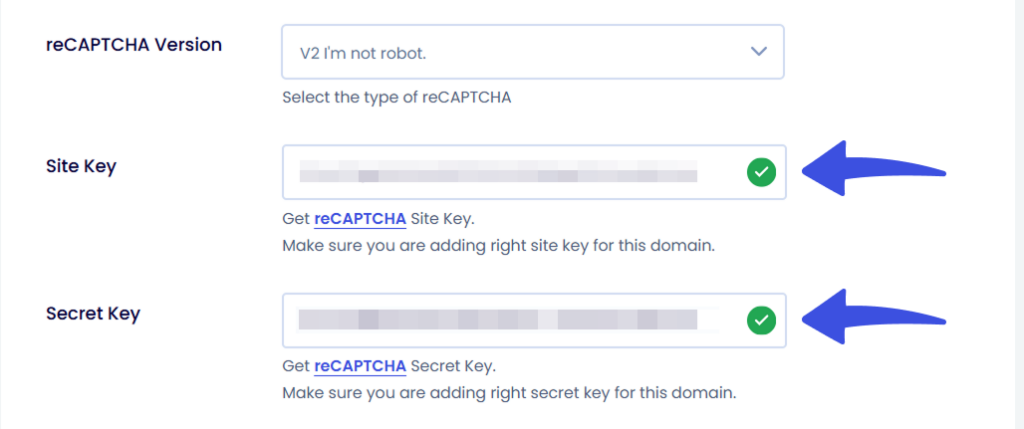
- For reCAPTCHA v2 Checkbox, the Validation Section will appear after entering the keys — users should manually check this box to validate the keys.
- For reCAPTCHA v2 Invisible, the Validation Section will be auto-validated — no manual action is required.
- For reCAPTCHA v3, the Validation Section will not appear, as validation is handled in the background.
Note: You can choose between a Light or Dark theme if you select the reCAPTCHA V2 checkbox.
After selecting the reCAPTCHA v2 checkbox or v3, you can choose where to enable it on your site.
Note: If you select reCAPTCHA v2 Invisible, it can be enabled only on the Login, Registration, and Lost Password forms.
Click the Save button once the changes have been made.
Step 5: Adding a reCAPTCHA to Your Login Page
You’ve successfully added reCAPTCHA to your WordPress site. Now your site is protected against bots and automated scripts. It won’t let the user log in to your site unless they pass through a simple test that proves whether they are human or a bot.
With LoginPress, you can enjoy a well-maintained, secure, and protected WordPress site.
This is what your login page would look like with Google reCAPTCHA:
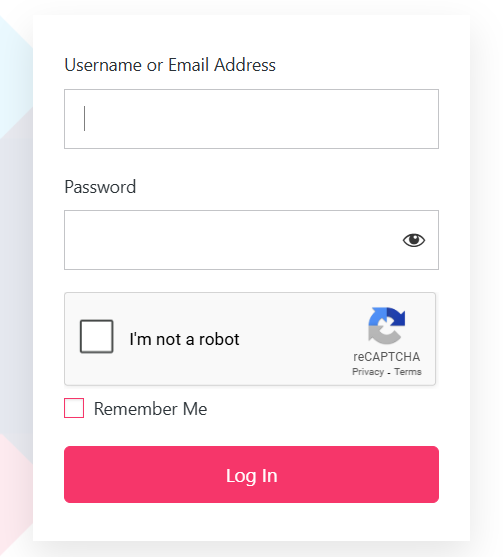
That’s all. We hope you understand how to integrate reCAPTCHA into the WordPress login/register page using LoginPress.
Final Thoughts
This article helped you understand how to successfully add CAPTCHA to WordPress site. You can easily make your site protected against bots and automated scripts. It won’t let the user log in to your site unless they pass through a simple test that proves whether they are human or a bot.
Enjoy a well-maintained, secured, and protected WordPress site.
That’s all. We hope you understand how to integrate reCAPTCHA into the WordPress login/register page using LoginPress.
You may also want to check out How To Redirect Woocommerce Users after login and How To Customize WordPress Login Page.
Frequently Asked Questions
Is Google reCAPTCHA free?
Yes! Google reCAPTCHA is a free service. It protects your website from spam and abuse.
How is CAPTCHA different from reCAPTCHA?
CAPTCHA users were asked to enter the text to see the photos. They had random letters, words, or numbers with a distorted style. Google introduced reCAPTCHA later. It has an easy checkbox for human users to click with I’m not a robot text on the login/registration form.


