How to Use LoginPress with WordPress Multisite in 2025
Are you looking for a simple way to customize the login page of your WordPress multisite network? If yes, you’ve landed on the right page!
A WordPress Multisite network consists of subsites. You may want to customize the default login page for each site. Managing login pages for each subsite can be a challenge.
This is where LoginPress comes in, offering a powerful solution to customize and enhance the login experience across your network, giving them their distinctive look and feel.
In this article, we’ll show you how to use LoginPress to customize the login pages of your entire WordPress multisite network.
WordPress Multisite (TOC):
What is WordPress Multisite?
WordPress Multisite network lets you create and manage multiple WordPress sites from one installation. Each site in the network can have its unique domain or subdomain, and you can manage them all from a single dashboard.
WordPress Multisite is an excellent tool for managing multiple sites, such as blogs or online stores, from a single location, making it an efficient and convenient way to manage your online presence.
The admins can install plugins on the network and share them with subsites. The good thing is that the site admin doesn’t have access to the WordPress Plugins screen, but at the same time, they can configure plugin settings for their subsites.
A multisite network consists of a Network Admin and a Site Admin. It’s essential to know the difference first of all.
1. Network Admin:
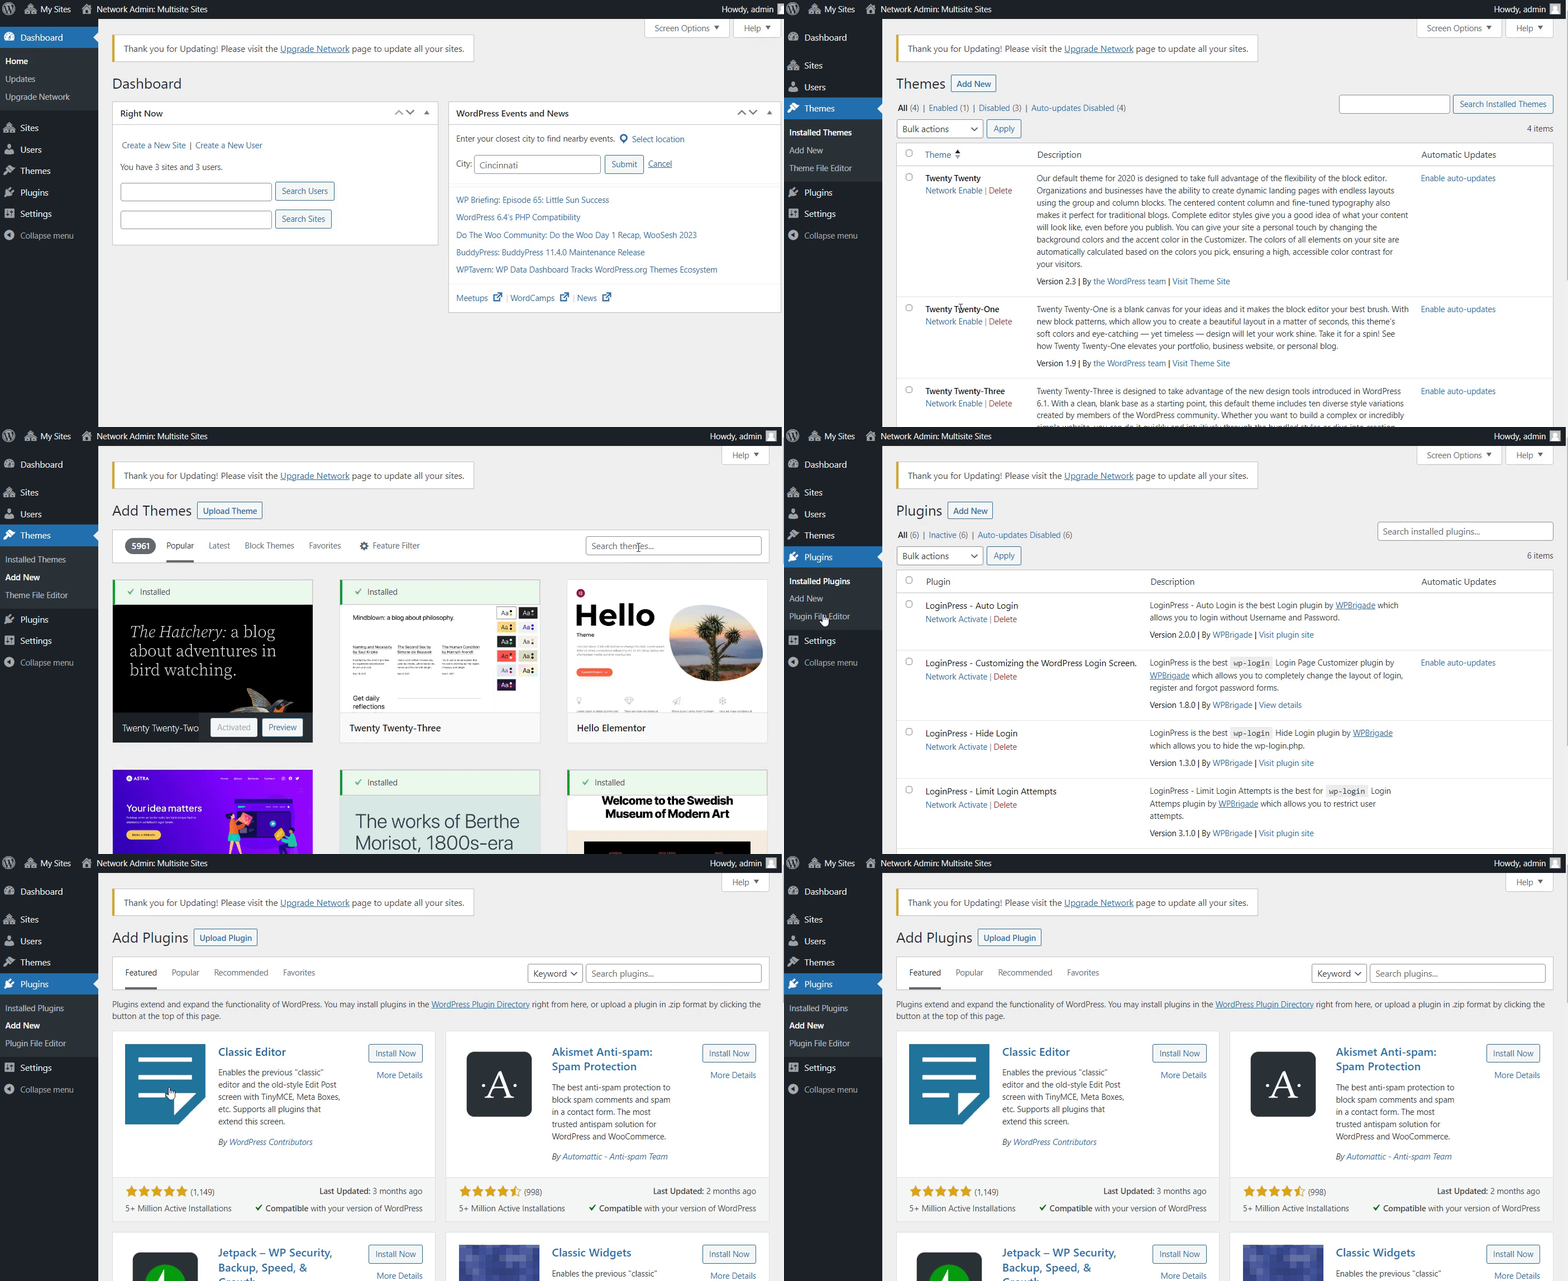
The Network Admins have full access to the Network Admin settings. Plus, they can get access to the dashboard of every website within the whole Multisite Network.
They can fully control users to create new accounts or websites. In addition, the Network Admins can install plugins and themes, and they manage uploads for all sites on the network.
See the GIF below:
2. Site Admin:
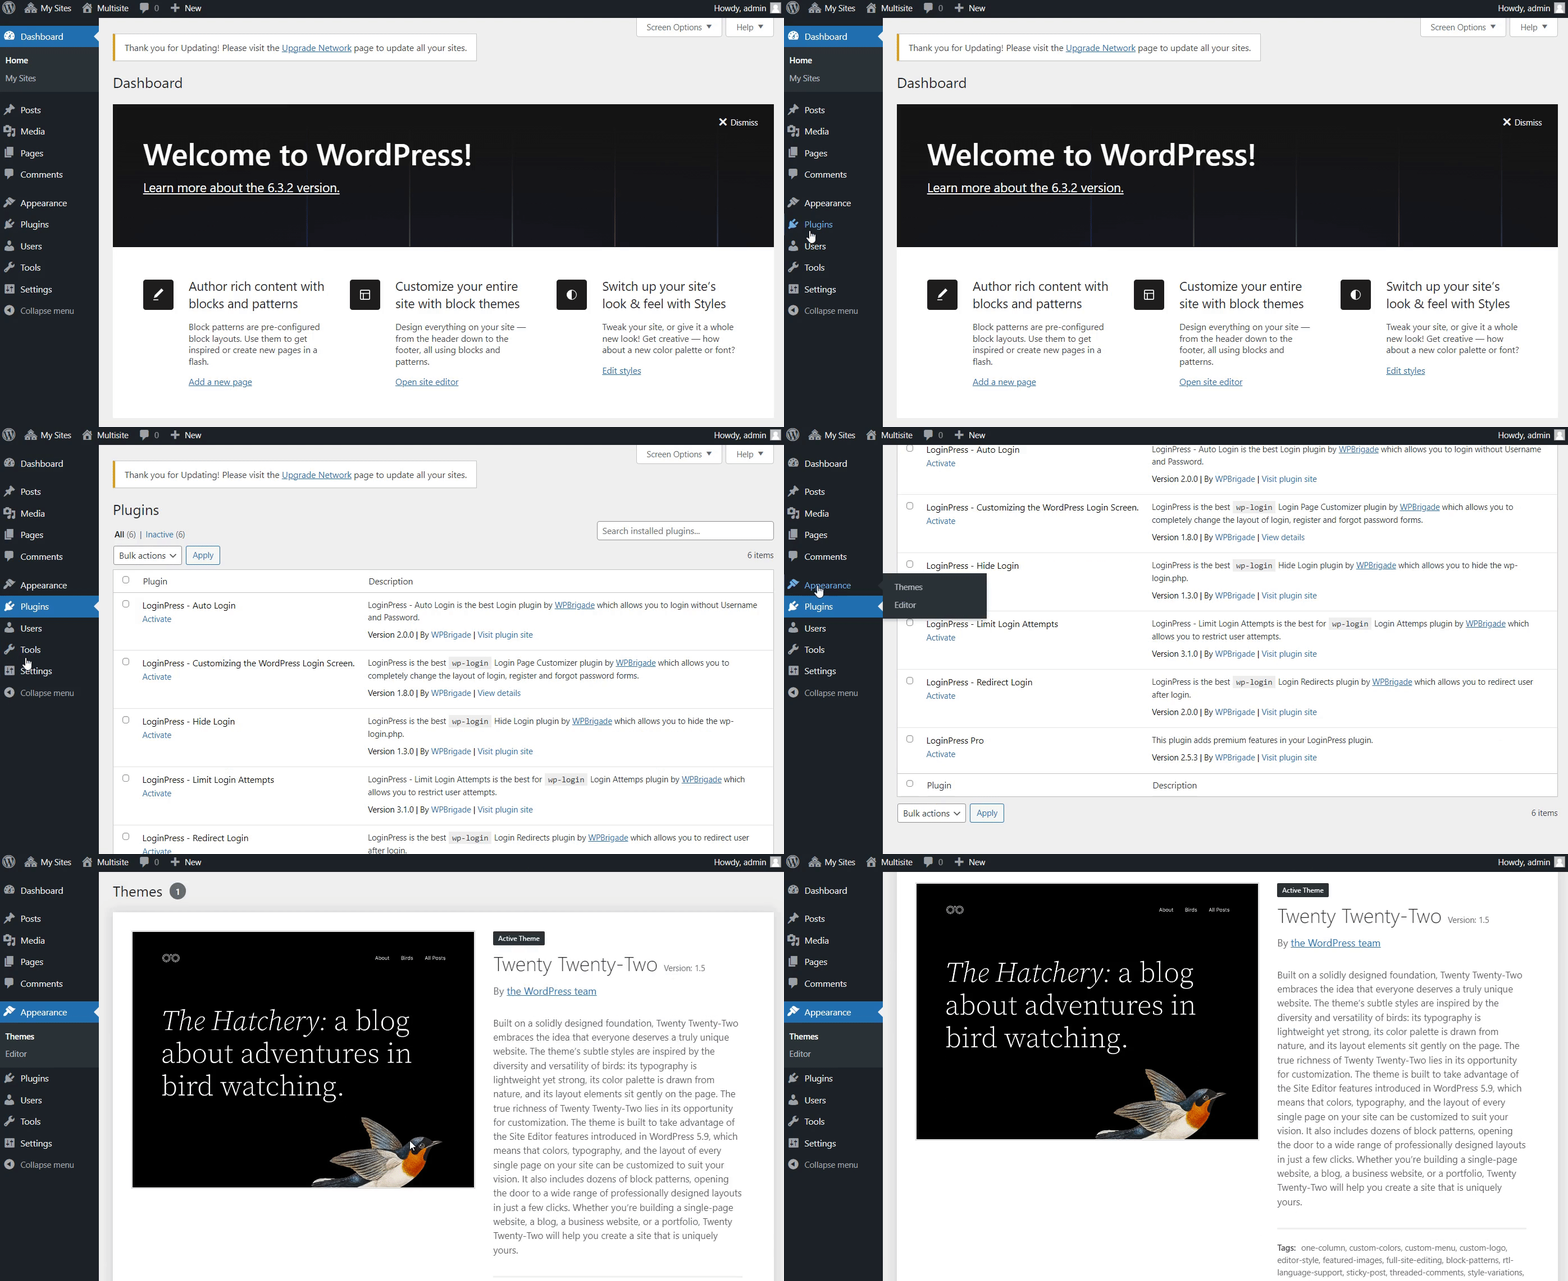
A site admin only has administrative access to subsites within the multisite network. However, the network admin can grant access to more than one subsite.
A site owner cannot perform the following things:
- Add or Delete a Plugin
- Add or Delete a Theme.
They can only activate or deactivate a plugin.
What is LoginPress?
LoginPress is one of the WordPress login page customizer plugins. The plugin is best to customize the login page of your entire multisite network. The best part is that you’re not required to write any code or hire an expert.
Note: We’re pleased to announce that LoginPress is fully compatible with WordPress’s multisite network. See our guide on Compatibility Between LoginPress and Multisites.
LoginPress free offers many features for customizing your WordPress login page. However, you can upgrade to the LoginPress premium version to get more advanced features such as social login, limited login attempts, reCAPTCHA, and many other customization options.
What Are the Advantages of WordPress Multisite?
WordPress Multisite offers a better way to manage multiple WordPress sites. There are several advantages of using WordPress Multisite, including:
- Time and Cost Savings: WordPress Multisite uses a single installation to manage multiple sites. It’s the best way to save time and reduce the costs of managing multiple WordPress installations.
- Centralized Management: With WordPress Multisite, you can manage all your sites from a single dashboard. It makes it easy to update themes, plugins, and settings across your entire network.
- Consistent Branding: With WordPress Multisite, you can ensure consistent branding across all your sites using the same theme and design elements.
- User Management: WordPress Multisite allows you to manage user roles and permissions across all your sites.
- Customization: WordPress Multisite allows you to customize each site on your network in terms of rebranding the login page, creating unique posts and pages, etc.
How Does WordPress Multisite Work?
WordPress Multisite allows you to create multiple WordPress sites from a single installation. Here’s how it works:
- Install WordPress: First, you’ll need to install WordPress on your web server.
- Activate Multisite: Once WordPress is installed, you must activate the Multisite feature by adding a line of code to your wp-config.php file.
- Set up Network: After activating Multisite, you can set up your network from the WordPress dashboard. You can choose whether to use subdomains or subdirectories to create your network of sites.
- Create Sites: With WordPress Multisite, you can create as many sites as you want, each with its unique domain or subdomain.
- Manage Sites: You can manage all your sites from a single dashboard, making it easy to update themes, plugins, and settings across your entire network.
How to Use LoginPress with WordPress Multisite
Step 1. Installing LoginPress on Your Multisite Network
Note: We assumed you’ve already created a WordPress Multisite network for your WordPress site.
When you want to install a plugin on multisite, you cannot do it directly from the left side menu of the WordPress admin dashboard. Instead, you can do it from the Network Admin dashboard.
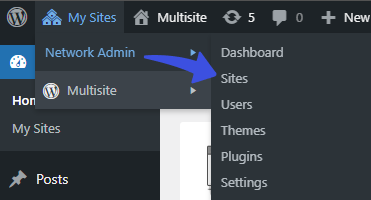
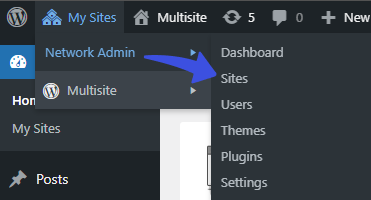
To do this, you must go to the upper left corner of the WordPress admin dashboard screen and click My Sites. Navigate to Network Admin and select Sites from the menu list.
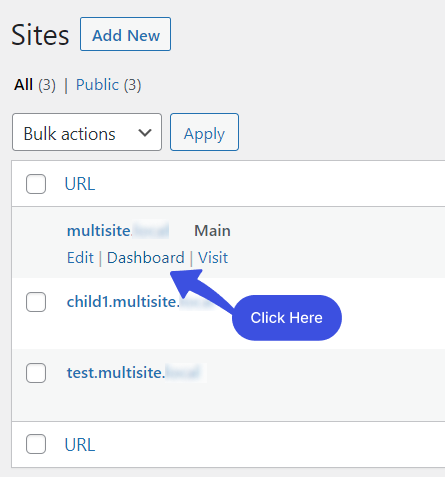
Next, go to the Multisite Main and click on the Dashboard option.
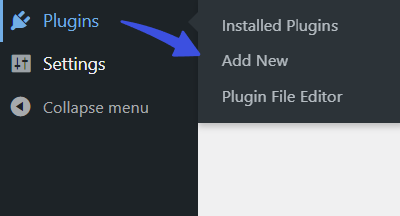
Now, you can add any plugin of your choice to your Multisite. For this purpose, go to the left side of the WordPress admin dashboard, navigate to Plugins, and click the Add New option.
Next, simply search for the plugin in the search box. Find the plugin, click Install Now, and then the Activate button.
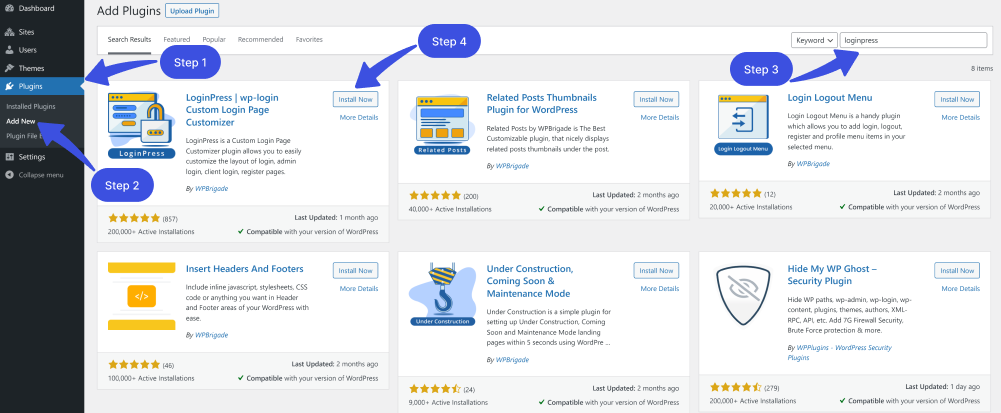
LoginPress is now installed and activated on your WordPress Multisite.
Note: You don’t need to separately install LoginPress on each child site once installed on the parent site.
Step 2. Select a Site’s Dashboard.
You’ll notice that each child site gets its WordPress dashboard, which looks and functions like the standard WordPress dashboard for single-site installs.
To customize an individual site, you’ll need access to its dashboard.
To do this, you’ll need to go to the upper left corner of the WordPress admin dashboard screen and click the My Sites option on the top. Navigate to Network Admin and select Sites from the menu list.
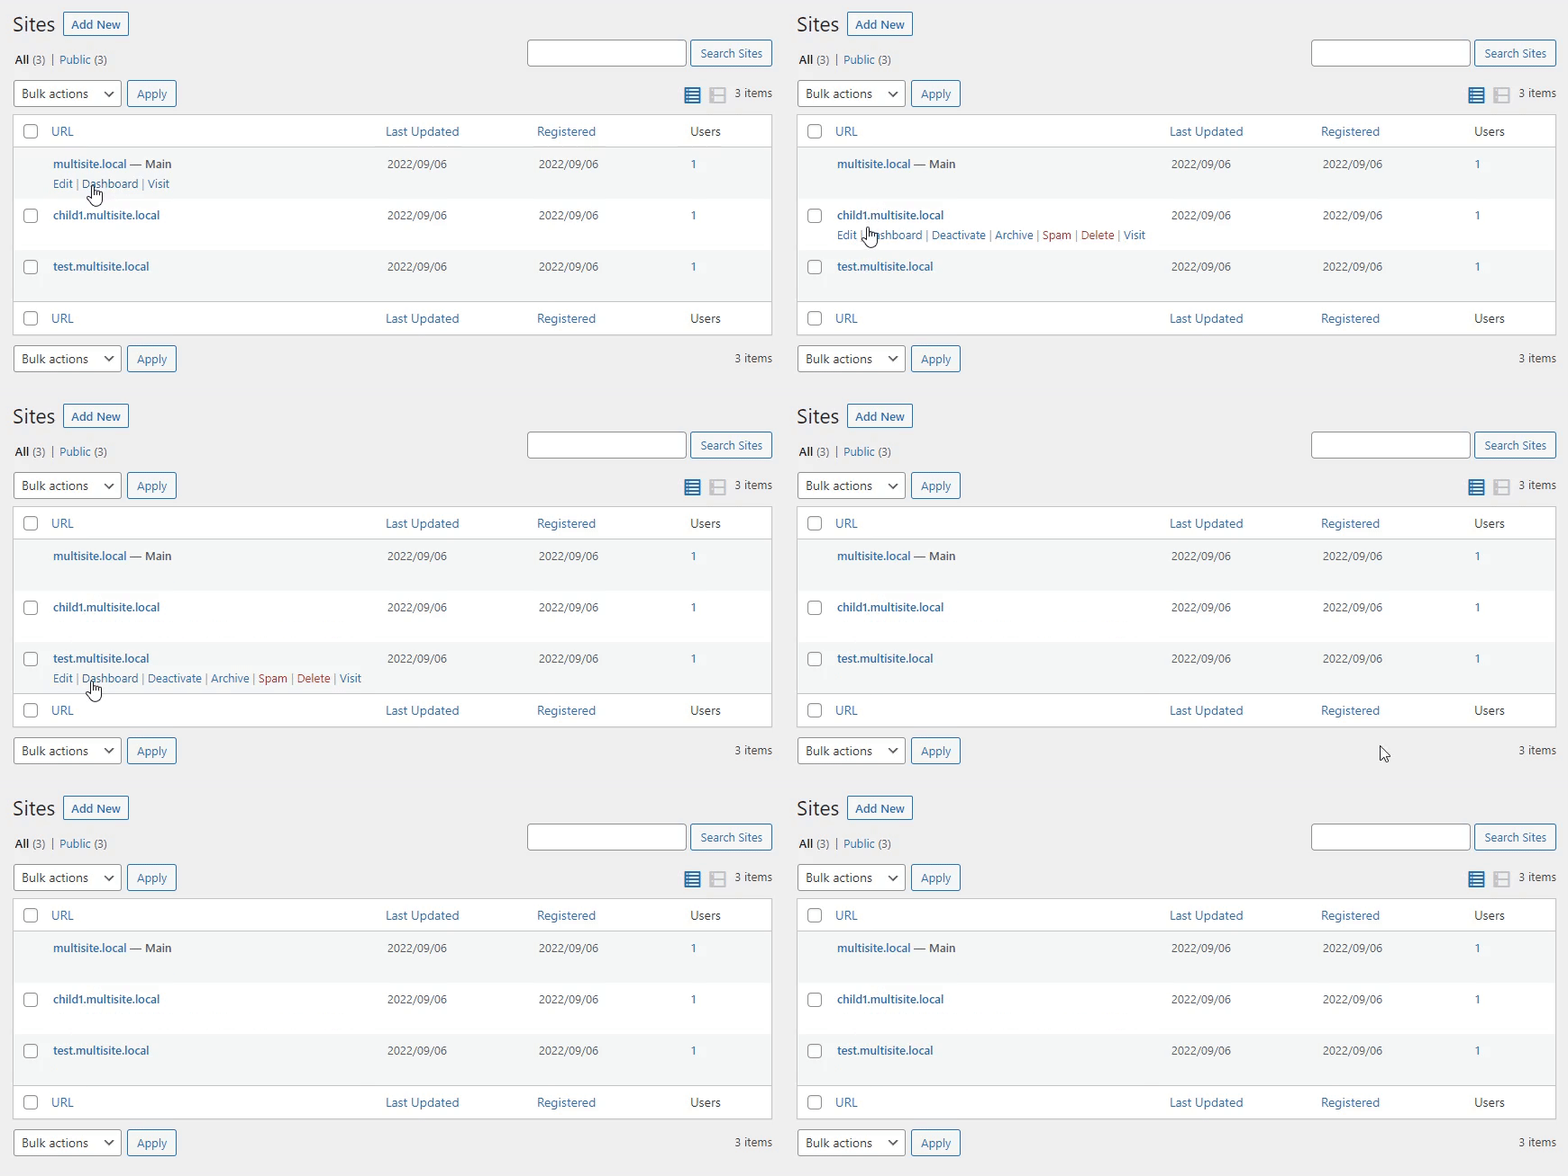
On the next screen, you can see all the added sites. Simply select the Dashboard link against the site you wish to customize.
Step 3. Customize the Login Page of the Selected Site
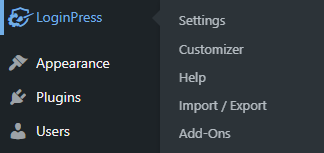
Next, you’ll be on the selected site’s WordPress admin dashboard. From here, navigate to LoginPress.
Here, you’ll find the Settings, Customizer, and Add-Ons options to fortify your subsite’s login page.
1. LoginPress Settings Option
The Settings option helps you customize the overall behavior of the multisite network login page.
For example, you can add the Session Expire time, auto-checkboxing the Remember Me on the login form, add the Custom Password Field on the Registration form, and Enable PCI Compliance.
Note: You can upgrade to the premium version anytime to enjoy unique features, including the Force Login and reCAPTCHA.
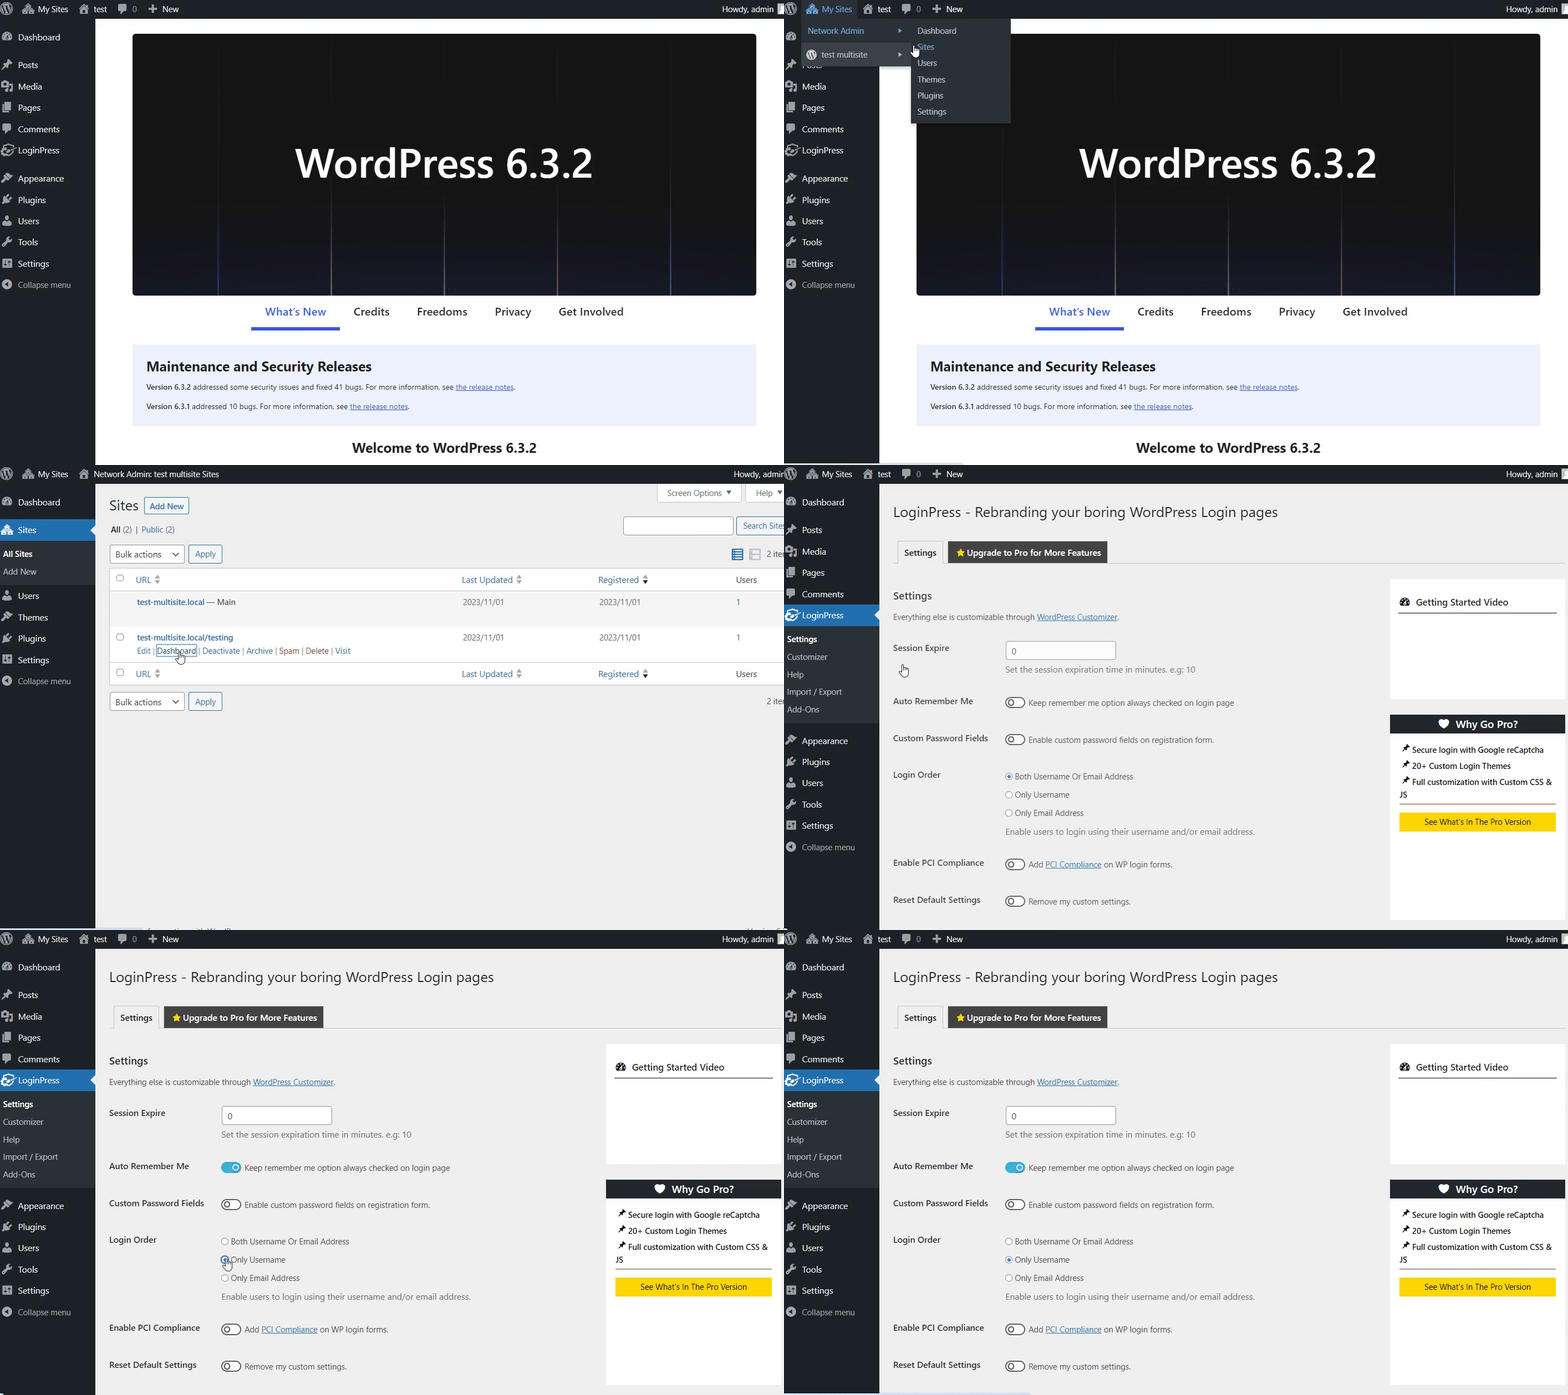
To customize the Settings for your subsite, select the My Sites option in the top left corner > Network Admin > Sites.
Select the Dashboard option of the subsite you want to make changes with.
Note: Here, we’ve only one subsite.
Now, you’ll find yourself on the admin dashboard of the subsite from here; you can make changes.
Suppose you want to add:
- Auto Remember Me,
- Enable Custom Password Fields, a
- Change the Login Order, i.e., Only Username.
Simply toggle on the buttons against each option and click the save changes button.
See the GIF below:
Now visit your login page, and you’ll see these options are applied:
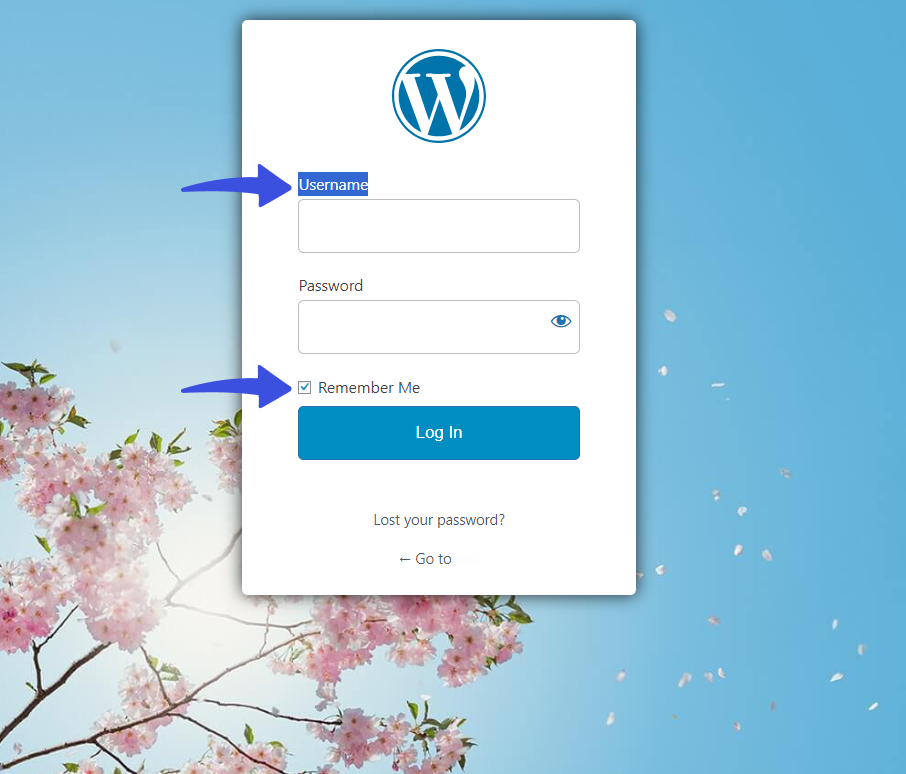
Login Order and Auto Remember Me Checkbox
2. LoginPress Customizer Option:
You can easily swap the default WordPress background of your subsite login page to make it look exactly how you want it.
To do this, go to the My Sites option in the top left corner > Network Admin > Sites. Next, you’re required to click the Dashboard option of the subsite you are looking for customization.
Now, you’ll be in the subsite’s admin dashboard.
From here, select LoginPress > Customizer > LoginPress > you’ll be on the Customizer screen. Here, you can see all the customization options on the left-hand side and a live preview on the right-hand side, where you can keep track of all the changes in real-time.
See the GIF below:
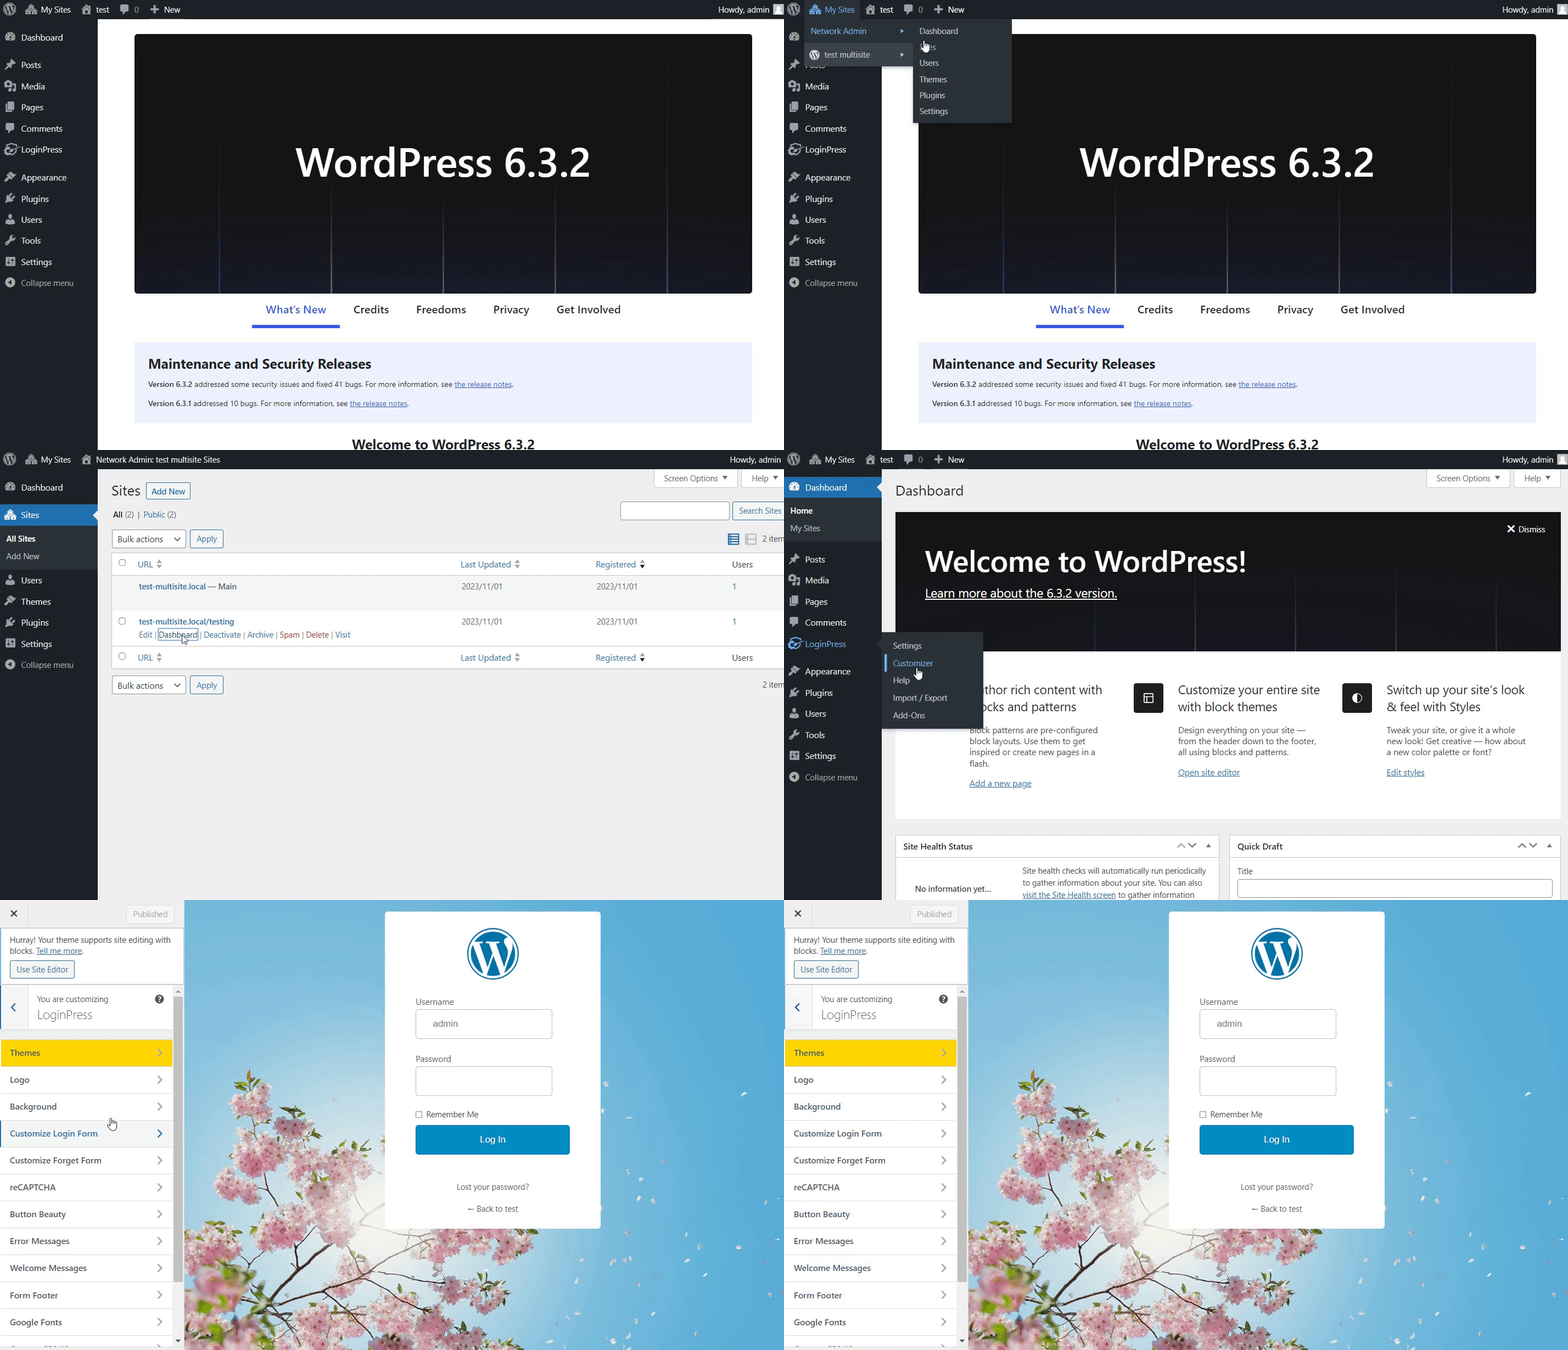
Let’s look at how you can customize the Logo, Theme, and Background for your subsite:
2.1. Customize the Theme for the Subsite
On the customizer screen, select the Theme option.
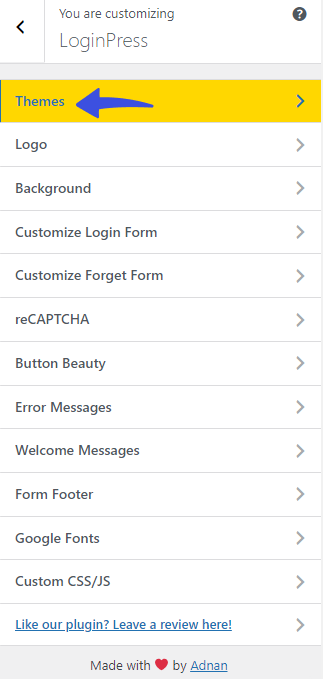
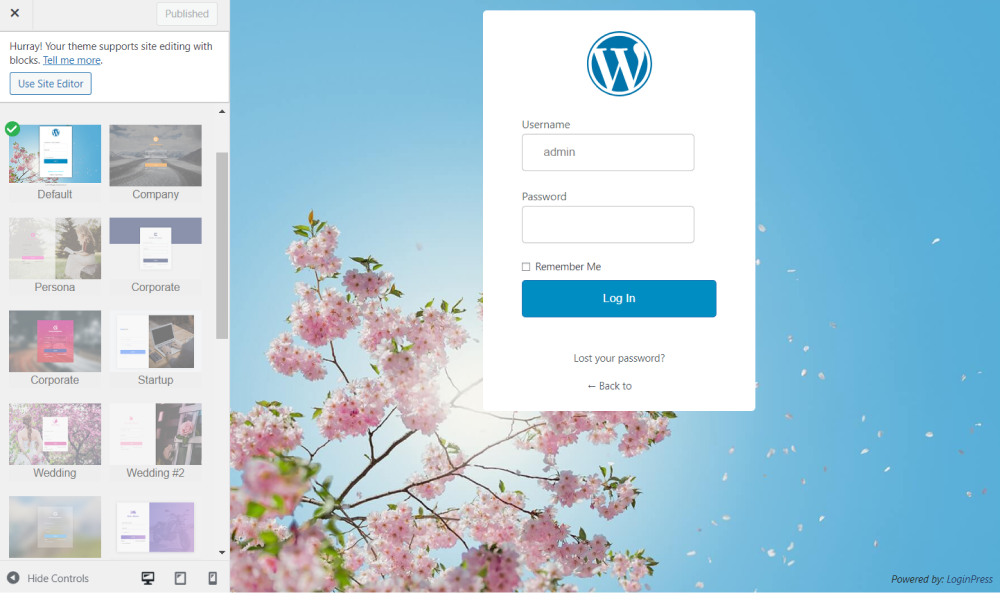
Next, you can select any theme of your choice.
Note: The Default LoginPress theme is available for free. You’re required to upgrade to the premium version to enjoy numerous other stunning Themes. See our detailed guide on How to Customize Login Page Theme with LoginPress.
2.2. Customize the Logo for the Subsite
If you want to add Logo to your WordPress login page, select the Logo option from the customizer.

On the next screen, you’ll find all the options to customize the Logo for your subsite’s login page, including:
- Enable/ Disable Logo
- Logo Width
- Logo Height
- Space Bottom
- Logo URL
- Logo Title
- Login Page Title
Note: See our detailed guide on How to Customize Login Page Logo with LoginPress.

2.3. Customize the Background for the Subsite
If you want to add a background to your WordPress login page, select the Background option from the Customizer.
Note: See our detailed guide on How to Customize WordPress Login Page Background with LoginPress.
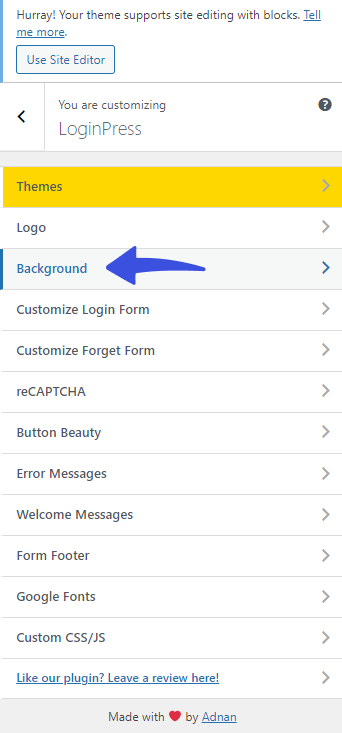
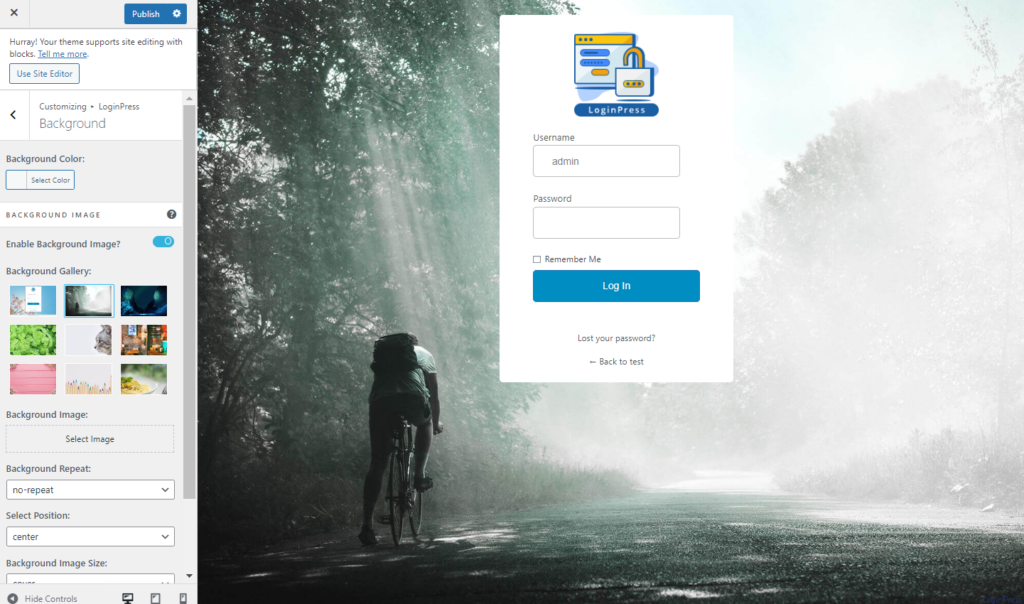
On the Background Customizer screen, you can select different options for your subsite background, like:
- Background Color
- Background Image
- Background Video
Note: See our detailed guide on How to Customize WordPress Login Page Background with LoginPress.
3. LoginPress Add-On Options
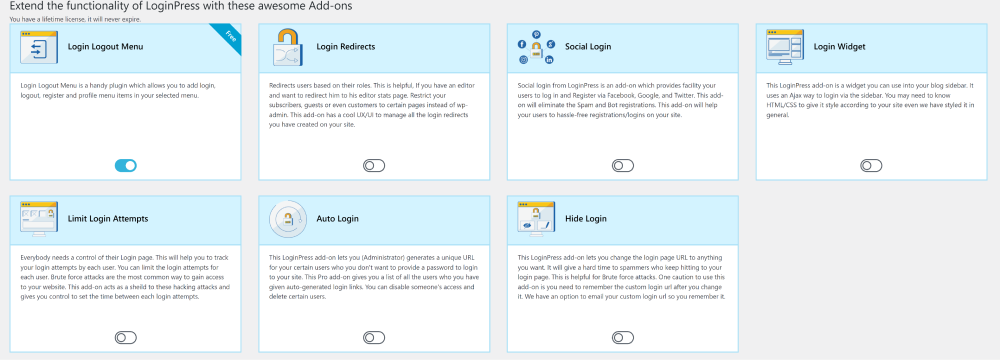
LoginPress Pro has excellent Add-Ons that will help you add different features to not only customize your subsite’s login page but enhance the login page security.
Note: LoginPress offers a Login Logout Menu for free. You’ll need the LoginPress Pro to have the rest of the Add-Ons.
WordPress Multisite FAQs
Is WordPress Multisite Network Secure?
WordPress Multisite Network is not immune to security vulnerabilities. Therefore, it’s better to take security measures to protect your WordPress Multisite Network against cyber criminals.
Can You Use LoginPress Pro with WordPress Multisite?
Yes, you can use LoginPress Pro alongside WordPress Multisite. However, you will need an active license key for each network site rather than just one license key for the entire network.
Can I convert an existing WordPress site into a Multisite network?
Yes, you can easily convert an existing WordPress site into multisite network. But it’s recommended to do this after creating a backup of your existing site.
Can I use custom domains for individual sites in a Multisite network?
Yes, you can use custom domains for individual sites in a Multisite network. Plus, you can also create custom domains for every subsite.
Conclusion
In conclusion, LoginPress is the best plugin to help you revamp the WordPress Multisite login experience for users.
The plugin is easy to install and use, providing a range of customization options to suit your needs, i.e., adding custom backgrounds and logos and creating a secure user login process for your multisite network.
Following the steps outlined in this guide, you can quickly and easily set up LoginPress on your WordPress Multisite network and take advantage of its powerful features.
Here are the key takeaways:
- What Is WordPress Multisite?
- What is LoginPress?
- How Does WordPress Multisite Work?
- What Are the Advantages of WordPress Multisite?
- How to Use LoginPress with WordPress Multisite
Thank you for reading this article. You can also check out our guides on:
- How to Customize A WordPress Multilingual Login Page
- How to Add CAPTCHA to WordPress Login and Registration Form
How far has LoginPress helped you customize your multisite login pages?
Let us know by leaving a comment below.

