WordPress Smart Login Redirects: Personalized UX (Guide)

A WordPress smart login redirect sends each user to the page that fits them after they log in, log out or register, instead of always sending them to the dashboard. You can set it up with code or, without code, with the LoginPress Login Redirects add-on.
By default, WordPress sends every user to the dashboard after login. That rarely makes sense for customers, members or clients who expect a more guided next step.
In this post, I will explain what smart redirects are, why I’d use LoginPress for them, and the steps to set them up.
Smart Login Redirects (TOC):
What Are Smart Login Redirects? (And Why They’re a big improvement)
A WordPress smart login redirect is a rule that sends users to specific pages after they log in, log out or register, based on who they are.
Rather than landing on the default WordPress dashboard, users are guided to the page that matters most to them, based on predefined conditions such as their role, membership level, or user group.
You can think of it as a personalized login experience for WordPress custom login redirect WordPress that ensures every user’s journey is relevant and smooth.
Smart login redirects in WordPress personalize each user’s post-login journey and give your visitors exactly what they need without unnecessary clicks or confusion.
Here are a few real-world examples:
- WooCommerce Redirects: After logging in, a customer is taken straight to their Account page, where they can view orders, track shipments, or manage subscriptions.
- LMS Student: A learner lands directly on their course dashboard, ready to continue their lessons without hunting through menus for membership login redirect.
- Contributor or Editor: Instead of the generic admin panel, a content contributor is redirected to the WordPress editor, streamlining their workflow.
By implementing smart login redirects for WordPress, you’re not just saving clicks but also improving user experience and productivity.
Users reach the pages they care about faster, reducing frustration and making your site feel easy to navigate and professional.
So whatever type of redirect you aim to add, these strategies help every visitor feel like your site was built just for them.
Why Use LoginPress for WordPress Smart Redirects
LoginPress is the easiest way to manage WordPress smart redirects, because it keeps all redirect rules in one place and needs no code. Different user types need different post-login pages, and that gets hard to manage by hand.
The LoginPress Login Redirects Add-on gives you structured control over where users land after login, logout, or registration, all without writing code or juggling multiple plugins.
It’s flexible enough to support nearly every real-world scenario, including:
- Redirect based on user role in WordPress: It will send admins, subscribers, customers, teachers, or students to the correct destination instantly.
- Redirect by username or specific user: It is useful when certain accounts need tailored handling.
- User group login redirects or membership-based redirects: It is ideal for community, LMS, and membership sites.
- WooCommerce or LMS-driven redirects: For customers who want to go to their account page and students to their course dashboard.
- Global redirect rules and fallback pages: These ensure every user always lands on a meaningful page.
You also get other helpful security features, such as Auto Login, Captcha, and session handling, which can improve overall security and create a smooth, personalized login experience in WordPress without coding.
How to Set Up Smart Login Redirects in WordPress (Step by Step)
You set up smart login redirects in WordPress by planning each user journey first, then creating a rule for each one. These steps keep the setup predictable for visitors.
Step 1: Plan your Post-Login Journeys
This step is the most crucial as it sketches out the whole user journey on your site and gives you a clear pathway of where each type of user needs to be landed based on factors like:
- Relevance
- Pre-login/register behavior
Try to keep it simple. Here are some of the logical pathways I suggest for these basic redirects:
- Students >> course dashboard.
- Members >> private content or community home.
- Customers >> WooCommerce Account/loyalty page.
A clear blueprint of the redirects needed on your site prevents conflicting rules and keeps UX consistent throughout.
Step 2: Choose LoginPress for Redirects Implementation
For this tutorial, I will be using the plugin method to implement easy redirects without the hassle of creating and managing code snippets.
This method is most recommended for most sites because it is less error-prone and well-suited to complex multi-rule setups.
Here, I will use the full features of LoginPress Pro to enable quick, manageable redirects on my site.
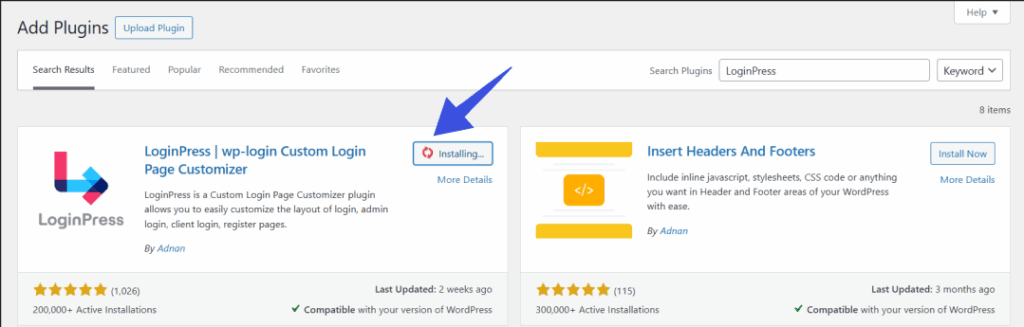
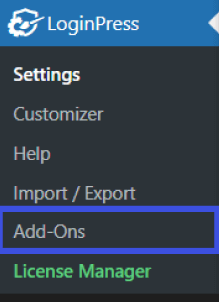
- Activate the Login Redirects Add-On before moving to the next step. To do that, go to LoginPress >> Add-Ons.
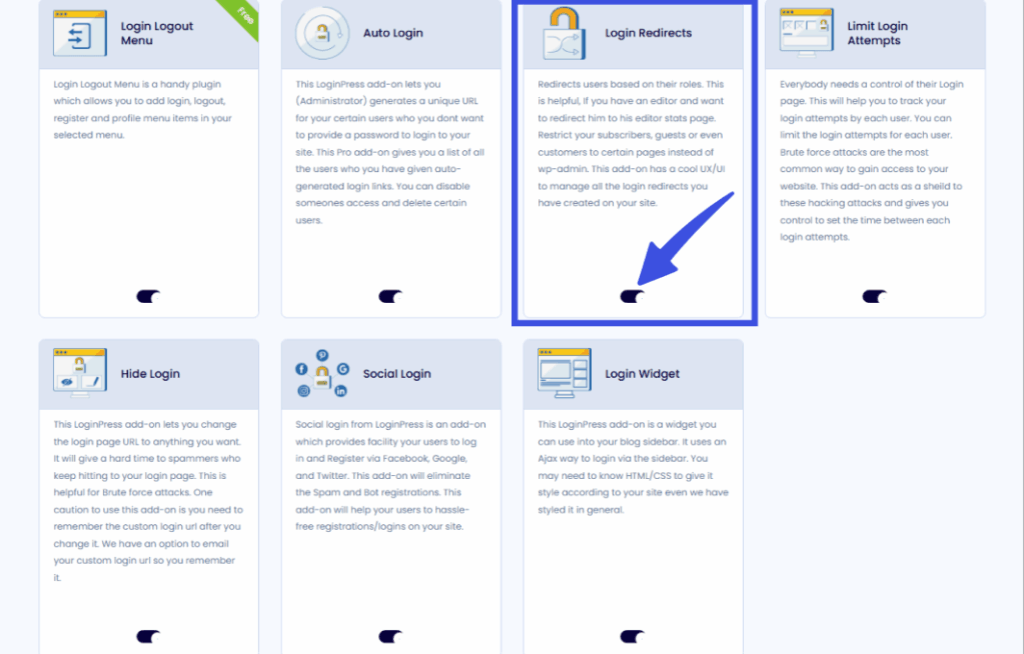
Then, locate the Login Redirects Add-On and toggle it on to activate.
- Once the Add-On is activated, navigate to Settings >> Login Redirects.
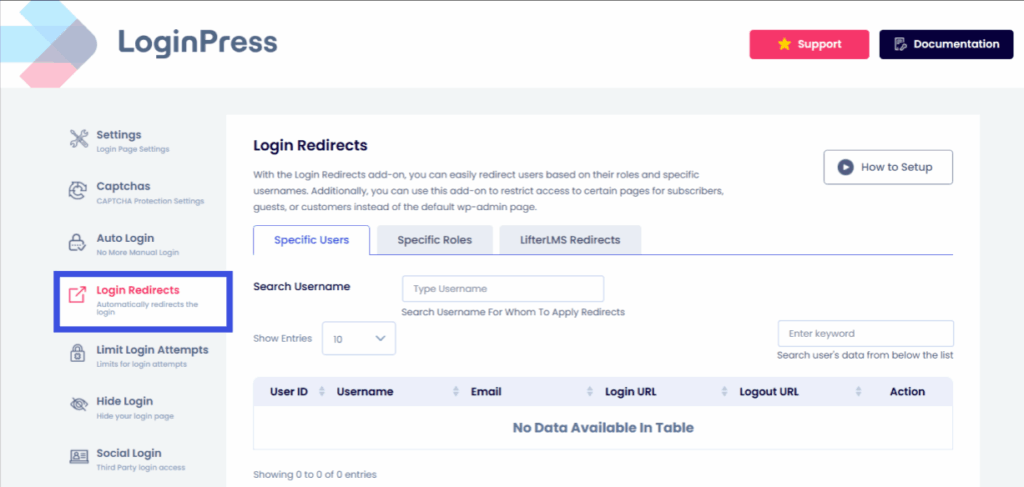
Here you can see different settings which you can tweak according to your preferences.
This also ensures that the users feel guided and recognized.
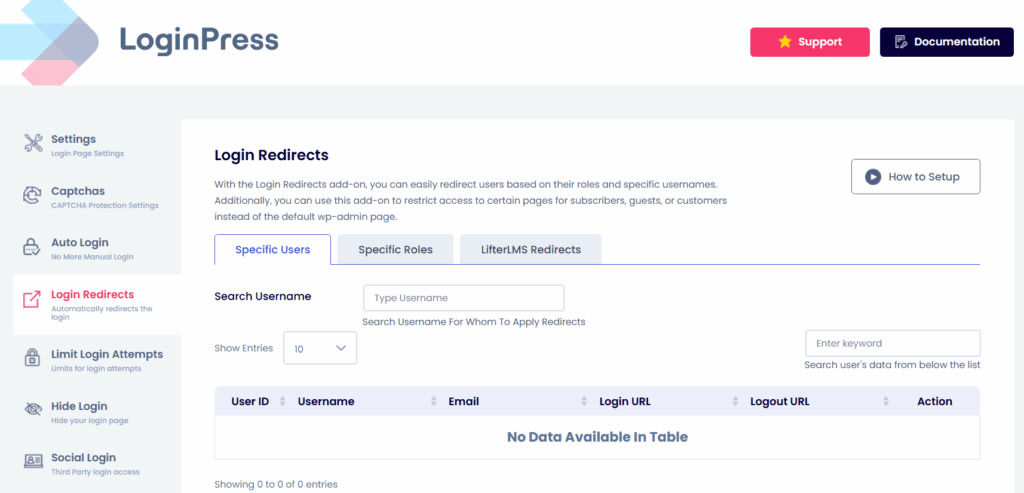
In the highlighted table in the screenshot below, all redirected user-specific information will be displayed for monitoring purposes.
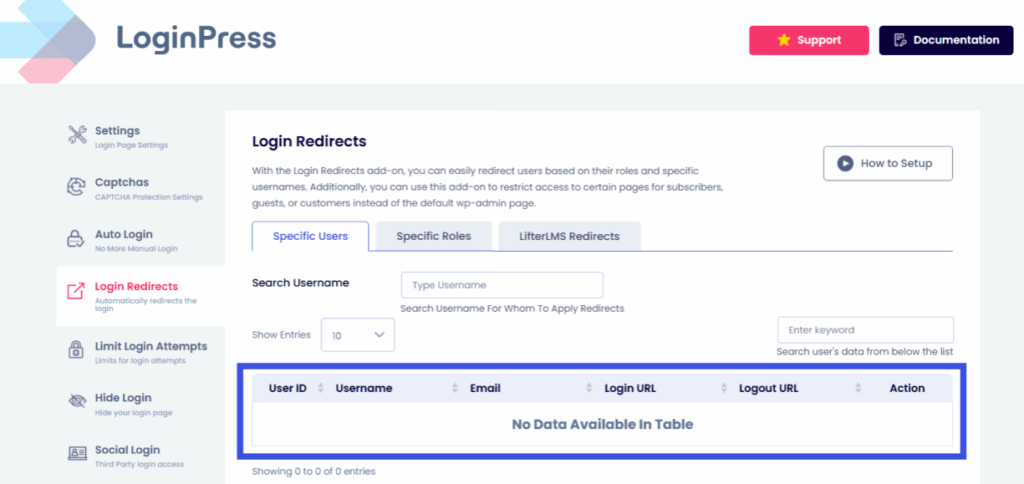
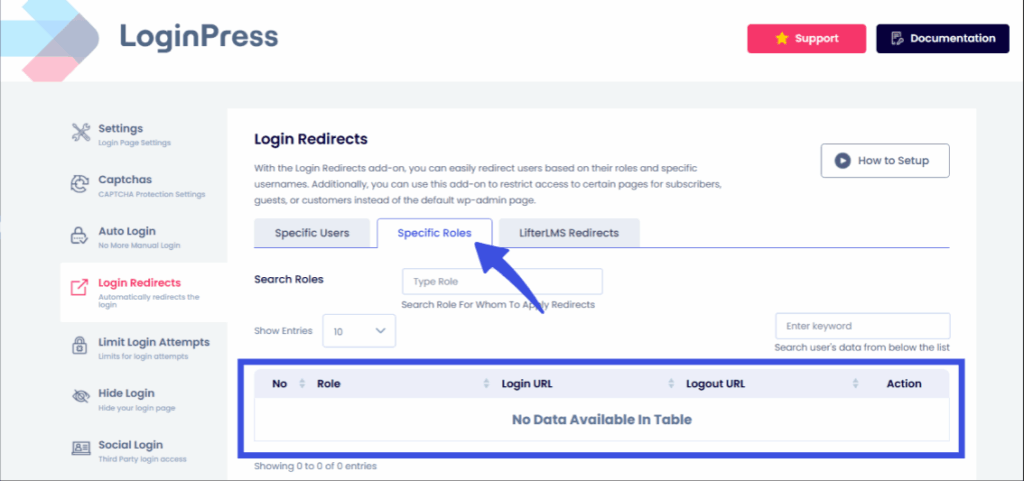
Other than that, navigate to the Specific Roles tab for more information on each user role’s redirection history.
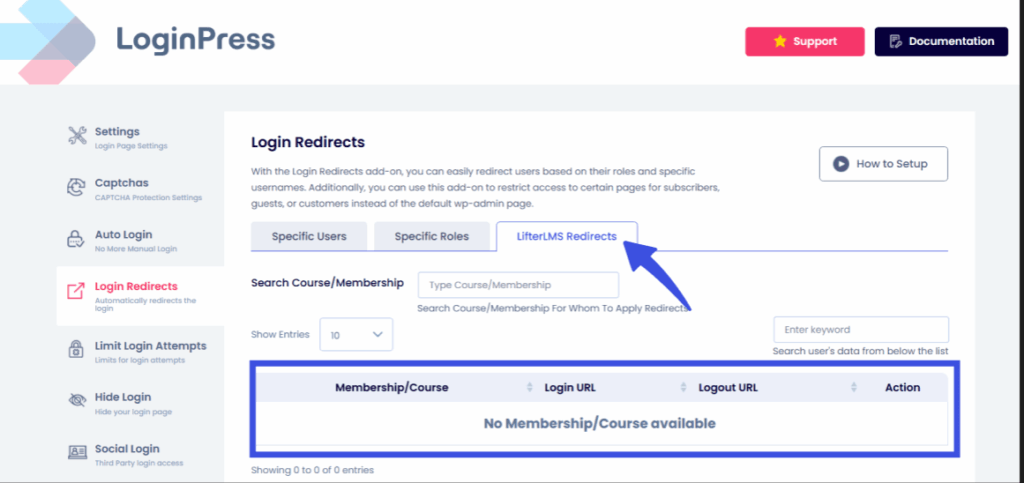
For information on LifterLMS redirection history, LoginPress provides a separate tab of LifterLMS Redirects, where you can easily track and monitor LifterLMS redirects and see where your students and teachers are landing.
Tip: If you want to use a code-based method, do so only if you need a custom login filter and a lightweight code change. Either way, keep backups and version control in place before implementation.
These make the login feel like a UX shortcut, and the users arrive exactly where they want to continue.
Step 3: Secure your Redirects
Balancing personalization with security is essential as it:
- Avoids open-redirect vulnerabilities by validating the redirect URLs against an allowlist.
- Protects destination pages by checking capabilities, membership status, or course enrollment before showing sensitive content.
- Use HTTPS, keep plugins up to date, and enforce strong user permissions for admin destinations.
Step 4: Monitor and Iterate
Track behavior, such as analytics events using Analytify, the best analytics plugin in the market for small businesses to see whether redirects improve engagement.
Then you can adjust rules based on real usage, such as if members keep bouncing from a page, try a different destination.
Bonus: Best Practices for WordPress Smart Login Redirect
The best practices for smart login redirects are to keep rules consistent, intentional and user-friendly.
Here are a few practical guidelines to keep in mind:
- Keep destination pages relevant and active:
Direct users to pages that make sense for their role or purpose, such as a dashboard, course library, or account area. Make sure these pages are published, accessible, and regularly updated. - Use clear navigation or “Back to Homepage” options:
If the redirected page is highly specific (like a lesson page or order history), simple navigation controls help users find their way around without confusion. - Avoid redirect loops:
Test every redirect rule individually so users don’t get caught bouncing between pages. Loops are standard when multiple plugins manage redirects, so reviewing each rule helps prevent issues. - Create a fallback redirect for general users:
Not every visitor will fit into a defined role. Setting a default destination, like the homepage or a custom welcome screen, ensures no one gets stuck. - Pair redirects with custom messages or welcome text:
A short greeting or update helps orient users and improves the overall experience, especially after login or registration.
Frequently Asked Questions
How do I create custom smart login redirects for WordPress?
Custom smart login redirects for WordPress can be created using plugins that specialize in login page customization or user management. These tools usually offer simple dropdowns or rule builders that let you choose a destination page for actions such as login, registration, or password reset. Once enabled, users are automatically redirected to the page you’ve assigned, without needing any custom code.
Can I redirect users based on roles in WordPress?
Yes. Role-based redirects let you set different destinations for users depending on their role, such as administrators, editors, customers, or students. This is especially helpful for membership sites, LMS platforms, or WooCommerce stores where each user type has a different workflow. After logging in, users see the page most relevant to them immediately.
Does LoginPress support logout and registration redirects?
LoginPress includes built-in settings for redirecting to login, logout, and registration pages. This means you can create a consistent flow for users from the moment they register, through each login, and even when they log out. These options help ensure every part of the login journey feels smooth and intentional.
What’s the best way to set up WooCommerce customer redirects?
WooCommerce stores often benefit from redirecting customers to functional areas like the “My Account” page, order history, or a personalized dashboard after login. The easiest approach is to use a plugin that recognizes WooCommerce-specific pages and lets you assign redirects for customers only. This helps streamline the shopping experience.
How can redirects improve WordPress user experience?
Redirects act as guided pathways for your users. By sending people directly to the pages they need, you reduce unnecessary clicks and confusion. Smart redirects are especially useful for returning members or customers, helping them jump straight into meaningful actions and improving overall site navigation.
Conclusion: WordPress Smart Login Redirects
Smart login redirects give each user a smoother, more personalized experience on stores, membership sites and business sites. Sending users to a relevant page right after login strengthens engagement and trust.
LoginPress makes this process easier with built-in role-based rules, custom redirect options, and flexible settings that adapt to any workflow. That is all for this article. For more related posts, check:
- WordPress Fraud Prevention: Protect Logins, Forms and Checkouts
- WordPress Session Management: How to Secure User Sessions
- How to Configure Role-Based Redirects for WP 2FA Compatibility (Pro)
If you could send every user to one perfect post-login page, where would it be? Let us know in the comments below!