How to Change Author in WordPress (2025)
Are you looking to change author in WordPress? If yes, you’ve landed on the right article!
Sometimes, users are required to change the author of a post in WordPress, especially if they’re running a multi-author blog or WordPress site. Fortunately, WordPress lets the users do the job without copying and pasting the original post.
In this article, we’ll show you 6 easy methods to learn how to change author on WordPress.
Change WordPress Author (TOC):
Why You Might Need to Change Author on WordPress?
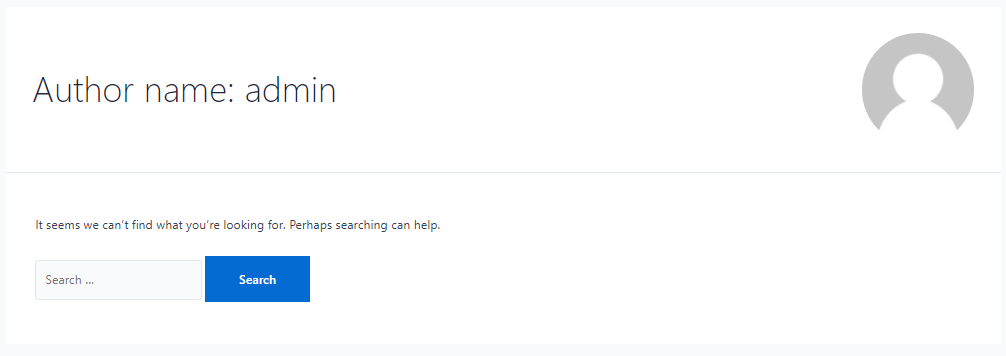
WordPress author is a person who has been registered on a site. The author has multiple permissions, such as:
- Write Posts
- Delete Posts
- Edit Posts
- Publish Posts
By default, the site administrator has the author role. However, if the site owner has a writer, this default user must be changed to display the original author’s name.
Let’s explore why it’s necessary to change the author of a post in WordPress:
- Content Reassignment: Suppose an author leaves your team or organization. You might want to reassign the published content to another author.
- Multiple Authors: If multiple authors are working on a post, you can attribute it to the author who did the most significant work.
- Administrative Adjustments: Posts might be published under a default admin author. You should change the author to ensure accurate attribution.
- Content Updates: When a post is updated/ rewritten by a different author, you should change the author to tell the audience who wrote the current version of the content.
- Improved SEO: Authors Bio are quite important for increasing chnases to rank your content.
Changing the author is easy in the WordPress editor. It ensures that the right person is credited.
How to Add Author in WordPress?
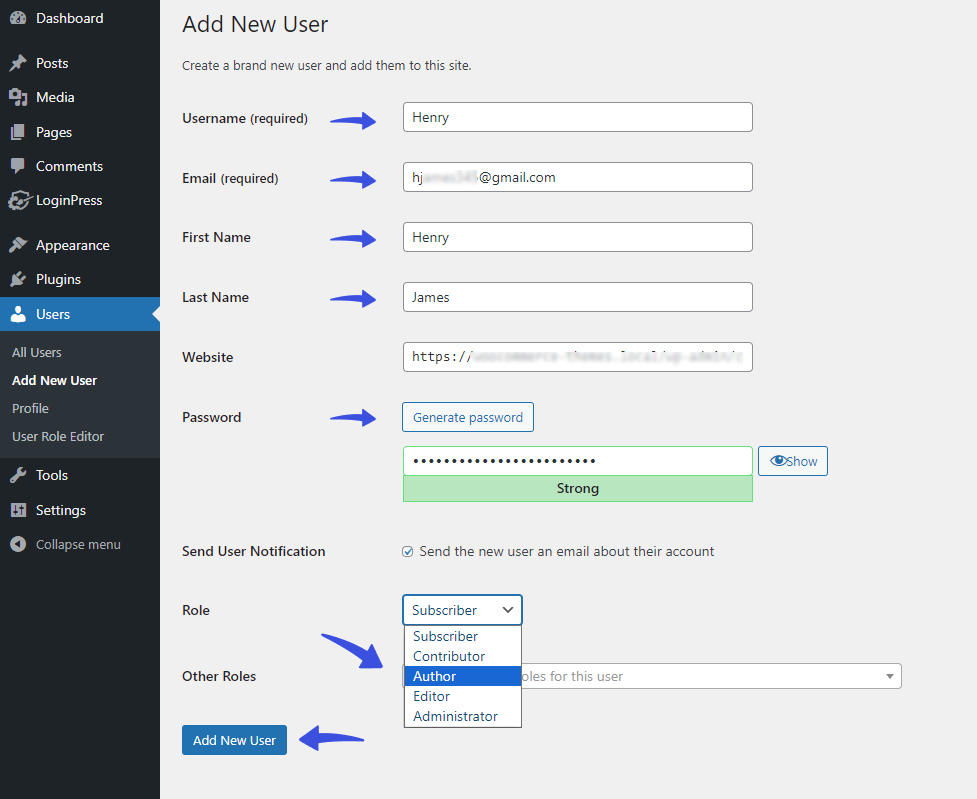
You can easily add an add a new author in the WordPress. For this purpose, go to the left sidebar of teh WordPress admin dashboard, navigate to the Users, and click the Add New User option.

On the next screen, you’re required to add user information, including:
- Username: Add user’s name first off.
- Email address: Add the email address of the author.
- Password: You can manually create a password or click the Generate password button to create a strong password.
- Role: Now, add the user role, e.g., Author, for giving permissions for content creation.
When done, click the Add New User button.
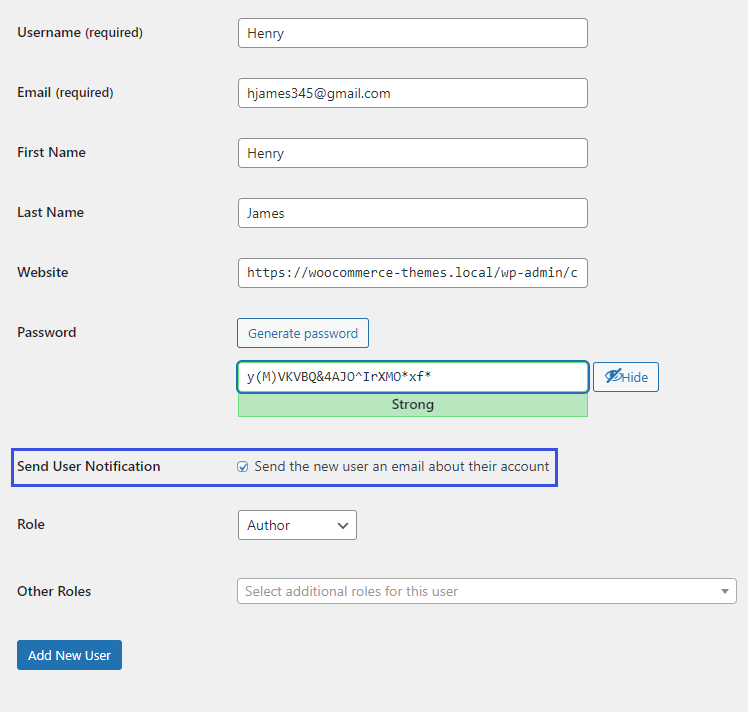
Remember, after manually adding a new user, you’ll need to email new users about their new account. Don’t forget to check the Send User Notification option before clicking the Add New User button.
How to Change Author in WordPress (6 Methods)
Method 1. Change WordPress with Block Editor
Do you have a Gutenberg block editor for your site? If yes, this method is meant for you!
All you need to do is open the page or post inside the WordPress admin dashboard where you plan to change your author.
Note: Here, we will show you how to change the author in a WordPress post via the block editor. You’ll need to perform the same steps for editing the author on the page, but make sure to open the desired page first.
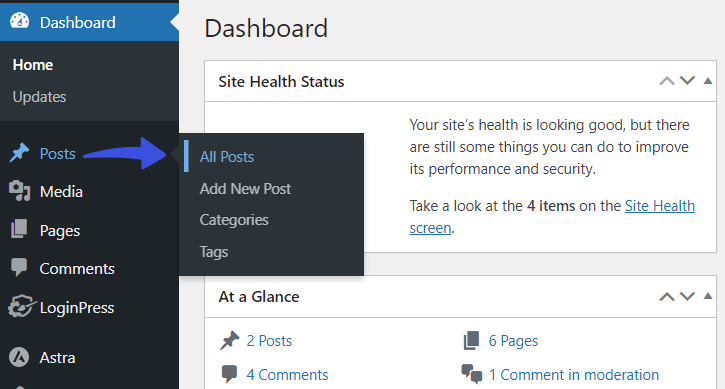
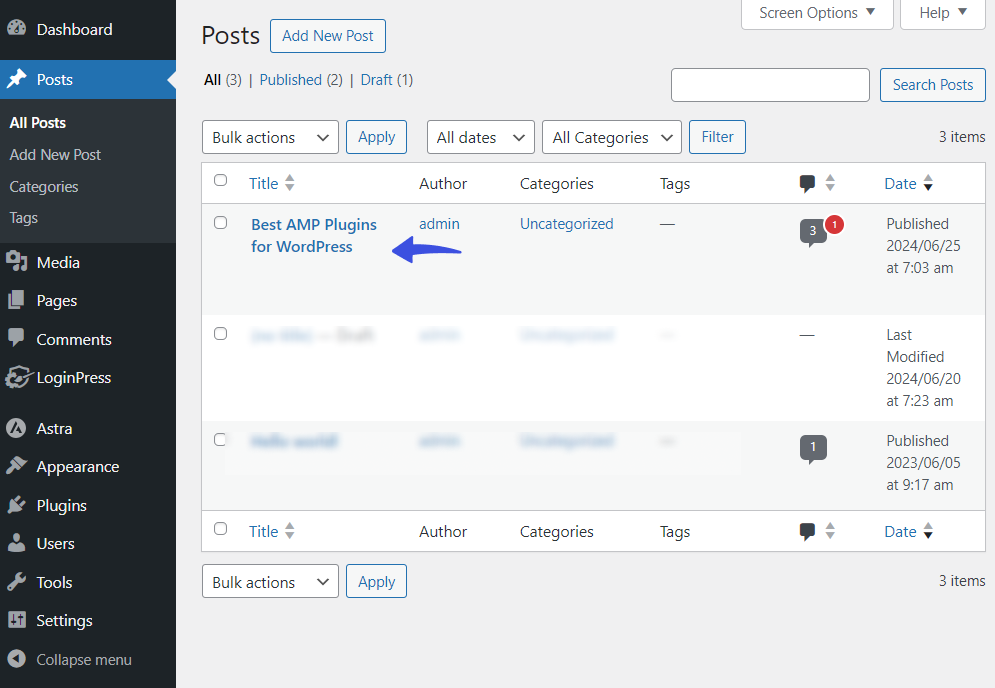
Go to the left sidebar of the WordPress admin dashboard, navigate to Posts, and click the All Posts option.
Now, select the post where you want to change the author.
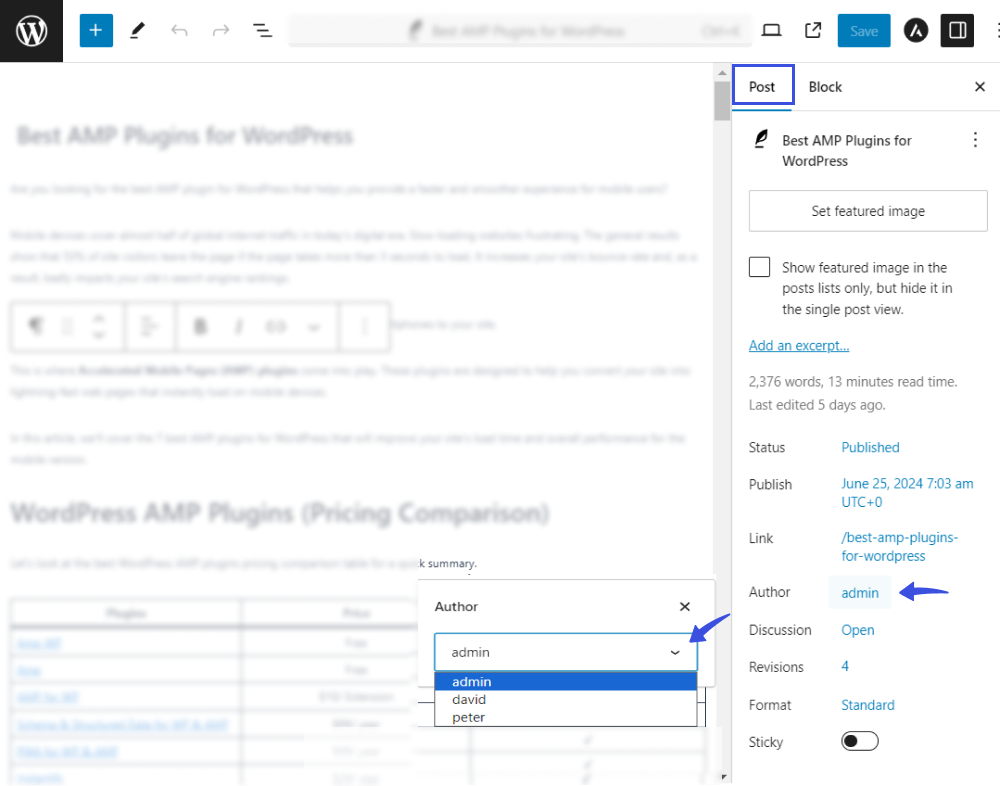
On the next screen, select the Post tab from the right sidebar, find and click on the Author option.
Next, you can replace the current author with a new one from the dropdown menu.
See the image below:
Method 2. Changing Author in WordPress using Classic Editor
Are you using the classic WordPress editor? This method is for you.
First, you must go to the post or page where you want to change the author’s name.
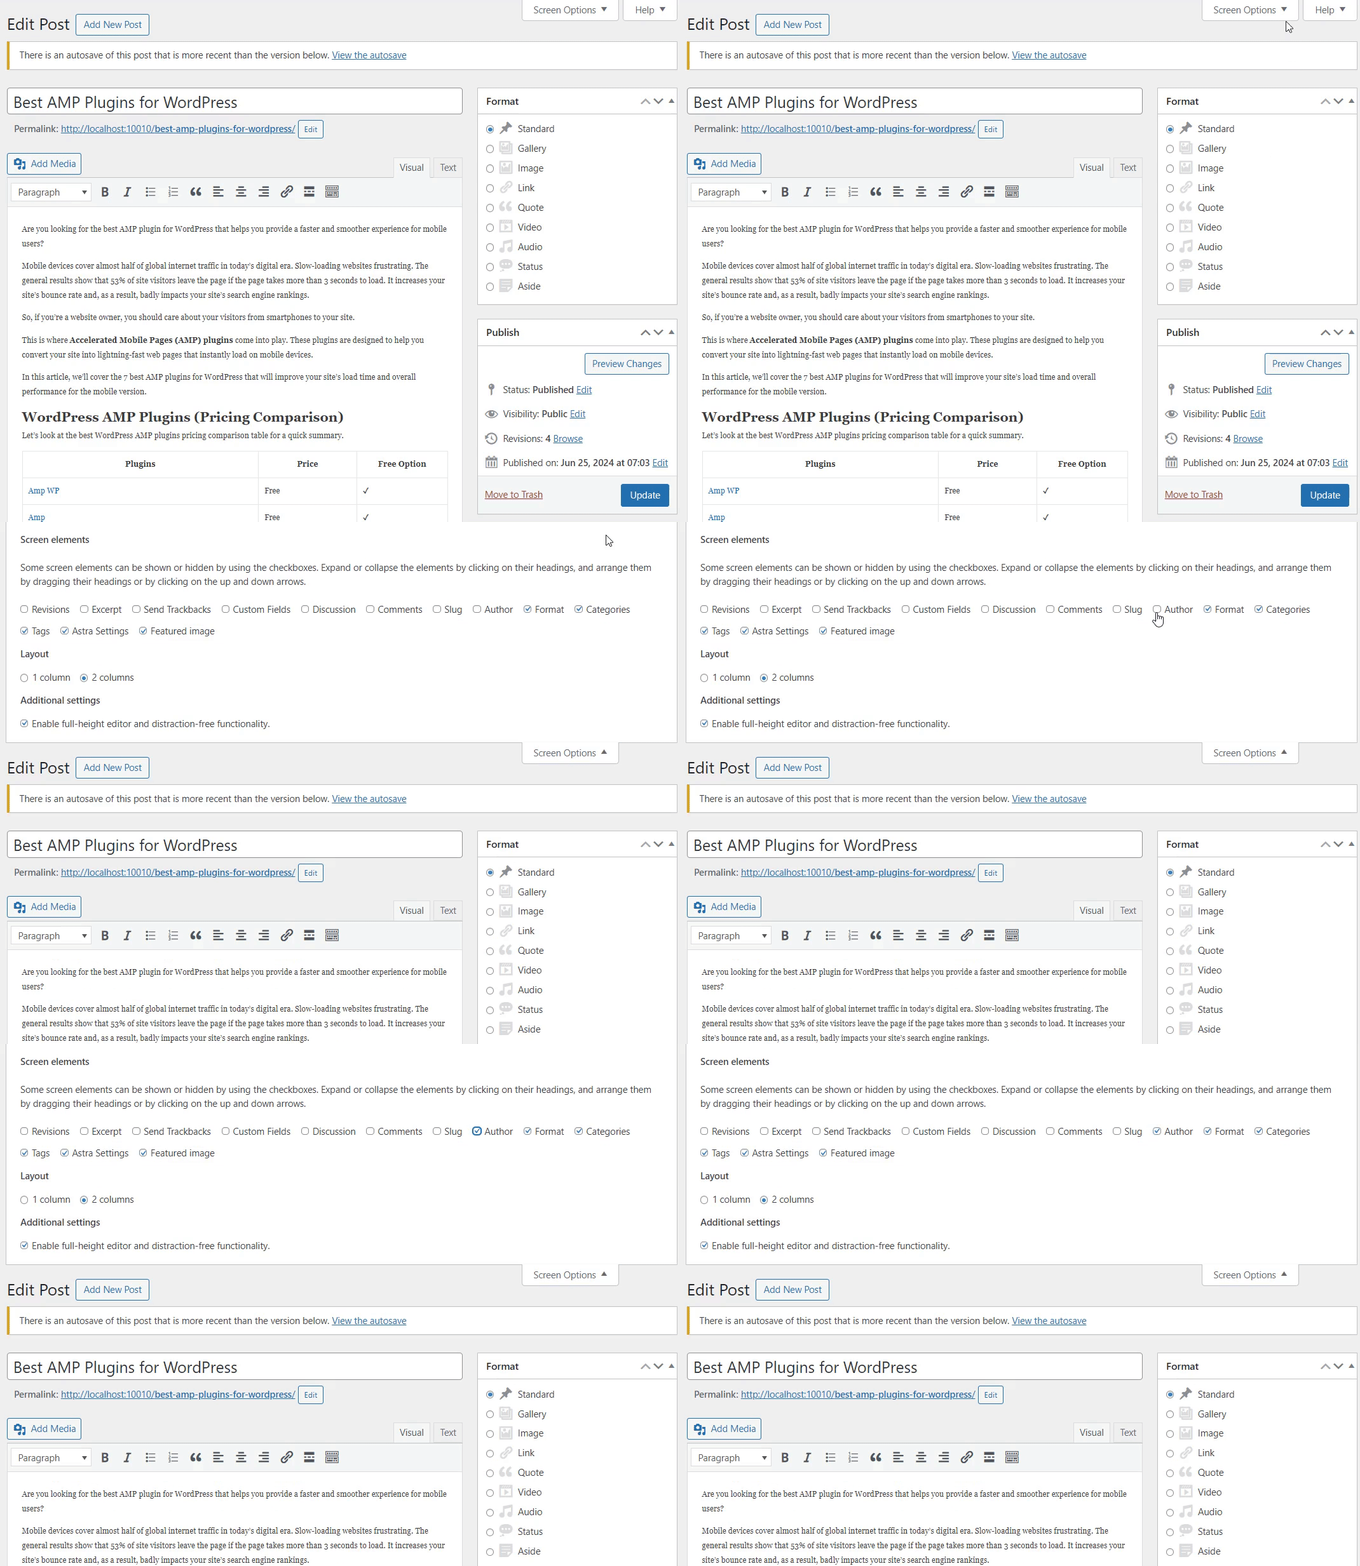
The Classic WordPress editor requires you to enable the Author option for your post/ page. To do so, click the Screen Option dropdown menu at the top right corner of the post page.
Next, check the Author box.
See the GIF below:
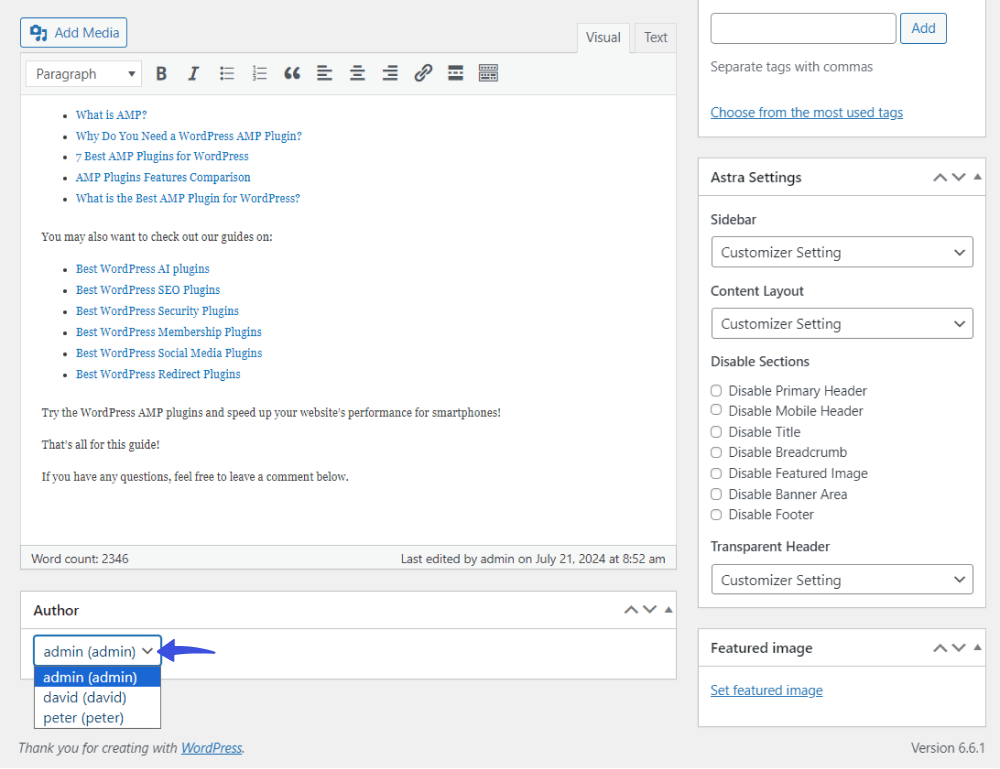
Now scroll down the post; you’ll find the Author option there.
Simply click the drop-down menu button and select the author for your post.
Method 3. How to Edit Author in WordPress with Quick Edit
WordPress brings a Quick Edit option that lets you quickly change the author for a post/ page.
Note: Here, we are going to apply Quick Edit to a post. The exact process will be applied to Quick Edit for a page. But for that, you’ll need to select the desired page from the next screen.
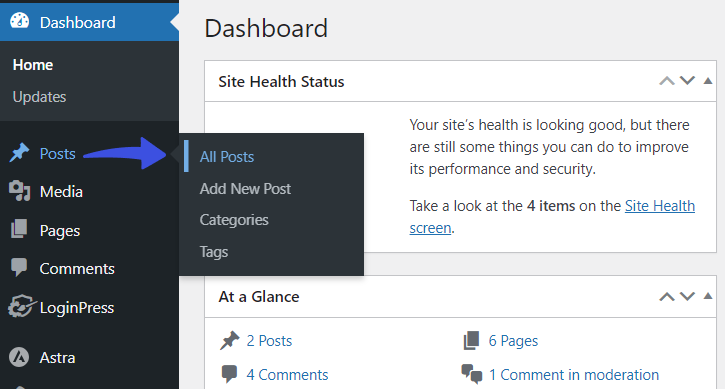
All you need to do is go to the left sidebar of the WordPress admin dashboard, navigate to Posts, and click the All Posts option.
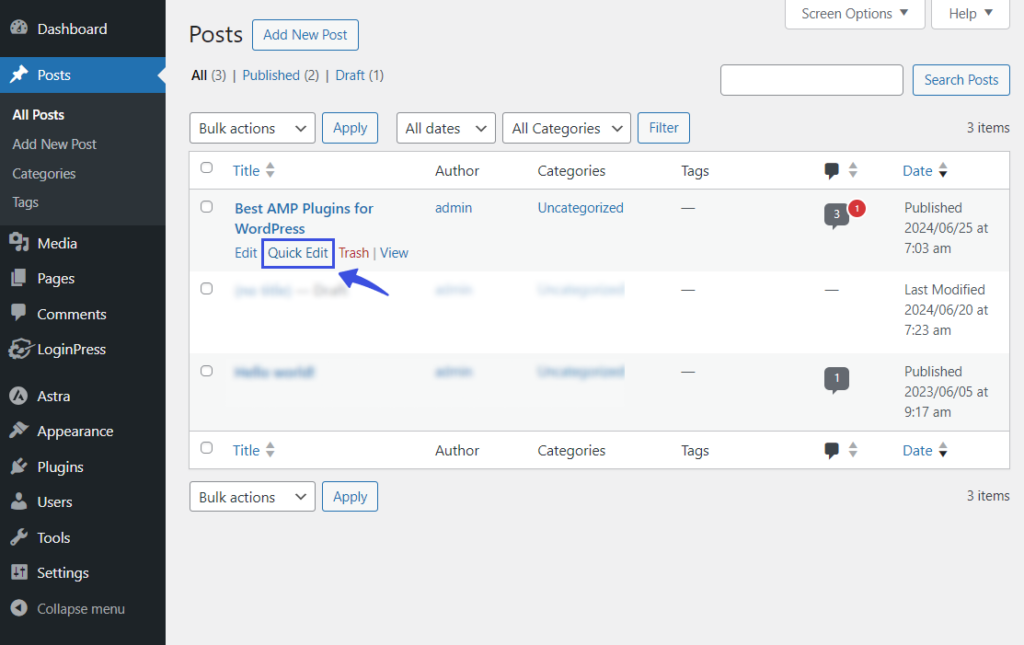
On the next screen, click the Quick Edit link under the desired post.
Now, click the dropdown menu against the Author option, select an Author, and click the Update button.
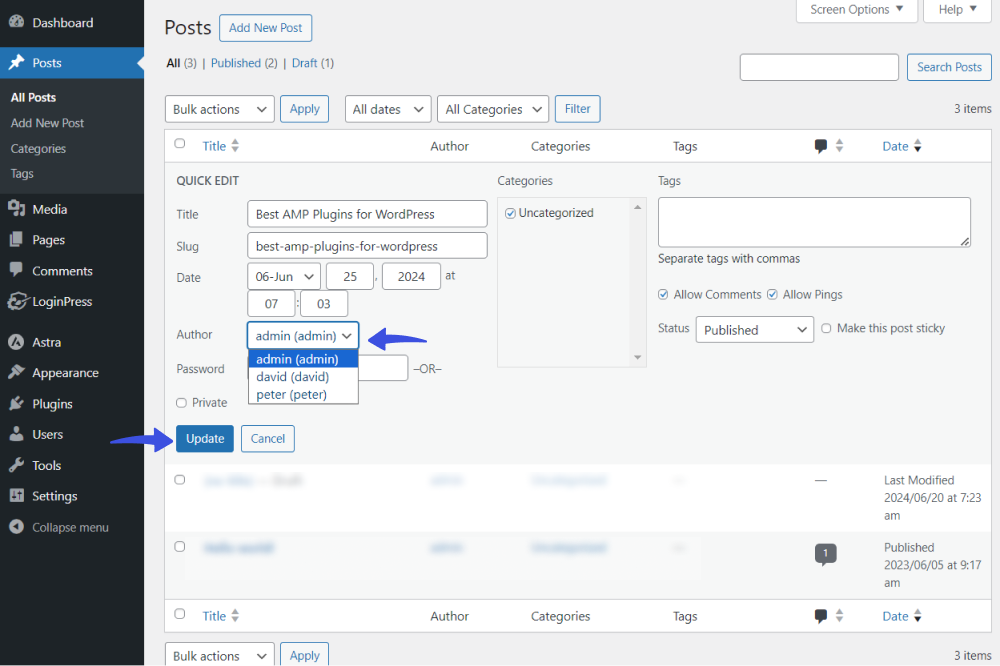
This is how WordPress change author for you.
Method 4. How to Change the Author in WordPress for Posts in Bulk
WordPress offers a Bulk action option that lets you quickly change the author for multiple posts/pages.
Note: Here, we will show you how to change the author in Bulk against pos. Remember, the same steps are needed to edit the author in bulk on the page, but open the Pages > All Pages option from the WordPress left sidebar menu first.
Go to the left sidebar of the WordPress admin dashboard, navigate to Posts, and click the All Posts option.

Next, select all the posts where you want to change the author.

Select the Edit option from the dropdown menu and click the Apply button.
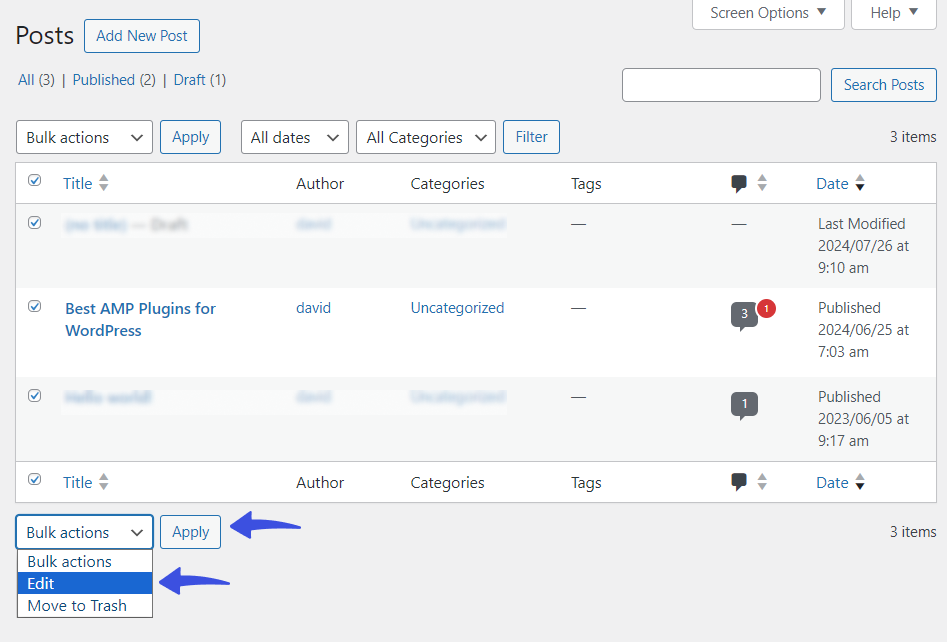
Next, you can see the WordPress Bulk Edit box.
Simply click the dropdown menu in front of the Author option and select the Author of your choice.
When done, click the Update button.
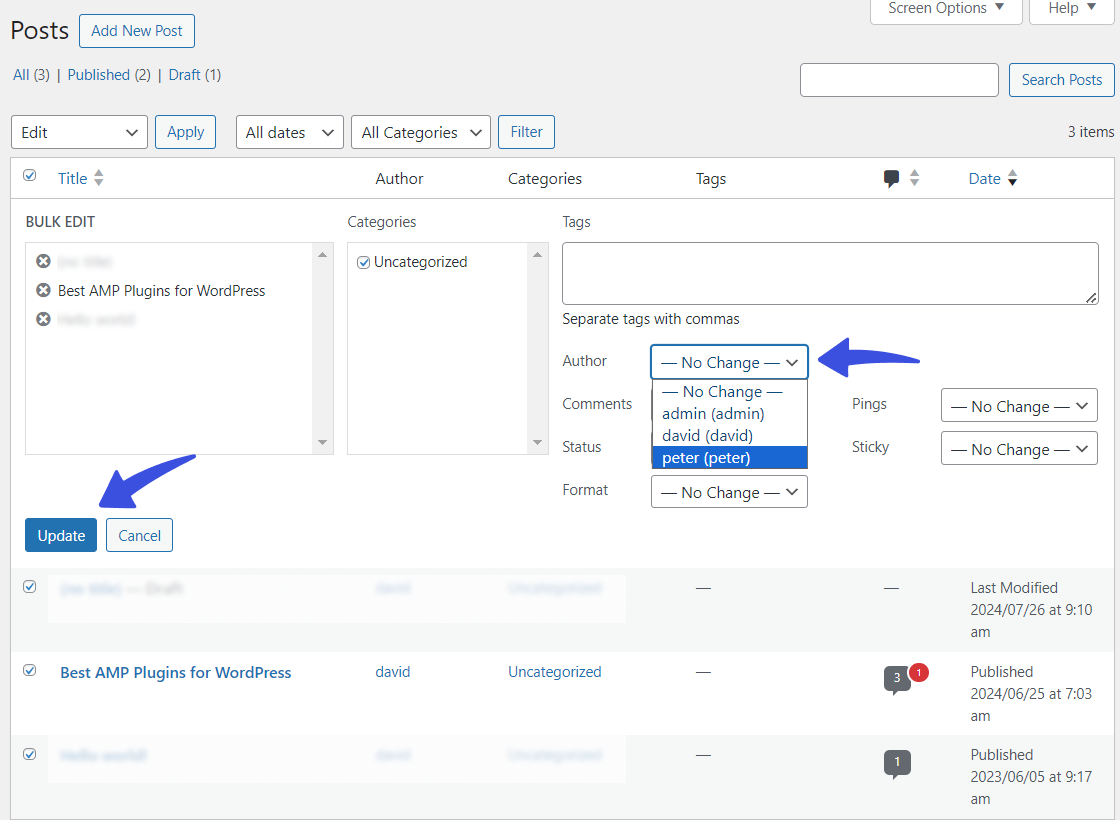
You’ve successfully updated the author for your multiple posts.
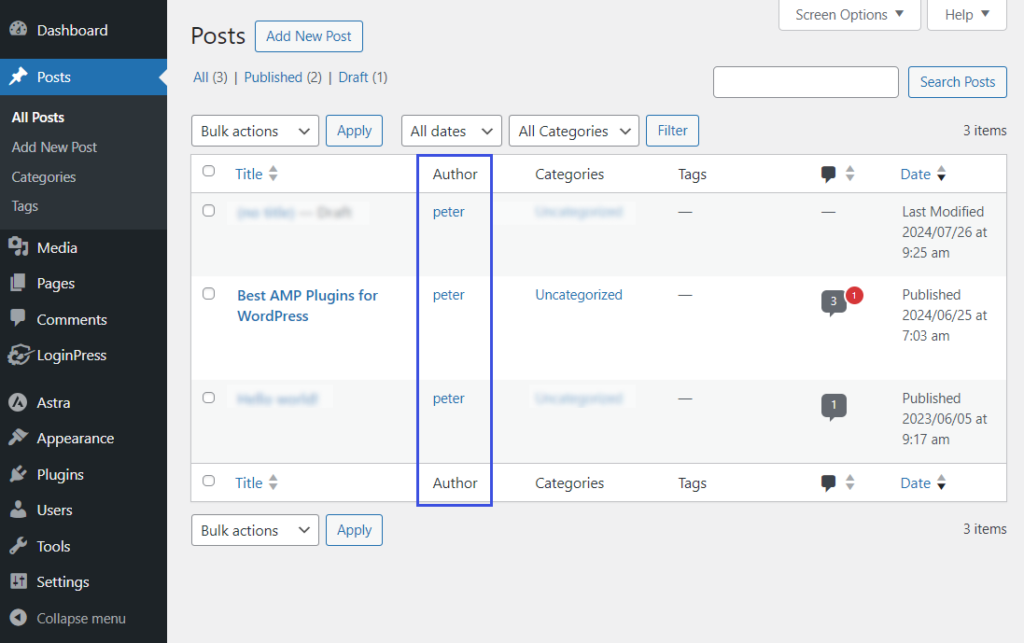
Method 5. Edit Author Display Name in WordPress
You can also change the author name for a post instead of changing the author. There can be many reasons to do so, like:
- If the author wants to add a full name instead of a username to make posts look more professional.
- An author might have changed the name and wants to update it on the post.
- The author might want to use a new name for their posts on your site.
Let there be any reason. Here, we have a solution for you!
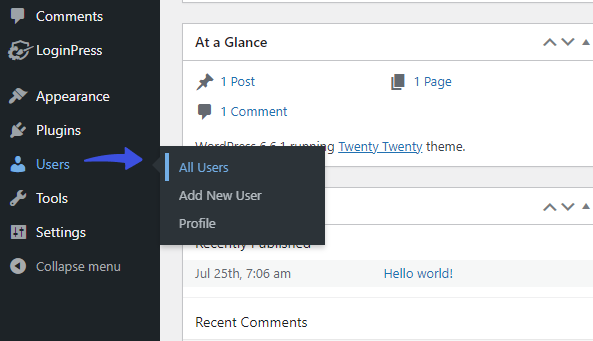
To do so, go to the left sidebar of the WordPress admin dashboard, navigate to Users, and click the All Users option.
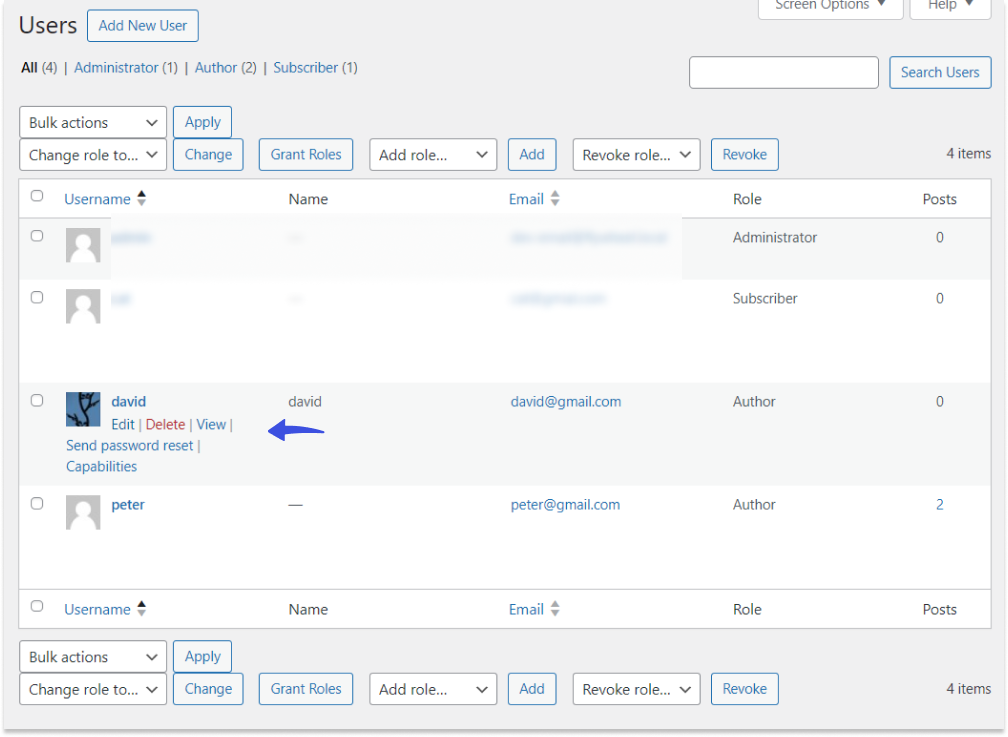
On the next screen, navigate to the user for whom you wish to change the name on your site and click the Edit button.
On the next screen, you can add the author’s First, Last, and Nickname. The username will remain as it is.
Next, click the dropdown menu against the “Display name publicly as” option.
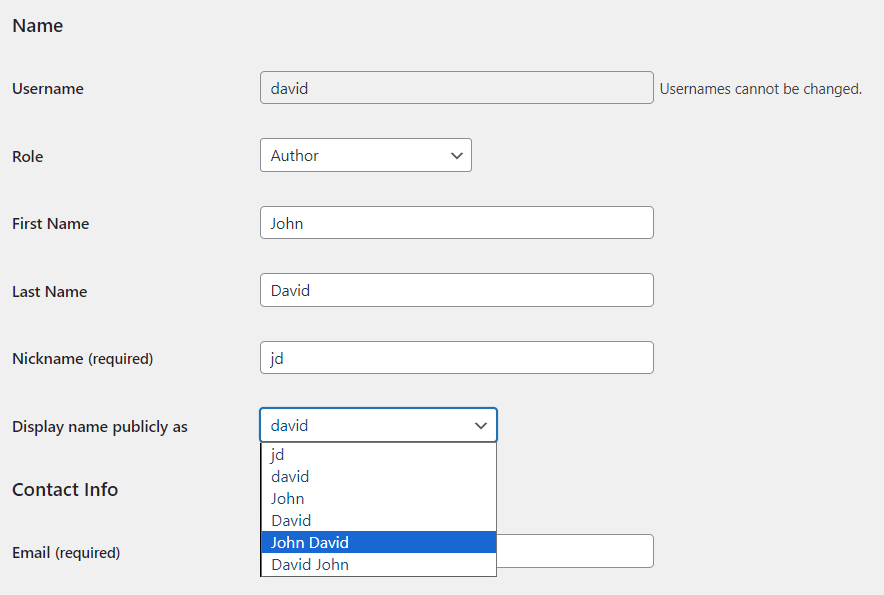
When done, click the Update User button below.

This change will be automatically applied to the published posts on your site.
Method 6. How to Change the Author Archive Slug in WordPress
By default, when an author creates a new post, WordPress automatically generates a slug based on the permalink settings. This slug contains information about your content.
WordPress places it right after the author’s username on the archive page. You cannot edit it by default.
However, you can fill the gap with a WordPress plugin like Edit Author Slug.
All you need to do is install and activate the plugin on your site.
Next, go to the WordPress admin dashboard on the left sidebar, navigate to Users, and click the All Users option.
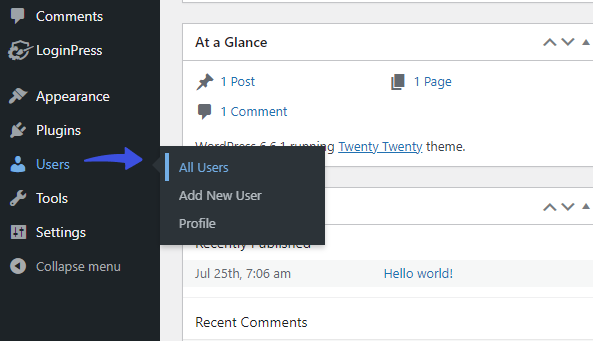
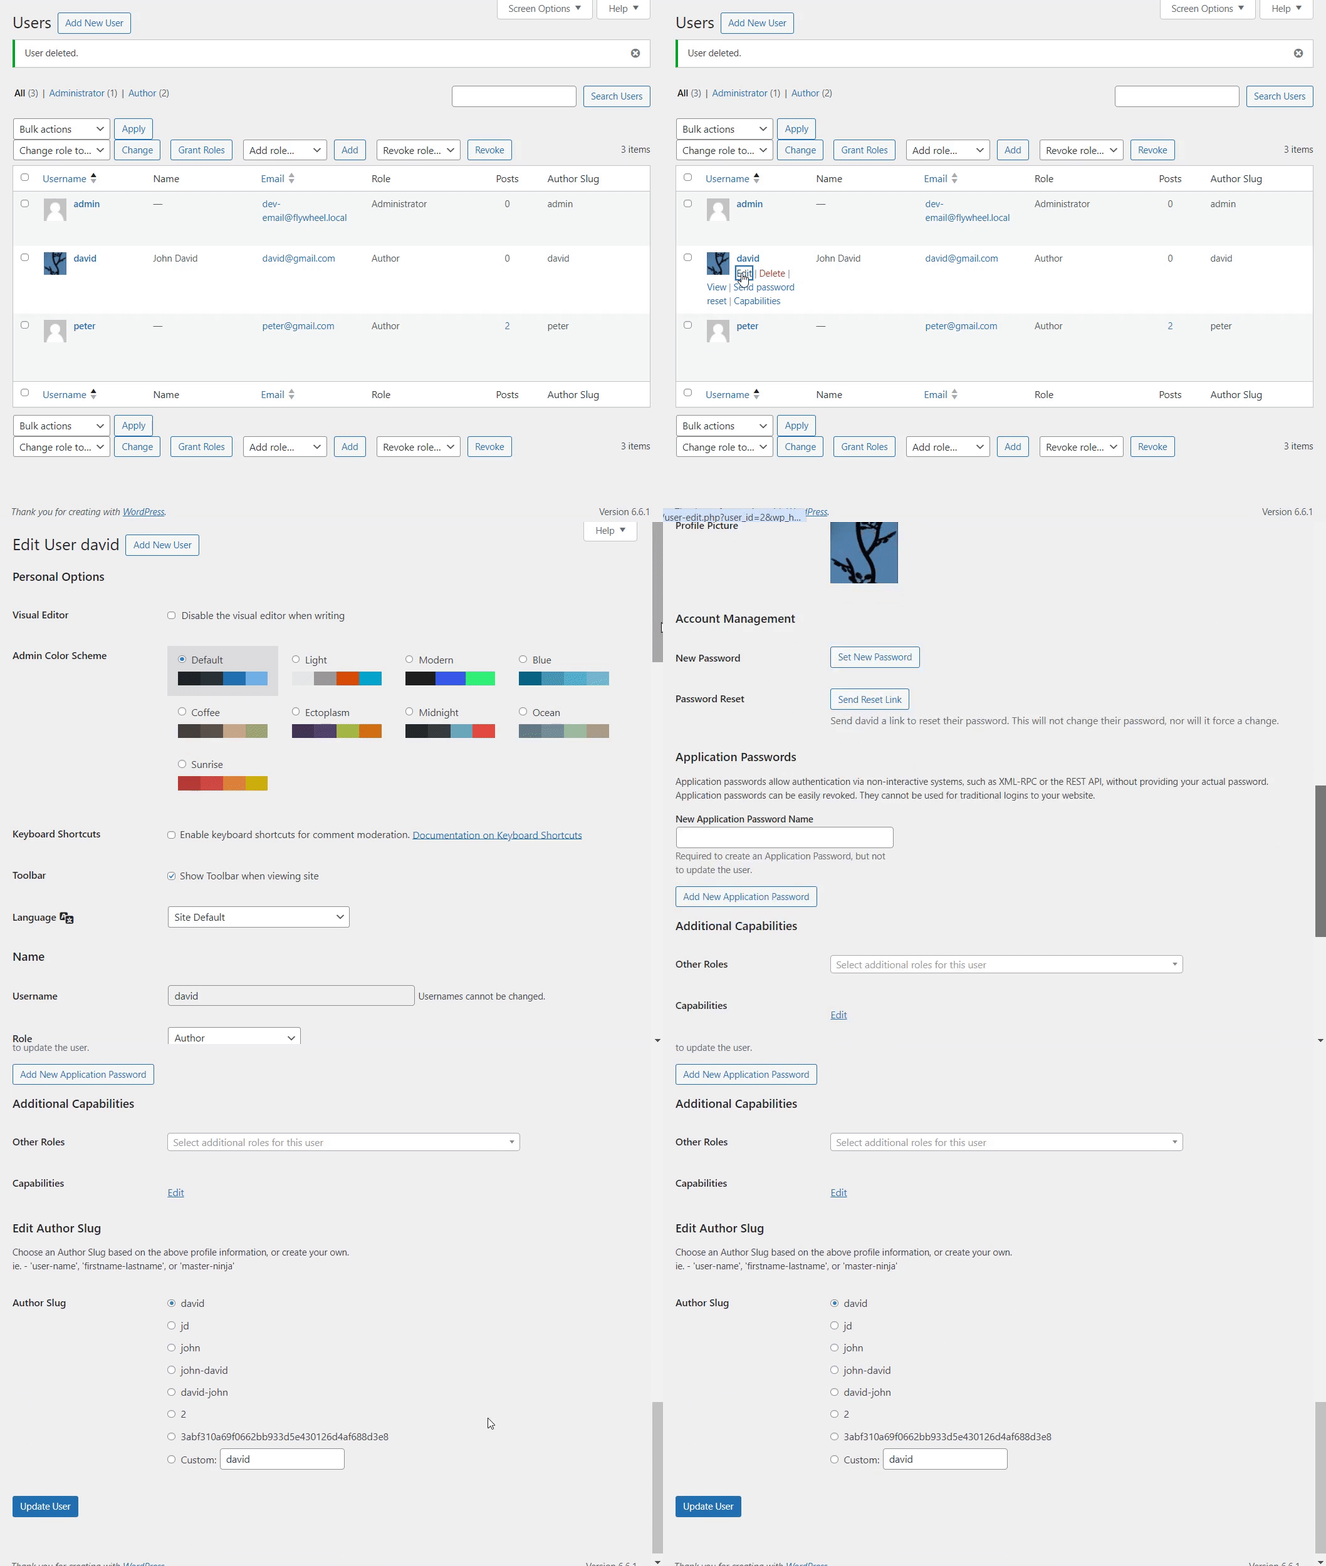
Now, hover over the desired user and click the Edit link. On the next screen, scroll down to the Edit Author Slug section.
See the GIF below:
Here, you can choose one of the listed slugs or enter a custom one on your own.
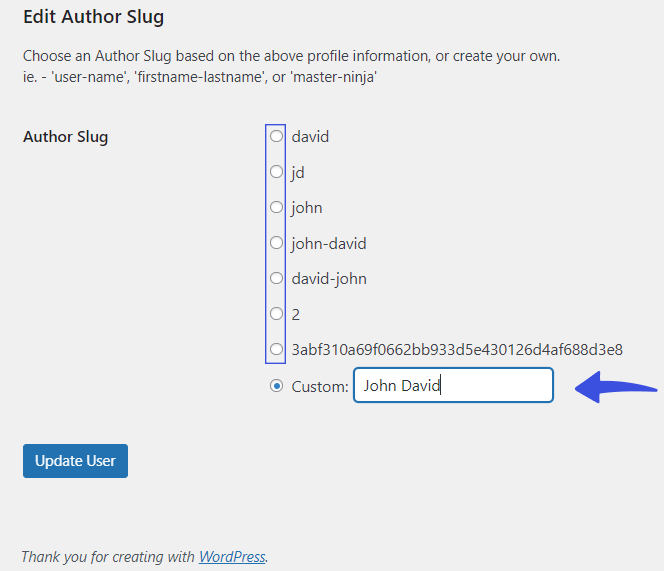
When done, click the Update User button.
How to Track Authors Stats in WordPress
Are you running a multi-author blog or website? Keep in mind that top-performing authors are a must.
This is where Analytify Author Tracking Add-on comes to the rescue.
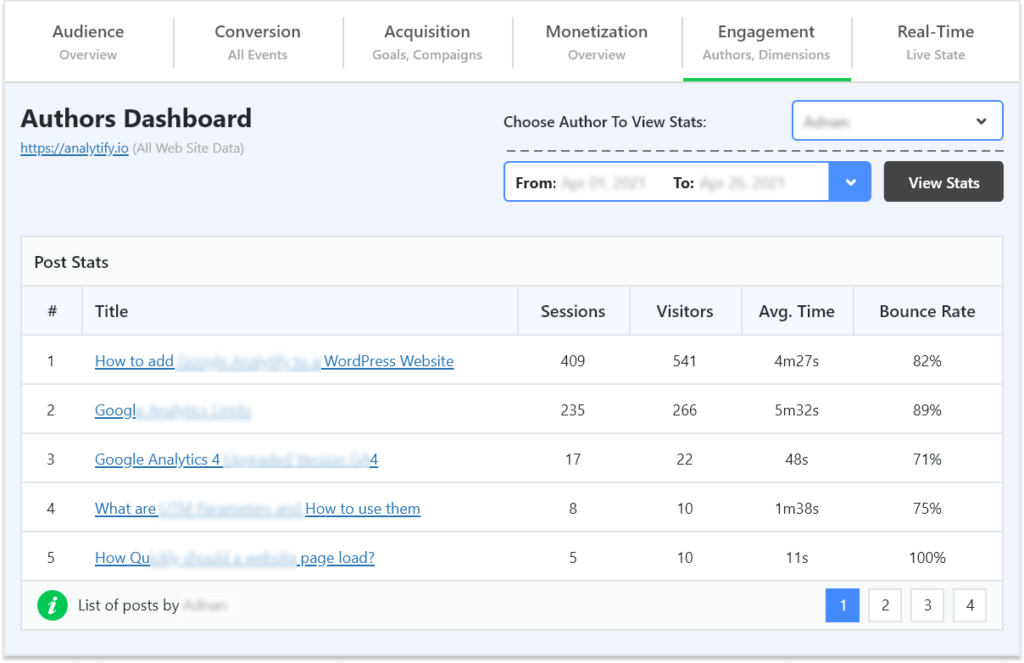
With this Add-on, you can easily manage multi-author blogs or websites. Its new Author Posts reporting feature allows you to assess the performance of each post.
It helps you identify which author drives the most traffic, generates engagement, and influences the bounce rate. You can also optimize content strategies and boost your WordPress site’s overall performance.
See the image below:
How to Hide Authors on WordPress Posts
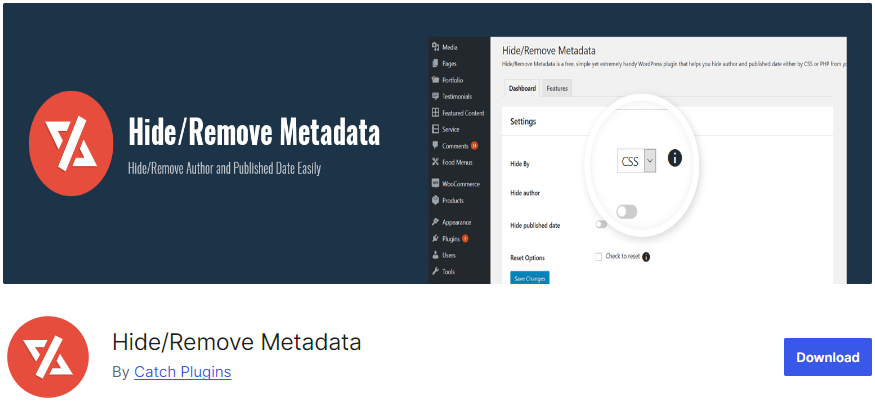
You can also hide authors on WordPress Posts. To do so, install and activate the Hide/Remove Metadata plugin on your site.
Go to the left sidebar of the WordPress admin dashboard, navigate to tools, and click the Hide/remove Metadata option.
On the next screen, enable the Hide author option.
Note: You can also help with the published date by enabling the Hide published date option.
When done, click the Save Changes button.
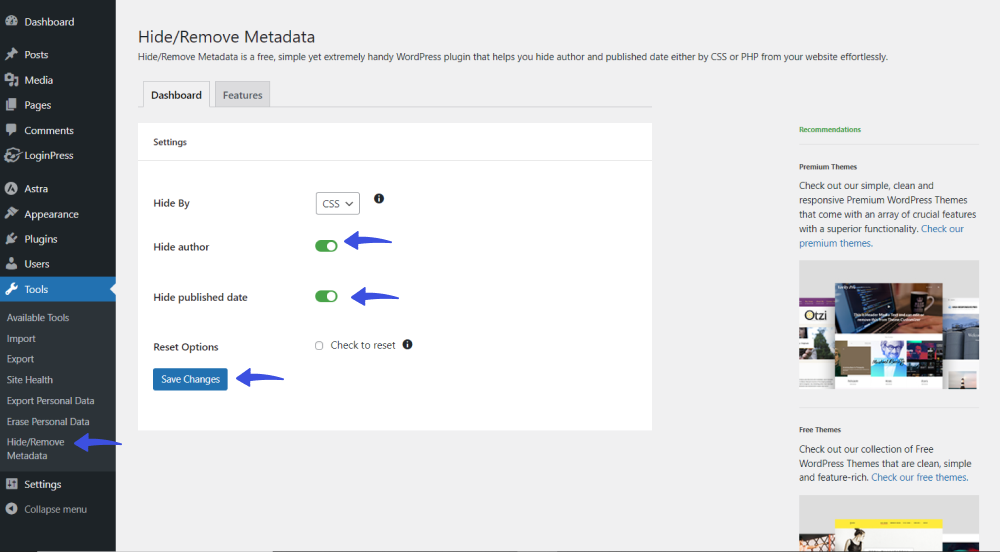
You’ve hidden the author successfully.
Bonus: How to Change Your WordPress Login Page
Now that you know how to change the author in WordPress, why not customize the default WordPress login page to reflect your brand’s identity?
This is where LoginPress jumps in!
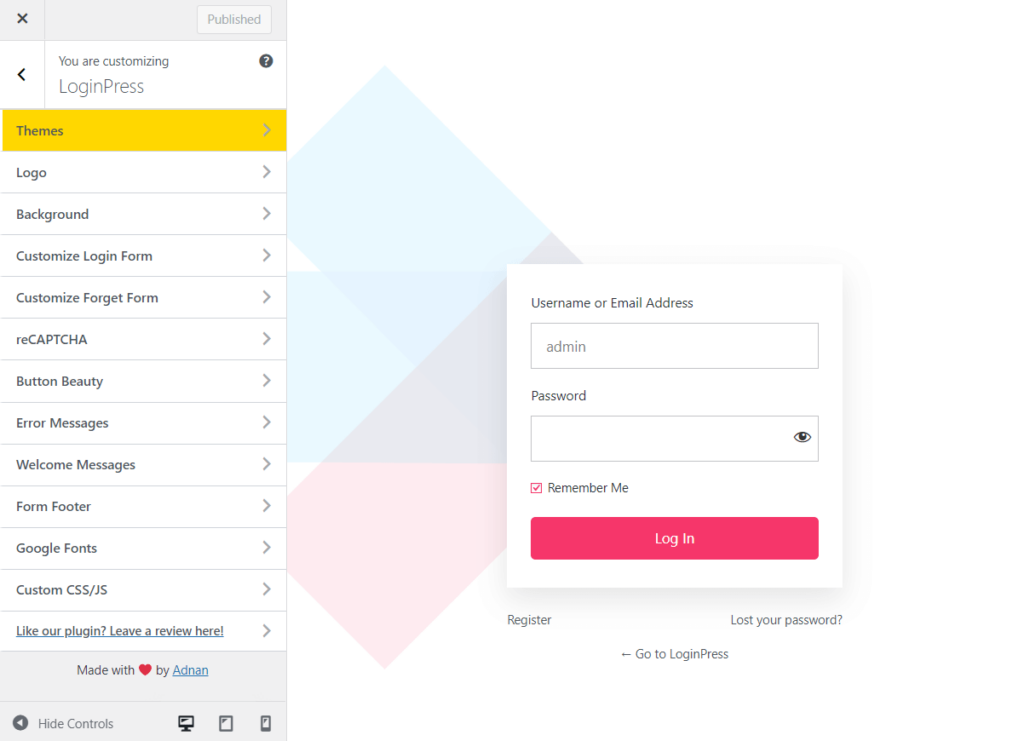
It is the best WordPress login page customizer plugin. Use Loginpress to customize each element on the default WordPress login page without any coding required.

Customize Your WordPress Login
Stand out from the competition with the best WordPress login plugin that lets you quickly and easily customize your login page – no coding required!
LoginPress has all the features that help you control the overall behavior of the default WordPress login, register, and lost password page, including:
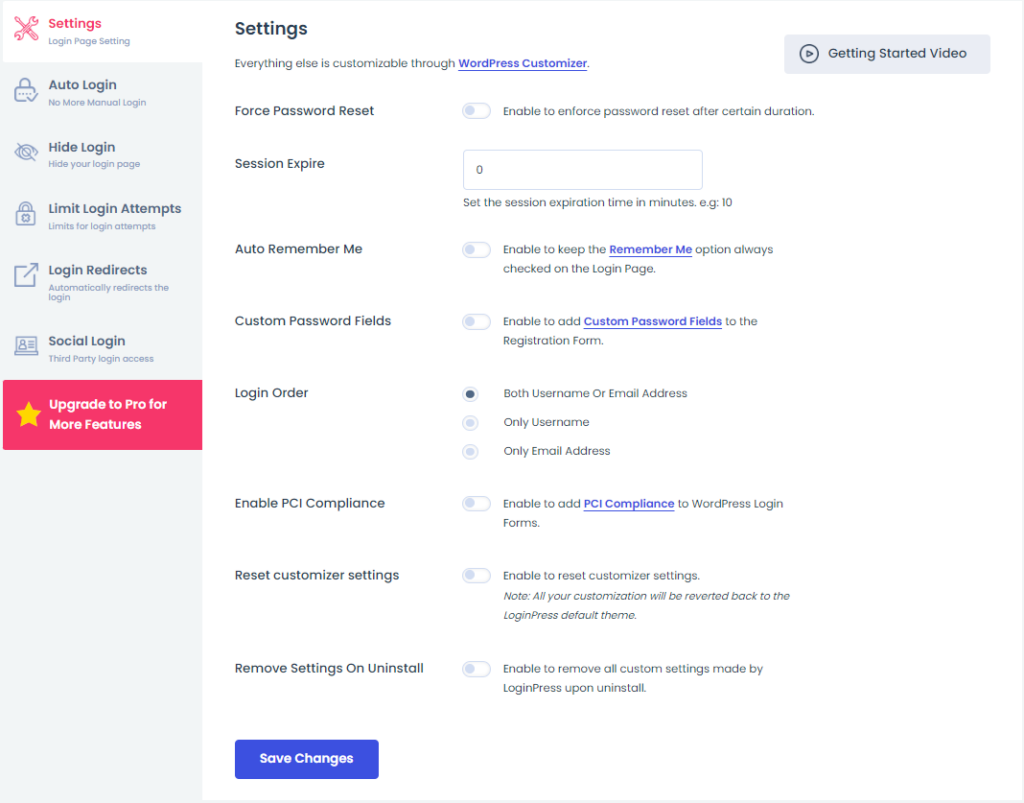
Other than this, you get features to customize the overall look and feel of your login page, such as:
- Themes
- Logo
- Background
- Customize Login Form
- Customize Forget Form
- reCAPTCHA
- Button Beauty
- Error Messages
- Welcome Messages
- Form Footer
- Google Fonts
- Custom CSS/JS
Wait, there’s a lot more packed with LoginPress Pro, including:
Upgrade to LoginPress Pro and strengthen the default WordPress login security.
Change WordPress Author (FAQs)
Can I add multiple authors in a single WordPress post?
Yes, you can easily add multiple authors in a single WordPress post. All you need to do is install and activate a WordPress plugin like PublishPress Authors on your site. It lets you create, manage, and display one author, coauthors, multiple authors, etc., for all your WordPress content.
Can I change the author of multiple posts at once?
Yes, you can change the author of multiple posts at once. Go to your WordPress dashboard, navigate to Posts, and click All Posts. Next, select the posts you want to change. In the “Bulk Actions” dropdown menu, select Edit and click the Apply button. Now, choose the new author from the “Author” dropdown and click “Update” to apply the changes.
Can I edit WordPress author for a post without editing the post content?
Yes, you can change the author of a post without editing the post content. All you need to do is to change the author using the methods described in this article above.
Do I need any special permissions to change the author of a post?
By default, WordPress Authors and Contributors cannot change post authors. To change the author of a post, you need at least editor or administrator privileges.
Final Thoughts
To sum up, we’ve shared different methods for changing the author in WordPress. These methods will ensure that your posts reflect the correct authors.
Manage your content and authorship!
That’s all for this article!
Here is a quick recap:
- Method 1. How to Change the Author in WordPress via Block Editor
- Method 2. How to Change the Author in WordPress using Classic Editor
- Method 3. How to Change the Author in WordPress with Quick Edit
- Method 4. How to Change the Author in WordPress for Posts in Bulk
- Method 5. How to Change the Author’s Display Name in WordPress
- Method 6. How to Change the Author Archive Slug in WordPress
You may also like to read our other valuable how-to guides, including:


