How to Indent in WordPress (Multiple Options 2025)
Do you want to learn how to indent in WordPress? If yes, we’ve got you covered!
Indenting a paragraph in WordPress improves the readability of your content. You can use it to emphasize a paragraph, visually separate blocks of text, or maintain a professional look.
In this article, we’ll cover 5 easy methods to help you understand how to indent text in WordPress.
WordPress Indentation (TOC):
Why Do You Need to Indent a Paragraph in WordPress?
Indenting in WordPress helps improve your content’s readability and overall structure. It adds spaces or tabs at the beginning line of your paragraphs.
Here’s why you might choose to indent a paragraph:
- Visual Separation: Indenting a paragraph lets you visually separate text.
- Professional Appearance: You can indent a paragraph to give your content a professional look.
- Highlighting Quotations: Indents can highlight quotations, lists, etc. It will help you make your quotes, lists, information, etc., pop out.
- Continuity or Subsections: It provides a sense of continuity, telling the readers it is a subsection of the same text.
- Readability: An indented paragraph improves the overall readability of the text by visually separating different blocks of paragraphs, indicating their hierarchical relationship.
How to Indent in WordPress (5 Methods)
Method 1. Indent Paragraph in WordPress Using Classic Editor
WordPress Classic Editor provides a built-in option for paragraph indentation.
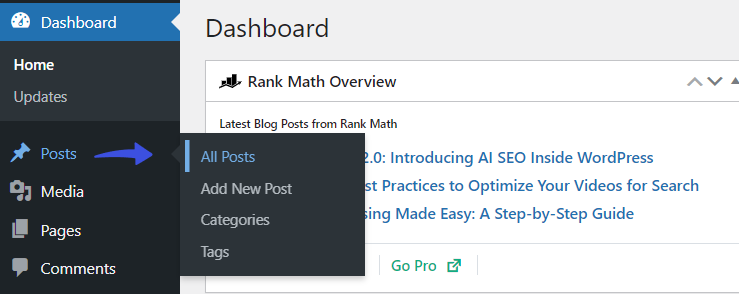
For this purpose, go to the left sidebar of the WordPress admin dashboard, navigate to Posts, and click the All Posts option.
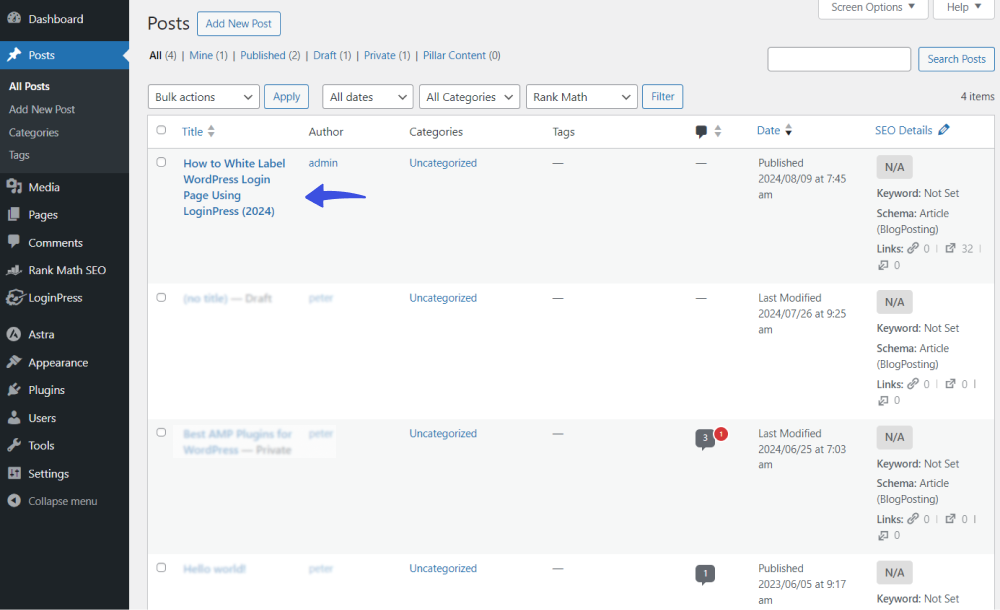
On the next screen, select the post where you want to indent a page.
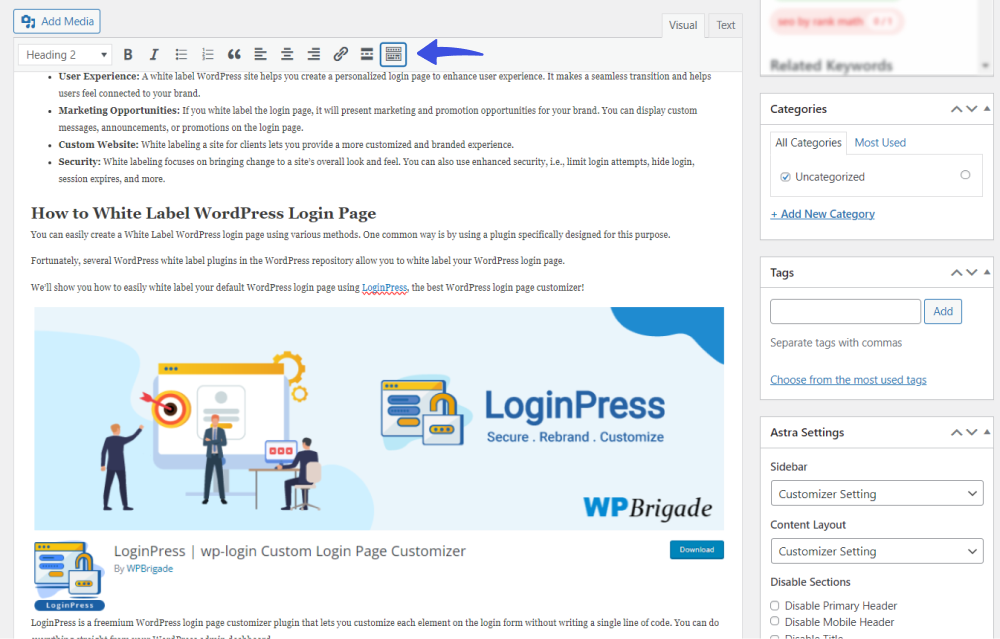
Now, click the Toolbar Toggle icon.
See the image below:
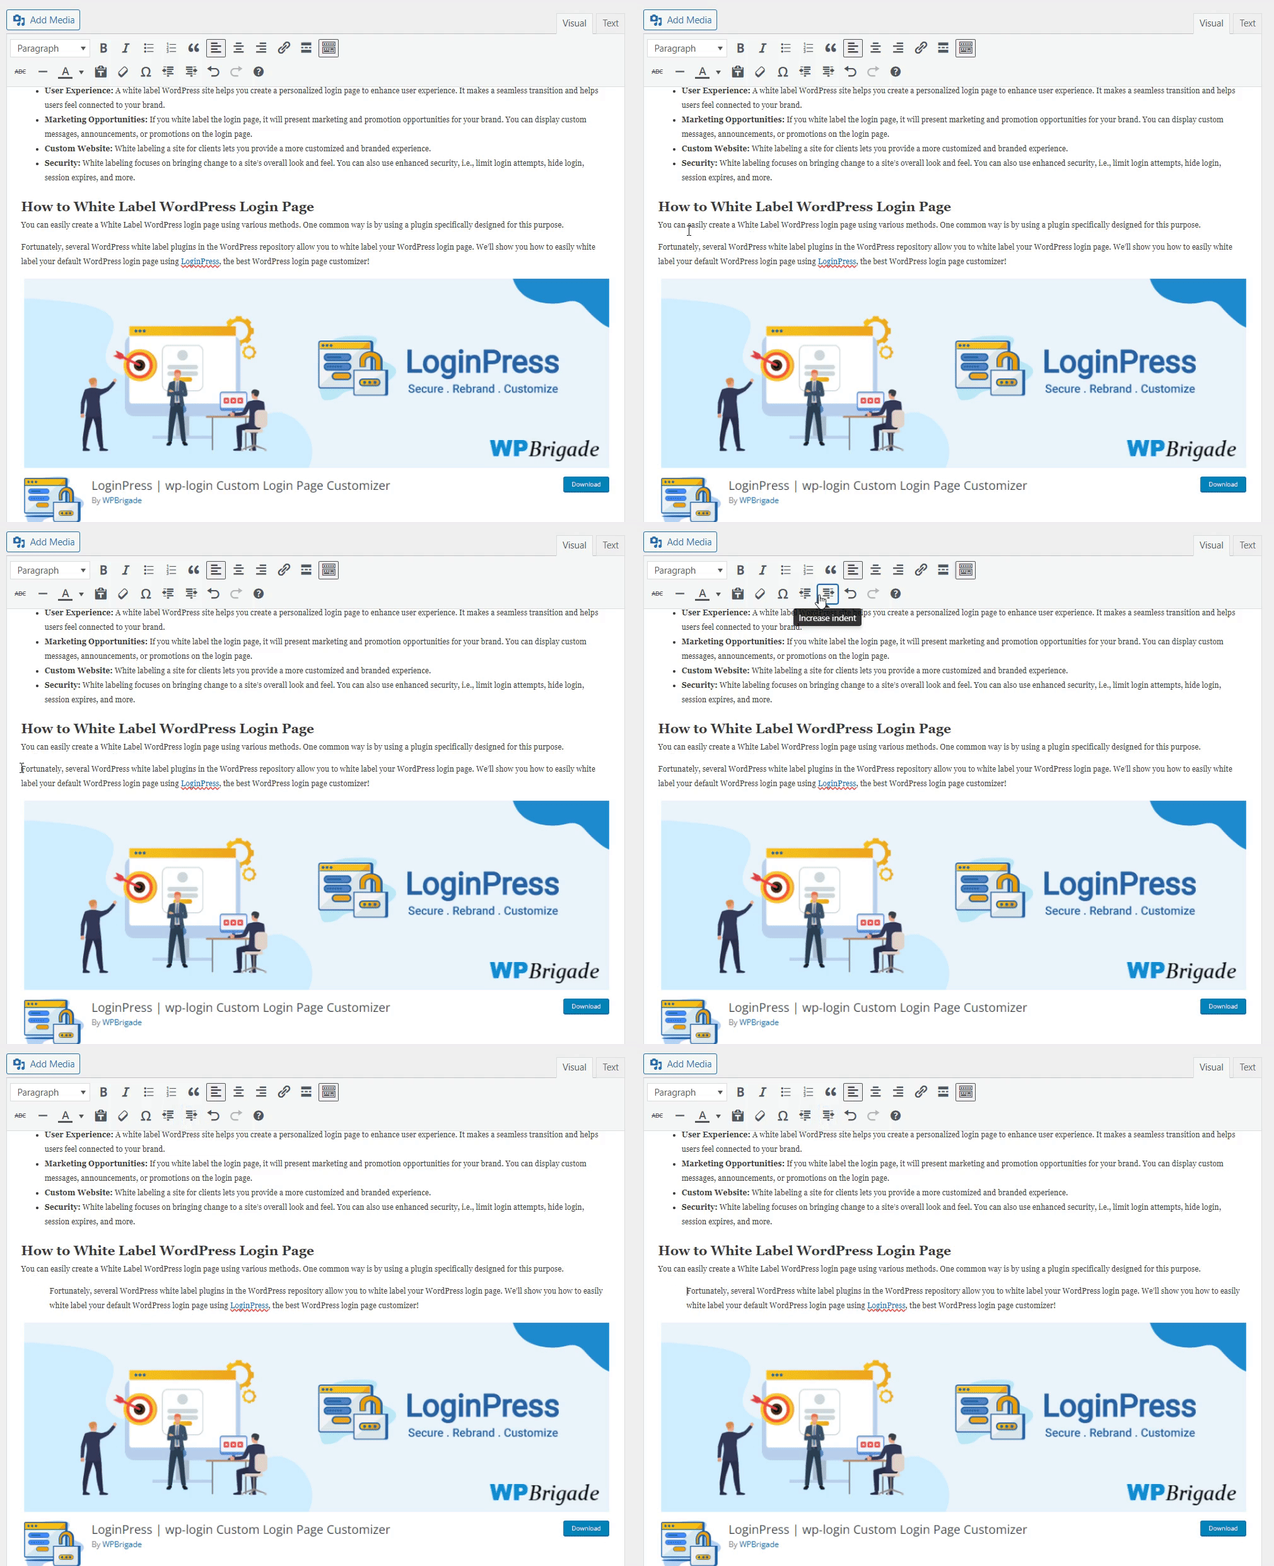
Select the paragraph you want to indent and click the indent button. It will add spacing to the left of the paragraph.
See the GIF below:
Method 2. WordPress Indent for Gutenberg Editor
By default, paragraph block in Gutenberg doesn’t support indenting.
But don’t worry, there is a simple solution. All you need to do is add a classic block instead of a paragraph block for text.
For this purpose, click the + (plus) sign within your selected post.
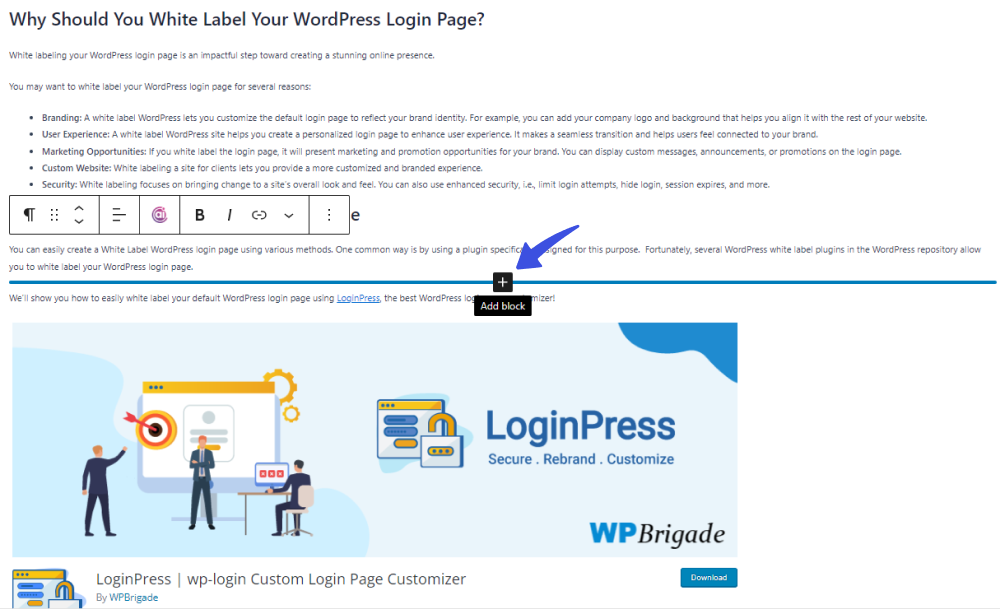
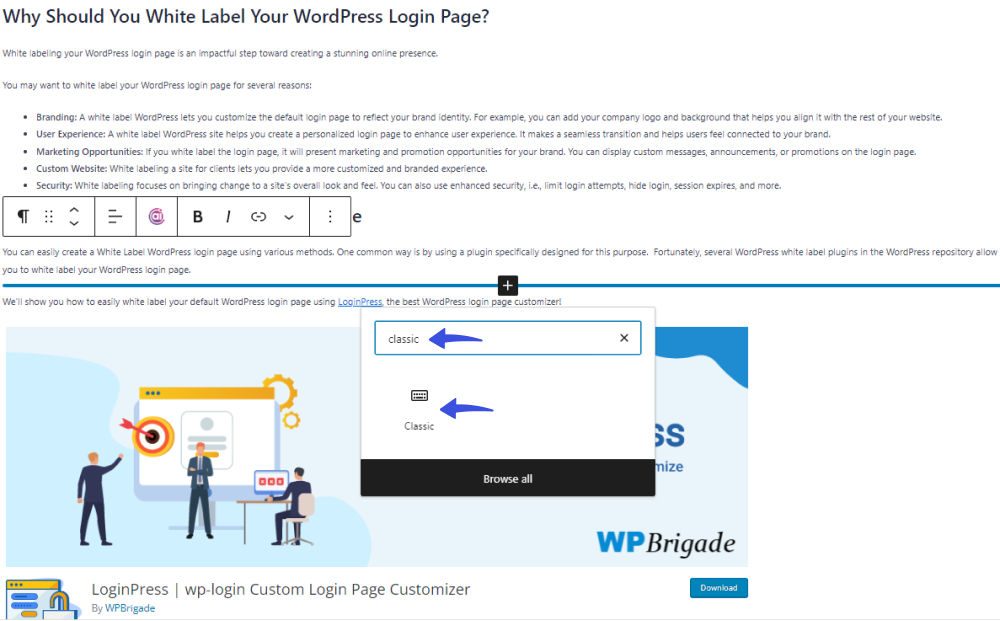
Next, search for the Classic block.
Now, you can see the indent tools for your text with the Classic block.
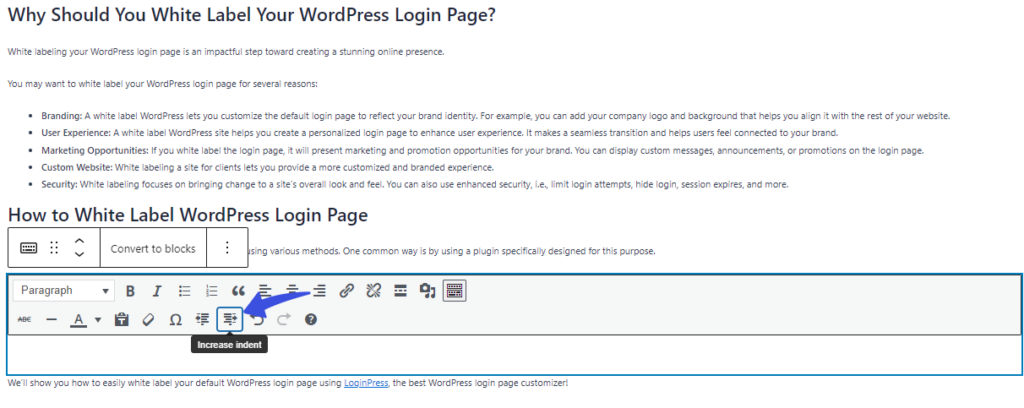
Simply add the text in it and click the Increase indent button.
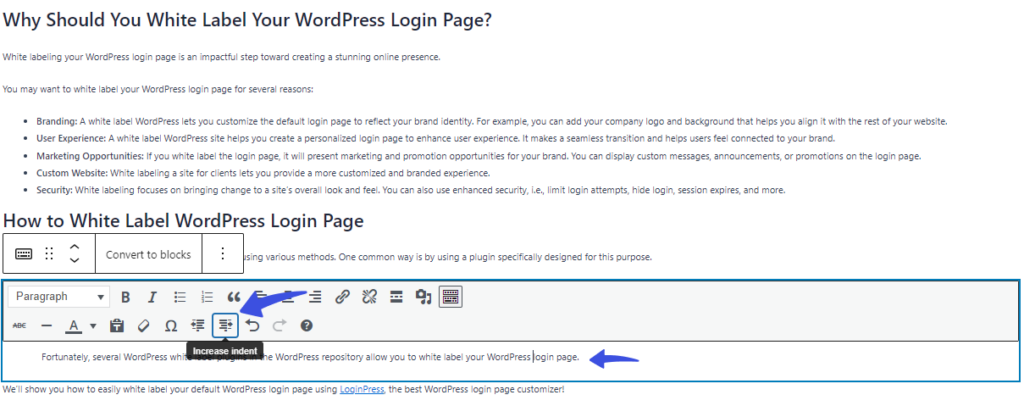
Your text has been indented.
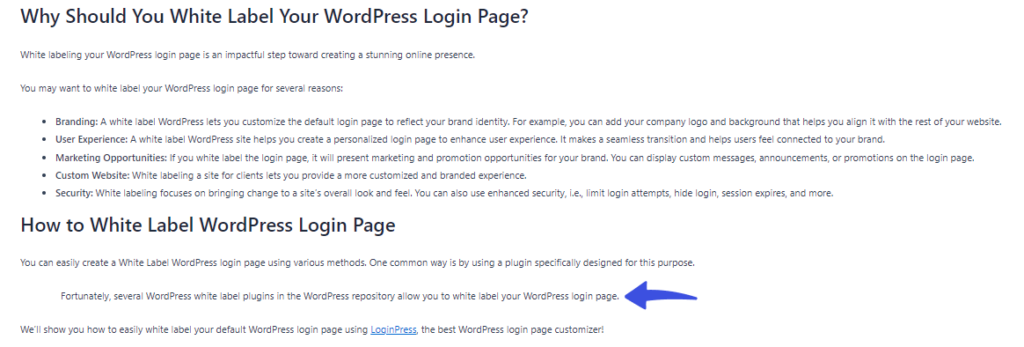
When done, click the Publish/Update button to make your changes live.
Method 3. WordPress Indentation Using HTML Tags
You can indent your paragraphs using HTML tags in the text mode of the classic editor.
For this purpose, open the desired post where you want to make changes. On the next screen, click the Text tab.
See the image below:
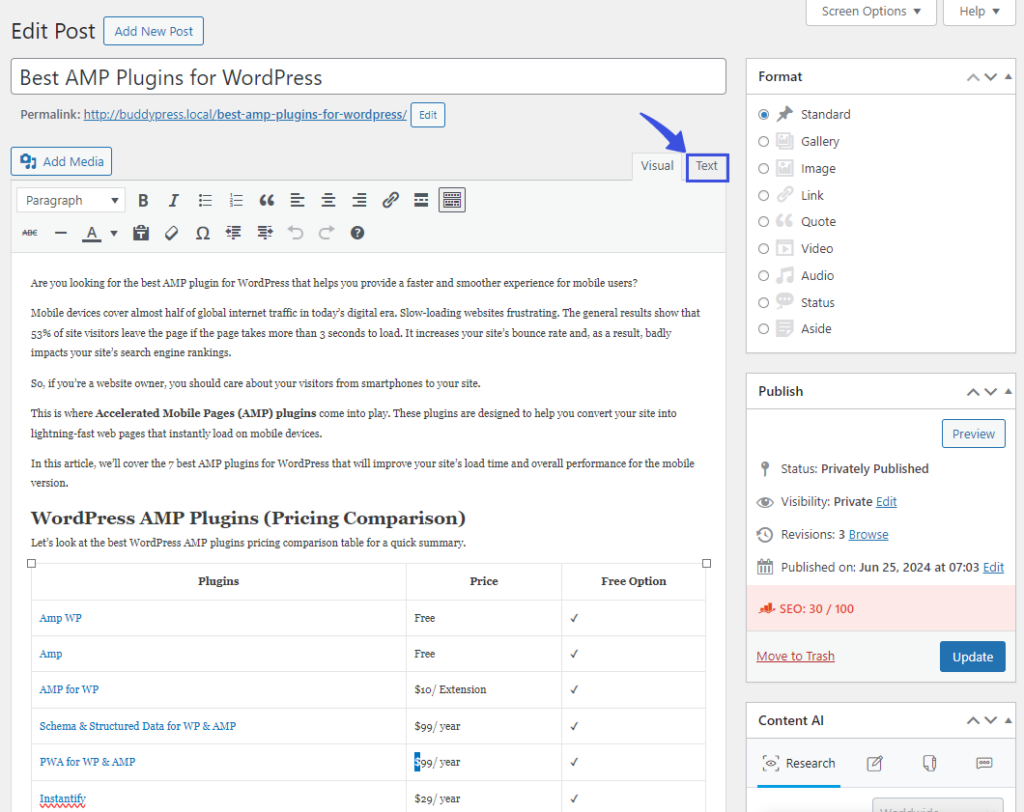
Now, Next, you need to do is to wrap your text around paragraph tag <p> and </p> tags and add inline CSS to the paragraph text like this:
<p style="padding-left:35px;">Your paragraph text goes here...</p>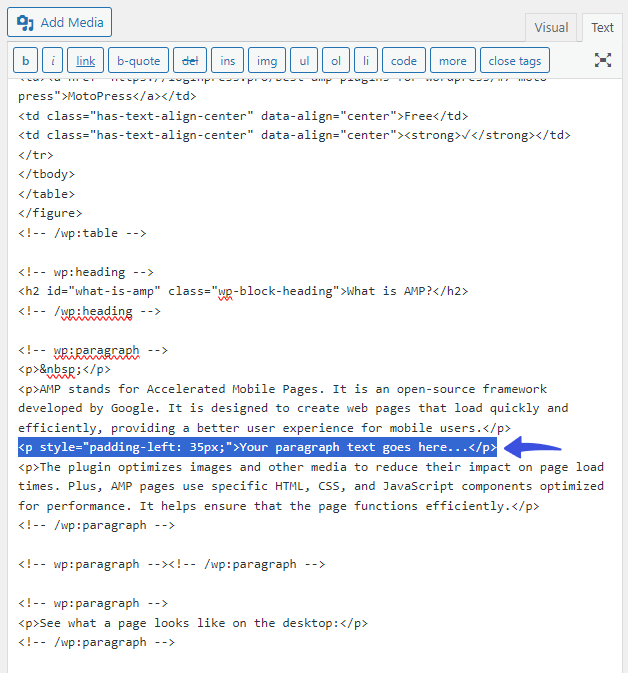
Now, return to the Visual tab, where you can see the indented paragraph that says, “Your paragraph text goes here….” Simply type in the desired text within this indented paragraph.
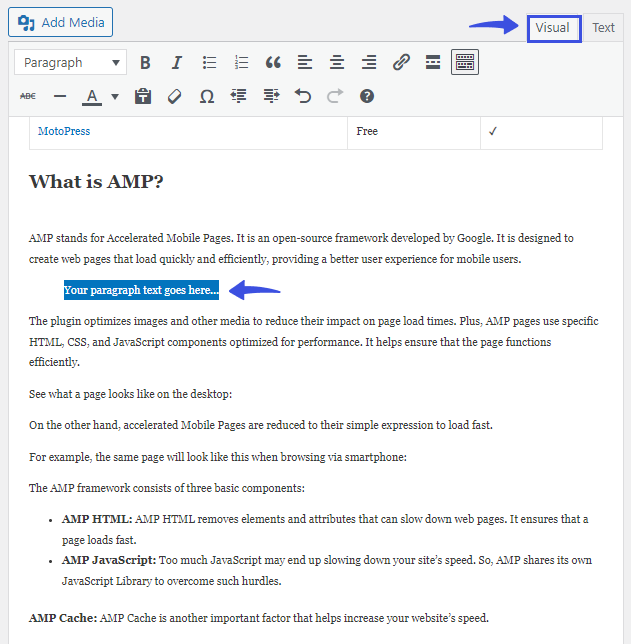
Repeat the method to indent other paragraphs in your text.
When done, click the Save/Update button.
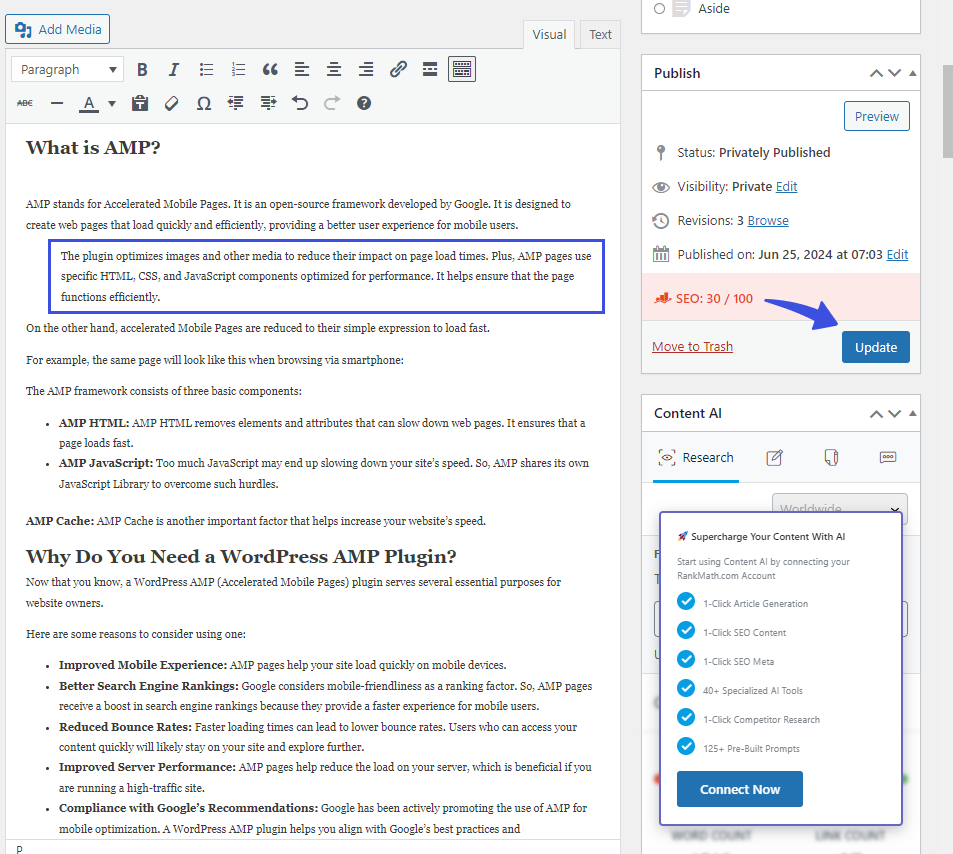
Method 4. How to Indent a Line in WordPress
Custom CSS code can help you indent the first line of a paragraph. All you need to do is add custom codes to your theme’s CSS.
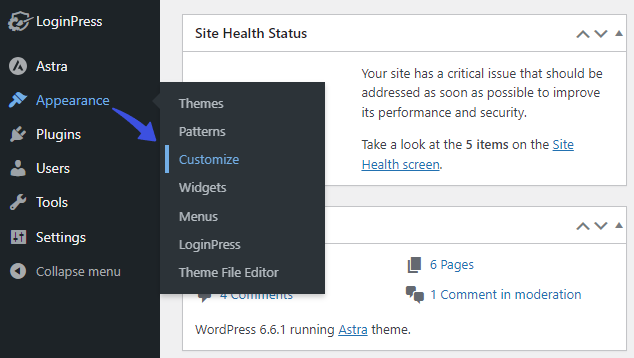
To do this, go to the left sidebar of the WordPress admin dashboard, navigate to Appearance, and click the Customize option.
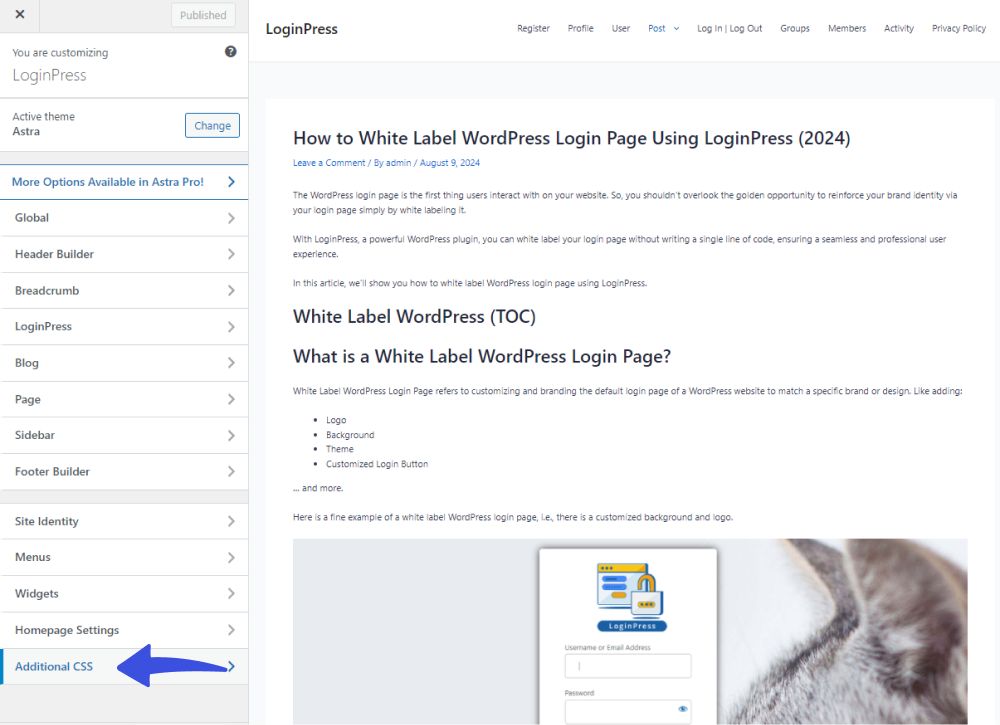
On the next screen, click the Additional CSS option.
On the next screen, you’re required to add the following lines of code to indent the first line of the paragraph by, say, 50 pixels.
Here is the code for you:
p.custom-indent {

text-indent:50px;

}
When added, click the Publish button on the top left corner of the screen.
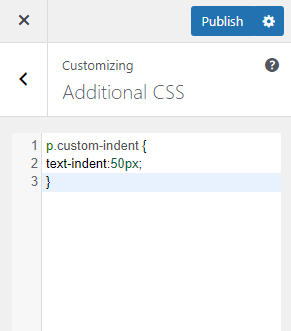
These lines of code will tell your browser to add 60px as text-indent if a paragraph has a .custom-indent class.
The next step is to go to the desired post, click the kebab menu in the upper right corner of the screen, and select the Code Editor option.
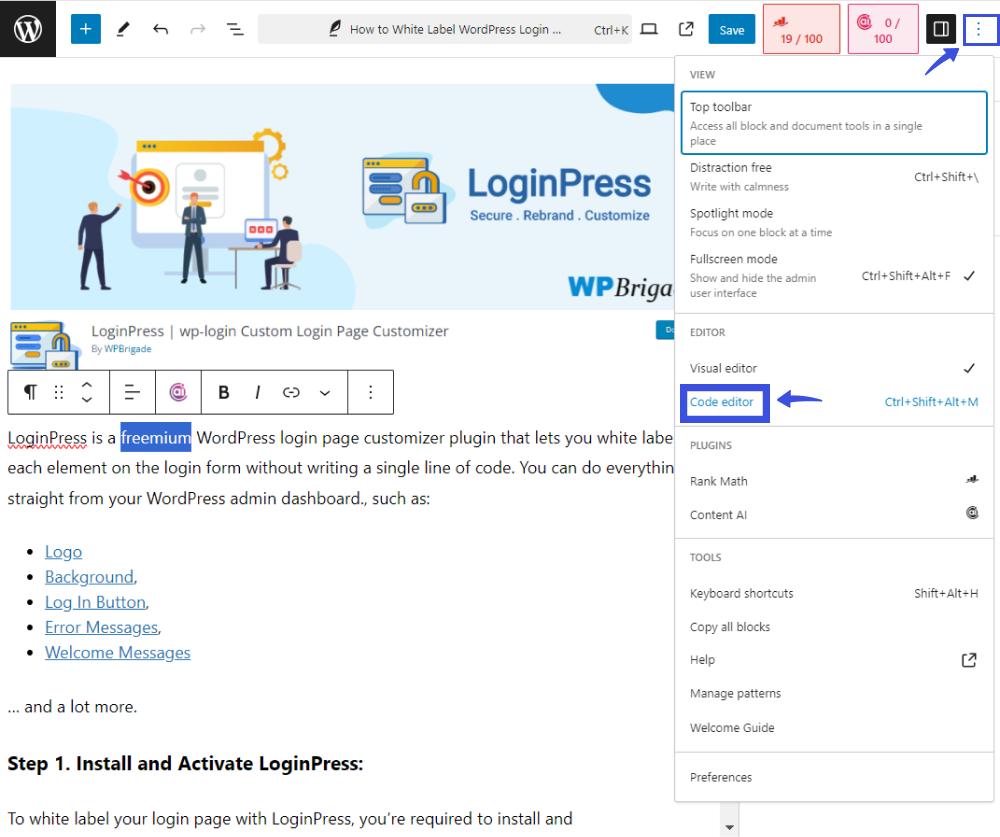
Now, and wrap your paragraph inside <p class=”custom-indent”> and </p> tag like this:
<p class="custom-indent">Your paragraph text goes here...</p>See how we did it:
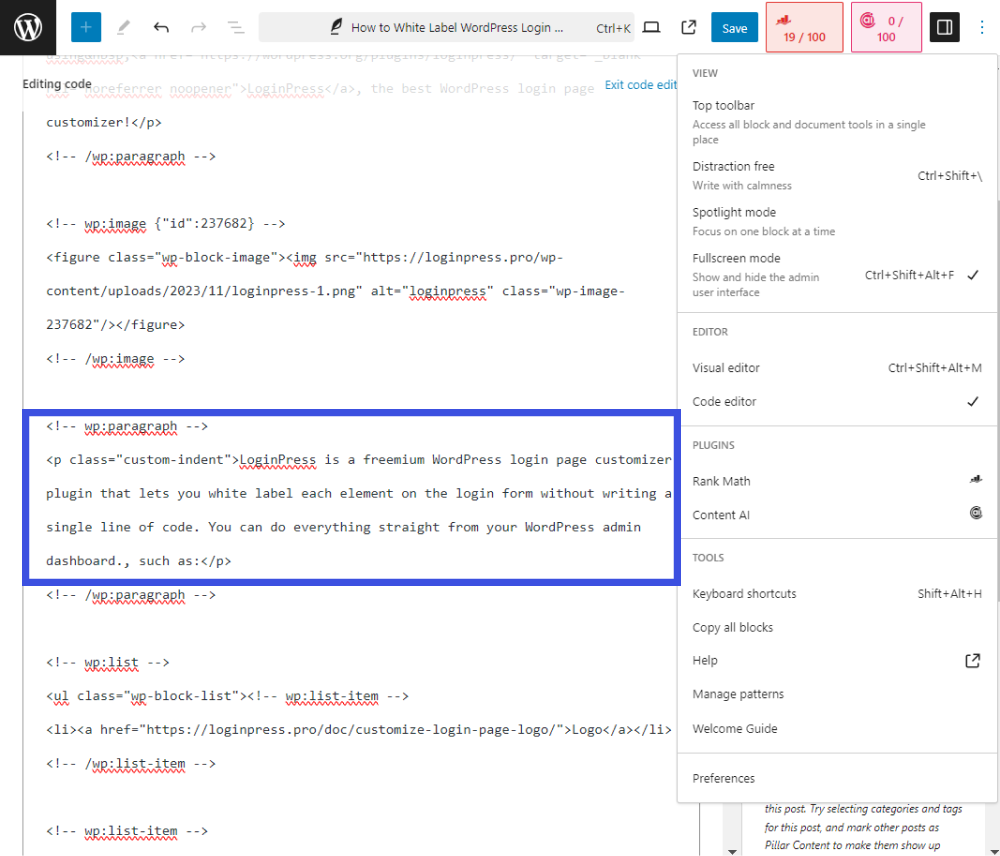
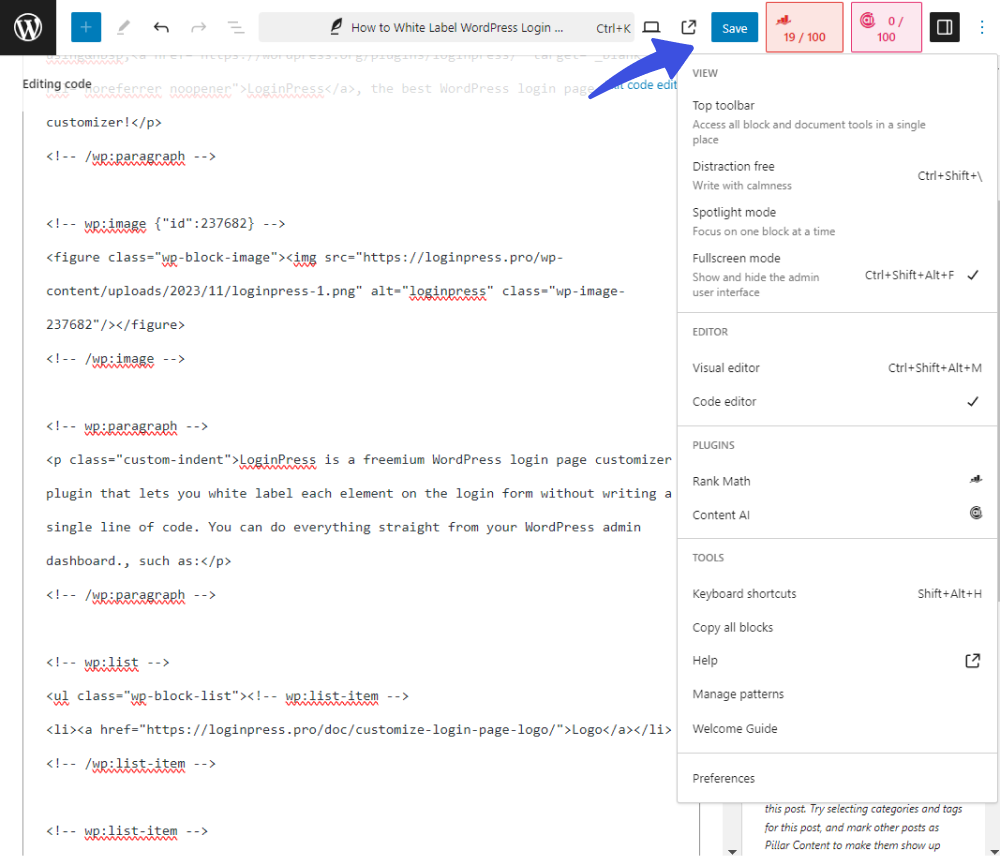
When done, click the Save button on the upper right corner of the screen.
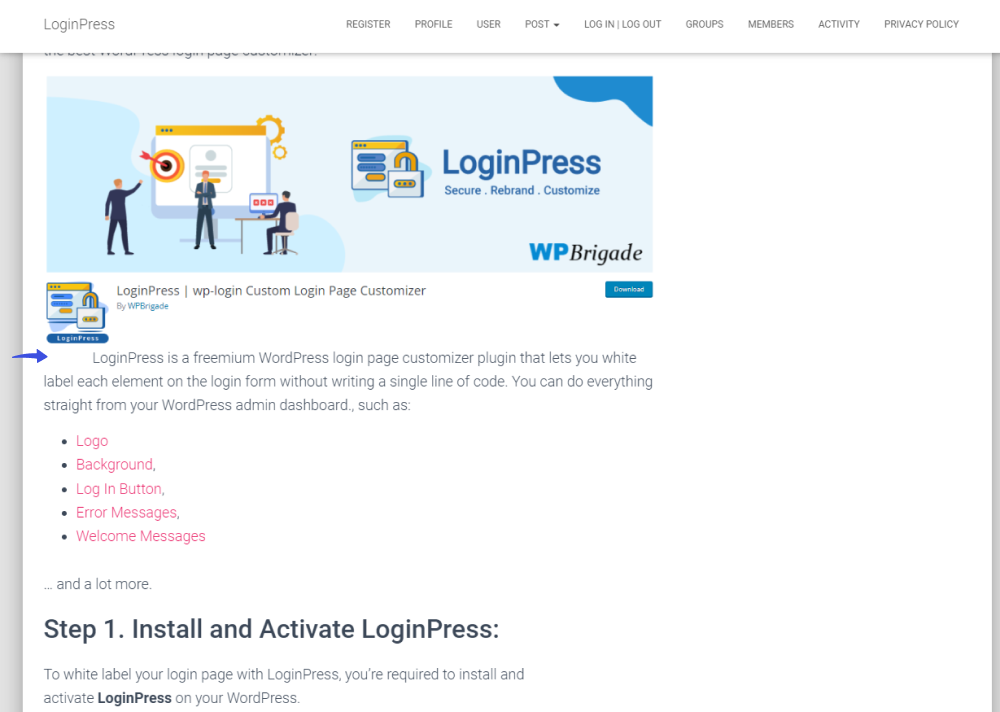
Now, you can preview your post, and you will see that only the first line of the paragraph has spacing before it.
Indent the First Line of All Paragraphs
You can also indent the first line of all paragraphs.
To do so, go to the left sidebar of the WordPress admin dashboard > Appearance > Customize option.

On the next screen, click the Additional CSS option.

On the next screen, add the following line of code within your theme’s custom CSS to indent the first line of all paragraphs of your posts.
article p {

text-indent:50px;

}
See the GIF below:
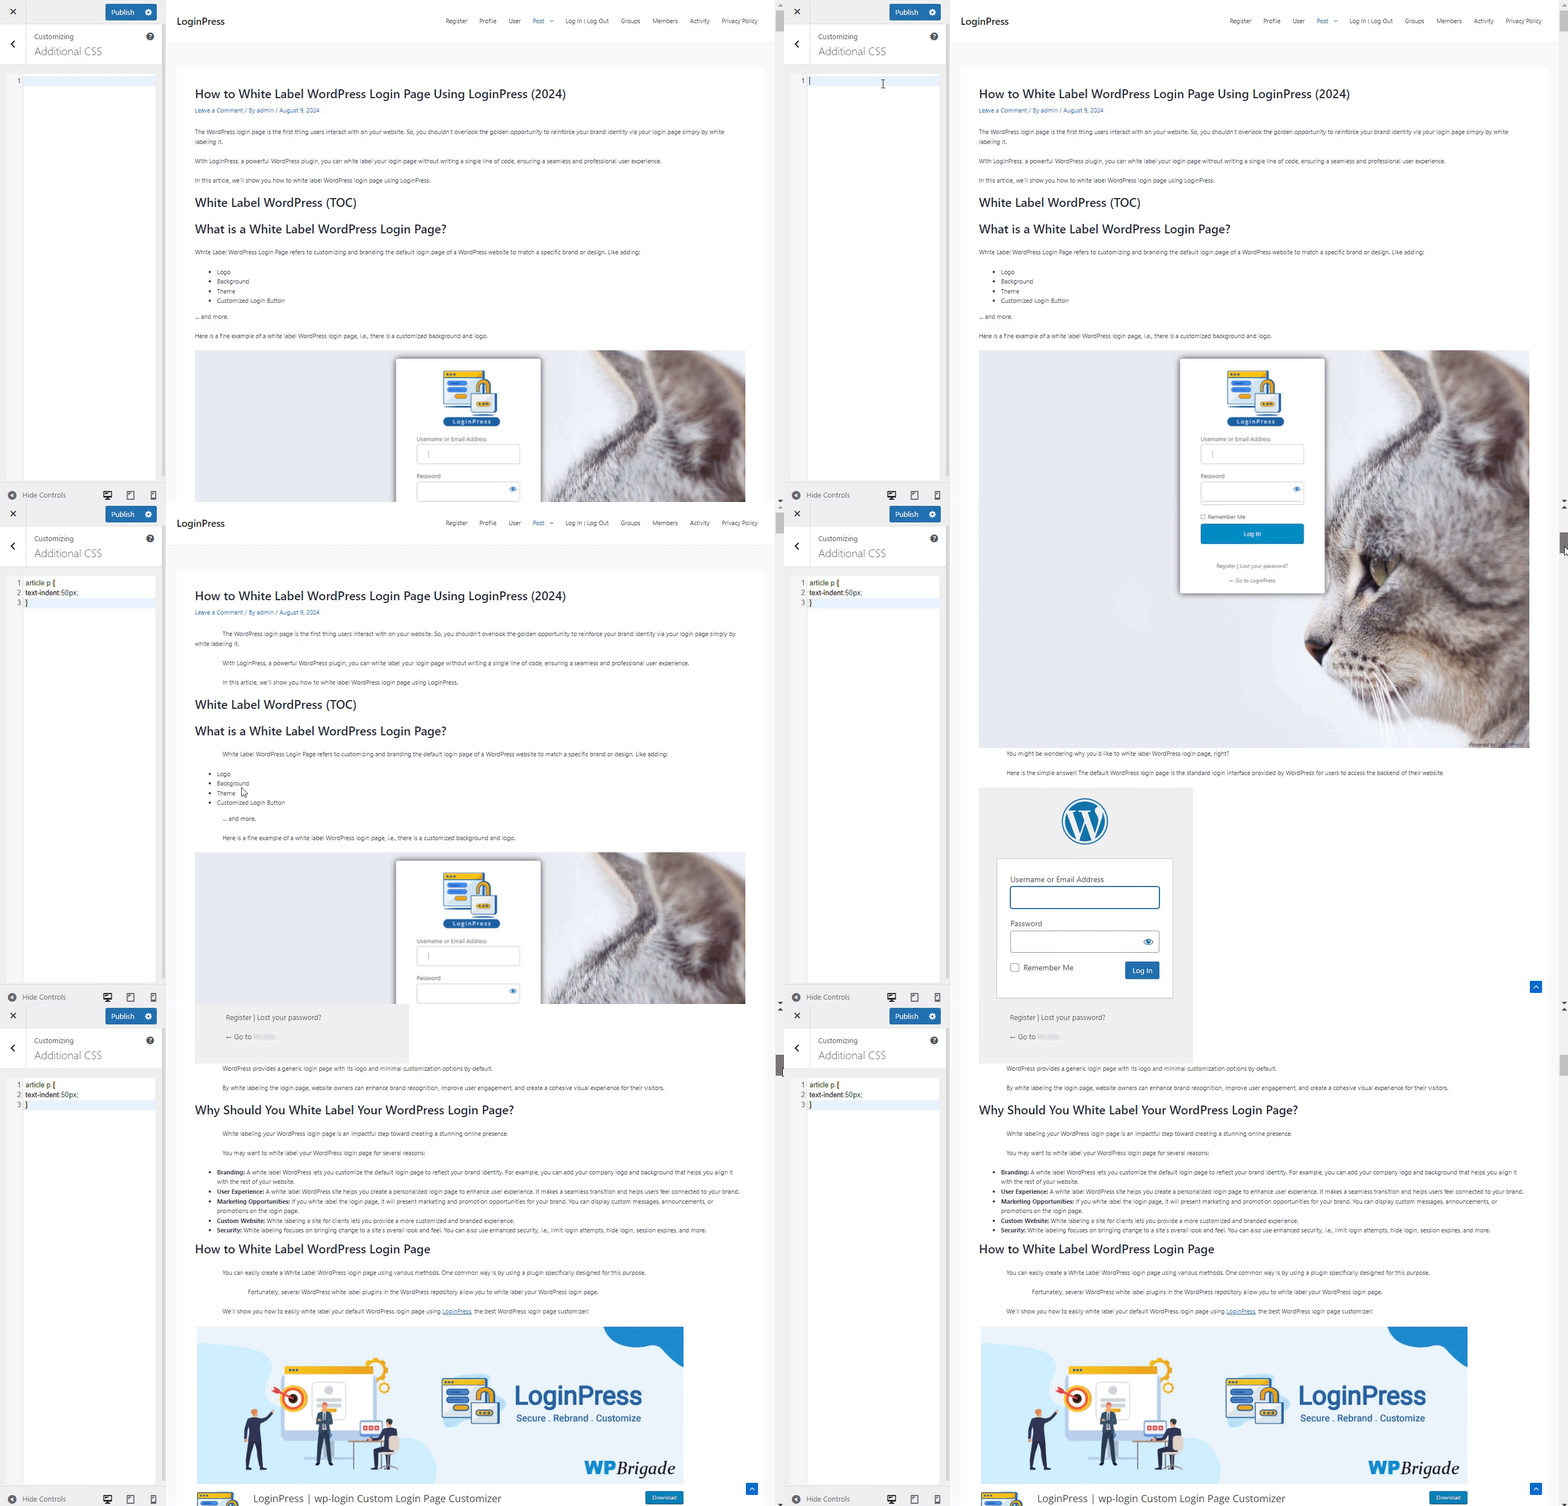
When done, click the Publish button on the top left corner of the screen.
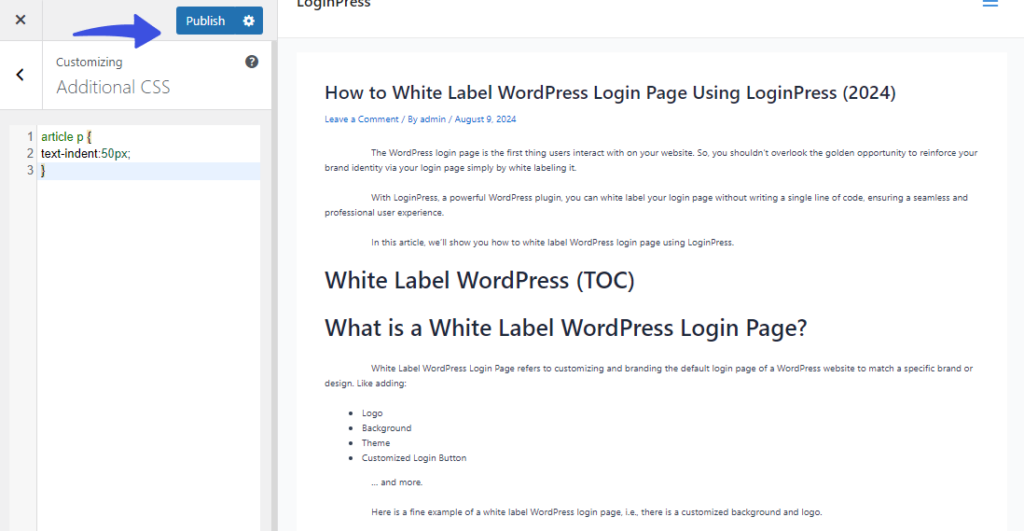
This will indent the first line of all paragraphs in this post.
Method 5. Apply a Hanging Indent to a Paragraph
You can also add a hanging indent to a paragraph.
It will not indent the whole paragraph, instead, only the line(s) after the first line.
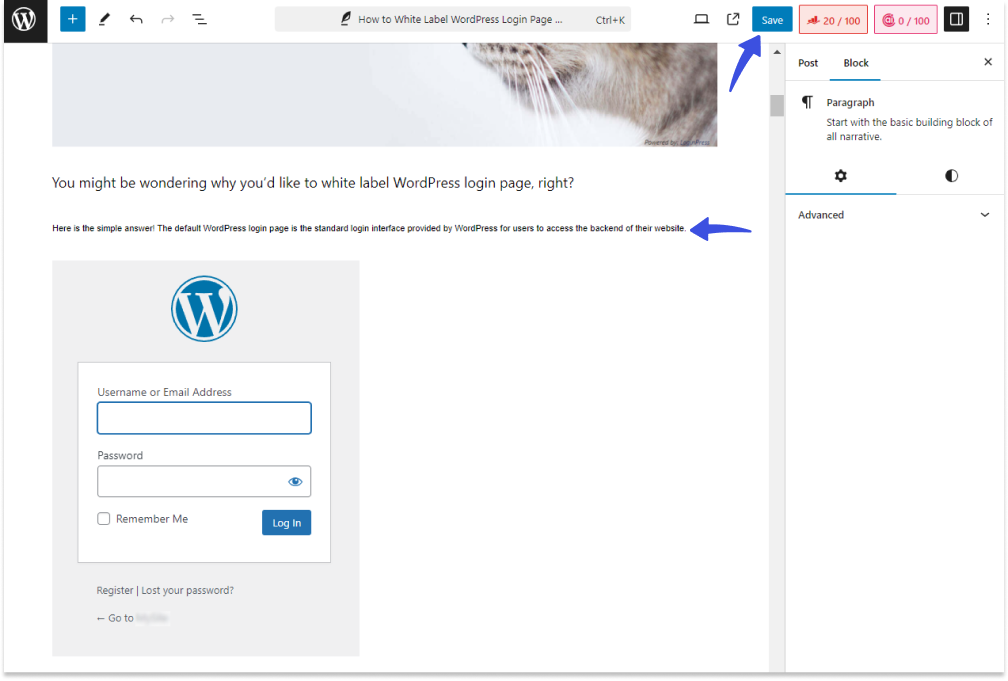
To do so, open a desired post and add a Custom HTML block as shown below:
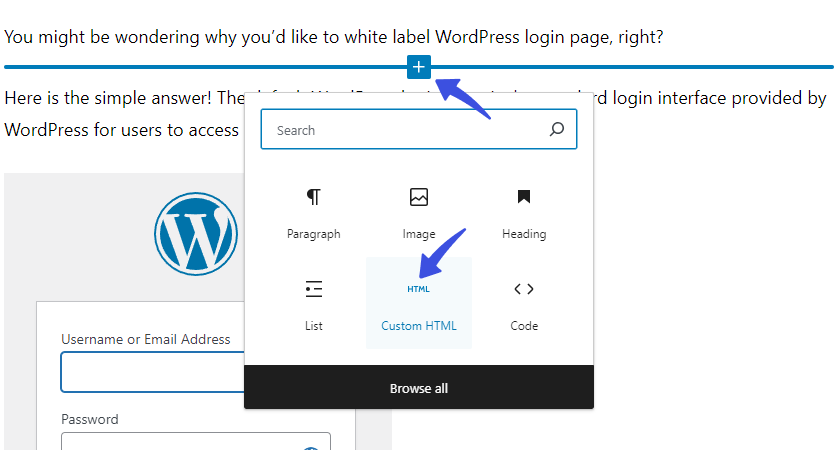
Next, you’re required to add the following code within the Custom HTML block:
<p style="padding-left: 40px; text-indent: -40px">Your text goes here.</p>See the GIF below:
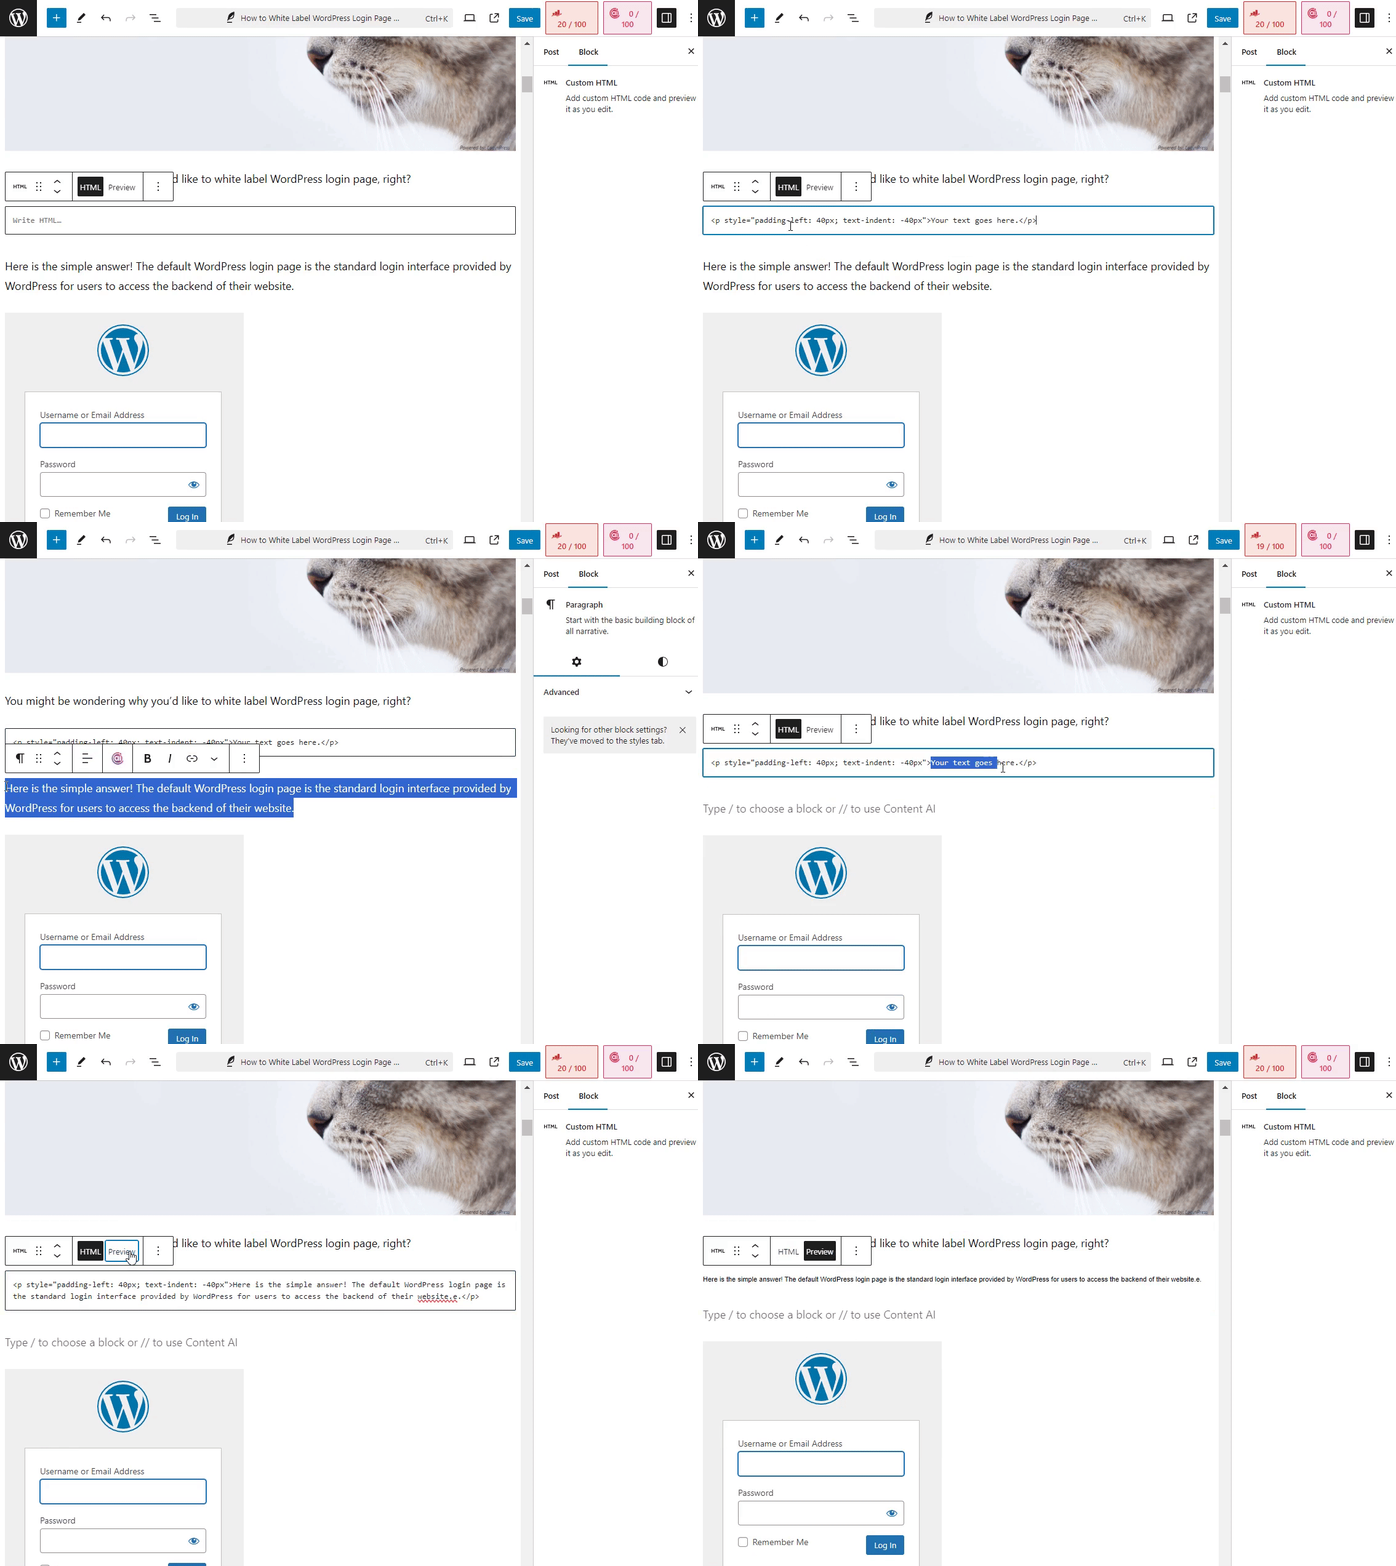
When done, click the Save button on the top.
Apply a Hanging Indent to All Paragraphs
You can apply a hanging indent to all paragraphs with the help of custom CSS code. For this purpose, you’re required to add custom codes to your theme’s CSS.
For this purpose, go to the left sidebar of the WordPress admin dashboard, navigate to Appearance, and click the Customize option.
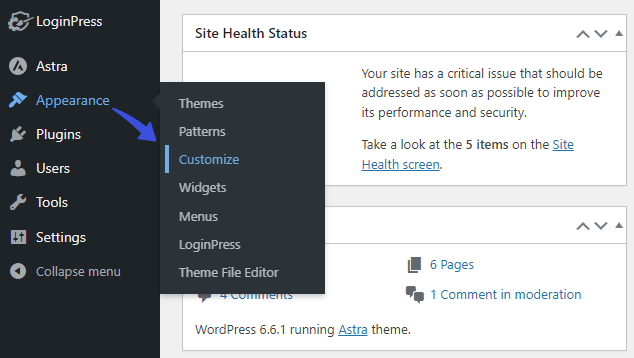
On the next screen, click the Additional CSS option.
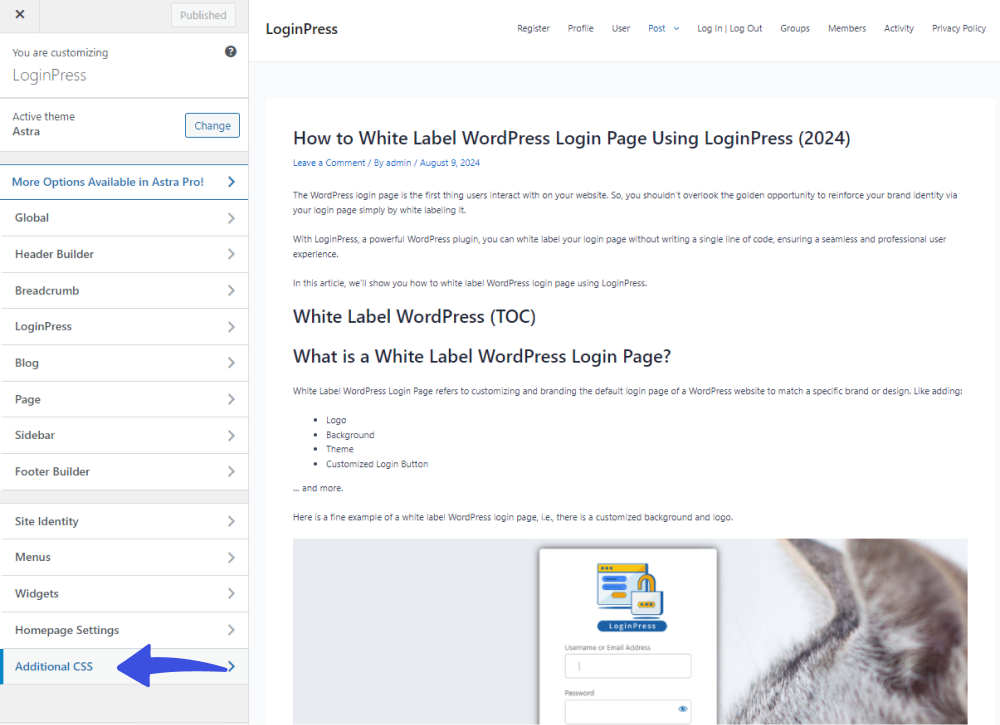
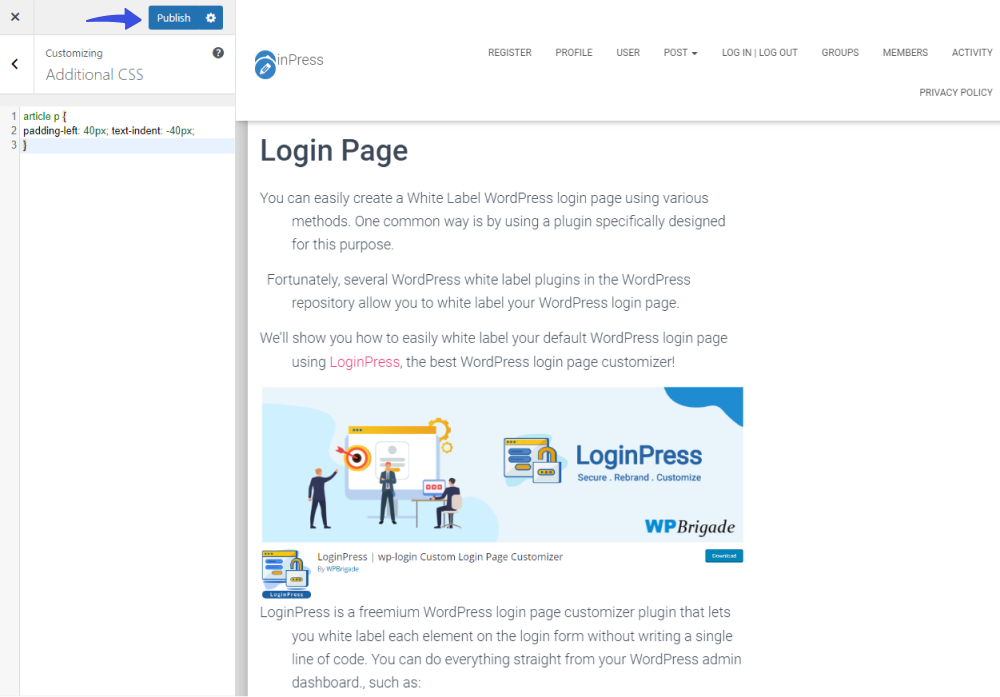
On the next screen, add the following line of code within your theme’s custom CSS to add a hanging indent to all paragraphs.
article p {

padding-left: 40px; text-indent: -40px;

}
See the image below:
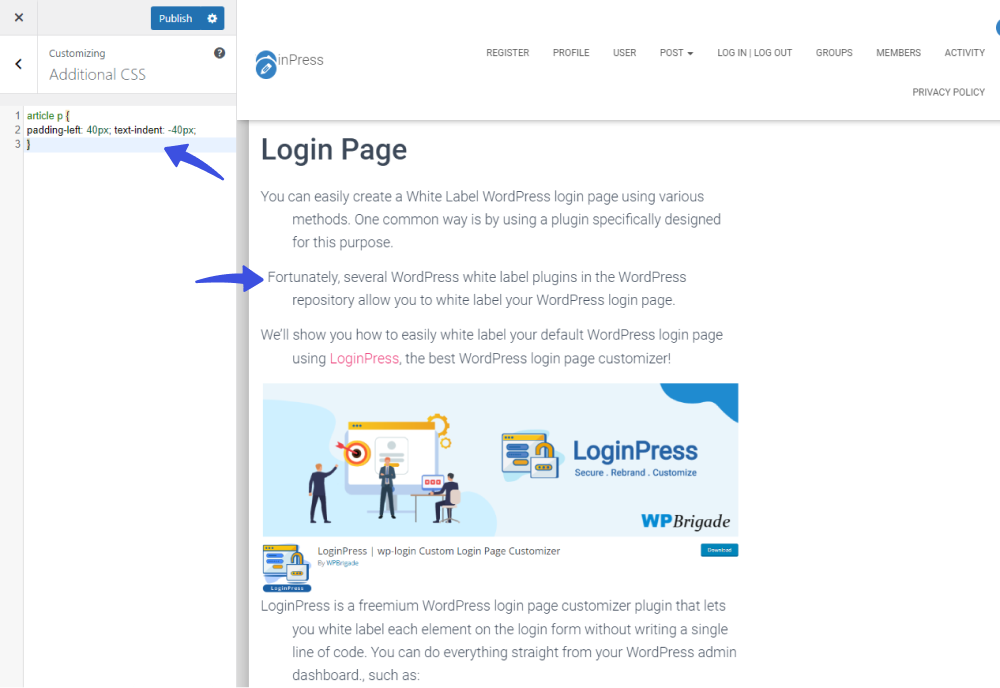
When done, click the Publish button on the top left corner of the screen.
Bonus: How to Customize WordPress Login page
Now that you’ve understood how to indent in WordPress, why not customize the default WordPress login page, too?
Try LoginPress now! It is the best WordPress login page customizer plugin. Use it to customize each element on the default WordPress login page, where you don’t need to code.

Customize Your WordPress Login
Stand out from the competition with the best WordPress login plugin that lets you quickly and easily customize your login page – no coding required!
LoginPress is the best WordPress login page customizer plugin. It lets you design the best login, register, and forget page without any coding.
The best part is you can do everything directly from the WordPress admin dashboard.
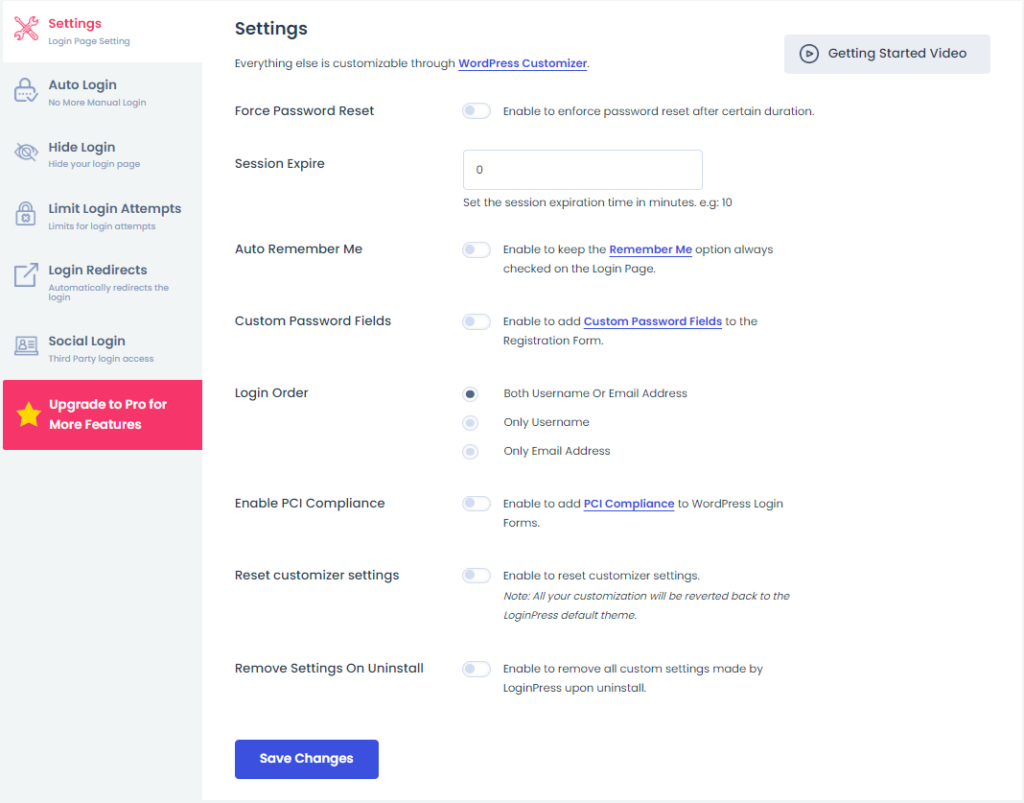
LoginPress has three main sections where resides the core functionality of the plugin, including:
The Settings section helps you make changes to the behavior of the default WordPress login, register, and forget page in terms of:
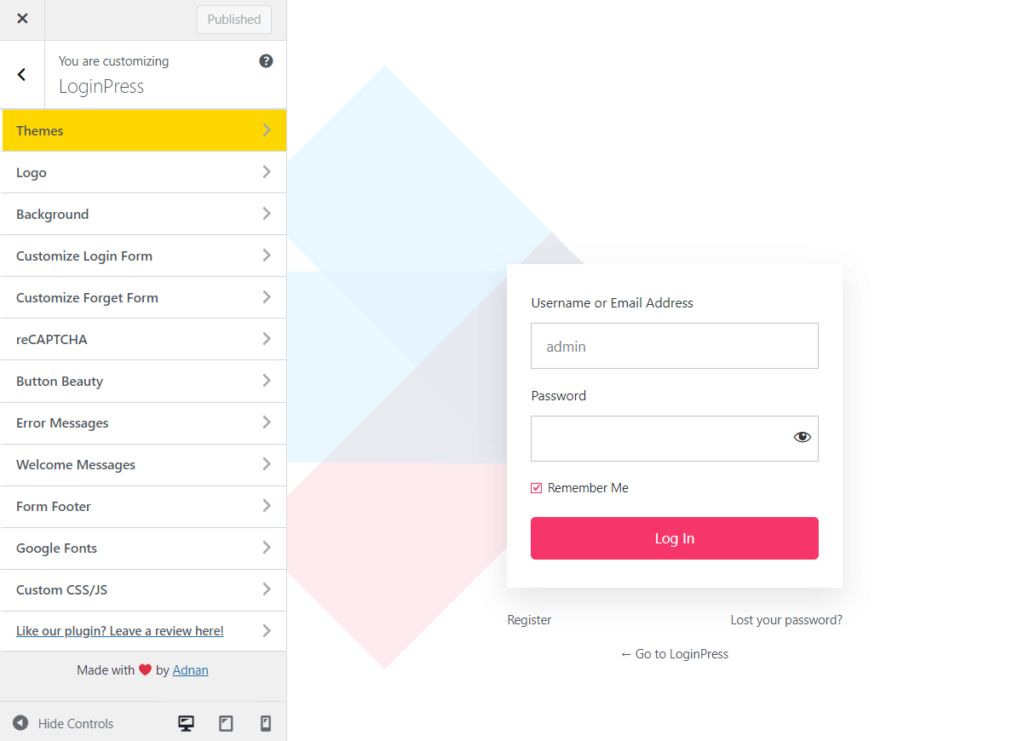
In addition, there is almost every feature to help you customize the overall appearance of the default WordPress login, register, and forget page, including:
- Themes
- Logo
- Background
- Customize Login Form
- Customize Forget Form
- reCAPTCHA
- Button Beauty
- Error Messages
- Welcome Messages
- Form Footer
- Google Fonts
- Custom CSS/JS
Wait, there are multiple powerful Addons packed with LoginPress Pro, including:
Indenting in WordPress: Best Practices and Tips
No doubt, Indentation is a useful formatting tool in WordPress. However, it’s important to use it wisely.
Here are some best practices and tips for indenting in WordPress:
- Use Limited Indentation: Remember to use Indentation for paragraphs; it can make your content look messy or disorganized.
- Use it Purposefully: It’s best to reserve indents for specific purposes, such as emphasizing or highlighting quotes, lists, or examples.
- Choose Consistent Styles: Your site should maintain a professional look by using a consistent indentation style.
- Test for Responsiveness: Indentation can affect how your content appears on mobile devices, so it’s better to test your site on different screen sizes.
- Avoid Manual Spacing: Manual spacing for indenting a paragraph in WordPress could be better, as it leads to consistent spacing. So, it would help if you preferred CSS for proper Indentation.
WordPress Indentation FAQs
Plugin or Custom CSS code, which is better for indenting a paragraph in WordPress?
A few WordPress plugins allow you to format content with custom CSS or styles. But remember, adding too many plugins can slow down your site or raise compatibility issues. If possible, stick to adding custom CSS to your site with a built-in WordPress CSS area.
How do I make paragraphs in WordPress?
You can easily add a paragraph in the Gutenberg. All you need to do is to open the post or page where you want to add the paragraph. Next, click the + (plus) icon to add a paragraph block to the post or page. All set!
How do I format a paragraph?
Your paragraph should contain a topic sentence, supporting details, and a conclusion. As far as the length of the sentence is concerned, use at least two complete sentences.
Does indenting a paragraph in WordPress look good on every browser?
Different browsers may render CSS properties differently. So, ensure that any indentation you add to your WordPress site looks correct in major browsers like Chrome, Firefox, Safari, etc.
Final Thoughts
To summarize, we’ve outlined five easy methods to help you understand how to indent a paragraph in WordPress.
Follow these methods to integrate indentation into your WordPress posts and pages. This will help you boost the clarity of your content for readers.
That’s all for this article!
You may also like to read our other valuable how-to guides, including:


