
To make the plugin extra easy and functional as per the requirements, here comes the detailed documentation regarding the plugin. All about educating the things related to the plugin.

Customize the Footer Text with LoginPress
The LoginPress Footer Text feature will help you to customize the footer text of your login form. You can customize the footer text, display, decoration, hover color, and font size.
This knowledgebase article will show you the best way to customize the WordPress login footer.
Let’s get started!
How to Get Started with LoginPress Form Footer
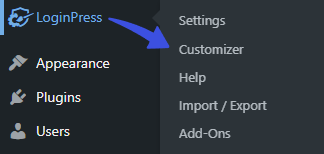
To get started with LoginPress Form Footer, go to the left side of your admin dashboard and navigate to LoginPress, and click the Customizer option.
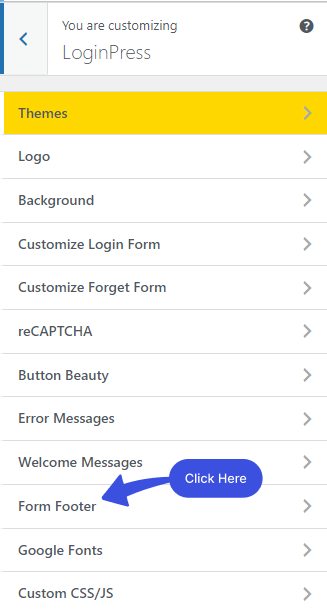
On the next screen, select the Form Footer option.
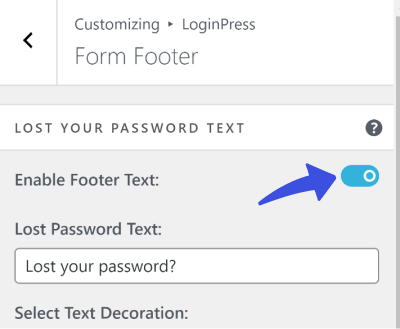
A new window will open where you will find the Form Footer customization options. You can enable or disable the "Register & Lost your password" text by toggling on or off the button.
After customizing the Form Footer, click on the Publish button to implement the changes.
Let’s see the options to customize the login form Footer in LoginPress.
1. Lost Password Text:
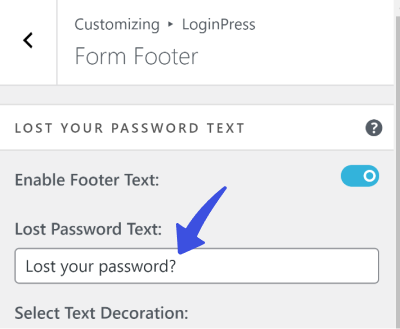
On the login page, there is a text in the footer that says, "Lost your password." You can customize that text to read something like, "Get a new password” or anything of your choice.
For this, you’ll need to fill in the text of your choice under the “Lost Password Text” field.
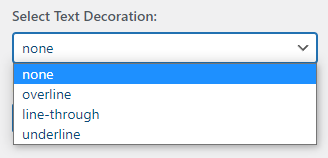
2. Select Text Decoration:
Form Footer lets you set different text decorations by using decorative lines on the text, including underline, overline, and line-through.
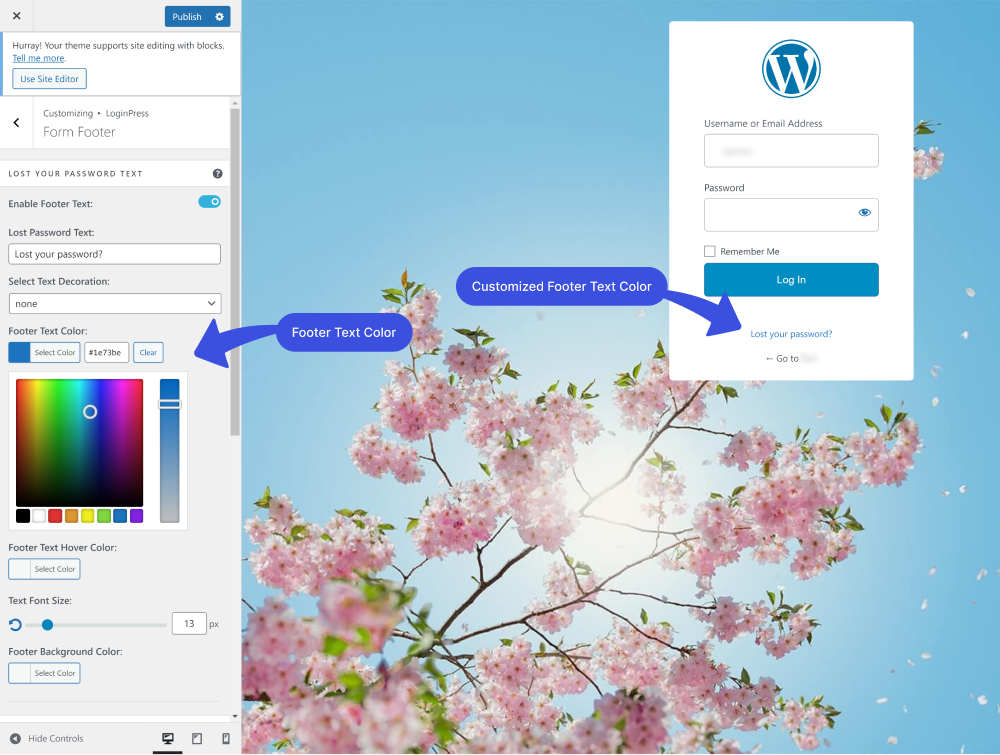
3. Footer Text Color:
You can customize the footer text color to anything you want by selecting a color from the color picker control.
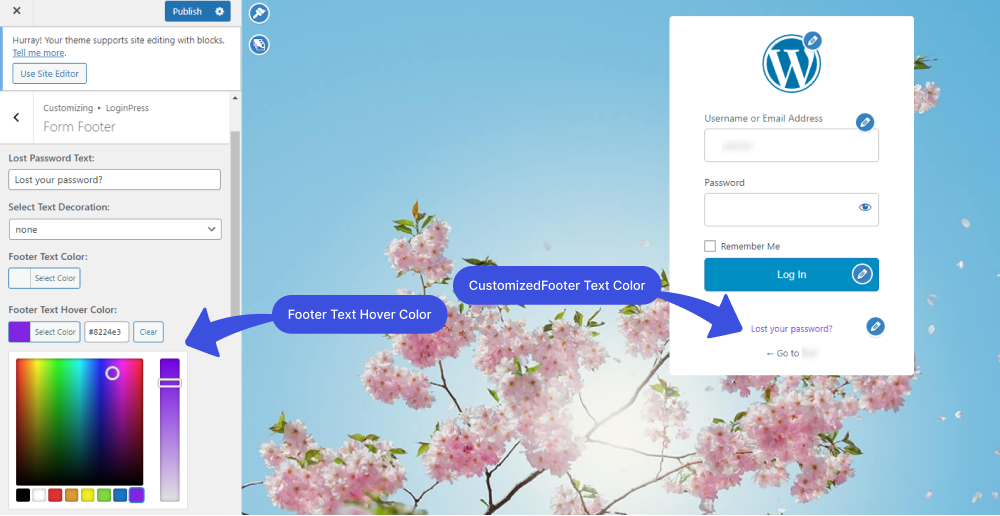
4. Footer Text Hover Color:
Form Footer lets you customize the hover text color to any other color. You can do this by customizing the Footer Text Hover Color. See the Gif below:
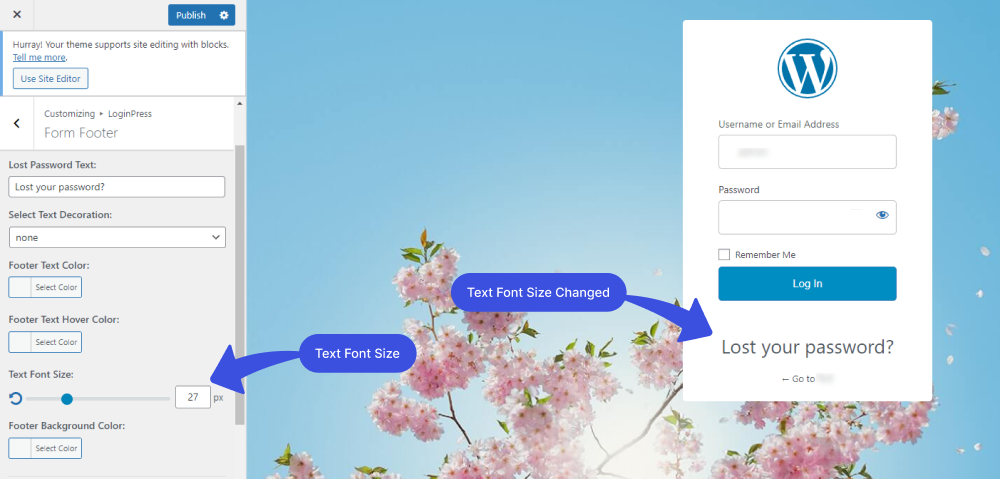
5. Text Font Size:
You can easily customize the Text Font Size by range control. See the gif below:
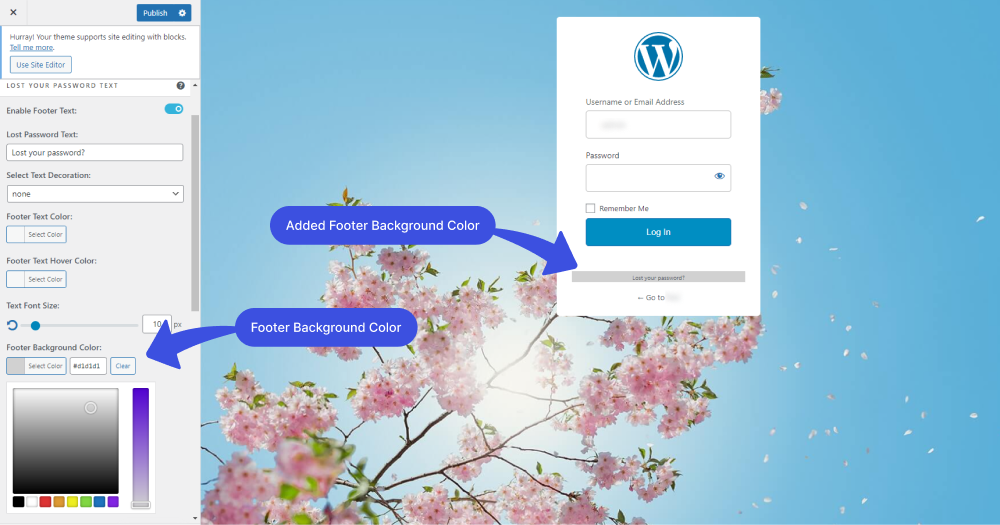
6. Footer Background Color:
You can easily customize the background color of the footer form by color picker control.
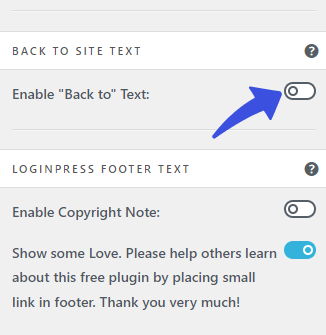
7. “Back to” Text Display:
Enable / Disable the “Back to Site” text. Once you disable it, all the customization options related to the “Back to” text will no longer exist.
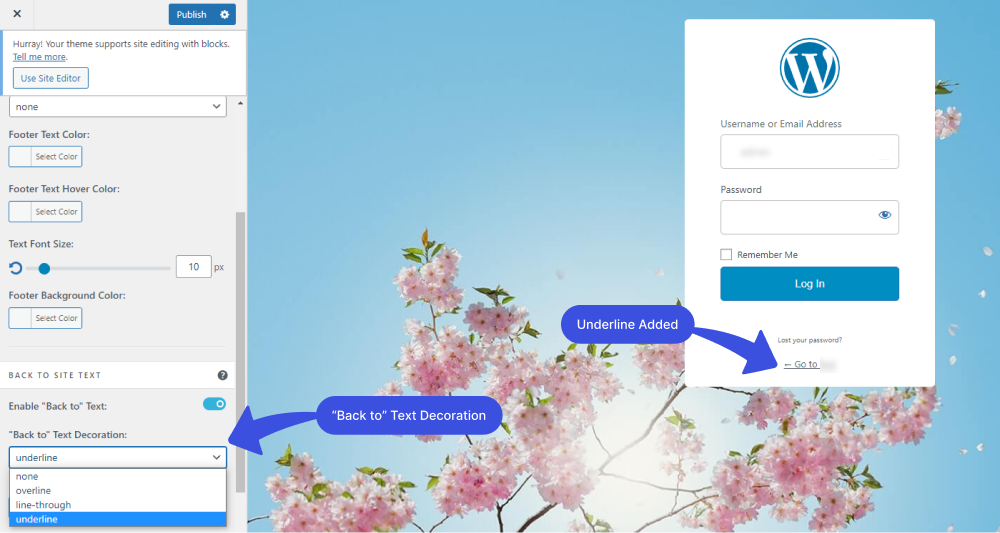
8. “Back to” Text Decoration:
Customize text decoration for “Back to Site” text.
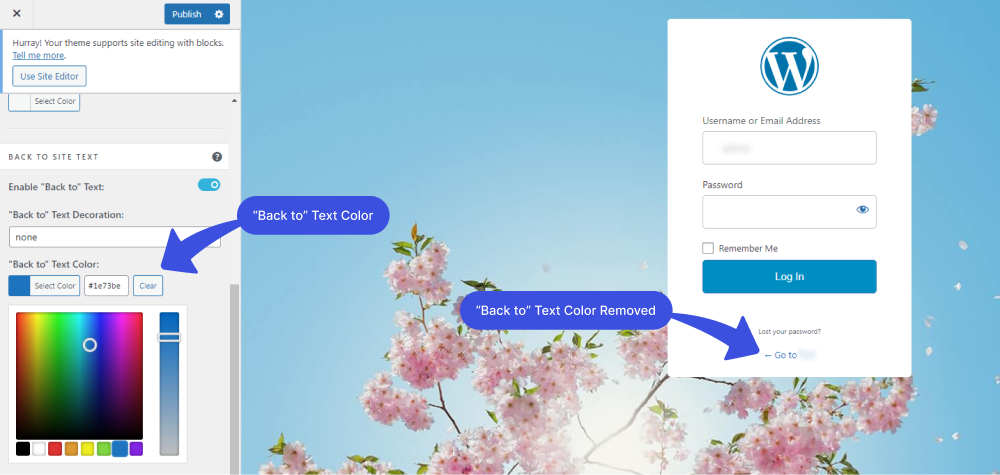
9. “Back to” Text Color:
To customize the “Back to” Text Color, click the Select Color option. The pop-up color picker will appear from where you can select any color.
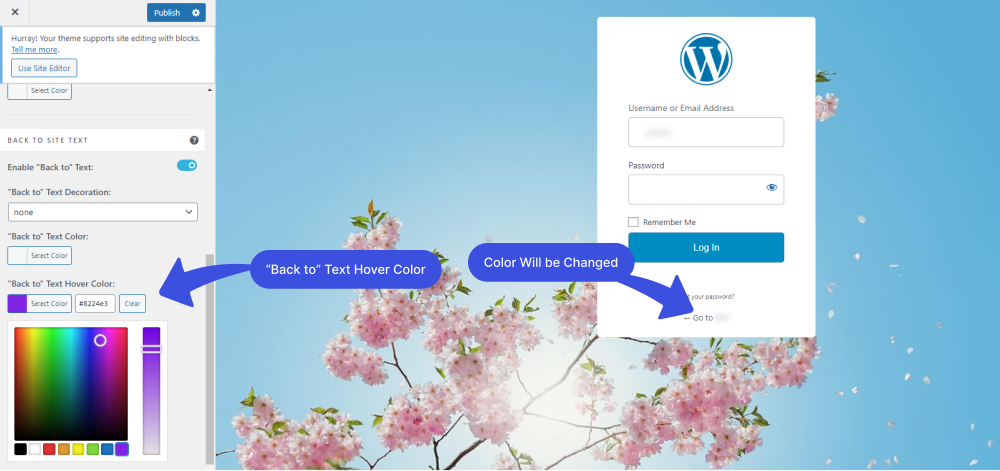
10. “Back to” Text Hover Color:
You can also customize the color of the text when you move the cursor on that particular text. For this, you need to customize the “Back to” Text Hover Color. See the Gif below:
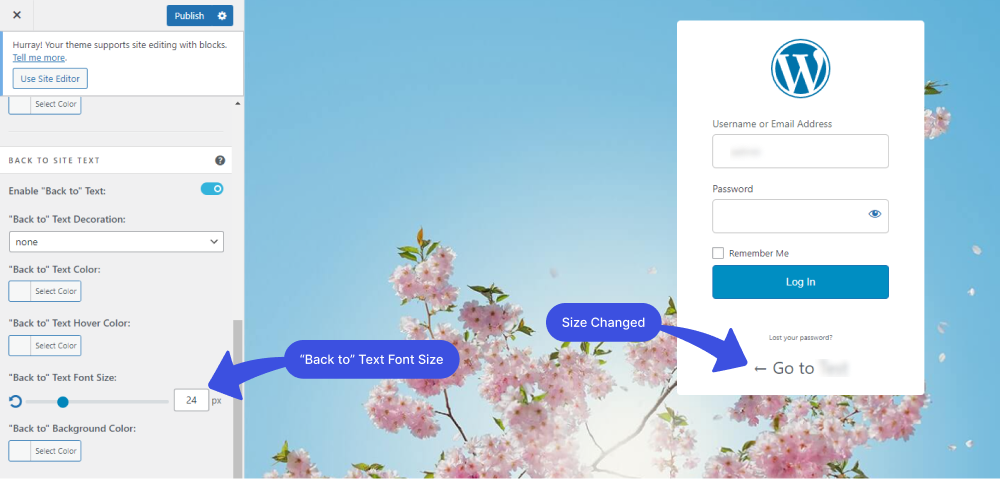
11. “Back to” Text Font Size:
Customize the “Back to” Font Text size by range control. See the Gif below:
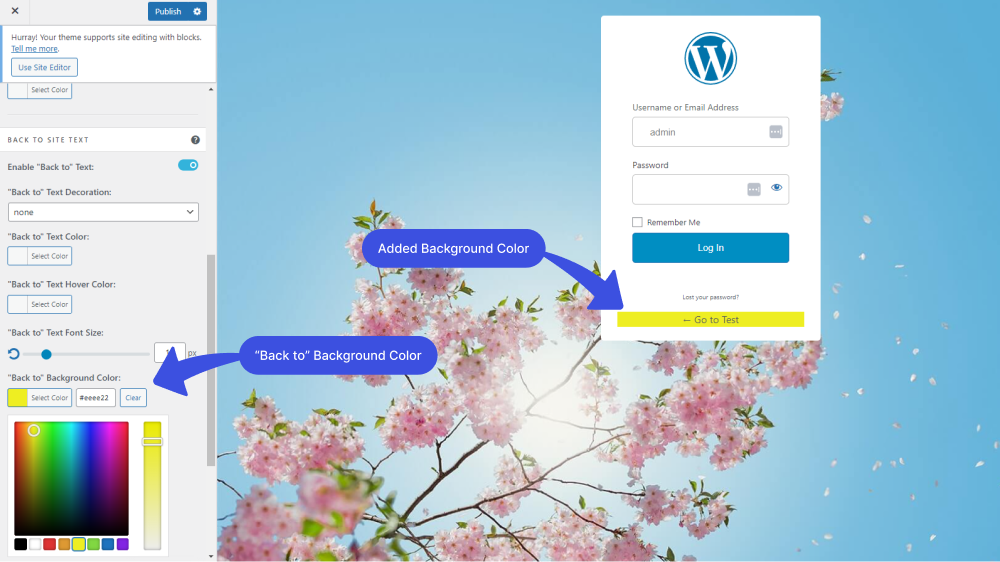
12. “Back to” Background Color:
To customize the “Back to” Background color, click the Select Color option. The pop-up color picker will appear to let you choose any color of your choice.
Customizing Login Page Footer Text with LoginPress
1. Login Page Footer Customization
You can also control the footer section of the Login page, like copyrights, and change the copyright text and background color.
Now Enable the "Enable Copyright Note" option. After enabling the Copyright Note option, a new window will open, where you can customize the login page footer text according to your requirements.
You can also add a "Copyright" Background Color.
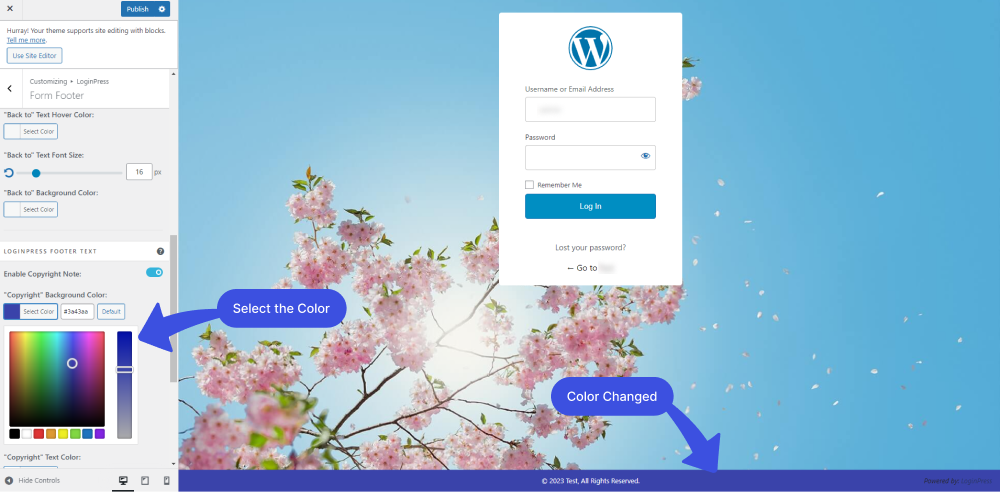
It also has an option to let you select the "Copyright" Text Color.
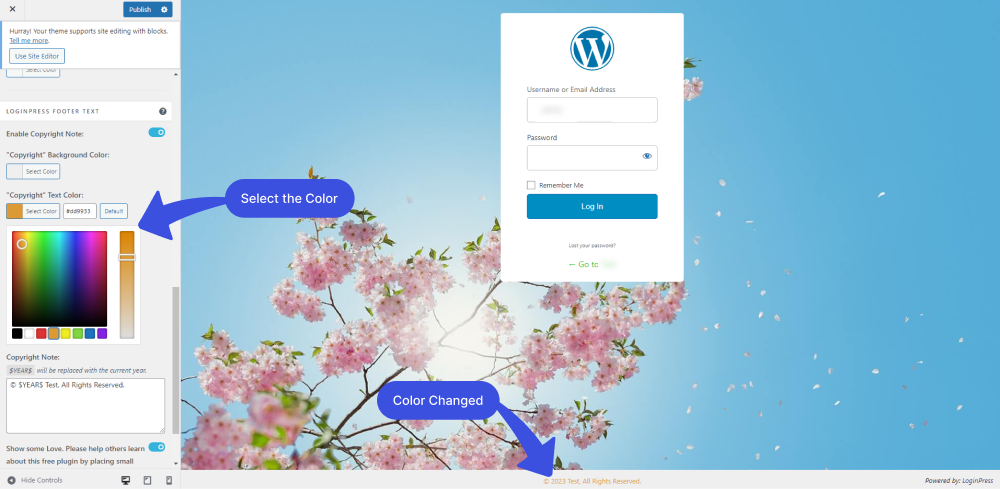
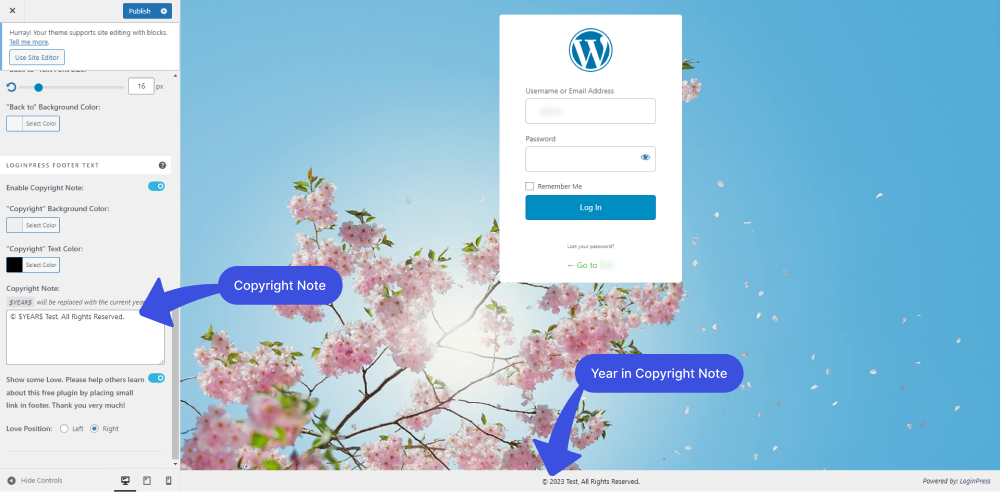
In the Login page footer "Copyright Note," you can quickly auto update the year instead of changing the year manually; you just need to Use the $YEAR$ variable instead of writing the current year.
You will find the following features for customizing the login page footer in the Footer Text feature.
2. Copyright Note:
Customize the copyright note. You can use HTML tags to beautify your text.
Note: The $YEAR$ automatically adds the year to the copyright note.
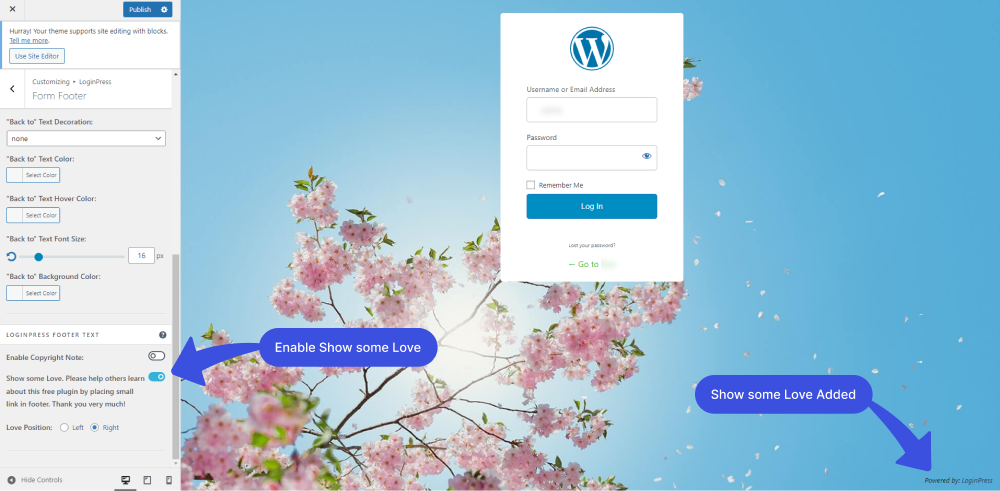
3. Show some Love:
Enable or Disable the “Powered by LoginPress” text by toggling on the button right now to Show some love.
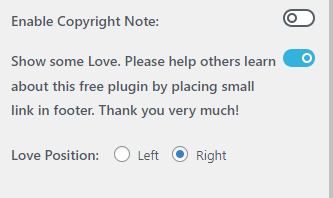
4. Love Position:
You can go for customizing the LoginPress Branding position to left or right.
That's how you can easily customize the Login form and login page footer according to your requirements with the LoginPress plugin. Check our video below on how to customize your Login form and Login page footer.
We demonstrated how you could customize the login page footer text. Try the LoginPress Footer Text feature, and let us know how much it helped you!
If you have any doubts or questions related to this matter, please don’t hesitate to contact our support team.
Check our video below on how to customize your Login form and Login page footer.

Frequently Asked Questions (FAQs)
These FAQs answer the most common questions about our WordPress custom login page plugin.


Where can I get support for LoginPress?
If you need help with LoginPress, you can contact us here. We’ll be happy to answer any questions about the plugin.
Do you have an affiliate program?
Yes, we have an affiliate program that you can sign up for here. As an affiliate, you’ll earn a commission on every sale you refer to us.
Do you offer refunds?
Yes, we offer a 14-day money-back guarantee on all of our plans. If you’re unsatisfied with LoginPress, simply contact us within 14 days of your purchase, and we’ll process a refund.
Can I upgrade my license after my initial purchase?
Yes, you can upgrade your LoginPress license at any time. Simply log into your account and go to the My Downloads page. From here, you can upgrade your license and download the latest version of the plugin.
Will LoginPress slow down my website?
No, LoginPress will not slow down your website. The plugin is lightweight and only loads the necessary files when someone tries to access your login page.

If you Still have Questions?
Get In Touch