
To make the plugin extra easy and functional as per the requirements, here comes the detailed documentation regarding the plugin. All about educating the things related to the plugin.

How to Create Login Redirects with LoginPress (Simple)
If your WordPress website has multiple user types, you may want to redirect users to the appropriate pages after login.
LoginPress allows you to redirect users and visitors, i.e., customers or editors, to specific pages using Login Redirects.
You can simply send one subscriber to its related page and one customer to another page, following the redirection rule. All redirections are managed through a single, intuitive UX/UI.
This knowledge base article explains how to redirect users after successful login to the WordPress site.
Activate Login Redirects Add-on
Note:We assume you’ve already upgraded to LoginPress Pro and activated the License Key.
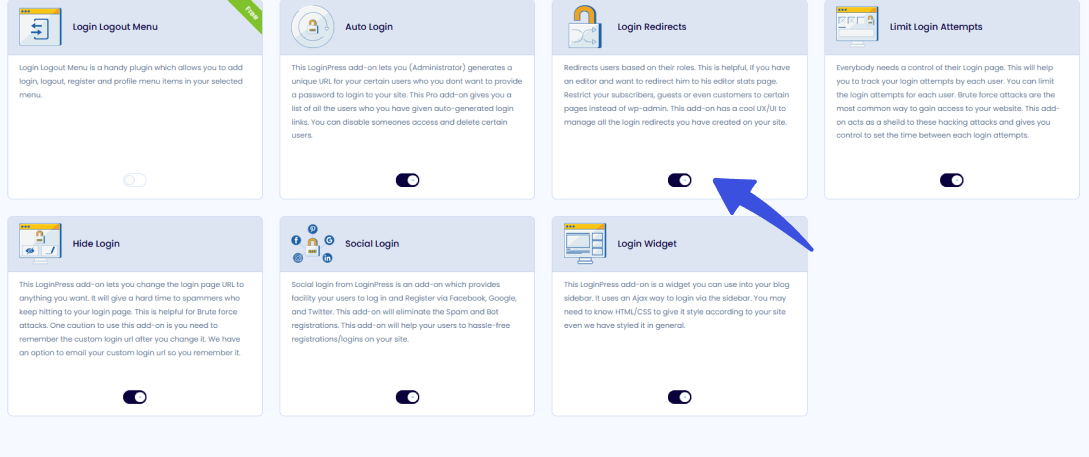
First, go to the left side of the WordPress admin dashboard and navigate to LoginPress >> Add-Ons.
Next, locate the Login Redirects Add-on and toggle the On button to enable it.
Set Up Login Redirects
You'll need to follow these steps to set up the Login Redirects Add-on.
Step 1: Go to Login Redirects
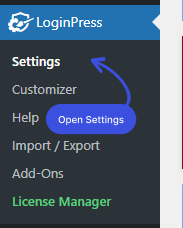
First, go to LoginPress on the left side of the admin dashboard, then click Settings.
Here, under the Login Redirects tab, you’ll find two tabs:
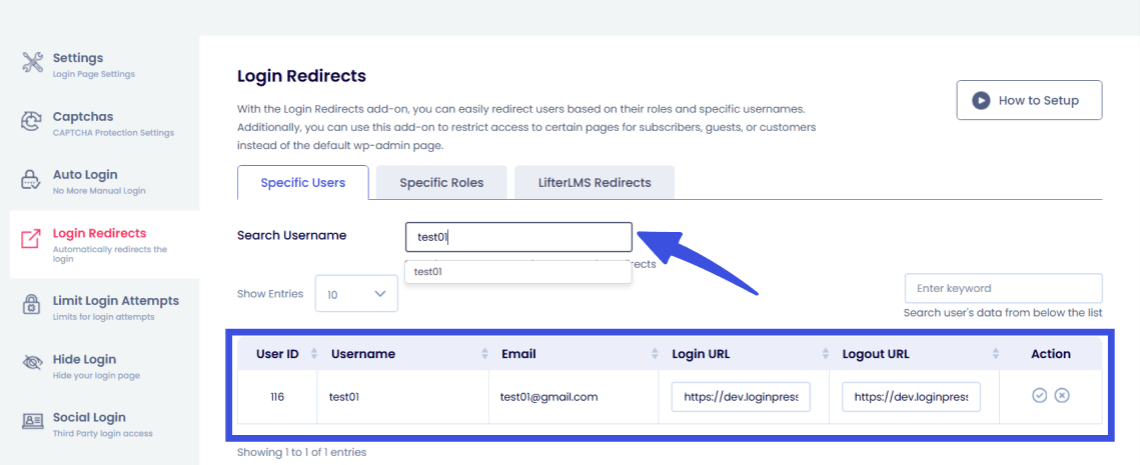
- Specific User:
You can search for the specific username in the Search Username field to apply redirects.
Once you’ve selected the user, you can see the User ID, Username, Email, Login URL, and Logout URL.
There will be two more Action buttons at the end of each row: Update and Delete.
The update button lets you update the links, and the Delete button lets you delete the redirect links for the specified users.
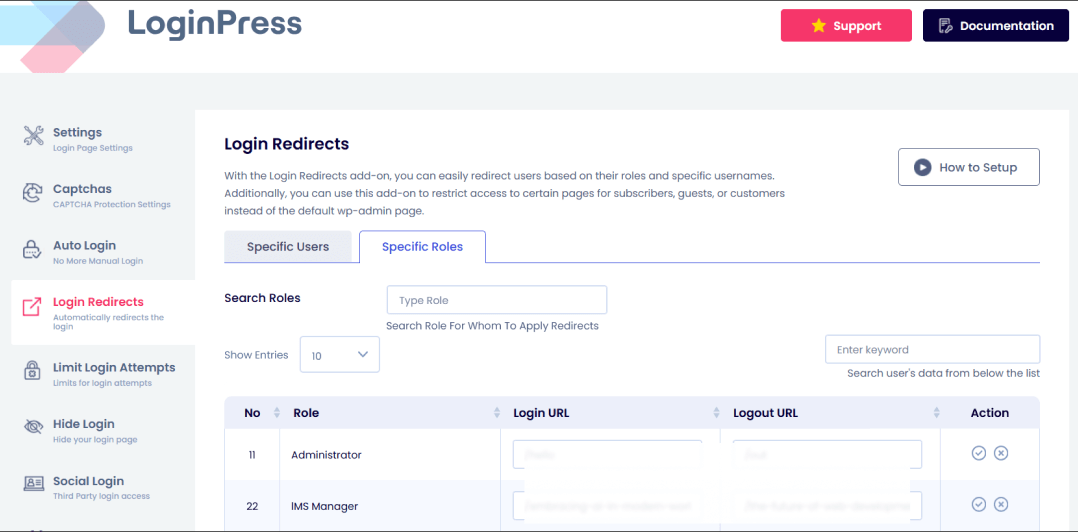
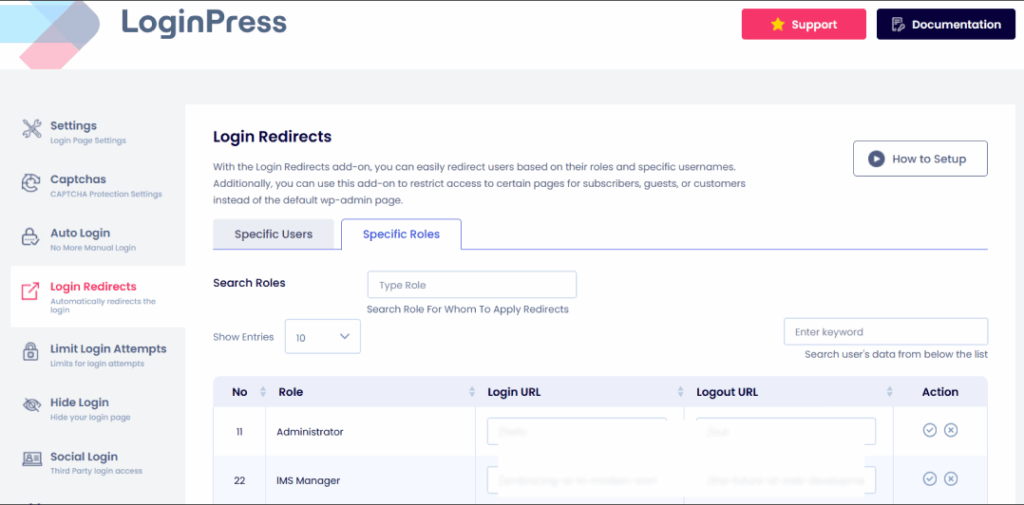
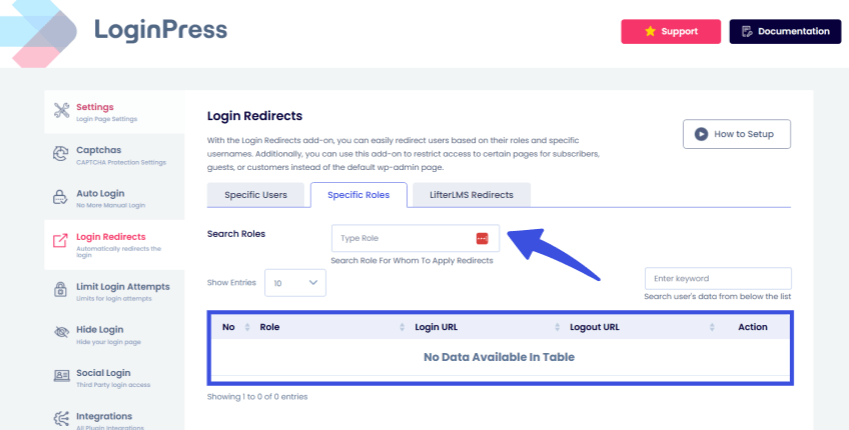
- Specific Roles:
The Specific Roles tab lets you apply redirects to users based on their roles on your site.
You’ll need to search for the specific role in the Search Roles field to apply redirects.
After selecting the specific role, you can view the User ID, Username, Email, Login URL, and Logout URL.
There will be two more Action buttons at the end of each row: Update and Delete.
The update button lets you update the links, and the Delete button lets you delete the redirect links for the specified users.
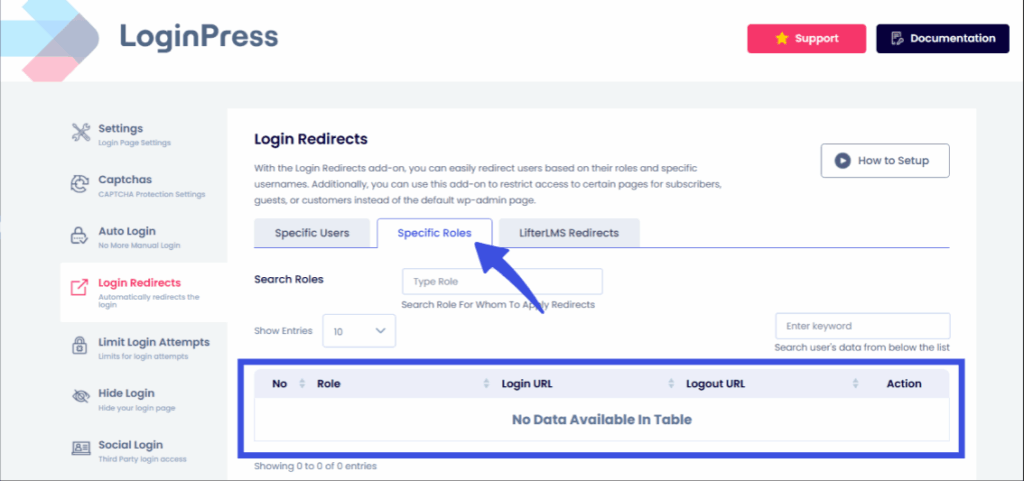
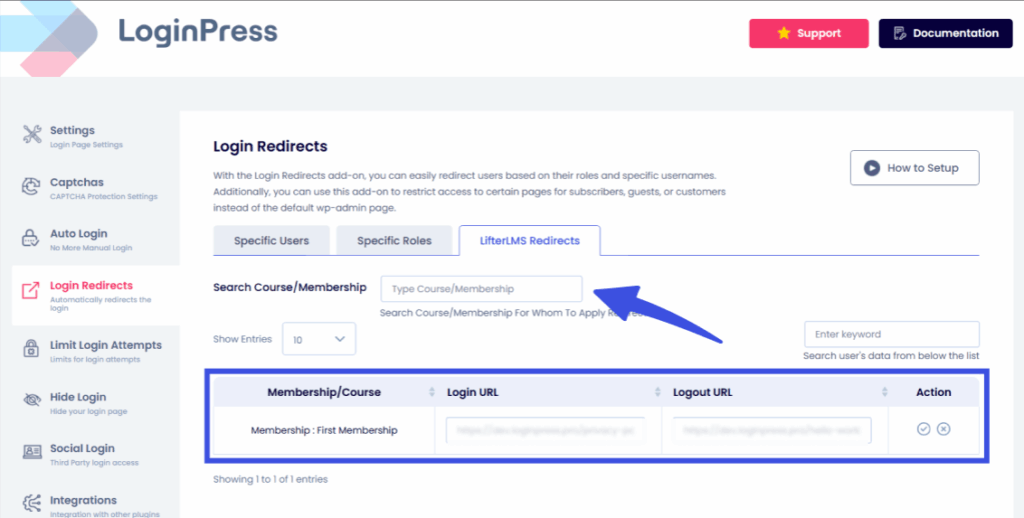
- LifterLMS Redirects
In case the LifterLMS plugin is installed and activated, and you are actively managing teachers, courses, and students, the LifterLMS Redirects tab is also visible.
Step 2: Set Up Login Redirection
To set up custom login redirection, go to the LoginPress settings. You'll see the Login Redirect tab, where you can configure redirection options for users.
As you can see, Login Redirects is a highly flexible Add-on that lets you configure redirects based on usernames or roles.
Login Redirects for Specific Users
Redirecting specific users is very easy. Go to the Specific User tab and search for the user's name in the Search Username box.
If the user exists, you’ll see their details, including their User ID, username, and registered email address. You get two fields labeled Login URL and Logout URL. You can specify the URLs to redirect users to at login and logout.
Once you have set the URLs, go to the next column and choose the appropriate action (Update or Delete).
Login Redirects According to User Roles
Redirecting users based on their assigned roles is straightforward. Go to the Specific Roles tab and search for a role in the Search Roles box.
Once you find the role, you can set the login and logout URLs. Remember to save the settings to retain the URL changes.
That's all!
Here, we demonstrated how you could redirect users upon login.
The LoginPress Login Redirects Add-on simplifies setup and lets you configure login and logout redirects for specific users or entire user roles.
Now it’s your turn! Try out the LoginPress Login Redirects Add-on, and let us know how much it helped you!
If you have any questions or concerns about this matter, please don’t hesitate to contact our support team.
Check our complete guide on Hide Login Addon that will help you to hide/rename your login page URL to secure your page from Brute force attacks.
Frequently Asked Questions (FAQs)
These FAQs answer the most common questions about our WordPress custom login page plugin.

Where can I get support for LoginPress?
If you need help with LoginPress, you can contact us here. We’ll be happy to answer any questions about the plugin.
Do you have an affiliate program?
Yes, we have an affiliate program that you can sign up for here. As an affiliate, you’ll earn a commission on every sale you refer to us.
Do you offer refunds?
Yes, we offer a 14-day money-back guarantee on all of our plans. If you’re unsatisfied with LoginPress, simply contact us within 14 days of your purchase, and we’ll process a refund.
Can I upgrade my license after my initial purchase?
Yes, you can upgrade your LoginPress license at any time. Simply log into your account and go to the My Downloads page. From here, you can upgrade your license and download the latest version of the plugin.
Will LoginPress slow down my website?
No, LoginPress will not slow down your website. The plugin is lightweight and only loads the necessary files when someone tries to access your login page.

If you Still have Questions?
Get In Touch