
To make the plugin extra easy and functional as per the requirements, here comes the detailed documentation regarding the plugin. All about educating the things related to the plugin.

Adding LoginPress Autologin Filters to Your WordPress Site
LoginPress Pro offers an Autologin Add-on. It best helps you create magic links for your users, based on their specific roles, that they can use to log in to your site.
With LoginPress Pro 3.0, many other useful features are added to the core functionality of the Add-on. You can further enhance the core functionality of the Add-on using filters.
This knowledgebase article will show you the LoginPress Autologin filters that you can use for several reasons.
LoginPress Autologin Filters
1. LoginPress Autologin Default Expiration
By default, all the Autologin links expire after 7 days. However, you can change the default expiration time with a filter to anything you want.
Remember, this code will only affect users added to Autolink after the code is implemented. Users already using Autolink before this code was added will not be affected.
All you need to do is update the code in your site’s functions.php file.
Note: It’s recommended to use a child theme to edit the functions.php file. There is the possibility that you might lose the modified code when you update your theme.
Here is the code for you:
/**
 * This function increases the default time for new links of LoginPress Autologin.
 *
 * @param string $default_expire The date and time string.
 * @return string $default_expire The modified date and time string.
 */
function loginpress_autologin_default_expiration( $default_expire ) {
	$date           = gmdate( 'Y-m-d' );
	$default_expire = gmdate( 'Y-m-d', strtotime( "$date -1 day" ) ); // PHP Date style:  yy-mm-dd.
	return $default_expire;
}
add_filter('loginpress_autologin_default_expiration','loginpress_autologin_default_expiration');
Note: You’re required to change "$date -1 day" as per your requirements.
2. LoginPress Autologin Email Subject
Autologin Add-on lets the admin send an Email to the users containing the autologin.
This is what the default Email Subject looks like:
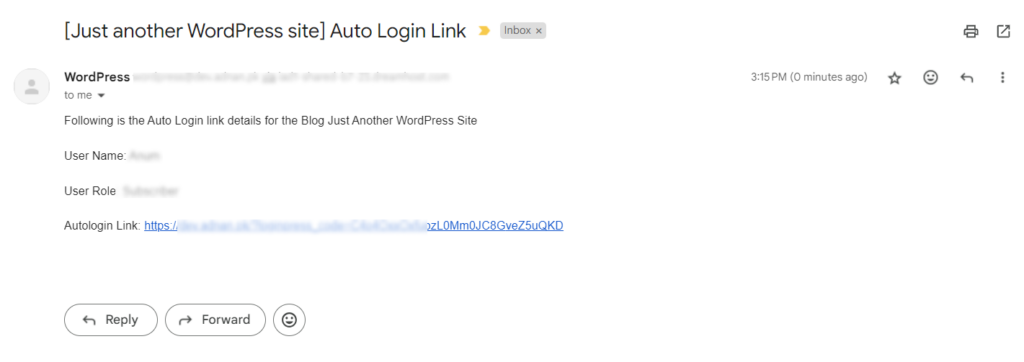
If the admin doesn’t like the default subject of this email, then you can easily change the default Subject for the Autologin Link Email. All you need to do is to update the code in your site’s functions.php file.
Here is the code for you:
Note: It’s recommended to use a child theme to edit the functions.php file. There is the possibility that you might lose the modified code when you update your theme.
/**
* Filter for modifying the autologin email subject.
*
* @param string $blog_name The blog name.
* @return string $new_subject The new subject of the email.
*/
function custom_autologin_email_subject( $blog_name ) {
// Modify the subject as needed.
$new_subject = sprintf( __( 'New Subject [%s]', 'loginpress-pro' ), $blog_name );
return $new_subject;
}
add_filter( 'loginpress_autologin_email_subject', 'custom_autologin_email_subject', 10, 1 );
This is what it looks like:

3. LoginPress Autologin Disable Error Message
In this instance, if the site's admin disables your autologin link, the user will be shown an error message stating: User is disabled by Admin.
See the image below:
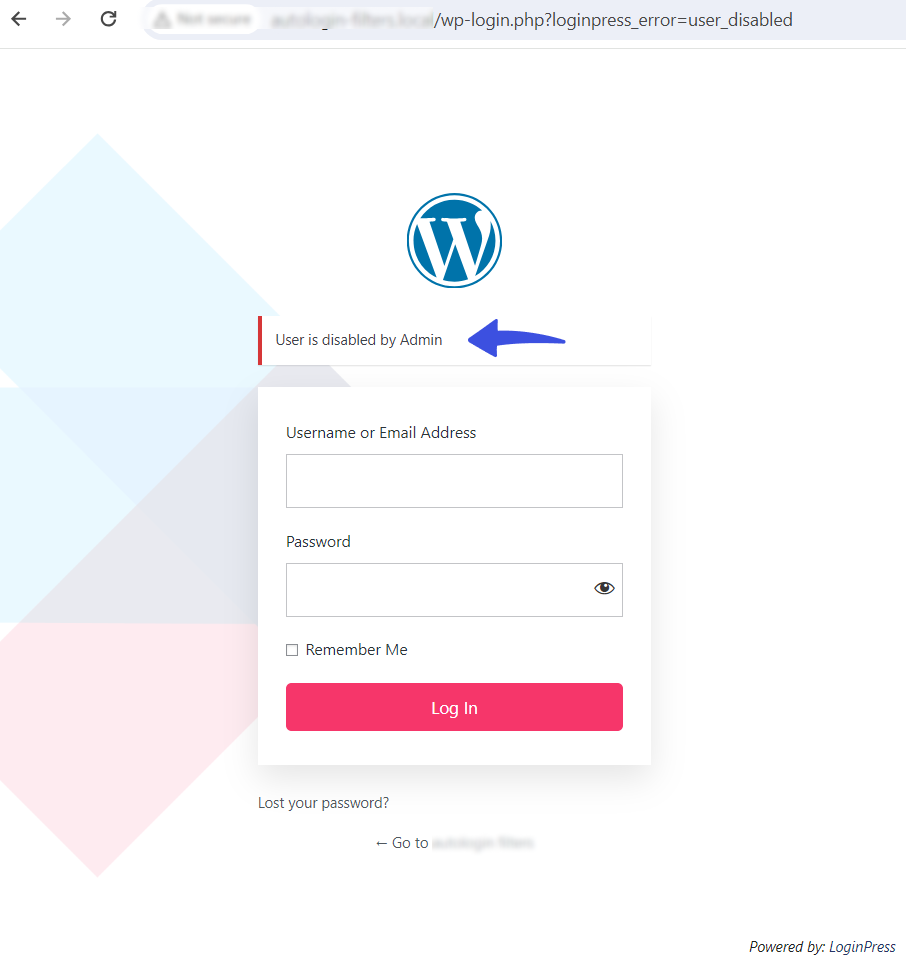
You can easily change the default Disable Error Message for Autologin by simply pasting a code in your functions.php file.
Here is the code for you:
Note: Replace the line ''Your customized error message for autologin disabled', with your custom code, i.e., here we’ve used “The Admin has Disabled this Link!”.
/**
 * Filter for customizing the error message when autologin is disabled.
 *
 * @param string $error Default error message.
 * @return string Modified error message.
 */
function custom_loginpress_autologin_disable_error( $error ) {
    // Modify the error message as needed
    $modified_error = __( 'Your customized error message for autologin disabled', 'loginpress-pro' );
    return $modified_error;
}
add_filter( 'loginpress_autologin_disable_error', 'custom_loginpress_autologin_disable_error' );
See the image below:
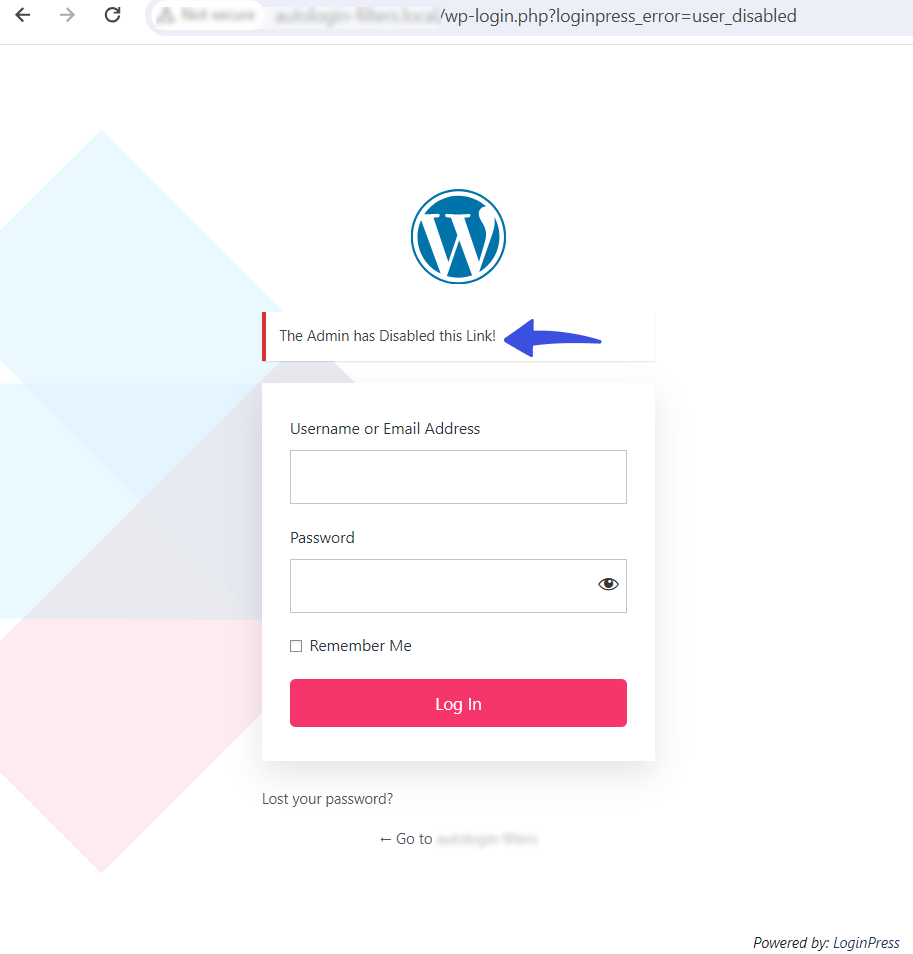
4. LoginPress Autologin Expired Error
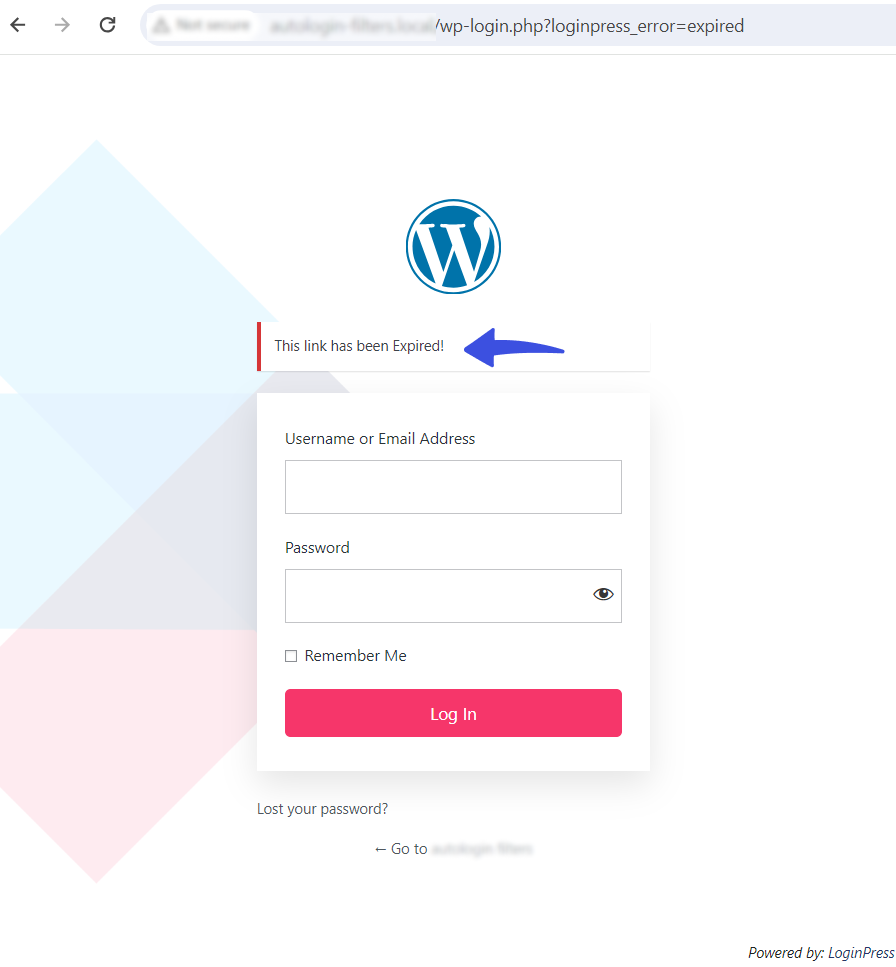
You can also change the Autologin Expired Error message for Autologin that says: This auto login link is Expired.
See the image below:
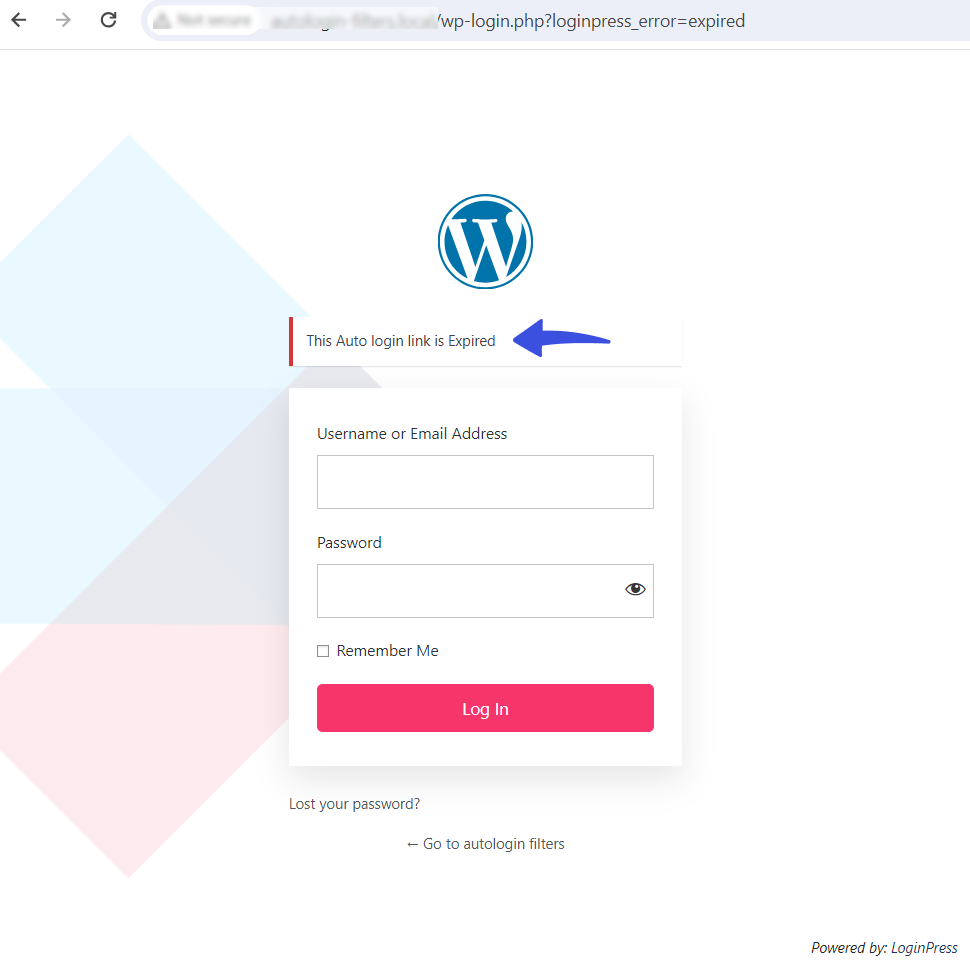
Here is the code for you:
Note: Replace the line 'Your customized error message for expired autologin link', with your custom code, i.e., here we’ve used “This link has been Expired!”.
/**
 * Filter for customizing the error message when the Auto Login link has expired.
 *
 * @param string $error Default error message.
 * @return string Modified error message.
 */
function custom_loginpress_autologin_expired_error( $error ) {
    // Modify the error message as needed
    $modified_error = __( 'Your customized error message for expired autologin link', 'loginpress-pro' );
    return $modified_error;
}
add_filter( 'loginpress_autologin_expired_error', 'custom_loginpress_autologin_expired_error' );
See the image below:
5. LoginPress Autologin Invalid Login Code
If the autologin link is wrong, the user gets the “This code is Invalid” message on the login form.
See the image below:
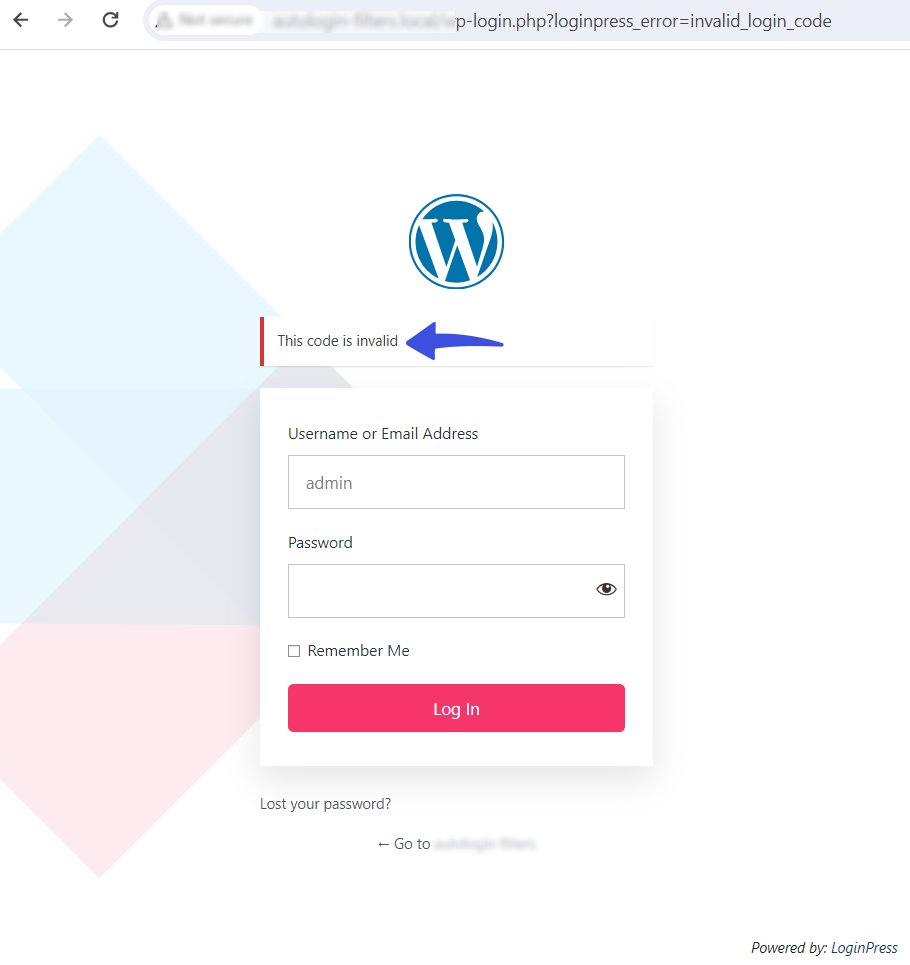
You can easily change the default “This code is Invalid” error message. All you need to do is paste the following piece of code into your functions.php file.
Here is the code for you:
Note: Replace the line 'Your customized error message for invalid autologin code' with your custom code. For example, here, we’ve used “Invalid Code!”
/**
 * Filter for customizing the error message when an invalid autologin code is provided.
 *
 * @param string $error Default error message.
 * @return string Modified error message.
 */
function custom_loginpress_autologin_invalid_login_code( $error ) {
    // Modify the error message as needed
    $modified_error = __( 'Your customized error message for invalid autologin code', 'loginpress-pro' );
    return $modified_error;
}
add_filter( 'loginpress_autologin_invalid_login_code', 'custom_loginpress_autologin_invalid_login_code' );
Now it will look like this:

6. LoginPress Autologin Email Message
LoginPress offers simple Autologin Email messages by default.
See the image below:
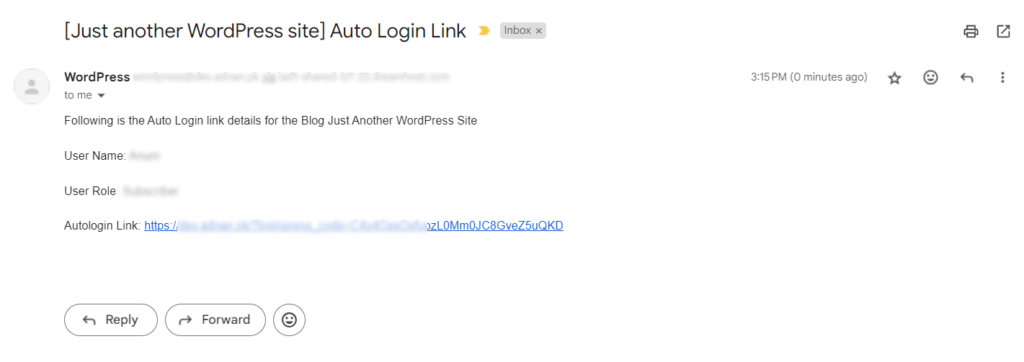
However, you can change this default Autologin email message. All you need to do is add the following code to your functions.php file.
Here is the code for you:
// Define a callback function for the filter
function custom_loginpress_autologin_email_msg($message, $blog_name, $user_name, $code) {
    // Build a custom message
    $custom_message = "Hello $user_name,\n\n";
    $custom_message .= "Welcome to $blog_name! Your autologin link is:\n";
    $custom_message .= $code;

    // Append some additional information
    $custom_message .= "\n\nPlease keep this link confidential as it allows direct access to your account.";

    // Return the modified message
    return $custom_message;
}

// Add the filter
add_filter('loginpress_autologin_email_msg', 'custom_loginpress_autologin_email_msg', 10, 4);
After pasting this piece of code, your Autologin Email message will look like this:
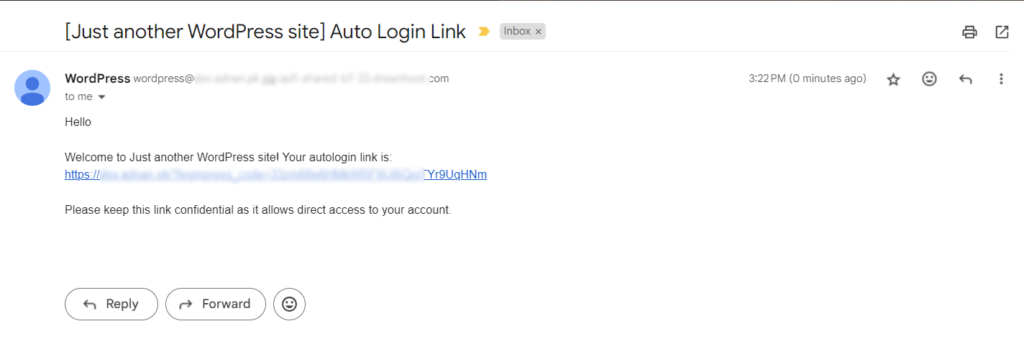
7. LoginPress Autologin Autocomplete Search Length
By default, the LoginPress Auto Login feature requires users to input a minimum of 3 characters before the search results display matching usernames. However, you can adjust this limit using this simple filter.
All you need to do is update the code in your site’s functions.php file.
Note: It’s recommended to use a child theme to edit the functions.php file. There is the possibility that you might lose the modified code when you update your theme.
Here is the code for you:
// Define a callback function for the filter
function custom_loginpress_autocomplete_search_length() {
	return 1; // The desired minimum length.
}
add_filter('loginpress_autocomplete_search_length', 'custom_loginpress_autocomplete_search_length');
Note: You can change the number "1" to your desired minimum characters limit.
8. LoginPress Autologin Default Link Count
By default, the Auto Login link count value is set to "Unlimited Clicks" as shown in the screenshot below:

But if you want to change this default value to any other value of your choice, you can do this easily.
Here is the filter to change the default value for Link Count in Auto Login. All you need to do is add the following code to your functions.php file.
function set_default_autologin_link_count($args) {
    $args['max_clicks'] = 10; // Set max clicks for the auto-login link
    return $args;
}
add_filter('loginpress_autologin_link_count', 'set_default_autologin_link_count');
That’s it. We hope you understand how to add different Autologin filters to your WordPress site.
If you have any questions or doubts related to this matter, please don’t hesitate to contact our support team.

Frequently Asked Questions (FAQs)
These FAQs answer the most common questions about our WordPress custom login page plugin.


Where can I get support for LoginPress?
If you need help with LoginPress, you can contact us here. We’ll be happy to answer any questions about the plugin.
Do you have an affiliate program?
Yes, we have an affiliate program that you can sign up for here. As an affiliate, you’ll earn a commission on every sale you refer to us.
Do you offer refunds?
Yes, we offer a 14-day money-back guarantee on all of our plans. If you’re unsatisfied with LoginPress, simply contact us within 14 days of your purchase, and we’ll process a refund.
Can I upgrade my license after my initial purchase?
Yes, you can upgrade your LoginPress license at any time. Simply log into your account and go to the My Downloads page. From here, you can upgrade your license and download the latest version of the plugin.
Will LoginPress slow down my website?
No, LoginPress will not slow down your website. The plugin is lightweight and only loads the necessary files when someone tries to access your login page.

If you Still have Questions?
Get In Touch