
To make the plugin extra easy and functional as per the requirements, here comes the detailed documentation regarding the plugin. All about educating the things related to the plugin.

How to Integrate Apple Social Login on WordPress
LoginPress Pro Social Login Add-on has now introduced the Apple Social Login integration for your WordPress site.
The Apple Social Login allows users to log in and register to your WordPress site using their existing Apple accounts.
Learn how to integrate it into your login/register form using LoginPress.
Table of Contents
Create an App for Apple Social Login in LoginPress
Note: See our complete guide on Social Login to learn how to activate the LoginPress Social Login Add-on.
Apple provider requires an active subscription to the Apple Developer Program, which costs $99 annually. You must enroll in the developer program to proceed.
The steps for creating an app to use Apple Login in a web application are as follows:
Step 1: Create an Apple ID
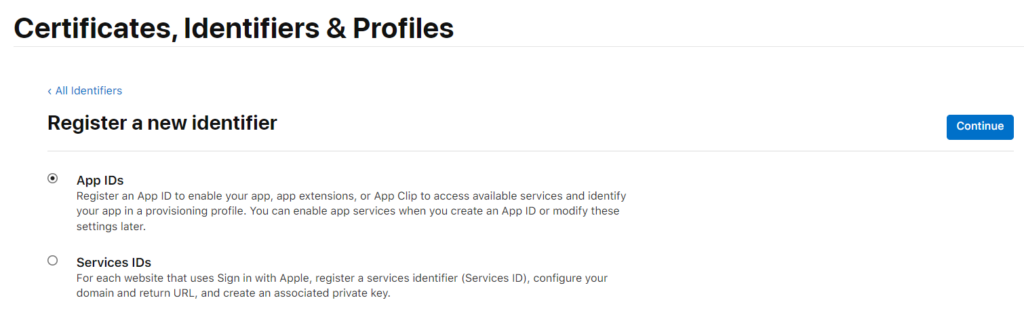
1. Navigate to Identifiers.
2. Click the blue + icon next to Identifiers, then select the App IDs option and click the Continue button.
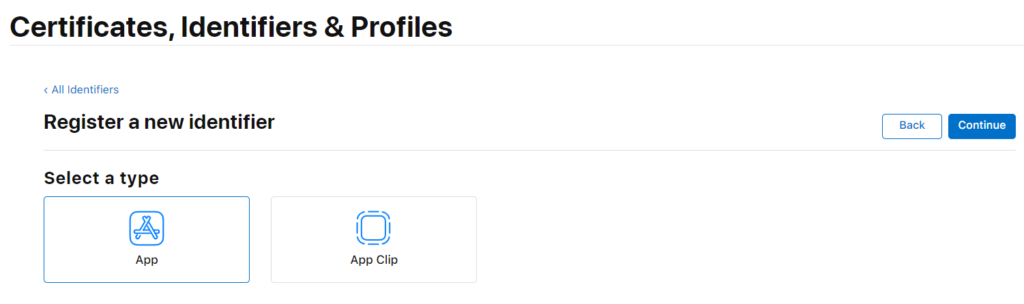
3. Choose the App option as type and click the Continue button.
4. Enter a description for your APP ID.
5. In the Bundle ID field, select the Explicit option and enter your domain name in reverse-domain name style, with the app's name on its end. (i.e., com.domainname.appname)

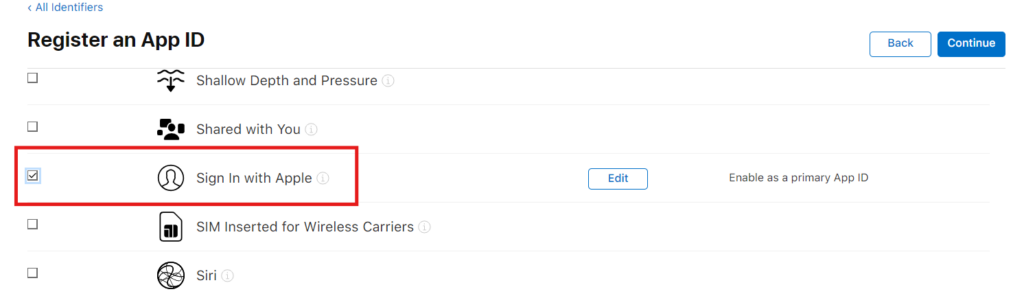
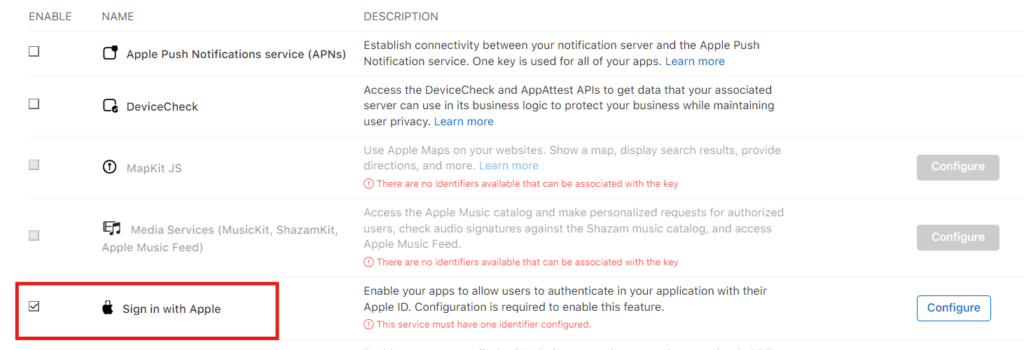
6. Under the Capabilities section, tick the Sign In with Apple option.
7. Scroll up and press the Continue button and then the Register button.
Step 2: Create the Apple Key
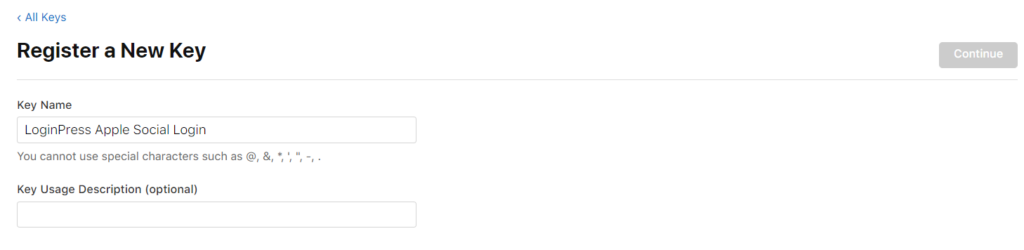
1. Navigate to the Keys tab.
2. Click the blue + icon next to Keys.
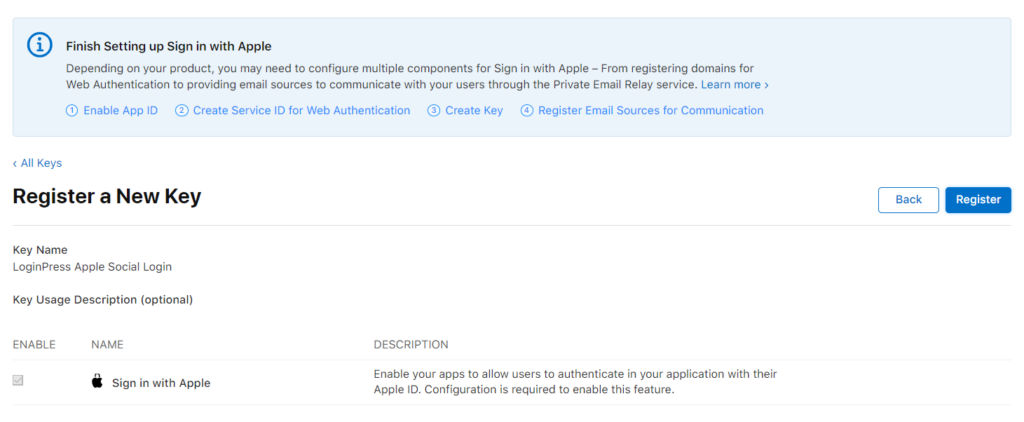
3. Enter a name in the Key Name field.
4. Tick the Sign In with Apple option, then click on Configure.
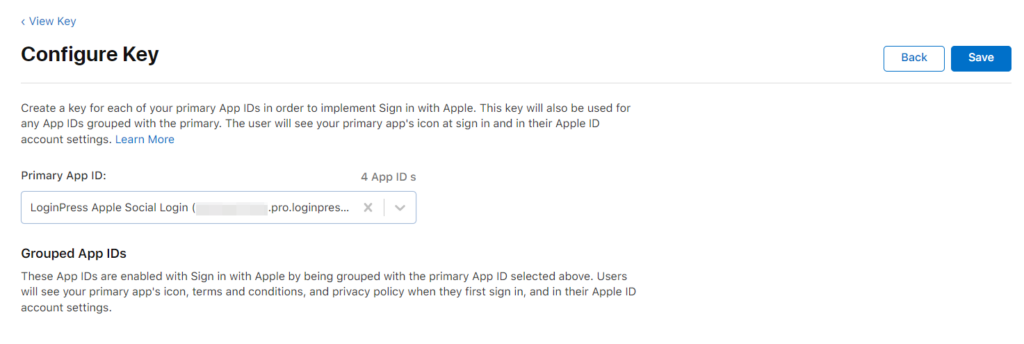
5. Select the app you just created from the Primary App ID dropdown, then click Save.
6. Finally, press the Continue button and then the Register button.
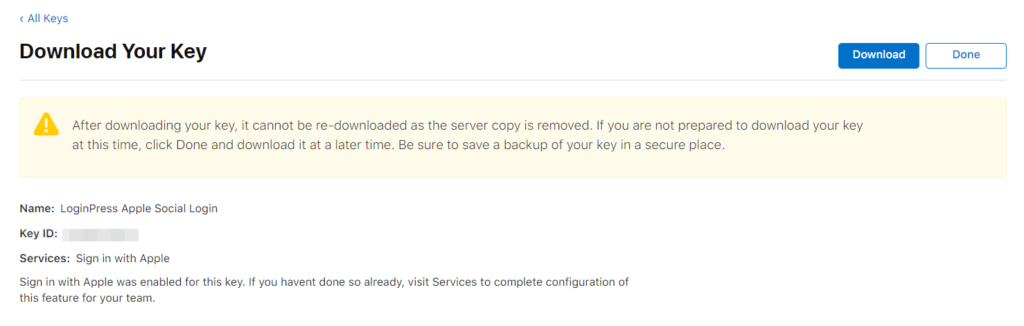
7. Don’t download the key yet; we will do that later in the coming steps.
Step 3: Create the Apple Service
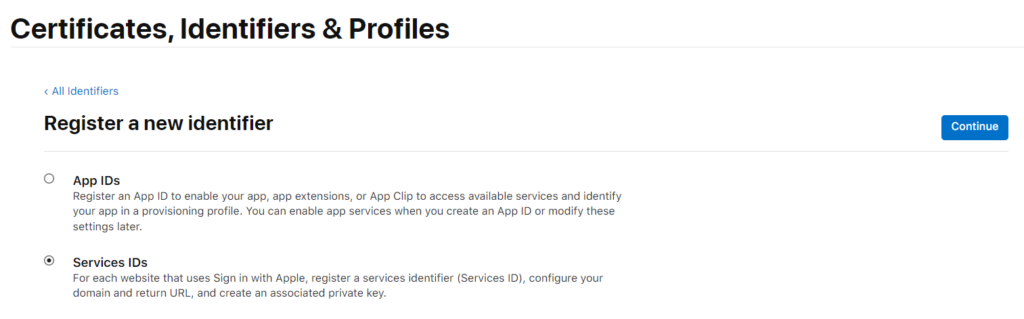
1. Navigate to Identifiers again.
2. Click the blue + icon next to Identifiers, then select the Services IDs option and click the Continue button.
3. Enter a description for your Services ID.
4. In the Identifier field, enter your domain name in reverse-domain name style, with the name of the client at its end. (i.e., com.domainname.clientname)
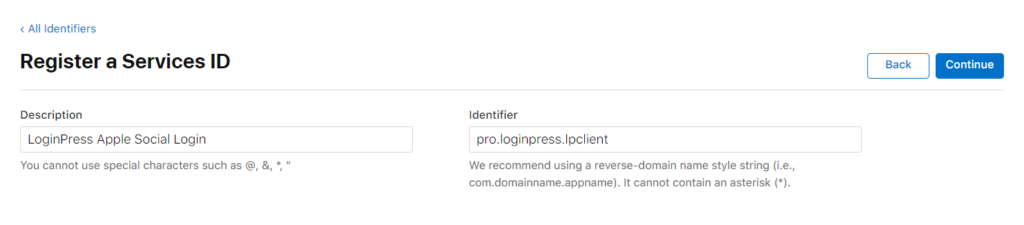
Note: Keep the “com. domainname” part the same as set previously in Step 1, but change the clientname part here; otherwise, you may face this error: “An attribute in the provided entity has an invalid value. An App ID with an identifier is not available. Please enter a different string.”
5. Now click the Continue button and then the Register button.
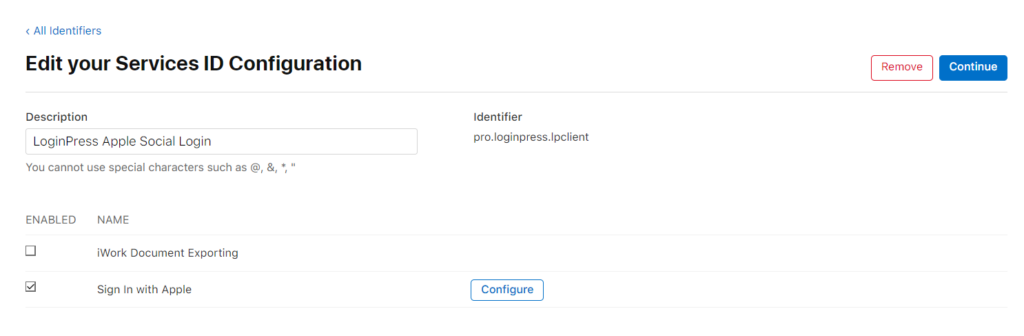
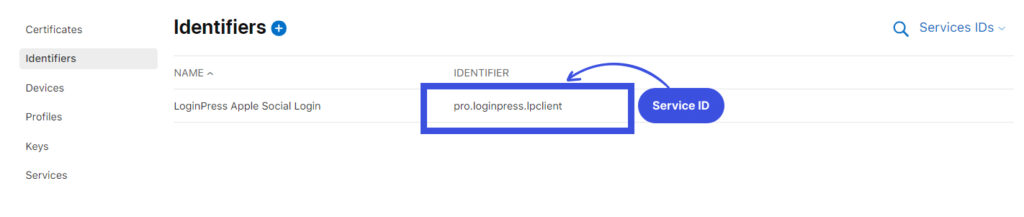
6. In the Services IDs section, click the service you just created.
7. Tick the Sign In with Apple option and click the Configure button next to it.
7.1. Select the App from the Primary App ID dropdown you created in Step 1.
7.2. Fill in the Domains and Subdomains field with your domain name. For example: loginpress.pro.
7.3. Add the following URL to the Return URLs field:
https://yourdomainname.com/wp-login.php?lpsl_login_id=apple_check
Note: Replace “yourdomainname.com” with your domain name, as in our example: loginpress.pro.

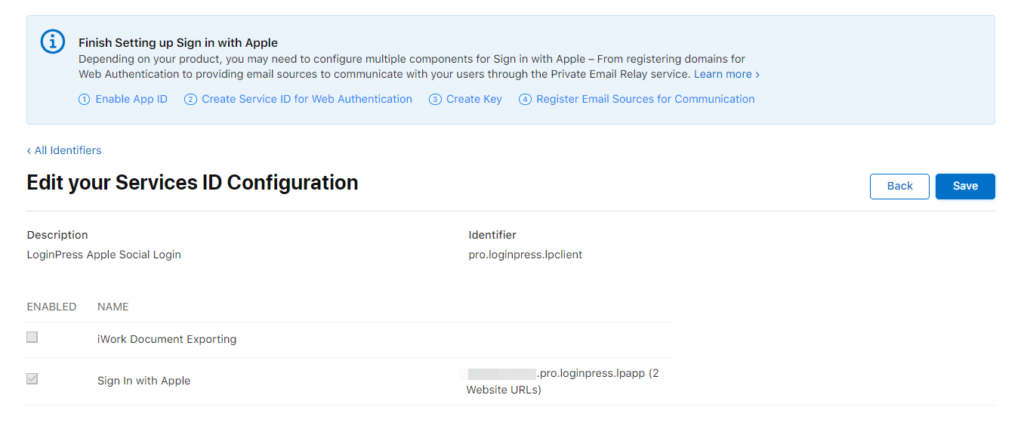
8. Click the Next button. Before proceeding with Done, review the Primary Bundle ID and Website URLs, as these settings can not be edited later.
9. Finally, click the Continue button and then the Save button.
Step 4: Apple Social Login Settings
Now, follow the steps below to add Apple keys to the LoginPress Social Login settings.
Go to LoginPress>> Settings, then open the Providers tab under Social Login. Click the Configure button for Apple. After enabling Apple login, you will see four fields.
1. Service ID: Navigate to the Identifiers tab in the Apple Developer account. You will find the Service ID under the IDENTIFIER column. Copy it and paste it into the Service ID field.
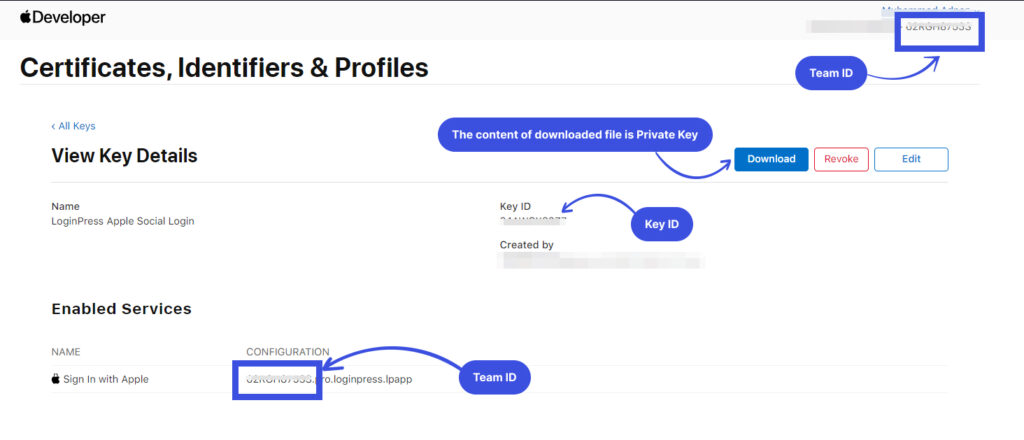
2. Key ID: Navigate to the Keys tab. Click on the name of your Key, and you will see the Key ID. Copy and paste it into the Key ID field.
3. Team ID: It is a 10-character-long identifier that you can find in the top-right corner under your name. Copy it and paste it into the Team ID field.
4. Private Key: Now, click the Download button for the Key you have generated in Step 2. Once this file is downloaded, it will no longer be available, so keep it safe! Open the downloaded file in a text editor like Notepad, copy all its contents, and paste them into the Private Key field.
Make sure you copied everything from the key file you downloaded, including the following parts:
—–BEGIN PRIVATE KEY—–
—–END PRIVATE KEY—–
After saving your changes, verify your app settings. This will generate a token that validates the authorization grant code provided to your app. Please note that this token cannot be edited directly. This indicates that your Apple social login configuration is successful.
You should now see this screen, which confirms that the token has been generated successfully.
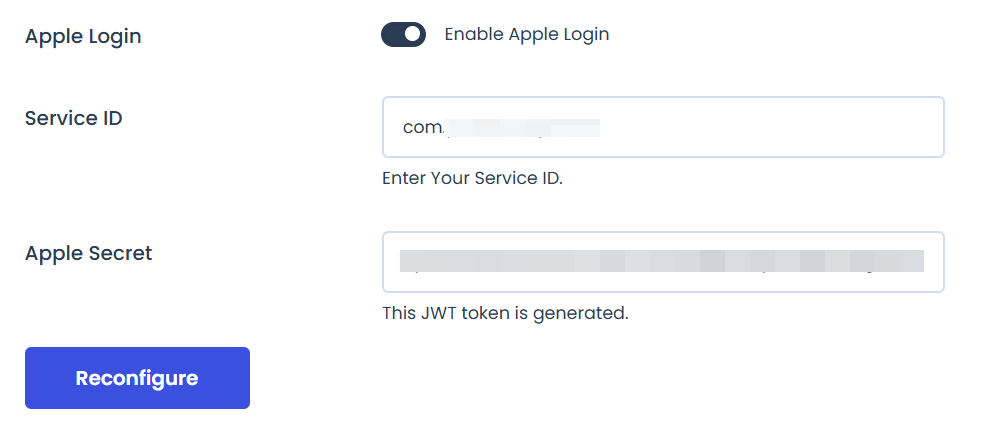
If you need to reset the settings and use some other keys, click the Reconfigure button and follow the same steps again.
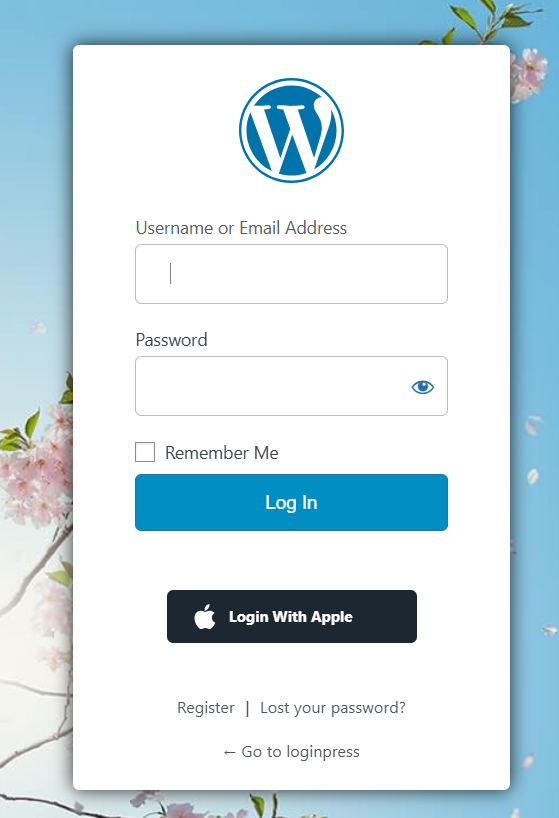
Once finalized, you can see the Apple Social Login button on your WordPress Login forms as shown below:
Conclusion
We hope you now understand how to integrate Apple Social Login into your WordPress login and registration form.
That’s all for this guide.
Looking to add more social logins to your WordPress site with LoginPress? Check the following docs:
- How to Add Facebook Social Login
- How to Add Twitter Social Login
- How to Integrate LinkedIn Social Login
- How to Integrate Google Social Login
- How to Integrate GitHub Social Login
- How to Integrate Discord Social Login
Feel free to contact us if you have any further questions or need help.
Frequently Asked Questions (FAQs)
These FAQs answer the most common questions about our WordPress custom login page plugin.

Where can I get support for LoginPress?
If you need help with LoginPress, you can contact us here. We’ll be happy to answer any questions about the plugin.
Do you have an affiliate program?
Yes, we have an affiliate program that you can sign up for here. As an affiliate, you’ll earn a commission on every sale you refer to us.
Do you offer refunds?
Yes, we offer a 14-day money-back guarantee on all of our plans. If you’re unsatisfied with LoginPress, simply contact us within 14 days of your purchase, and we’ll process a refund.
Can I upgrade my license after my initial purchase?
Yes, you can upgrade your LoginPress license at any time. Simply log into your account and go to the My Downloads page. From here, you can upgrade your license and download the latest version of the plugin.
Will LoginPress slow down my website?
No, LoginPress will not slow down your website. The plugin is lightweight and only loads the necessary files when someone tries to access your login page.

If you Still have Questions?
Get In Touch