
To make the plugin extra easy and functional as per the requirements, here comes the detailed documentation regarding the plugin. All about educating the things related to the plugin.

How to Limit Login Attempts with LoginPress (Easy)
WordPress websites are vulnerable to brute-force attacks, in which attackers use automated scripts and large lists of usernames and passwords to crack login credentials.
This knowledge base article will show you how to limit login attempts with LoginPress on a WordPress site using the LoginPress plugin's Limit Login Attempts Add-on.
Let's get started!
By default, there are no restrictions on login attempts. Hackers continuously try to compromise your WordPress site.
Such unsecured websites are often targeted by these attacks.
LoginPress plugin's Limit Login Attempts Add-on is a simple fix to this problem. It limits the number of login attempts users can make, helping protect your website against brute-force attacks.
Note: We assume that you have already upgraded to LoginPress Pro. If not, you can check out our guide on How To Install And Activate LoginPress PRO Version?
Limit Login Attempts Add-on in LoginPress (Step by Step)
Below is a simple way to limit login attempts with LoginPress.
Step 1: Activate Limit Login Attempts Add-on
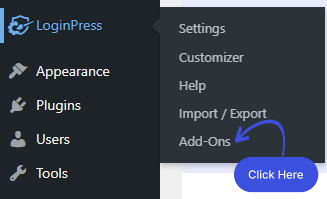
First, go to the left sidebar of the WordPress admin dashboard. Navigate to LoginPress >> Add-Ons.
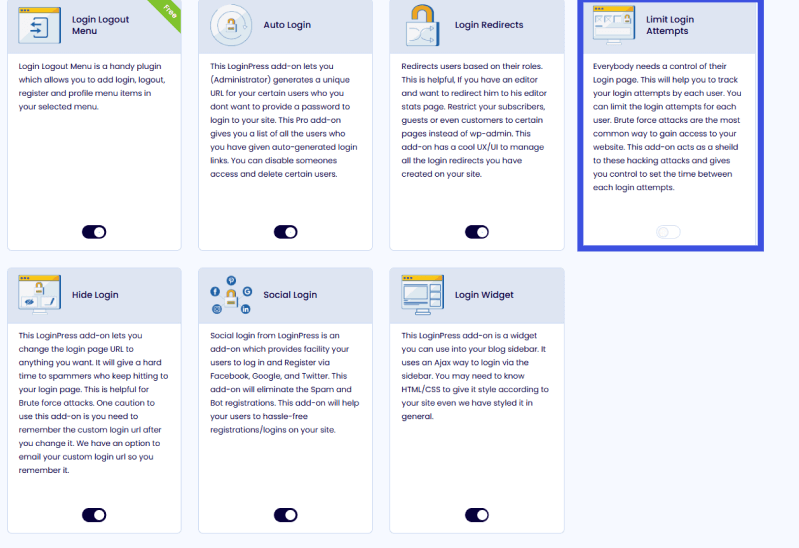
Next, locate the Limit Login Attempts Add-On and toggle the button on to enable it.
Step 2: Go to Limit Login Attempts Add-on
First, go to LoginPress in the left sidebar of the WordPress admin dashboard, then click Settings.
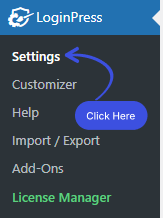
You can see the Limit Login Attempts tab next to the Settings tab.
Note: Don’t forget to click the Save Settingsbutton to store changes made with the Limit Login Attempts Add-on.
Step 3: Get Started with Limit Login Attempts Add-on
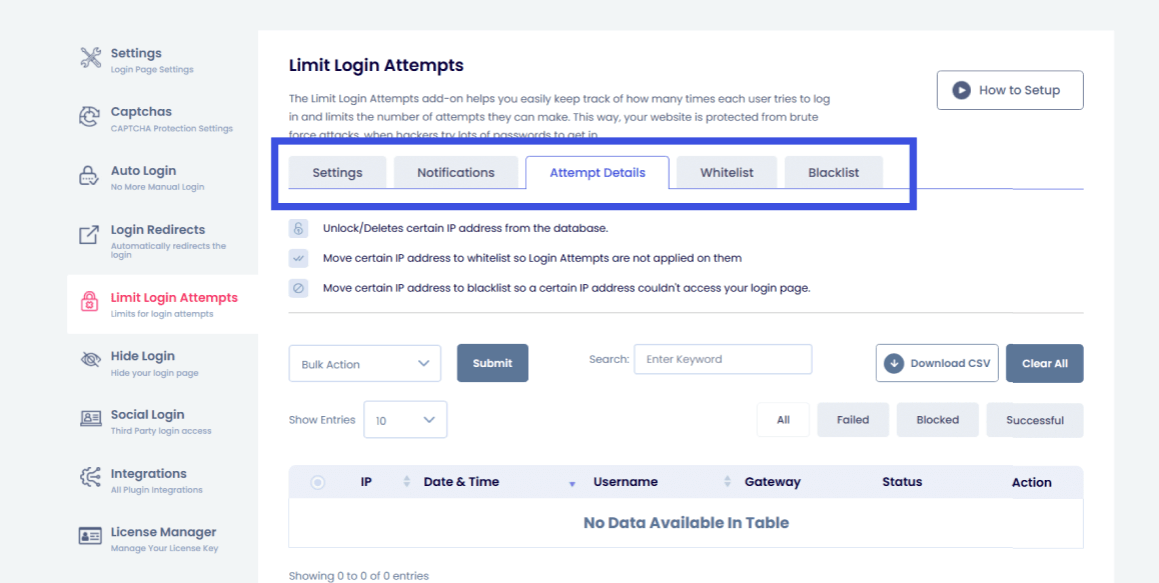
Under the Limit Login Attempts tab, you can find the five following tabs.
- Settings
- Attempt Details
- Whitelist
- Blacklist
- Notifications
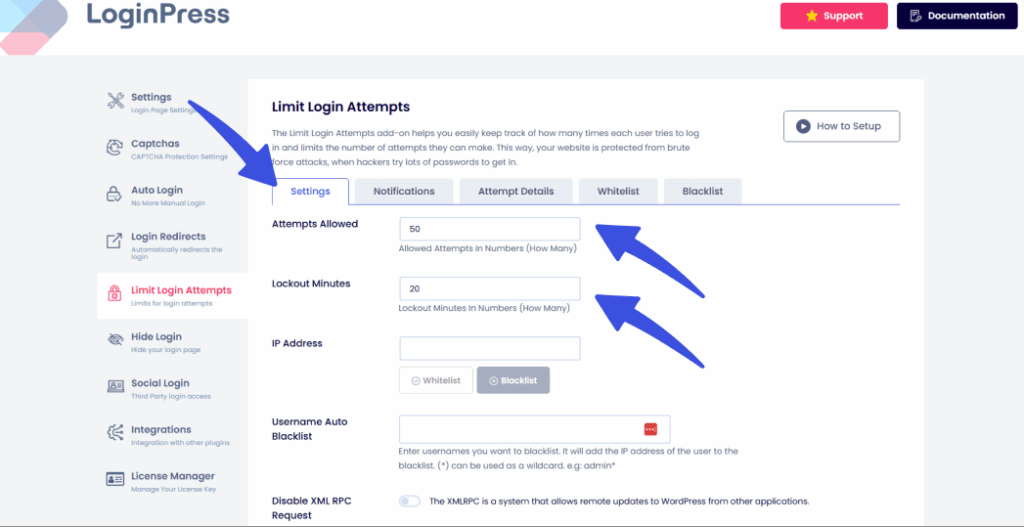
Tab 1: Settings
The main functionality of the LoginPress Limit Login Attempts Add-on is available in the Settings tab.
It lets you manage login attempts to your WordPress site, including allowed attempts and lockout time.
Note: Don’t forget to click the Save Settings button to store changes made with the Limit Login Attempts Add-on.
Once you click the Settings tab, you’ll find the following settings.
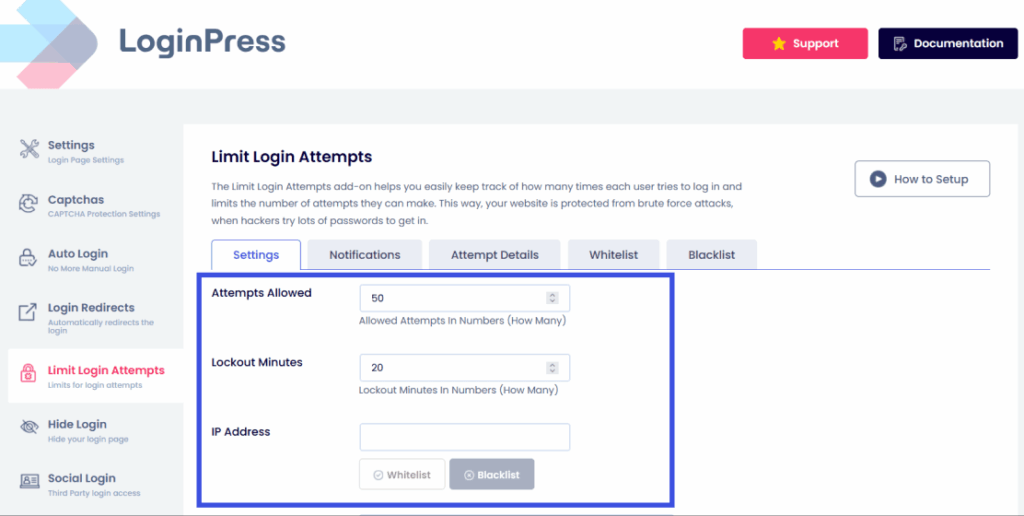
1. Attempts Allowed
The Attempts Allowed feature lets you set the number of login attempts a user is allowed before being locked out.
2. Minutes Lockout
In this field, you need to enter the number of minutes a user won’t be able to access the website login after they’ve exhausted this limit.
3. IP Address
You can also lock an IP address if it tries to log in too many times. Enter the IP address in this field, and make that IP Address Whitelisted or Blacklisted based on the attempt details.
4. Username Auto Blacklist
These settings allow administrators to block specific and suspicious usernames. You only need to enter the username, and it will automatically add the user's IP address to the blacklist.
Security and Access Control Settings
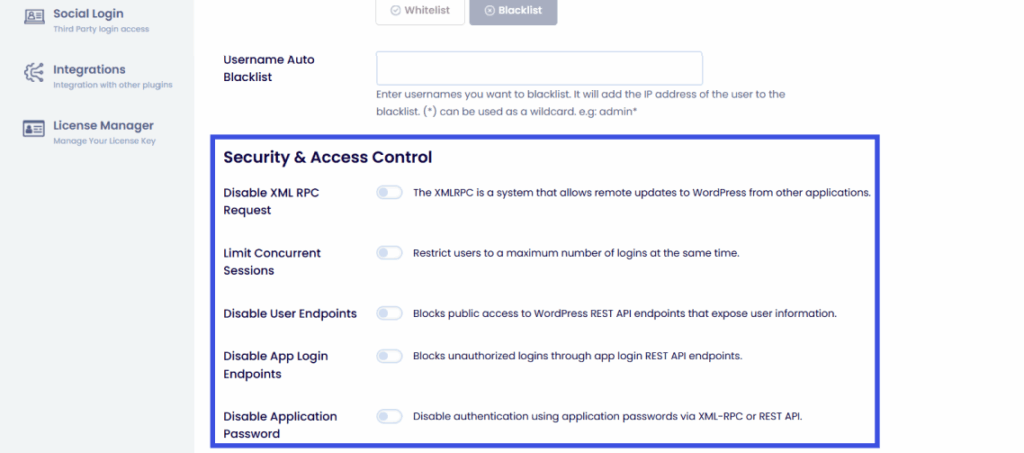
1. Disable XML RPC Request
You can toggle on the XML-RPC button to receive remote updates to WordPress from other applications.
2. Limit Concurrent Sessions
Limit the number of concurrent logins per user with this option to gain greater control over your site.
3. Disable User Endpoints
This feature allows administrators to block public access to WordPress REST API endpoints that expose user information.
4. Disable App Login Endpoints
Using this feature, you can block unauthorized logins through app login REST API endpoints.
5. Disable Application Password
Disable authentication using application passwords via XML-RPC or REST API.
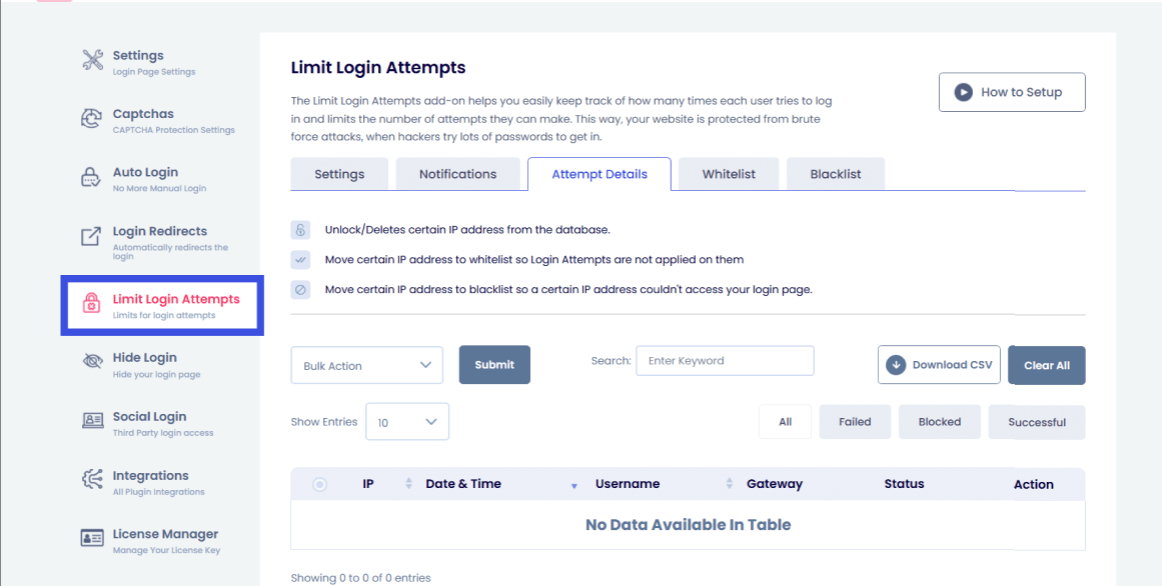
Tab 2: Attempt Details
The Attempts Details tab provides detailed insight into your WordPress site's login attempts, including IP, Date & Time, Username, Password, and Gateway.
Note: Based on their attempt details, you can either Whitelist or Blacklist that user.
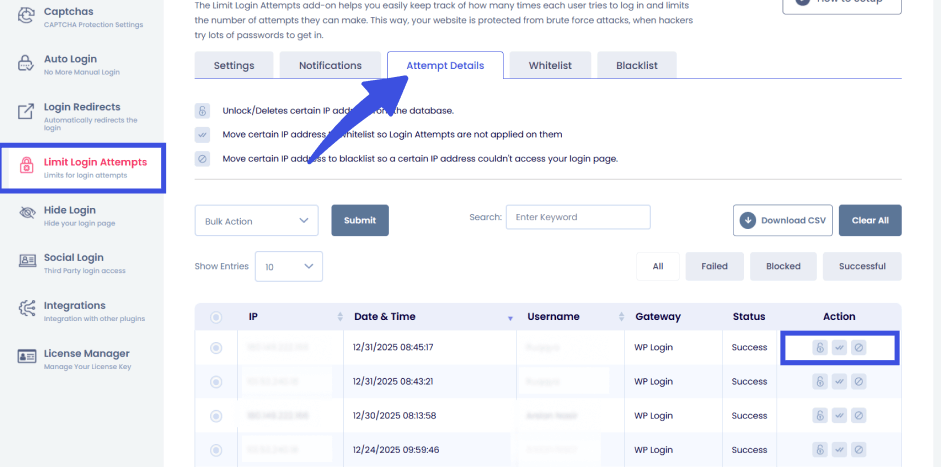
Under the Attempt Details tab, you can find a detailed layout of failed attempts. Here you can find the details:
1. IP: The IP address of the user.
2. Date & Time: The date & time when he tries to log in to your site.
3. Username: Which username does he try to log in to your site?
4. Password: Which password does he try to use to log in to your site?
5. Gateway: Which gateway does he use to log in to your site (WP Login, Woocommerce, Widget)?
6. Status: What is the status of the login activity of the respective user?
7. Action: Here is the main feature of login attempts, where you can perform actions for each user, such as:
- Unlock: You can unlock the IP address. After that, the user can log in again without being locked out.
- Whitelist: Add the IP address to the whitelist. The user will no longer face limitations.
- Blacklist: After clicking the Blacklist Button, the IP address is added to the blacklist. The user will no longer be able to see your WordPress site's login page and wp-admin.
Tab 3: Whitelist
Under the Whitelist tab, you can view the whitelisted IP addresses in a beautiful layout. Here you can manage all the Whitelisted users.
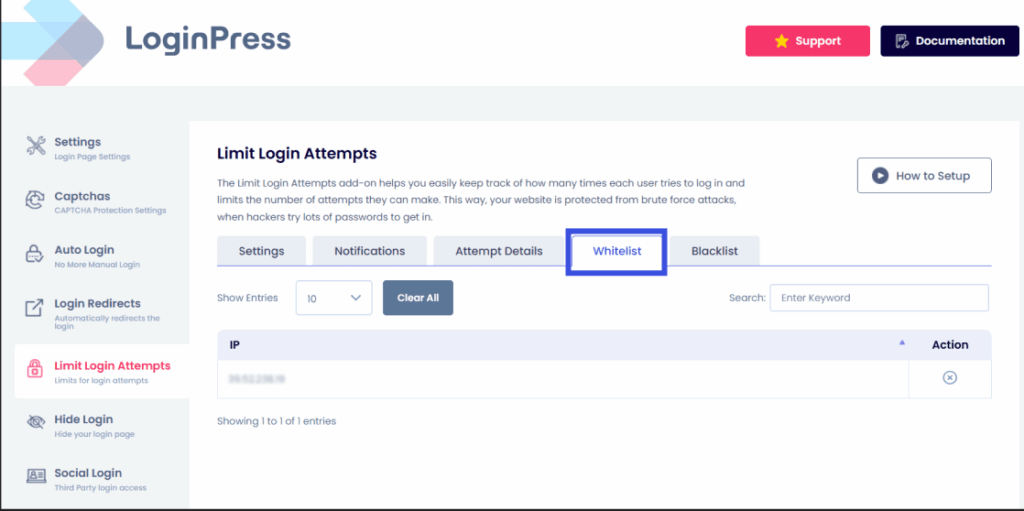
1. Clear: Remove the Whitelisted IP for a particular IP address. After removing the IP address from the whitelist, there will be no login restriction for that IP.
Tab 4: Blacklist
Under the Blacklist tab, you can view the blacklisted IP addresses in a clean layout.
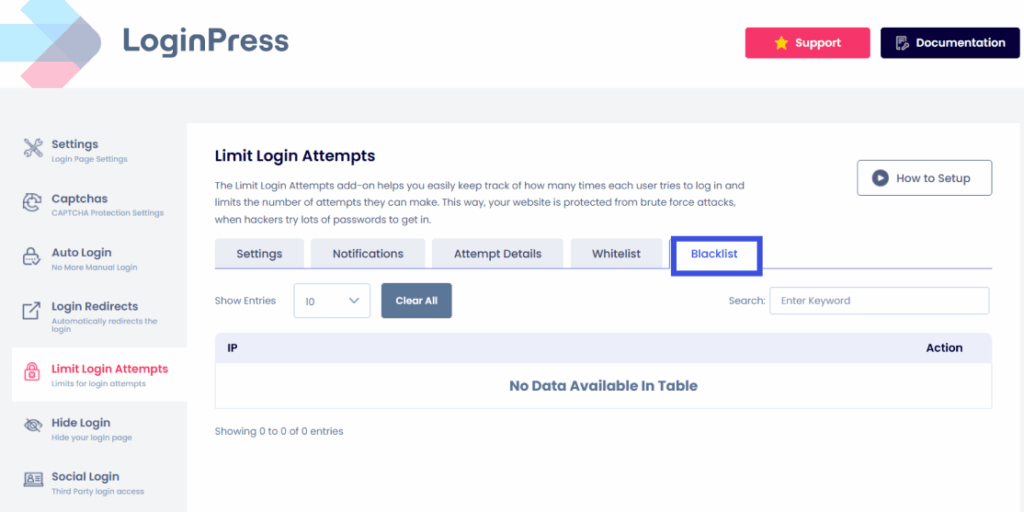
Here you can:
1. Clear: Remove the Blacklisted IP for a particular IP. After removing it from the blacklist, that IP address will be able to see the login page and the WP-Admin.
Tab 5: Notifications
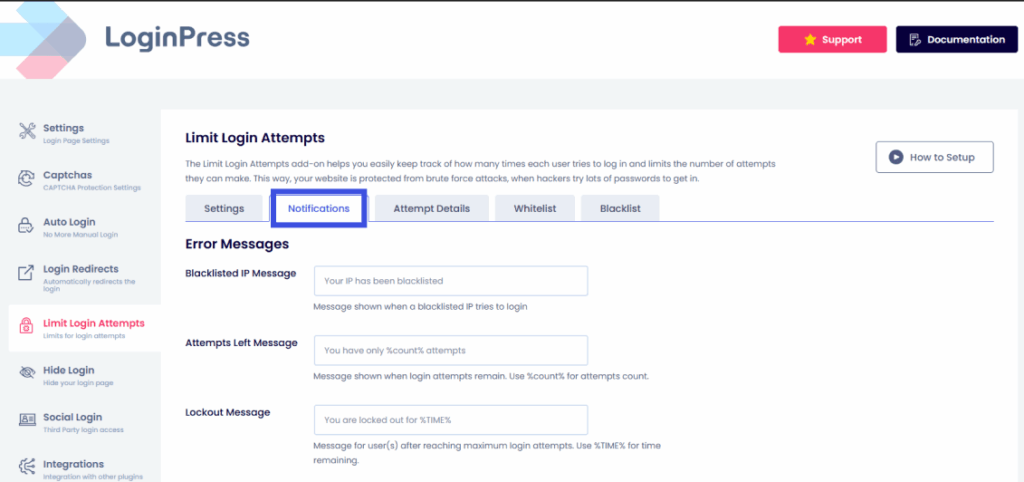
In this tab, administrators can enable notifications for various types of user login attempts. Here is what LoginPress Limit Login Attempts provides:
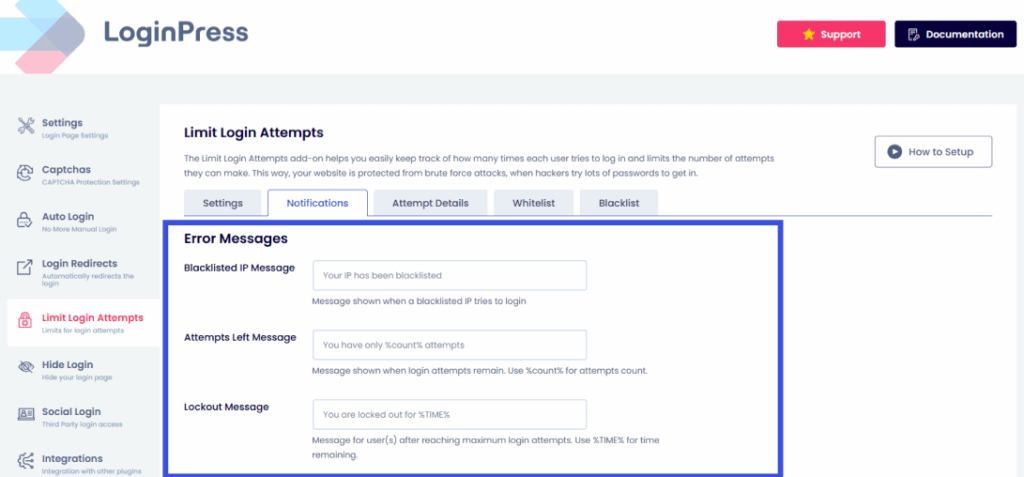
1. Error Messages Notifications: This allows administrators to customize error messages shown to each kind of user:
- Blacklisted IP Messages
- Attempts Left Message
- Lockout Message
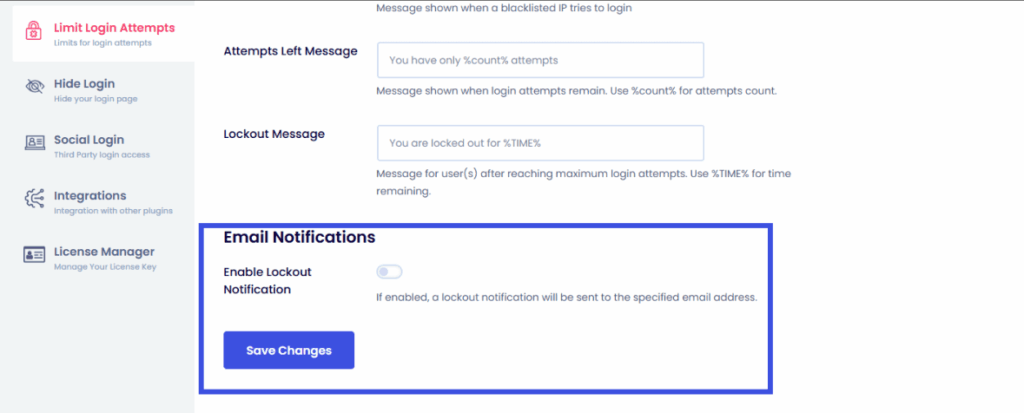
2. Email Notifications: Enable a lockout notification to the specified email address after attempts are finished.
That's it! We've demonstrated how to add Limit Login Attempts using the LoginPress Add-on.
Try LoginPress Limit Login Attempts Add-On now to shield your WordPress site against brute force attacks.
To enhance the security of your WordPress site, it's crucial to limit failed login attempts.
LoginPress offers built-in features to limit login attempts, but you can also explore other limit login attempts WordPress plugins for additional security measures.
Let us know how much this article helped you!
If you have any questions or concerns about this matter, please don't hesitate to contact our support team.
Frequently Asked Questions (FAQs)
These FAQs answer the most common questions about our WordPress custom login page plugin.

Where can I get support for LoginPress?
If you need help with LoginPress, you can contact us here. We’ll be happy to answer any questions about the plugin.
Do you have an affiliate program?
Yes, we have an affiliate program that you can sign up for here. As an affiliate, you’ll earn a commission on every sale you refer to us.
Do you offer refunds?
Yes, we offer a 14-day money-back guarantee on all of our plans. If you’re unsatisfied with LoginPress, simply contact us within 14 days of your purchase, and we’ll process a refund.
Can I upgrade my license after my initial purchase?
Yes, you can upgrade your LoginPress license at any time. Simply log into your account and go to the My Downloads page. From here, you can upgrade your license and download the latest version of the plugin.
Will LoginPress slow down my website?
No, LoginPress will not slow down your website. The plugin is lightweight and only loads the necessary files when someone tries to access your login page.

If you Still have Questions?
Get In Touch