
To make the plugin extra easy and functional as per the requirements, here comes the detailed documentation regarding the plugin. All about educating the things related to the plugin.

Customizing Login Form with LoginPress
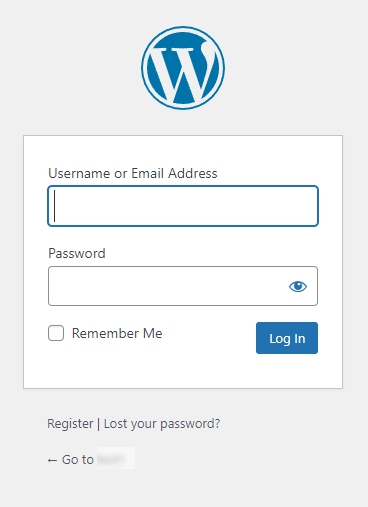
By default, the WordPress Login Form has the standard WordPress branding that doesn’t complement your website’s theme.
(As shown in the image below)
You can easily modify the look and feel of your Login Form with LoginPress’s Customize Login Form feature without writing codes or hiring an expert. Cool, right?
This feature is available in both Free and Premium LoginPress.
Note: We assume you’ve already Downloaded and Installed LoginPress. If not, you can check out our guide on How to Install And Activate LoginPress (Free).
This knowledgebase article will show how you can easily customize the login form with the LoginPress Login Form feature.
Let’s get started!
Customize Login Form Feature in LoginPress
LoginPress is a feature-packed WordPress login page customizer plugin that takes all the hassle away from the process of building your custom login pages.
When LoginPress is activated, the default theme overrides your WordPress login page.
But you can enhance the login form using the LoginPress Customize Login Form feature.
1. Get Started with Customize Login Form Feature
Go to the left side of the admin dashboard. Navigate to LoginPress and click on the Customizer option.
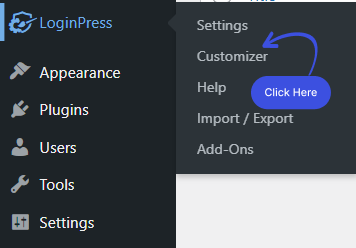
A new screen with all of the Customization Options will open up. Select the Customize Login Form option.

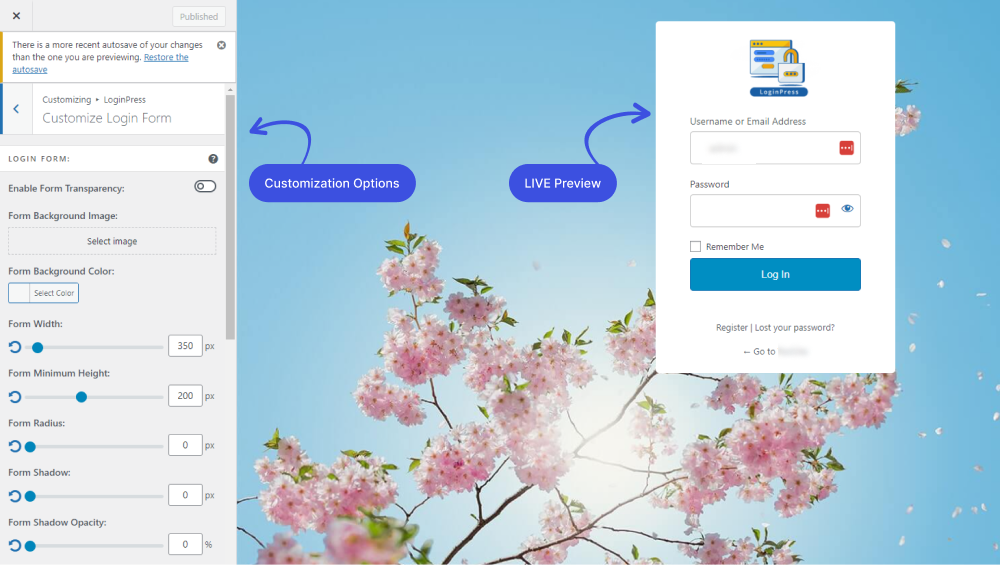
After clicking on the Customize Login Form option, a new window will open where you’ll get all the customization options. Along with the LIVE Preview, to instantly track the changes made to the Login Form.
2. Customize the Login Form
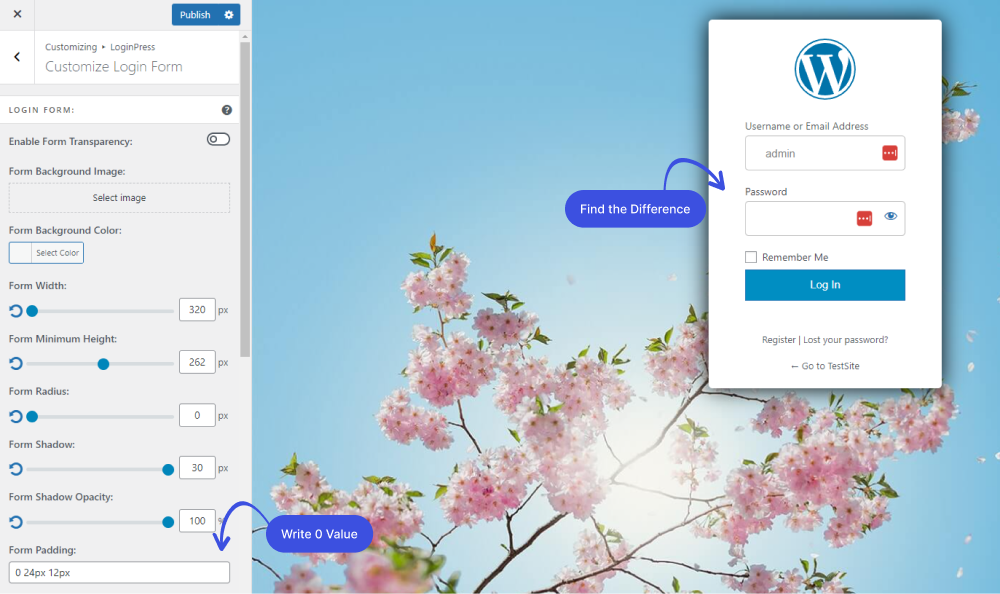
Option 1. Login Form Section
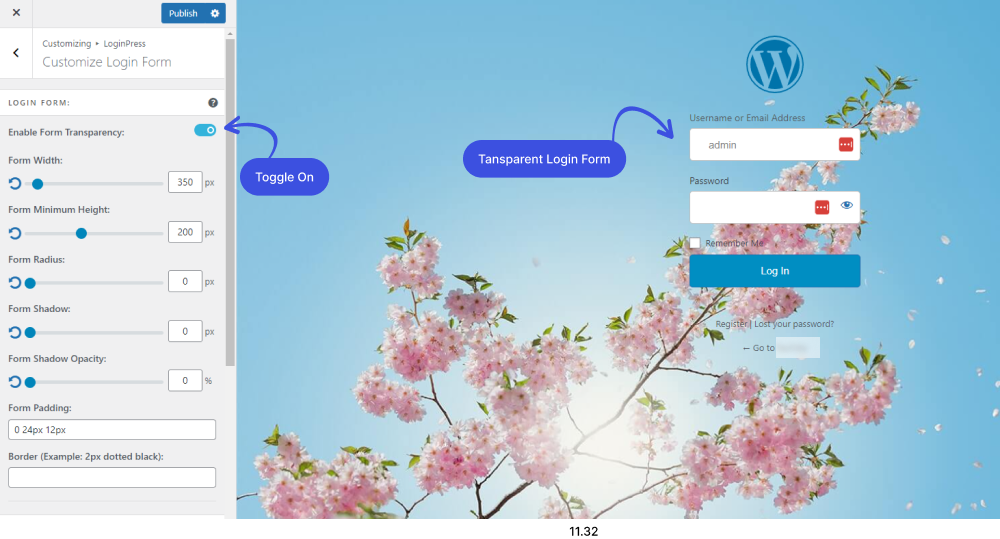
1. Enable Form Transparency:
You can make your Login Form transparent in seconds with the LoginPress Enable Form Transparency feature.
All you need to do is to enable the Login Form Transparency button.
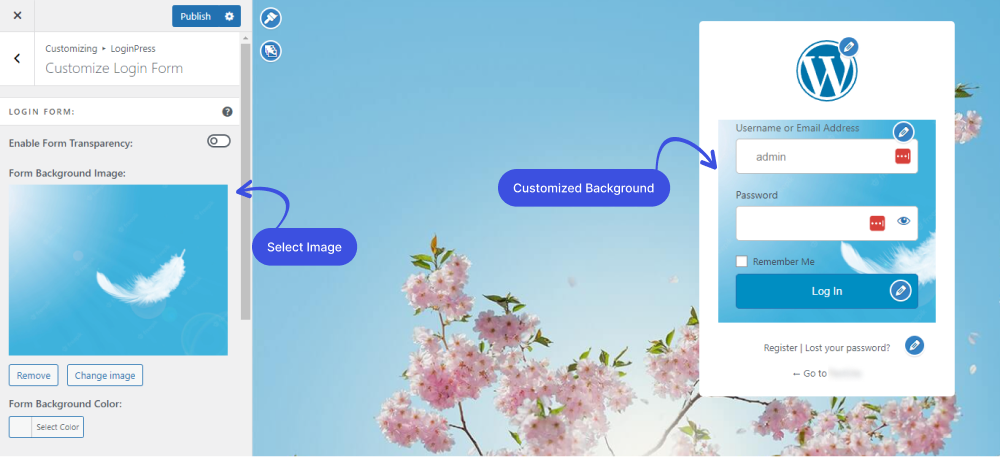
2. Form Background Image
Are you bored with the dull background of the Login Form? No problem; with the Form Background feature, you can easily replace it with a better one.
Just pick any image as the background of your choice and get the result seconds later.
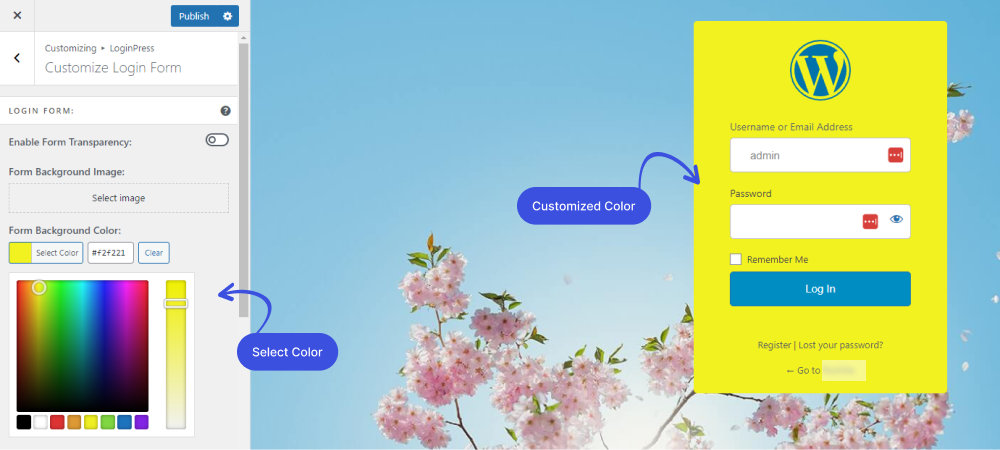
3. Form Background Color
Customizing the Login Form color is easy with the LoginPress Form Background Color feature.
All you need to do is select any color of your choice from the color picker; the color will be changed rights away.
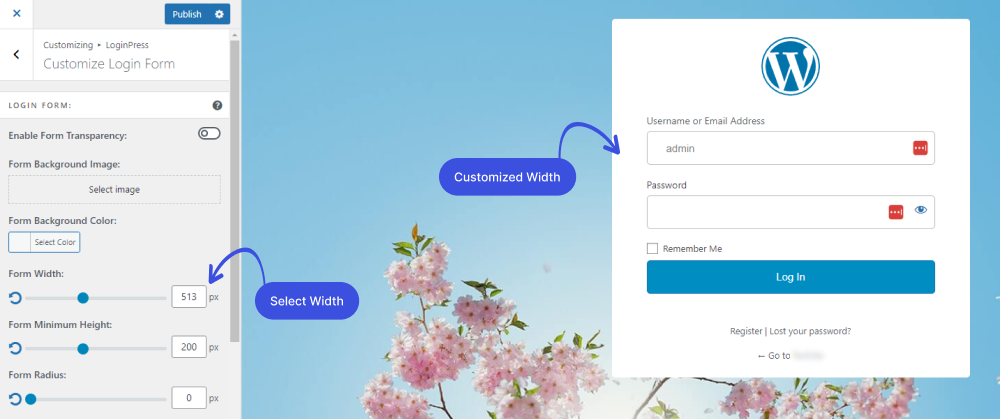
4. Form Width
The LoginPress Form Width feature is there for customizing the width of the form.
You can simply change the login form width by using the Form Width range control.
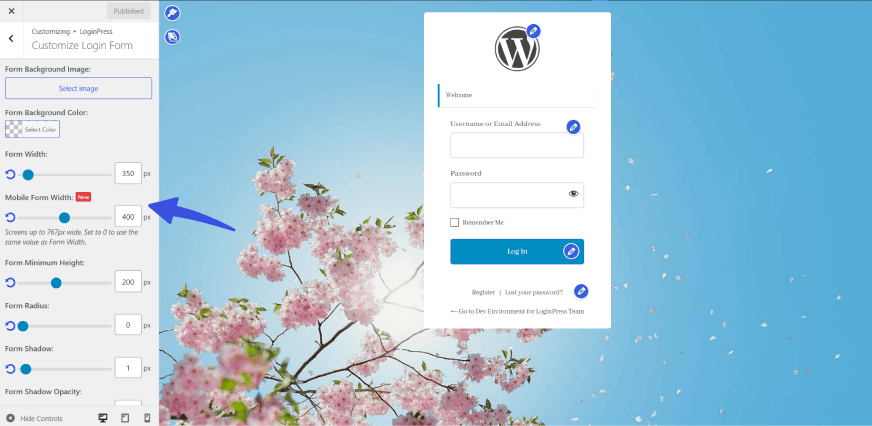
5. Mobile Form Width
The Mobile Form Width option lets you customize the login form width for smaller screens up to 767px wide. Setting this value to 0 will automatically configure the form to inherit the same dimensions specified in the standard Form Width setting.
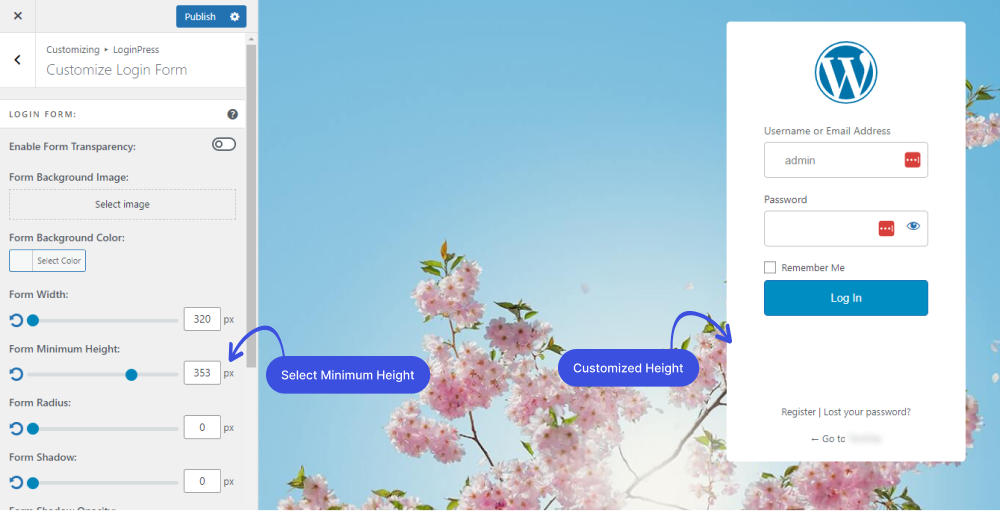
6. Form Minimum Height
The Form Minimum Height feature lets you customize the login form's height.
You can simply change the login form height by using the Form Minimum Height range control.
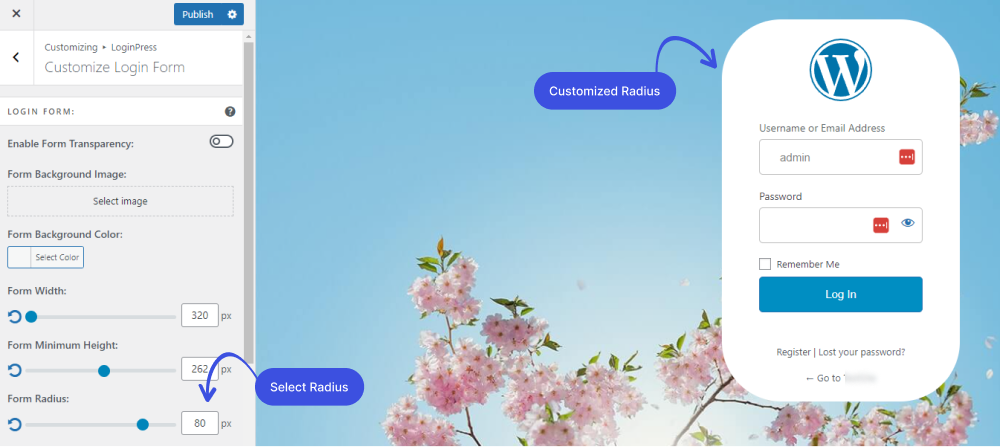
6. Form Radius
LoginPress lets you choose the perfect corner Radius for your Login Form.
Using the Form Radius range control, you can make corners of your Login Form square or rounded. It impacts the overall feeling of the interface of your Login Form.
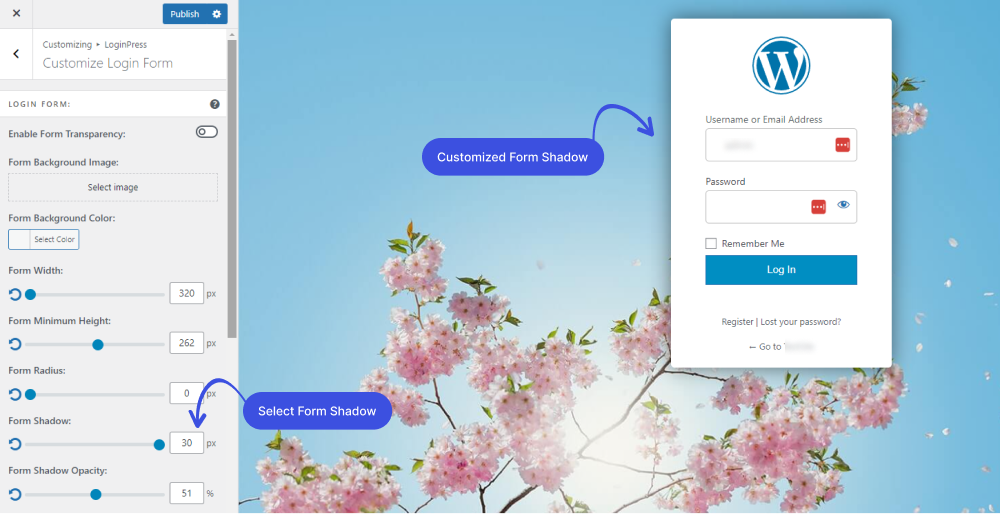
7. Form Shadow
The Form Shadow feature enables you to add a shadow to your Login Form. The shadow takes on the same rounded or square corners for your buttons as you’ve selected for the Login Form radius.
You can easily make it brighter or darker through Shadow range control or input value into the text field.
Note: You can see the Shadow effect if you enable the Form Opacity.
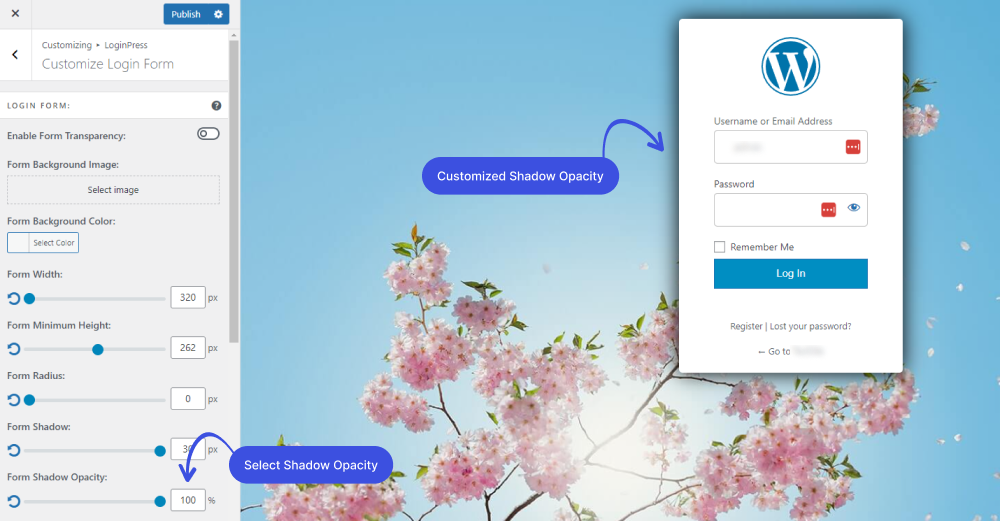
8. Form Opacity
The Customize Login Form feature lets you customize the shadow opacity of the Login Form.
This works the same as the Shadow feature.
9. Form Padding
You can customize the Form Padding simply by inserting the value 0 in the Form Padding field.
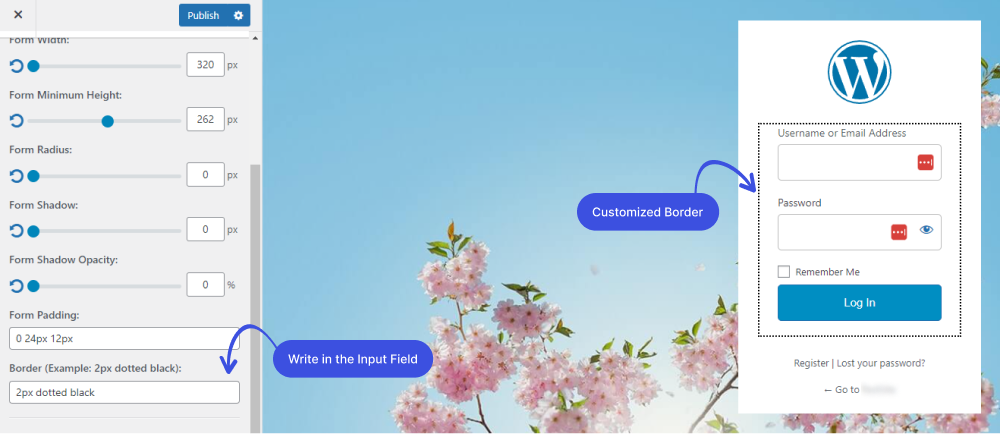
9. Border
You can add a customized border on the Login Form simply by writing “2px dotted black” in the Border input field.
Note: You can change the border color by changing “black” to any color of your choice.
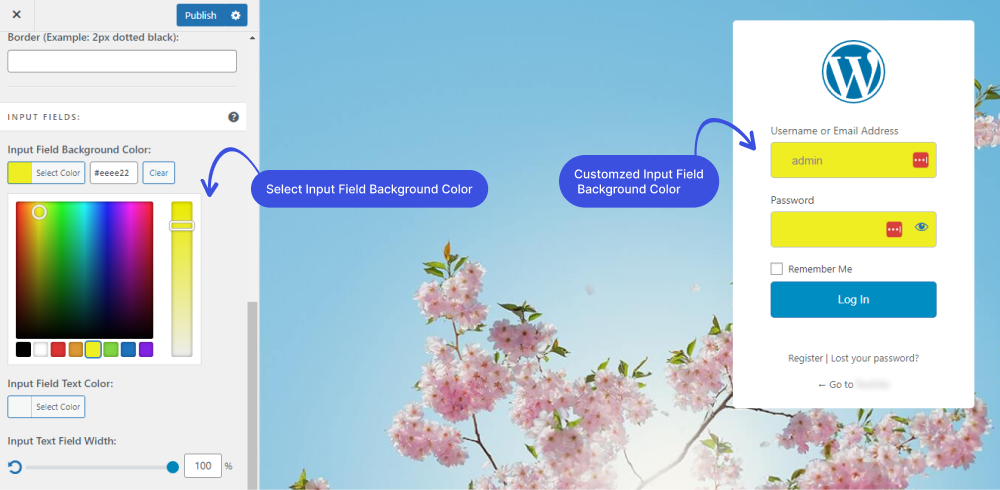
Option 2. Input Fields Section
1. Input Field Background Color
You can easily customize the input field background color on the Login Form using the Input Field Background feature.
All you need to do is to select any color of your choice from the Input Field Background color picker control.
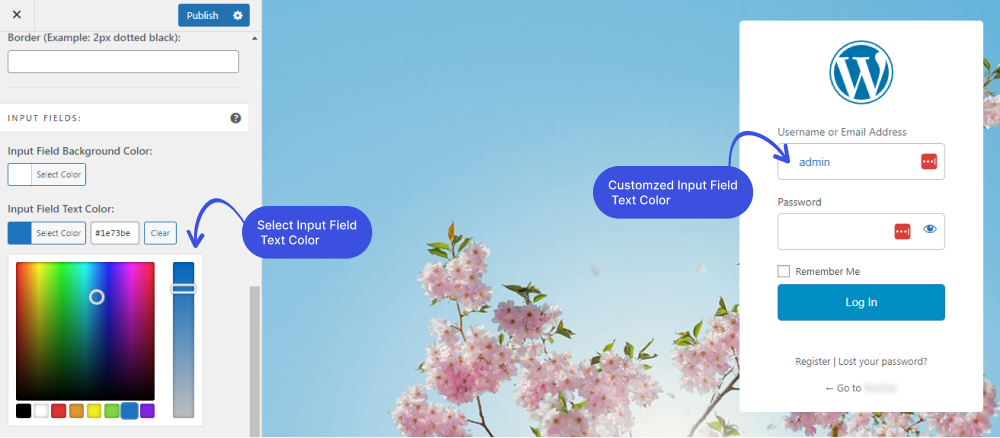
2. Input Field Text Color
We are still going! You can add different colors for the input field text color.
Simply select any color from the Input Field Background Text color
picker control.
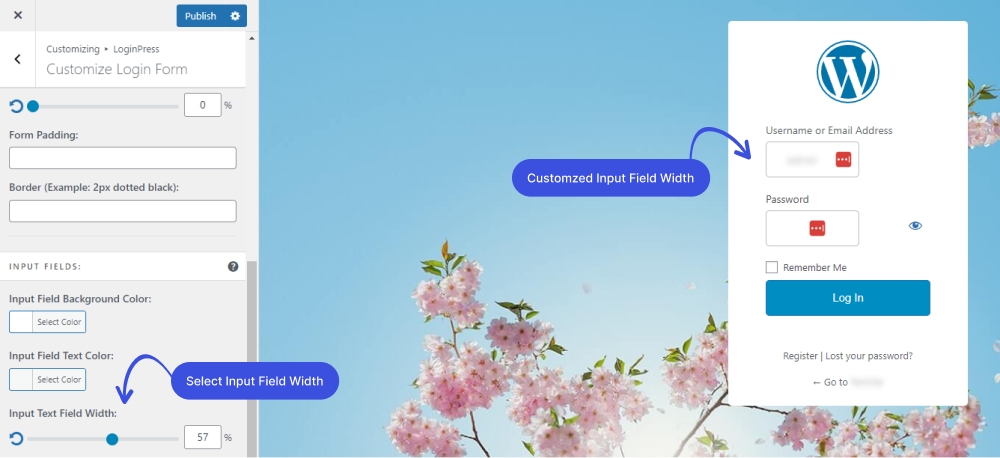
3. Input Text Field Width
You can even customize the width of the input text field.
You can simply make it smaller or bigger by using the Input Text Field Width range control.
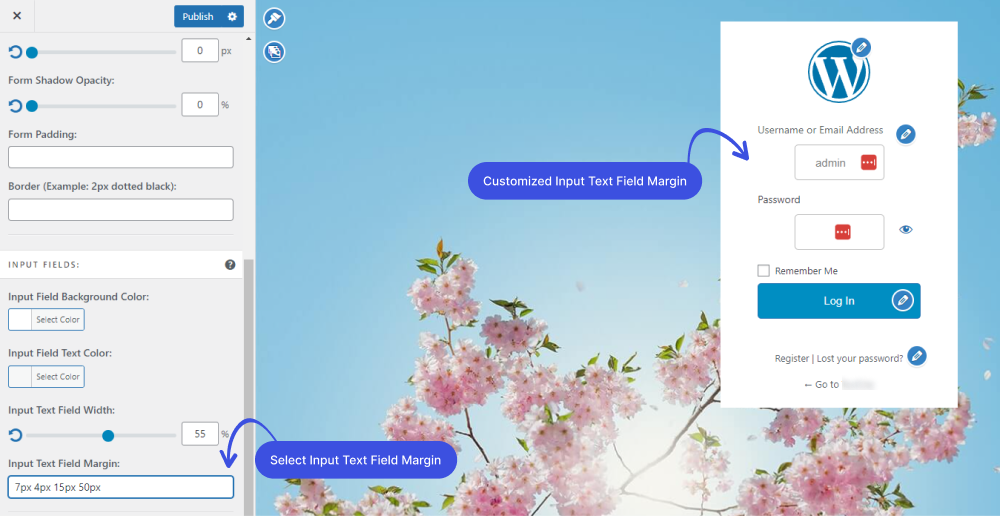
4. Input Text Field Margin
You can customize the Input Text Field Margin further.
All you need to do is to change the values 2px 6px 18px 0px to make it exactly what you want.
While focusing on the login form itself, don't forget to customize the footer. Include essential information like copyright notices and links to your privacy policy and terms of service.
Option 3. Input Fields Labels Section:
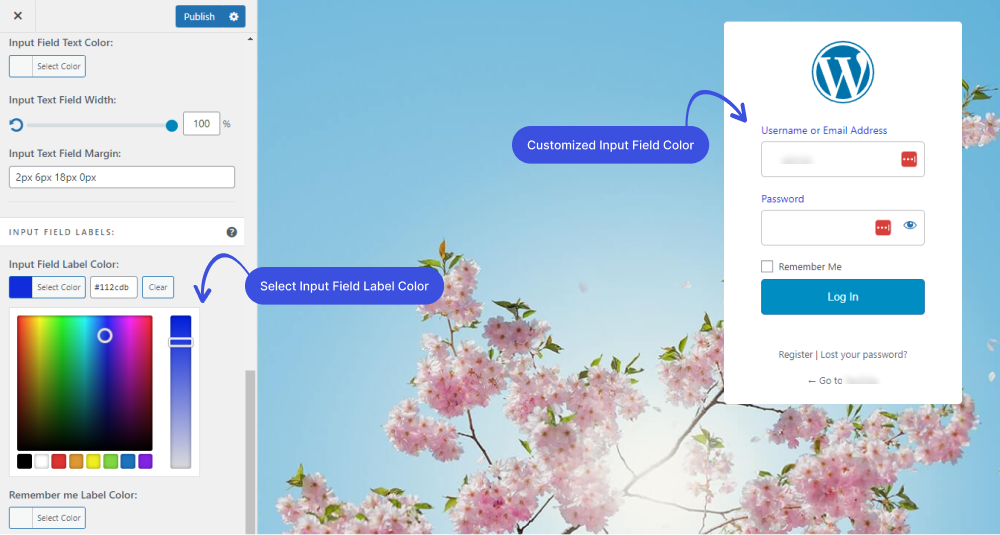
1. Input Field Label Color
Changing the input field label color is not a big deal with the LoginPress Input Field Label Color feature.
You can add different colors without writing a single line of code.
All you need to do is to select any color of your choice from the color picker control.
2. Remember me Label Color
You can further change Remember me label color with the help of the LoginPress Remember me Label Color feature.
Simply go to the color picker and select any color of your choice.

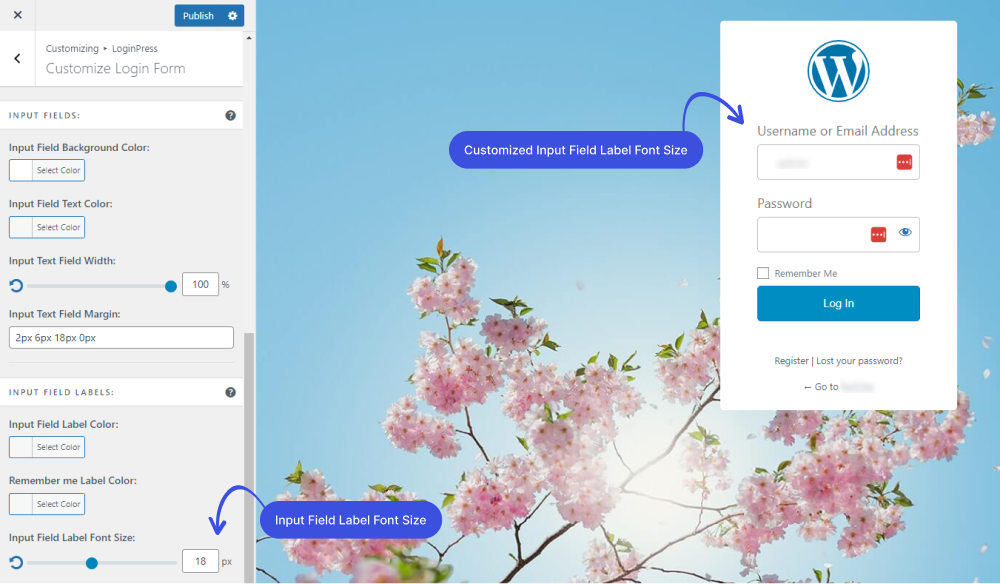
3. Input Field Label Font Size
By default, the WordPress input field label font has a specific size.
The LoginPress Input Field Label Font Size feature lets you customize its size. You can make it smaller or bigger simply by using range control.
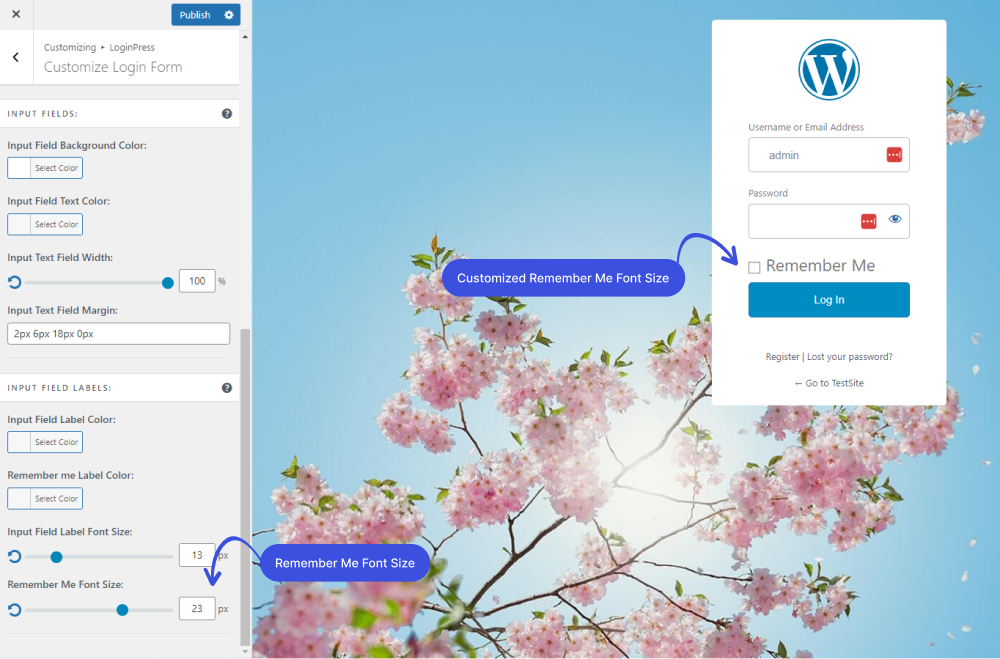
4. Remember Me Font Size
By default, WordPress Remember Me font also has a specific size.
The LoginPress Remember Me Font Size feature lets you easily customize its size without writing a single line of code.
You can make it smaller or bigger simply by using range control.
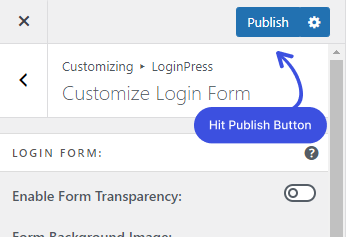
Once done, click on the Publish button to make all LIVE changes.
That’s it! You can quickly get started with LoginPress Customize Login Form feature.
Now it’s your turn! Create LoginPress custom Login Form and let us know how much it helped you!
If you are looking to customize your login page with a dynamic, interactive background, Vanta.js offers a range of animated 3D effects that can elevate your page's visual appeal.
If you have any doubts or questions related to this matter, please don’t hesitate to contact our support team.
Frequently Asked Questions (FAQs)
These FAQs answer the most common questions about our WordPress custom login page plugin.

Where can I get support for LoginPress?
If you need help with LoginPress, you can contact us here. We’ll be happy to answer any questions about the plugin.
Do you have an affiliate program?
Yes, we have an affiliate program that you can sign up for here. As an affiliate, you’ll earn a commission on every sale you refer to us.
Do you offer refunds?
Yes, we offer a 14-day money-back guarantee on all of our plans. If you’re unsatisfied with LoginPress, simply contact us within 14 days of your purchase, and we’ll process a refund.
Can I upgrade my license after my initial purchase?
Yes, you can upgrade your LoginPress license at any time. Simply log into your account and go to the My Downloads page. From here, you can upgrade your license and download the latest version of the plugin.
Will LoginPress slow down my website?
No, LoginPress will not slow down your website. The plugin is lightweight and only loads the necessary files when someone tries to access your login page.

If you Still have Questions?
Get In Touch