
To make the plugin extra easy and functional as per the requirements, here comes the detailed documentation regarding the plugin. All about educating the things related to the plugin.

How to Integrate Google Social Login on WordPress
LoginPress offers a Social Login Add-on that lets you integrate Google Social Login into your WordPress site.
By incorporating this feature, you can empower your users with a quick way to log in or register to your site using their existing Google accounts. It will eliminate the hassle of remembering additional credentials and ensure a secure login process.
Let’s discover the process of integrating Google social login into your WordPress site using the LoginPress Social Login Add-on.
Table of Contents
Add Google Social Login with LoginPress Social Login Add-on
Note: See our Complete Guide to Social Login to learn how to activate the LoginPress Social Login Add-on.
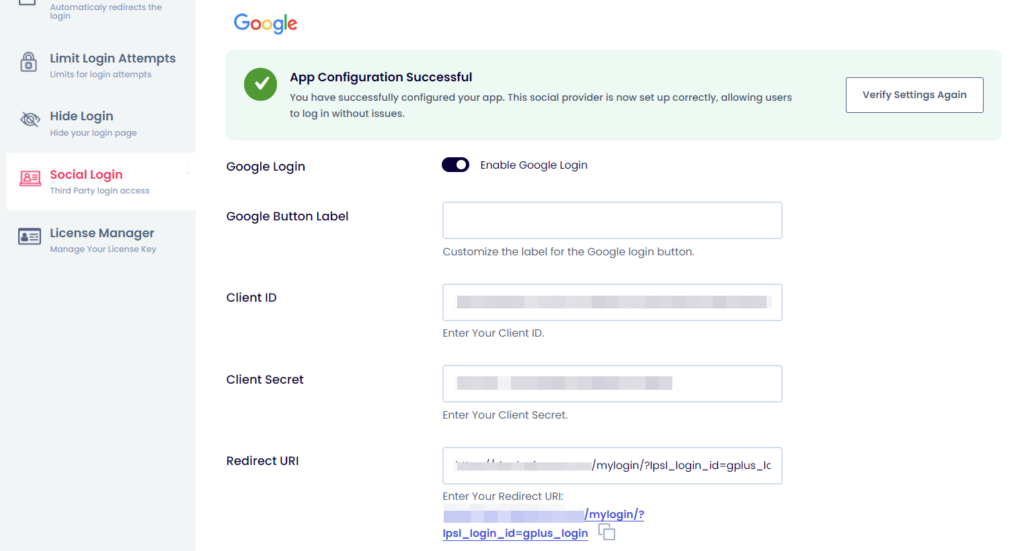
First, you’ll need to enable Google Login in the LoginPress Social Login’s Settings tab.
Once you’ve enabled Google Login, other fields, including:
- Client ID
- Client Secret
- Redirect URI
You’ll need to fill in these fields to integrate the Google Social Login on the WordPress Log In and/or Registration form with LoginPress.
Now, follow these steps to integrate Google Login into your WordPress site.
Step 1: Enable Google 2FA Requirement (Updated)
Google now requires Two-Factor Authentication (2FA) for all developers creating OAuth credentials or accessing sensitive API features for implementing social login.
Why is 2FA Required?
Google enforces 2FA to ensure:
- Security of developer accounts
- Prevent unauthorized API access
- Ensure safer OAuth-based login experiences
What Do You Need to Do?
Before proceeding with the steps:
- Make sure 2-Step Verification (2FA) is enabled on your Google Account.
If it is not enabled, follow these steps here to allow it to:
Go to your Google Security settings and select 2-Step Verification.
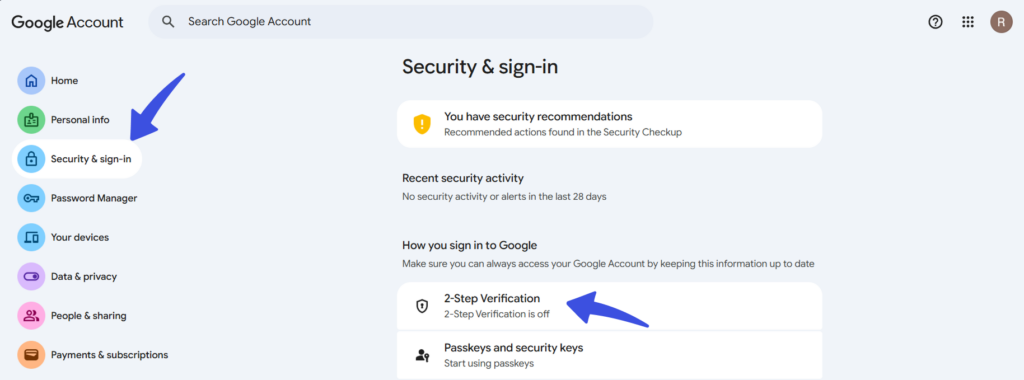
If the 2FA option here is disabled, you will not be able to create OAuth projects or credentials, or access sensitive APIs. Although once 2FA is activated, you can continue with the OAuth integration smoothly.
Step 2: Create a Google Developer Account
To configure Google Social Login into WordPress, you must register your website with Google APIs at the Google Developer Console.
When you are done, you can proceed to the next step.
Step 3: Create a Project
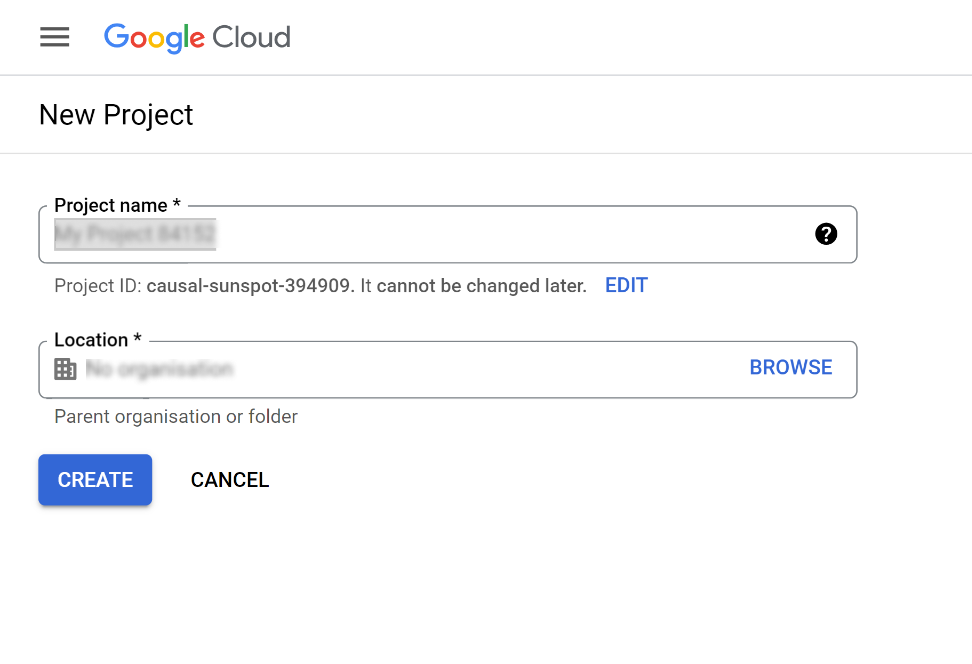
Sign in with your Google Account, which may require you to submit 2FA first. Then, once you have signed in successfully, click the Project Selector >> New Project.
You will be prompted to enter the following information about the new project:
- Project Name
- Organization/Location
After writing the project details, click Create.
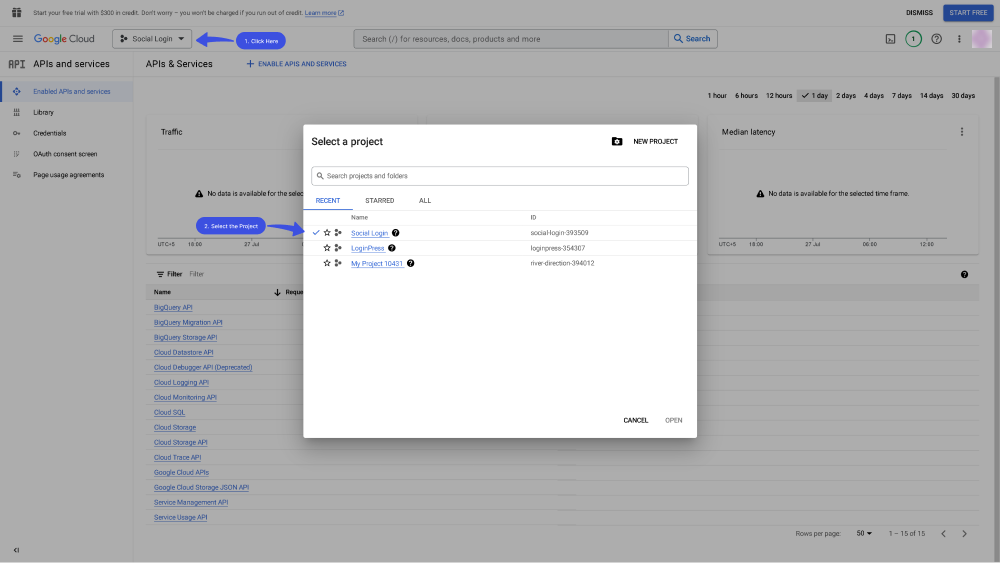
If you have more than one project in Google APIs, please confirm your project in the top-left dropdown project list.
Step 4: Open the OAuth Consent Screen
Once the new project is created, add App Information, such as App Name and User Email.
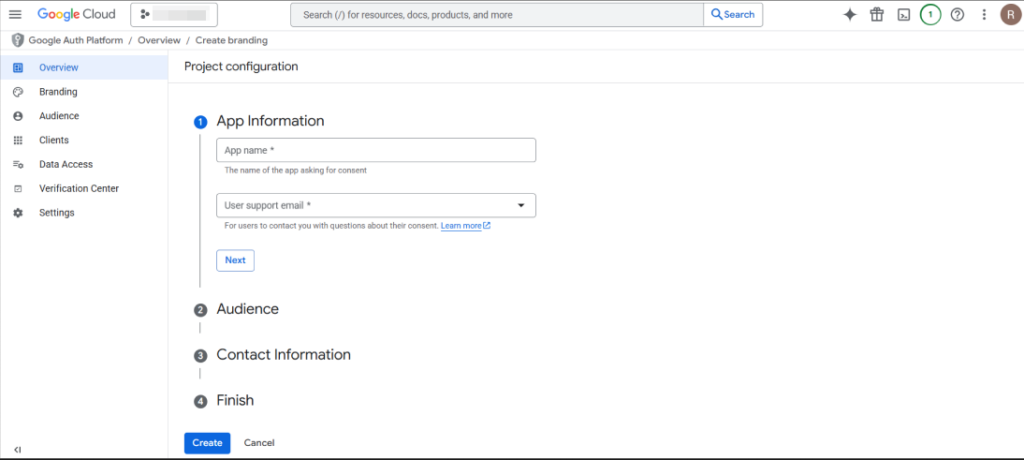
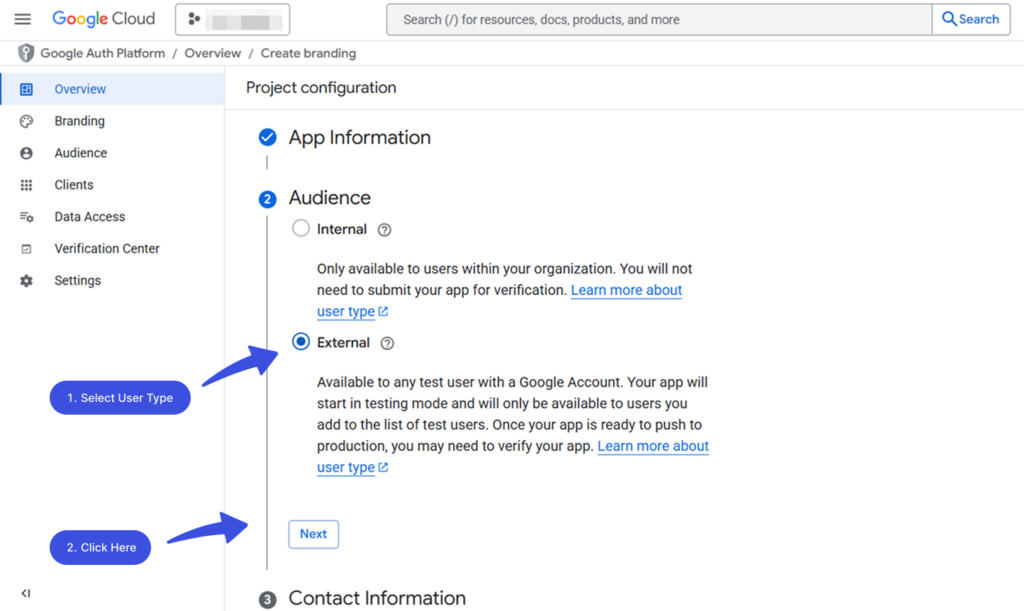
On the OAuth screen, select External audience type, then click Next.
Once the App Information and Audience are selected, add the required Contact Information.
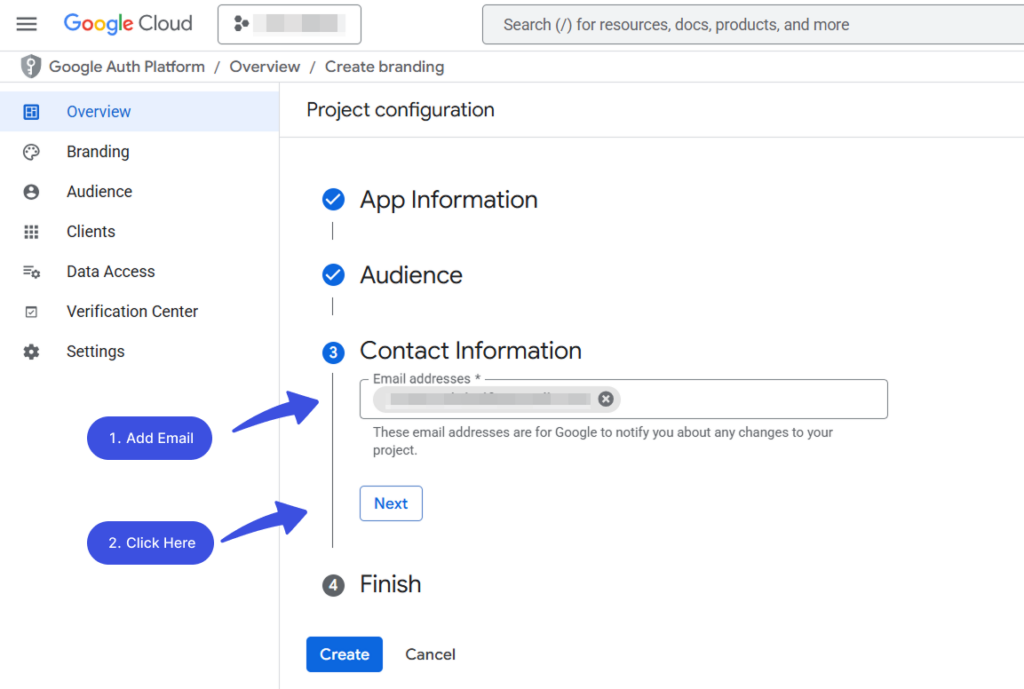
Complete the process by clicking Create to save the project setup.
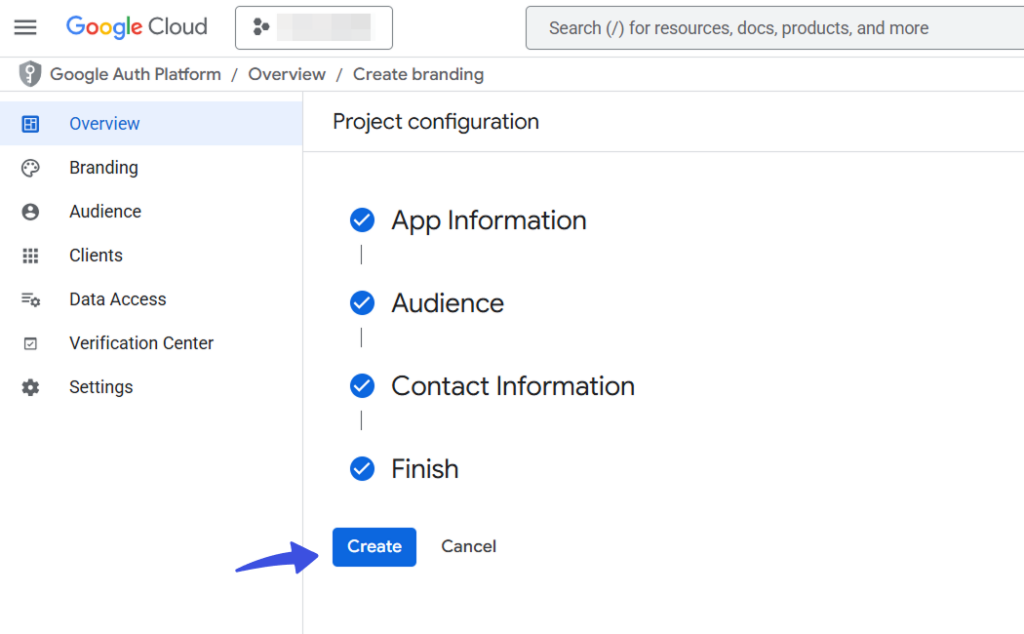
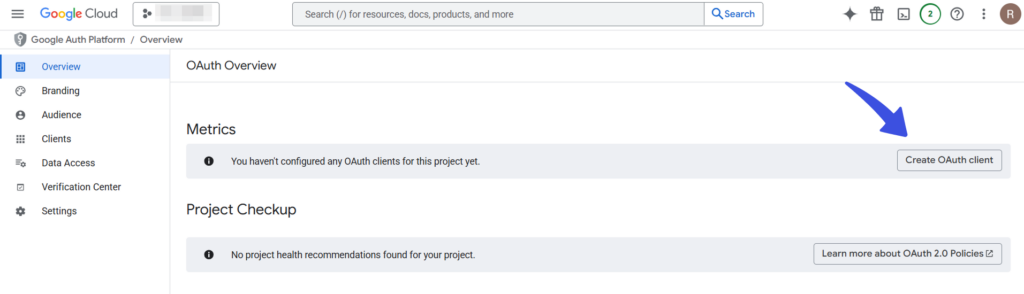
You will be redirected to the next screen, and you’ll be asked to add Information to configure the OAuth client. To proceed, navigate to Metrics >> Create OAuth Client button.
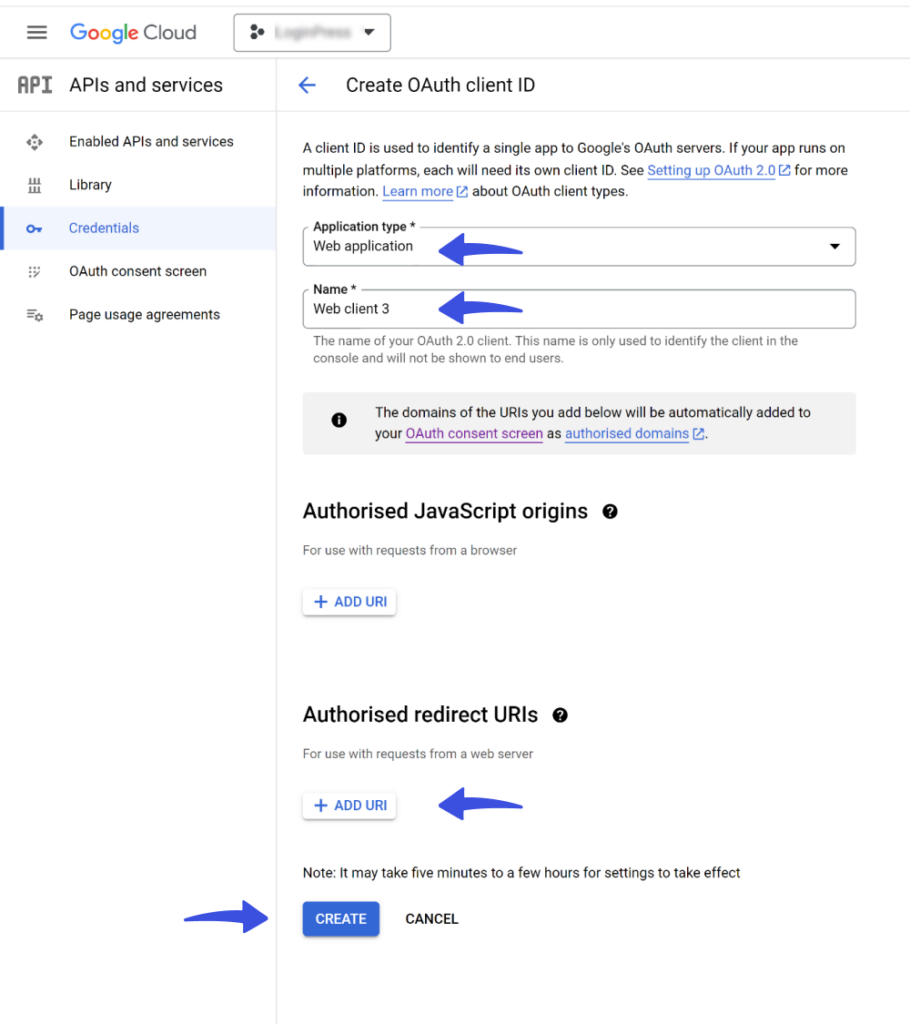
On the OAuth consent screen, simply fill out the required informational fields, including:
- Select App Type: Select Application Type. In our case, it’s a Web Application.
- Name of your Application: Your application name will help identify the client in the console.
- Authorized redirect URIs: A redirect URI is a location where the authorization server, in our case Google, sends the user when the app is successfully approved.
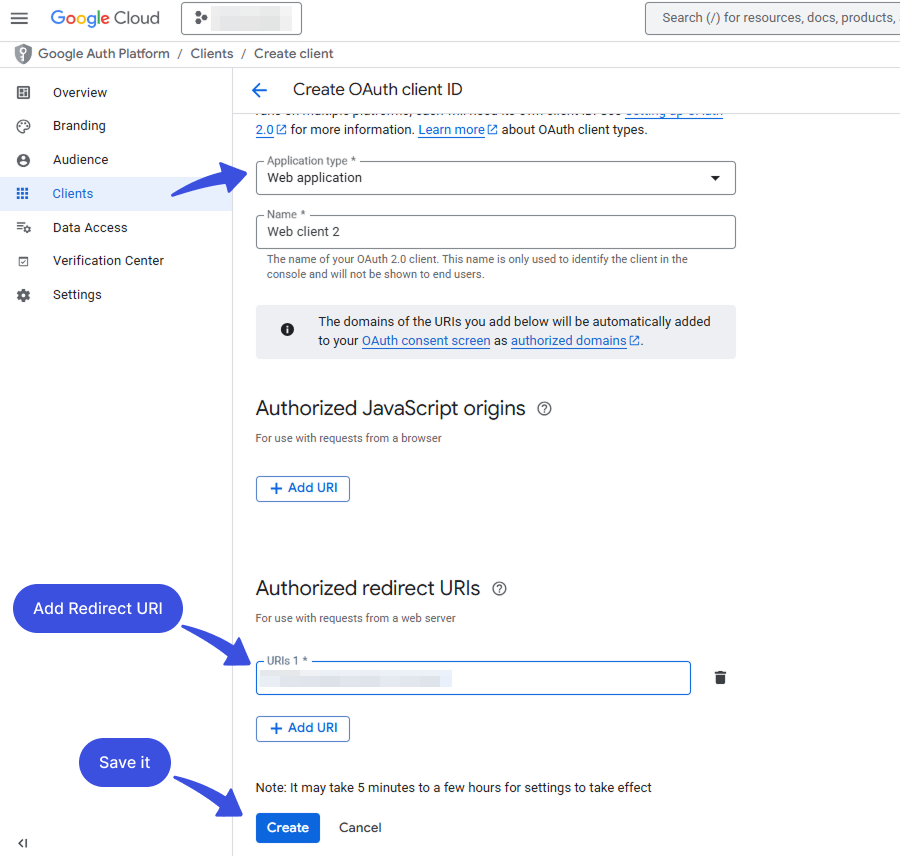
Get the Redirect URL from the Redirect URI field in Google Provider configuration settings. Click Create once all fields are completed.
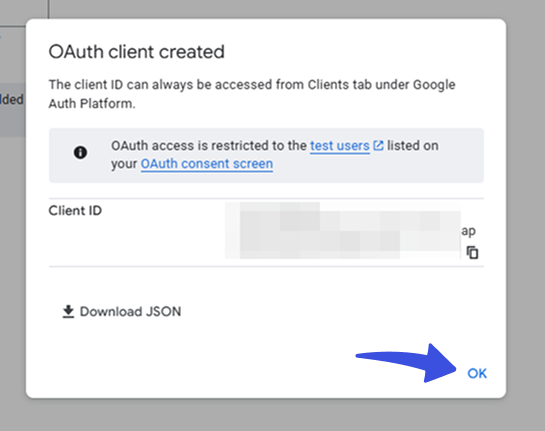
Your Client ID and Client Secret will now be generated. Click OK to proceed.
Step 5: Go to Credential Page
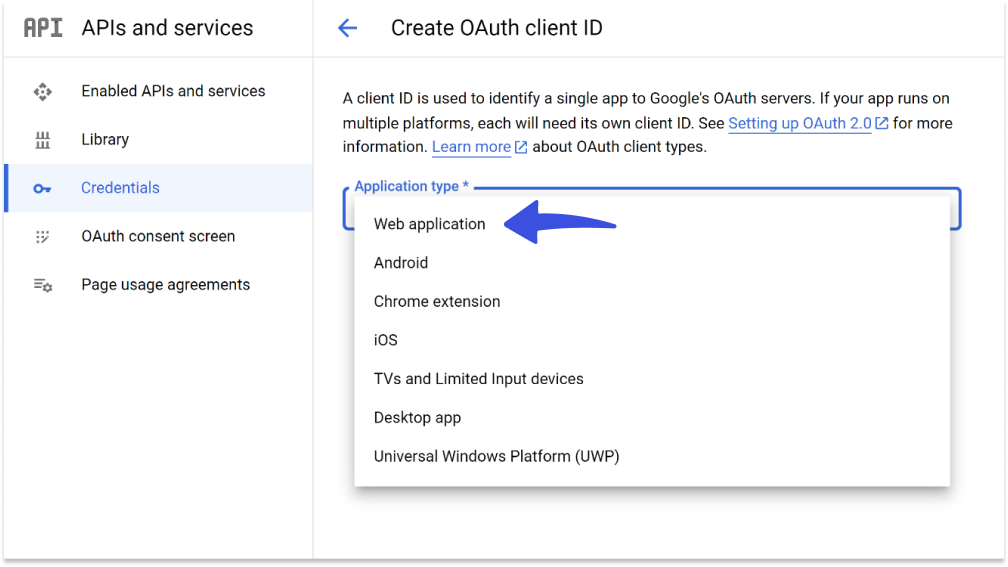
Next, you’ll require to select the Credentials option, click the + Create Credentials, and select “OAuth client ID” from the dropdown.
Select the Application type here, i.e., in our case, it's a Web application.
Fill out the required informational fields:
- Name of your Application: Your application name will help identify the client in the console.
- Authorized redirect URIs: A redirect URI is a location where the authorization server, in our case Google, sends the user when the app is successfully approved.
Note: Get the Redirect URL from the Redirect URI field in Google Provider configuration settings.
When done, click the Create button.
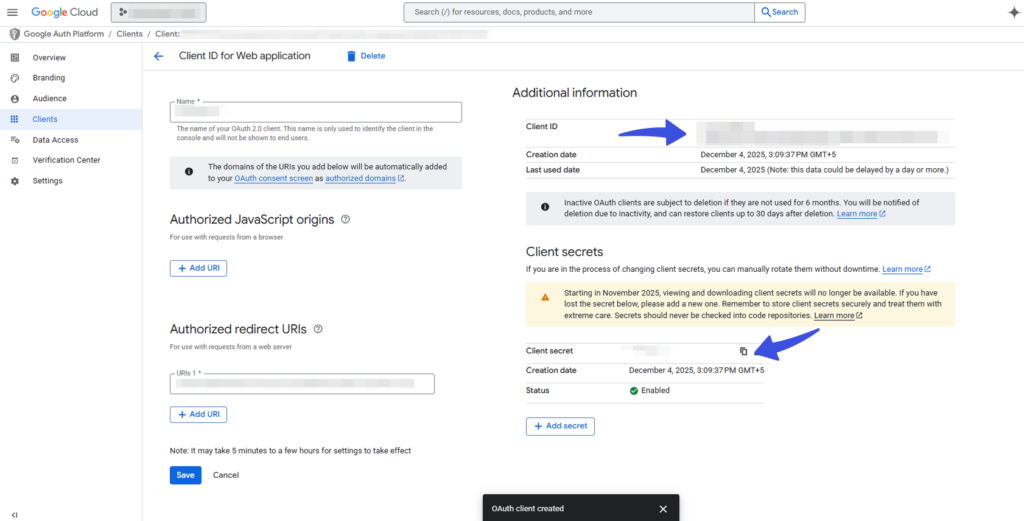
Step 6: Copy/Paste Client ID and Client Secret
Here you can access your Client ID and Client Secret. Click the copy icon to copy the credentials for integration into your LoginPress.
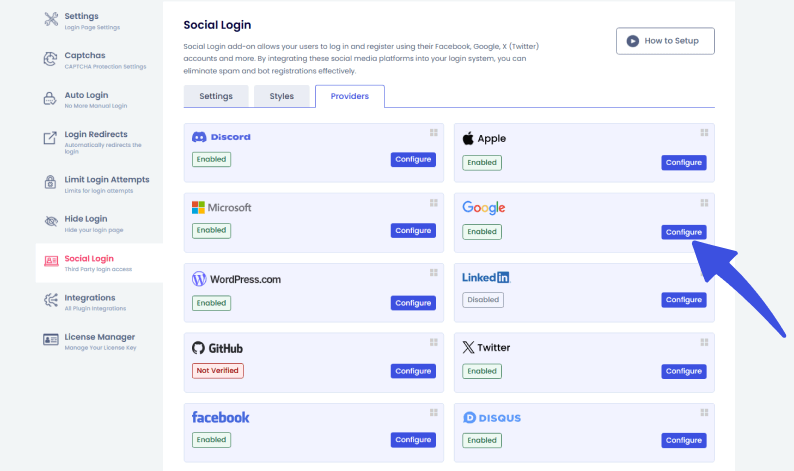
Now navigate to LoginPress >> Social Login option. This will show you the complete settings for the social logins on your site.
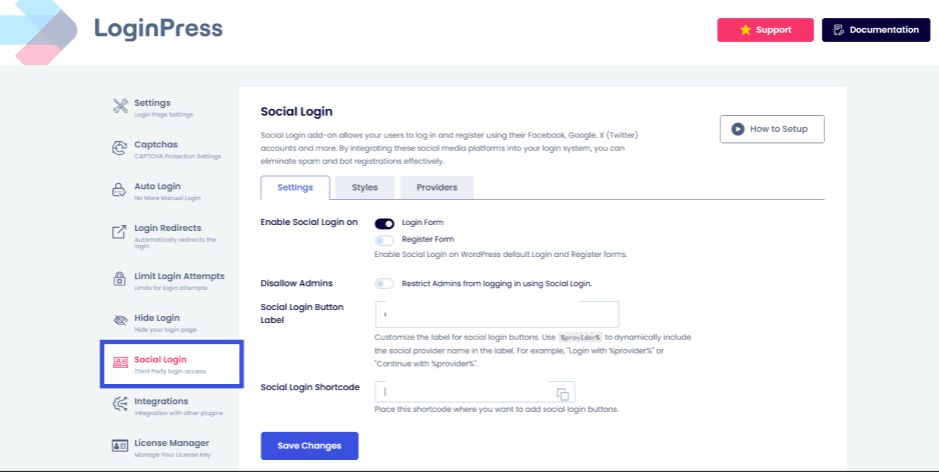
Next, go to the Providers >> Google provider and click on Configure.
Now, paste your Client ID and Client Secret in the given fields.
Once you’ve pasted the Your Client ID and Your Client Secret, you’ll need the Redirect URI.
You don’t need to go anywhere for the Redirect URI, as it is under the Redirect URI field. Copy and paste it into the field.
Click the Save button, then verify your app settings to ensure successful configuration.
Note: You can again choose whether to enable Google on the Login or Register form.

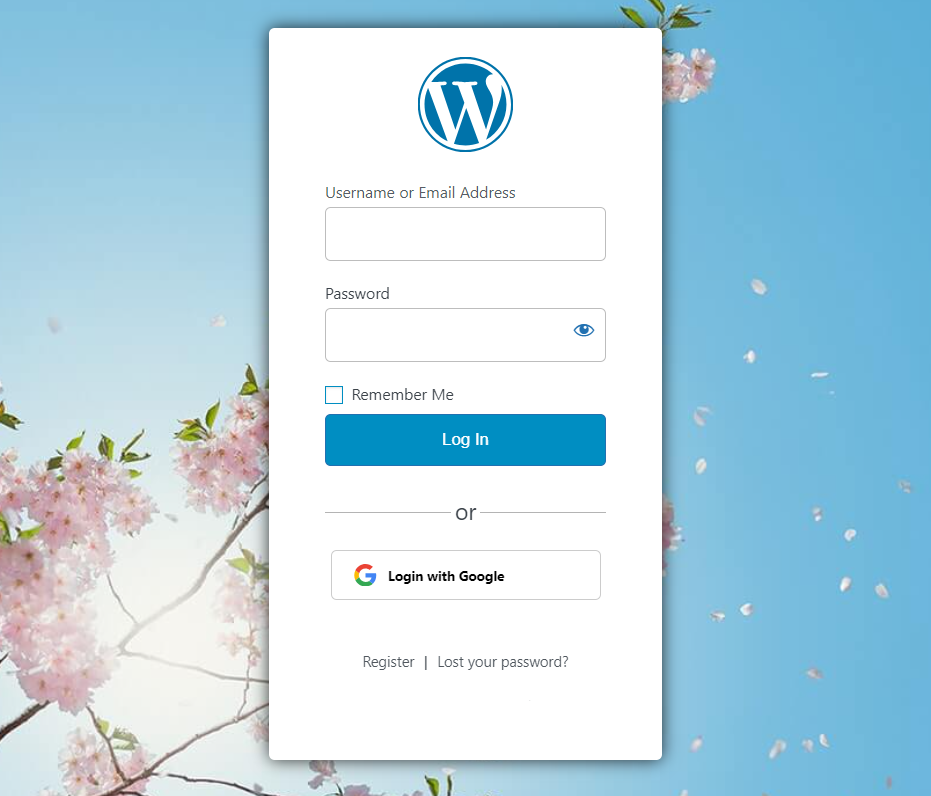
Log out of WordPress and check the login page to see the Google Social Login in effect.
That’s it! This is how you can easily add Google Social Login to your WordPress site with LoginPress.
Try the LoginPress Social Login Add-on now to unlock a seamless and user-friendly authentication experience for your users. What are you waiting for?
We have also covered separate documentation for integrating social logins on your WordPress site.
See our detailed guides on How to Add Facebook Social Login on Your WordPress Site with LoginPress and How to Add Twitter Social Login to Your WordPress Site with LoginPress.
You can contact our dedicated support team in case you need any help.
Frequently Asked Questions (FAQs)
These FAQs answer the most common questions about our WordPress custom login page plugin.

Where can I get support for LoginPress?
If you need help with LoginPress, you can contact us here. We’ll be happy to answer any questions about the plugin.
Do you have an affiliate program?
Yes, we have an affiliate program that you can sign up for here. As an affiliate, you’ll earn a commission on every sale you refer to us.
Do you offer refunds?
Yes, we offer a 14-day money-back guarantee on all of our plans. If you’re unsatisfied with LoginPress, simply contact us within 14 days of your purchase, and we’ll process a refund.
Can I upgrade my license after my initial purchase?
Yes, you can upgrade your LoginPress license at any time. Simply log into your account and go to the My Downloads page. From here, you can upgrade your license and download the latest version of the plugin.
Will LoginPress slow down my website?
No, LoginPress will not slow down your website. The plugin is lightweight and only loads the necessary files when someone tries to access your login page.

If you Still have Questions?
Get In Touch